Deploying using Databricks MLFlow
Introduction
MLFlow is an open source platform for managing machine learning life cycles. It provides experimentation and deployment capabilities. The latter allows serving models via low-latency HTTP interface, i.e. exposing any machine learning model as an HTTP endpoint. MLFlow can be deployed separately, but it also comes with Databricks, that’s why if the data warehouse is based on Databricks or if infrastructure already includes MLFlow as a component it is possible to register (deploy) to MLFlow and call from the UDF function.
In this section we will go through the steps on how to deploy any transformer model to Databricks provided MLFlow deployment, but all steps are valid for any custom MLFlow deployment as well.
Steps
In order to execute the following steps we will need a Databricks account with permissions to create ML clusters. We will use the SBERT Transformer model, but any other model will also work.
Steps we need to perform:
-
Create compute cluster
-
Create notebook
-
Register model in model registry
-
Verify model is available over HTTP
Create compute cluster
Note
This step is Databricks specific. If you are using vanilla MLFlow you can proceed to step 3 “Register model in model registry”.
Go to compute and create ML cluster:
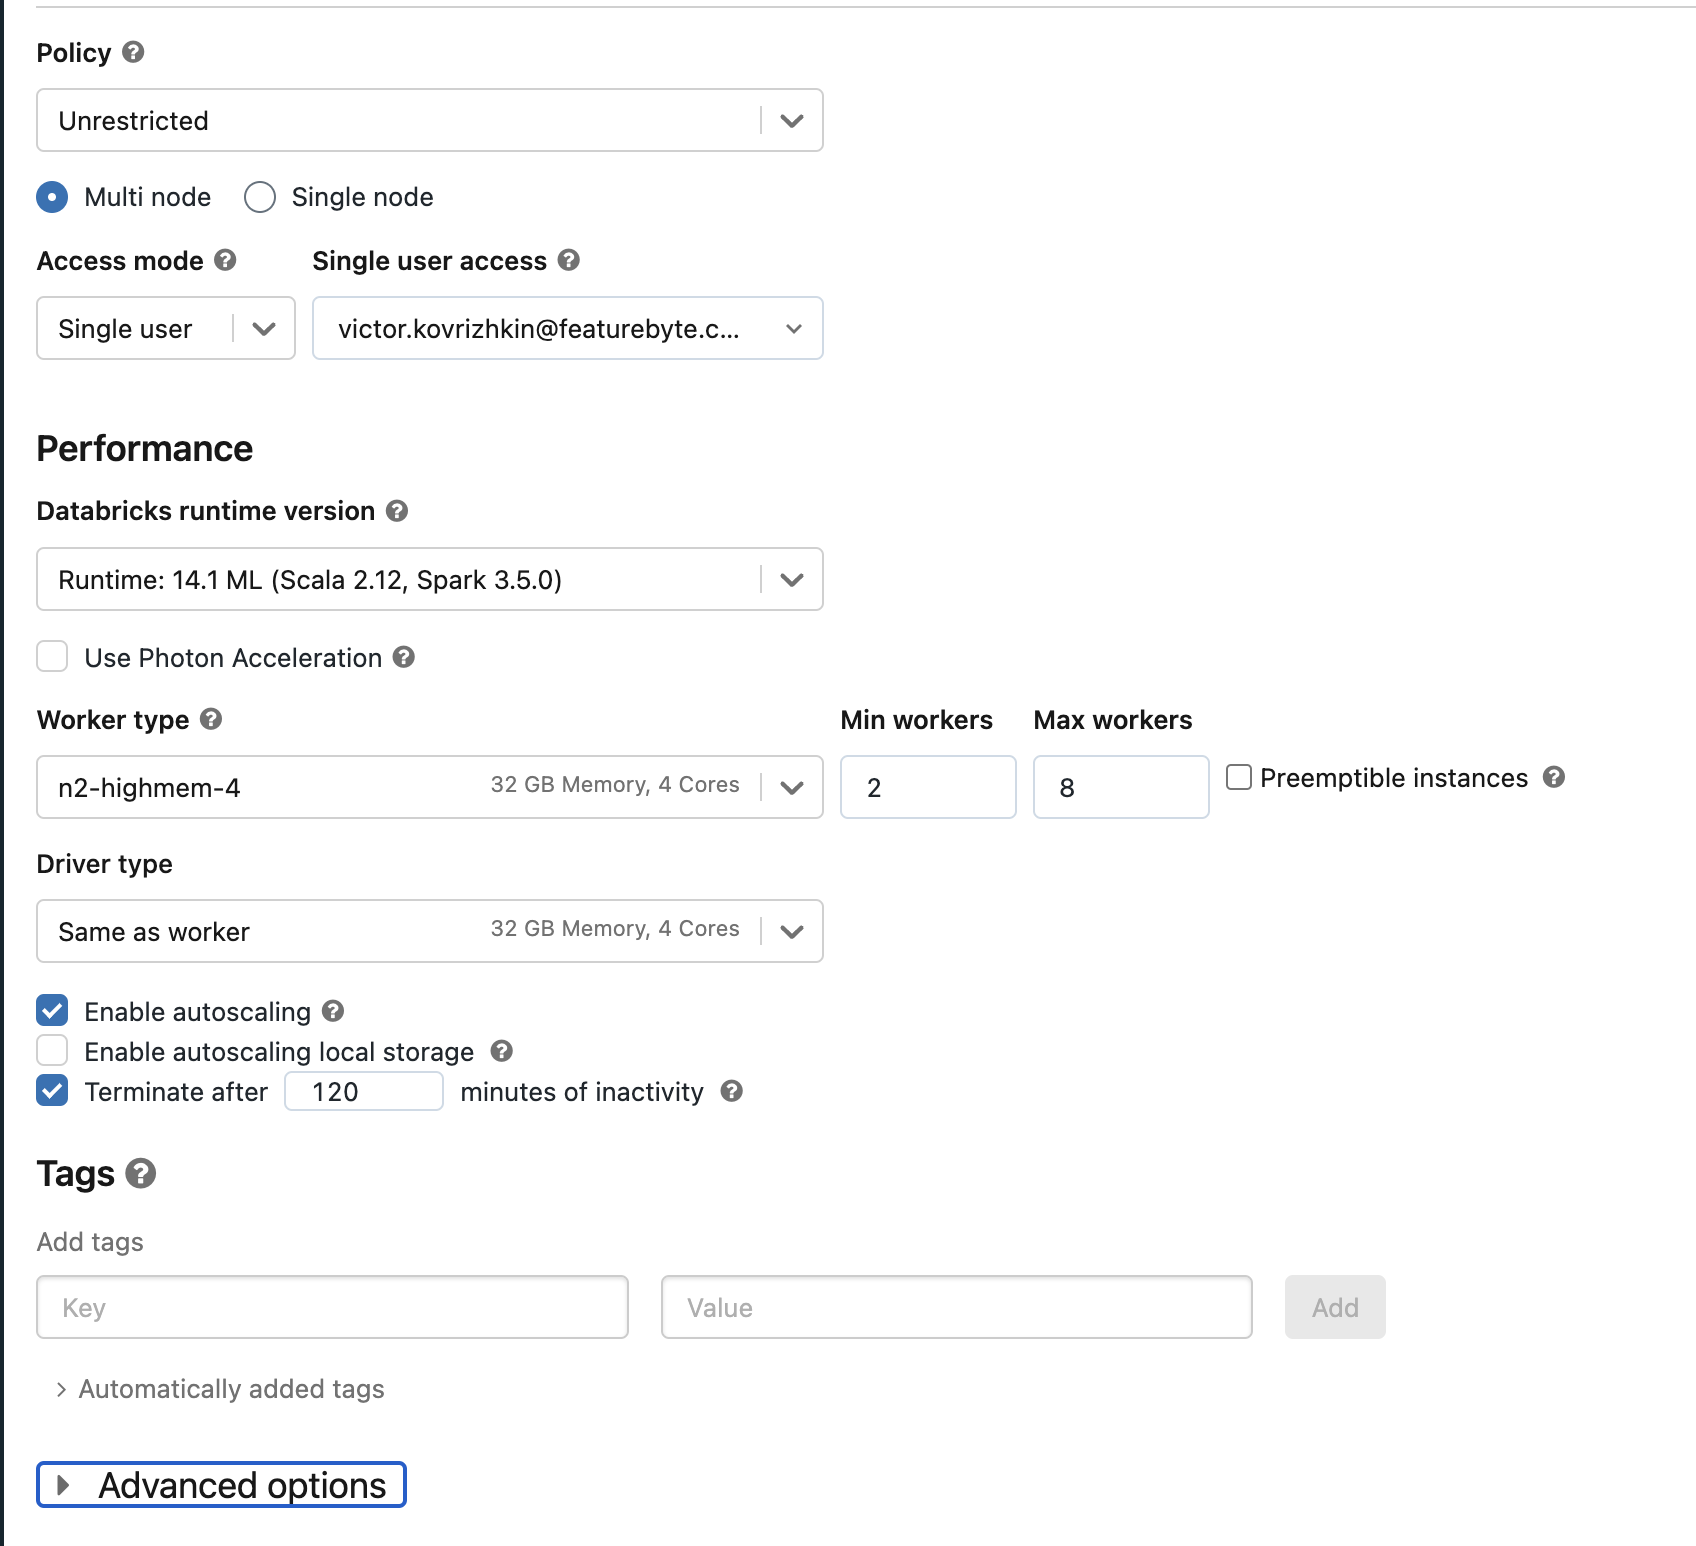
Make sure to pick an ML cluster in "Databrick runtime version", otherwise ML flow will not be available. Scroll down and click on the "Create Compute" button.
Create notebook
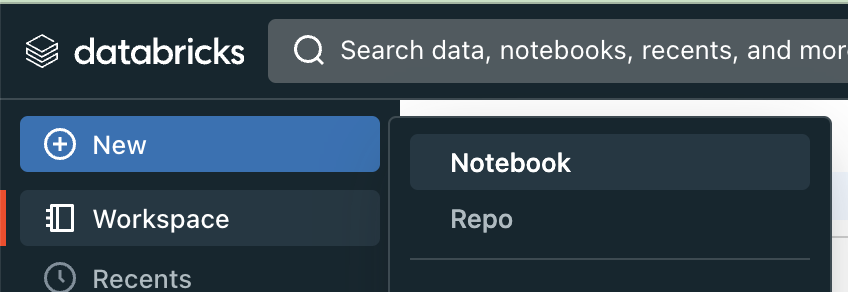
This notebook is mainly needed to register a model in the MLFlow registry and deploy it to production. If you are not using Databricks, just a Jupyter notebook or any other python script which has access to a custom MLFlow server is also fine. In Databricks you can create a notebook by clicking New -> Notebook
Register model in model registry
Since we are utilizing a Databricks notebook that was established in a prior step, there is no need to include MLFlow cluster connection code. If you're using a custom Jupyter notebook or Python script, it may be necessary to establish a connection with the MLFlow cluster. Typically, this connection is made using the mlflow.set_tracking_uri function, as detailed in the MLFlow documentation.
First step, install required dependencies which are not pre-installed
Import required libraries
import time

import cloudpickle
import requests
import pandas as pd
import mlflow
from mlflow.models import infer_signature
from mlflow.tracking.client import MlflowClient
from mlflow.utils.environment import _mlflow_conda_env

import sentence_transformers
from sentence_transformers import SentenceTransformer
Next, we will develop an MLFlow model wrapper. This wrapper will adapt the transformer model to meet the functional expectations of MLFlow. It will serve as the principal class for registration in the model registry and for subsequent deployment:
class TransformerWrapper(mlflow.pyfunc.PythonModel):
    def __init__(self):
        self.model = SentenceTransformer("sentence-transformers/all-MiniLM-L12-v2")

    def predict(self, context, model_input):
        inputs = model_input["text"]
        embeddings self.model.encode(inputs)
Now, proceed to create the model, infer its input and output structure, get the necessary pip dependencies, and log the model into the MLFlow run:
with mlflow.start_run() as run:
    pyfunc_model = TransformerWrapper()

    input_schema = mlflow.types.Schema([
        mlflow.types.ColSpec(name="text", type=mlflow.types.DataType.string)
    ])
    output_schema = mlflow.types.Schema([
        mlflow.types.ColSpec(name="embedding", type=mlflow.types.DataType.float)
    ])
    signature = mlflow.models.signature.ModelSignature(
        inputs=input_schema,
        outputs=output_schema,
    )

    conda_env =  _mlflow_conda_env(
        additional_conda_deps=None,
        additional_pip_deps=[
            "cloudpickle=={}".format(cloudpickle.__version__),
            "torch==1.13.1",
            "sentence-transformers=={}".format(sentence_transformers.__version__),
        ],
        additional_conda_channels=None,
    )

    model_name = "transformer-model"
    log_result = mlflow.pyfunc.log_model(
        model_name,
        python_model=pyfunc_model,
        signature=signature,
        conda_env=conda_env,
    )
    run_id = mlflow.active_run().info.run_id
The model is now logged, but it is not yet present in the model registry. To include it there, we need to proceed with its registration:
This will produce an output similar to:
Registered model 'transformer-model' already exists. Creating a new version of this model...
2023/10/24 11:34:16 INFO mlflow.tracking._model_registry.client: Waiting up to 300 seconds for model version to finish creation. Model name: transformer-model, version 10
Created version '10' of model 'transformer-model'.
Next, we will transition our model to the production stage. This step is not required for deployment and serving of the model. Models can be served at stages other than production.
client = MlflowClient()

client.transition_model_version_stage(
   name=model_details.name,
   version=model_details.version,
   stage='Production',
)
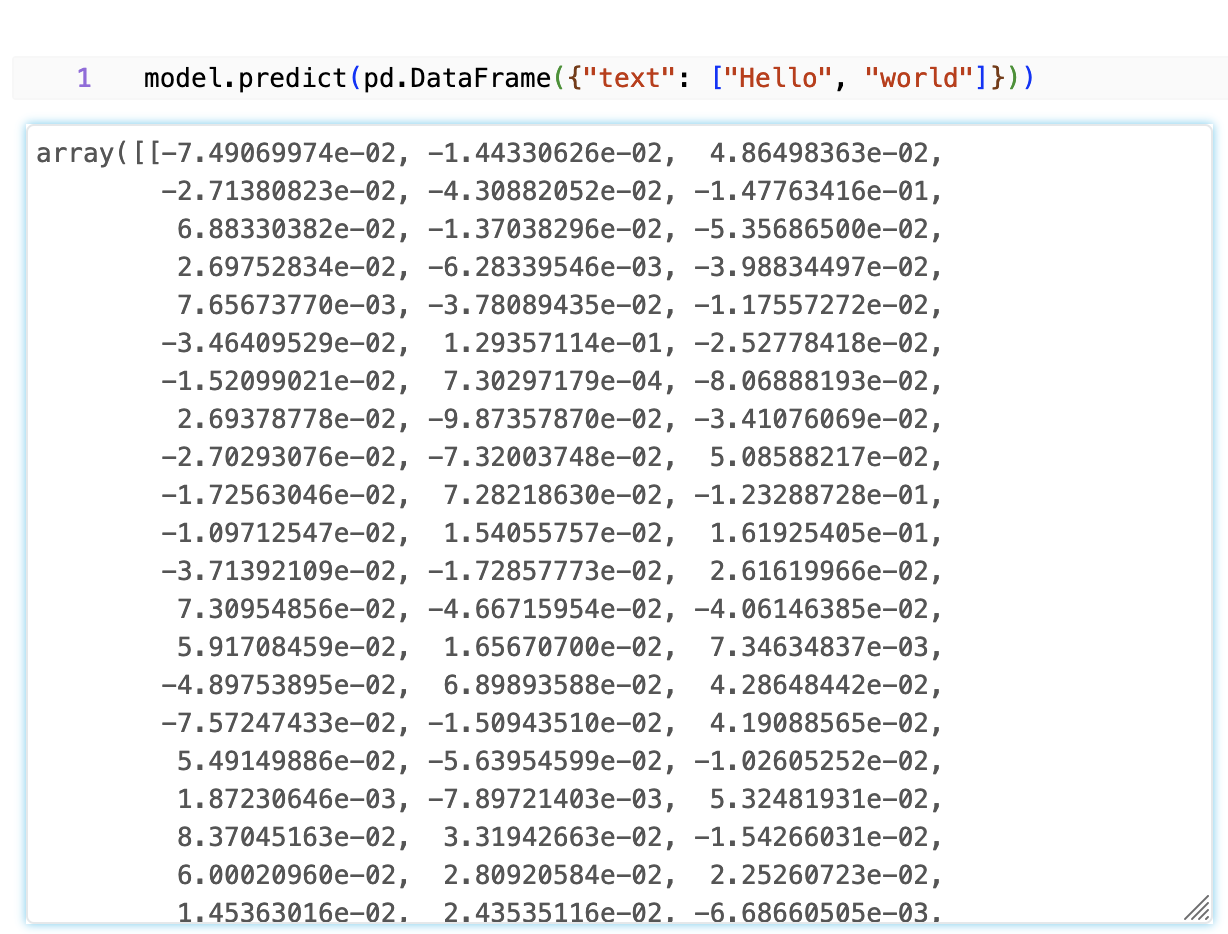
Now we can check if model works by computing predictions:
model = mlflow.pyfunc.load_model(f"models:/{model_name}/production")
model.predict(pd.DataFrame({"text": ['hello', 'world']}))
This should output a dataframe like this:
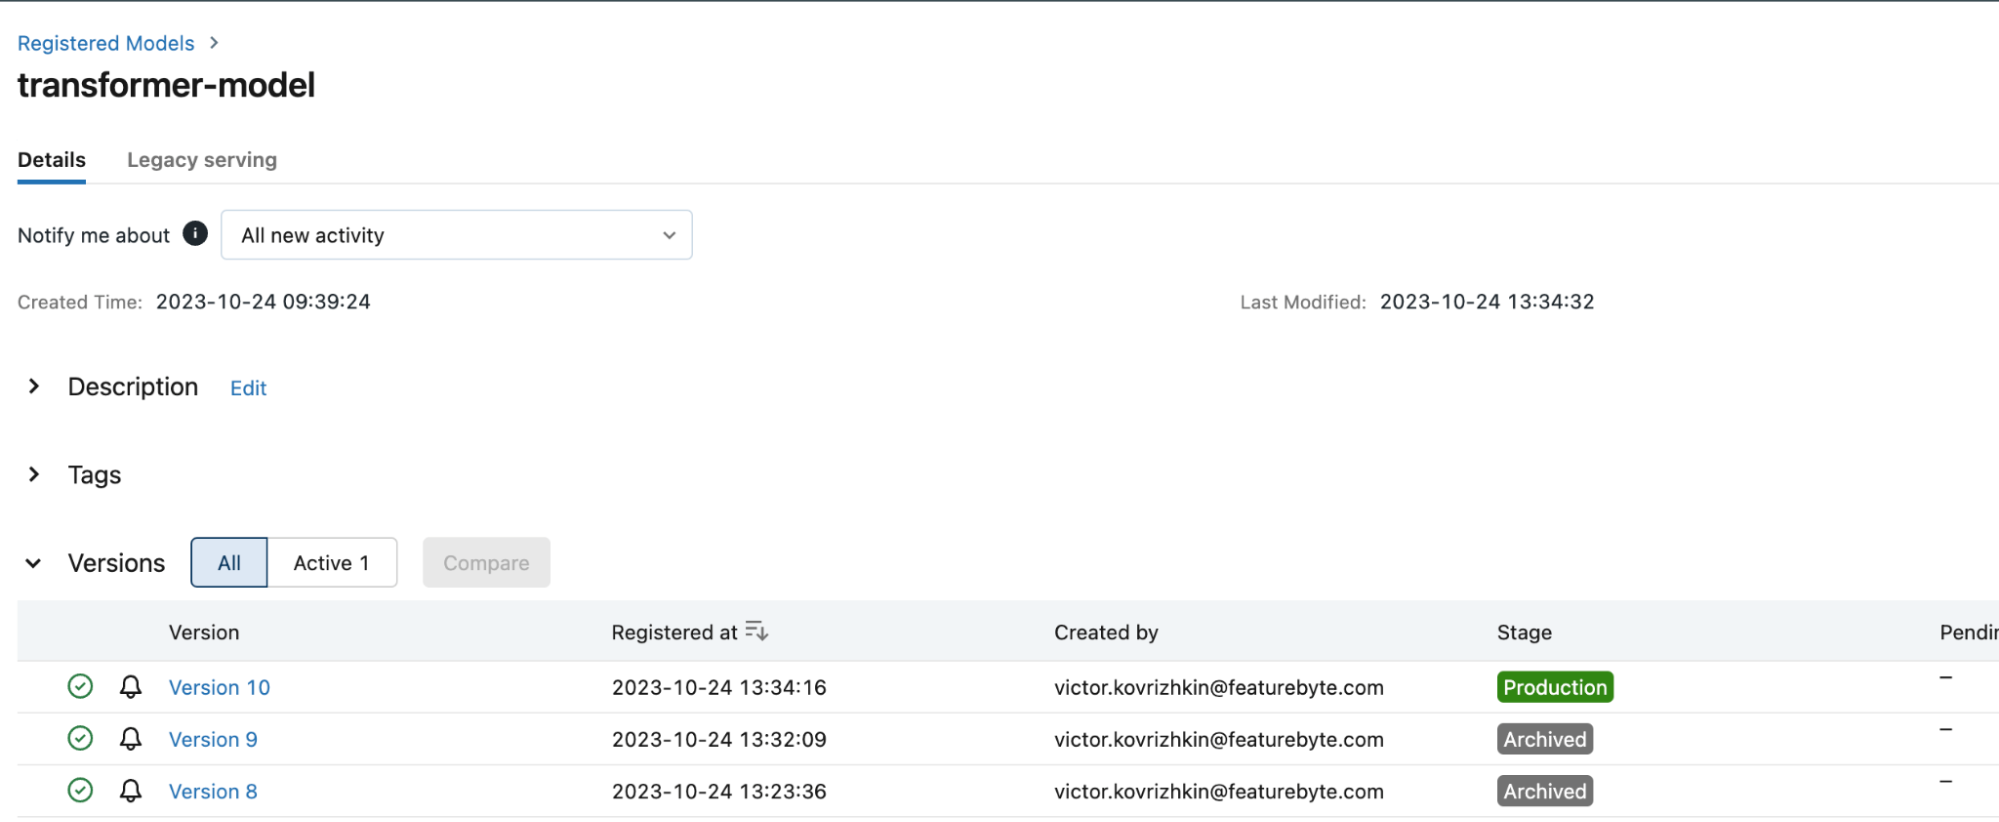
Navigate to the 'Models' section located in the left-hand menu. There, select our 'transformer-model' to view its details. You will observe that the model is registered and currently designated as being in the production stage. The interface should appear as follows:
Navigate to Legacy serving tab and click Enable:

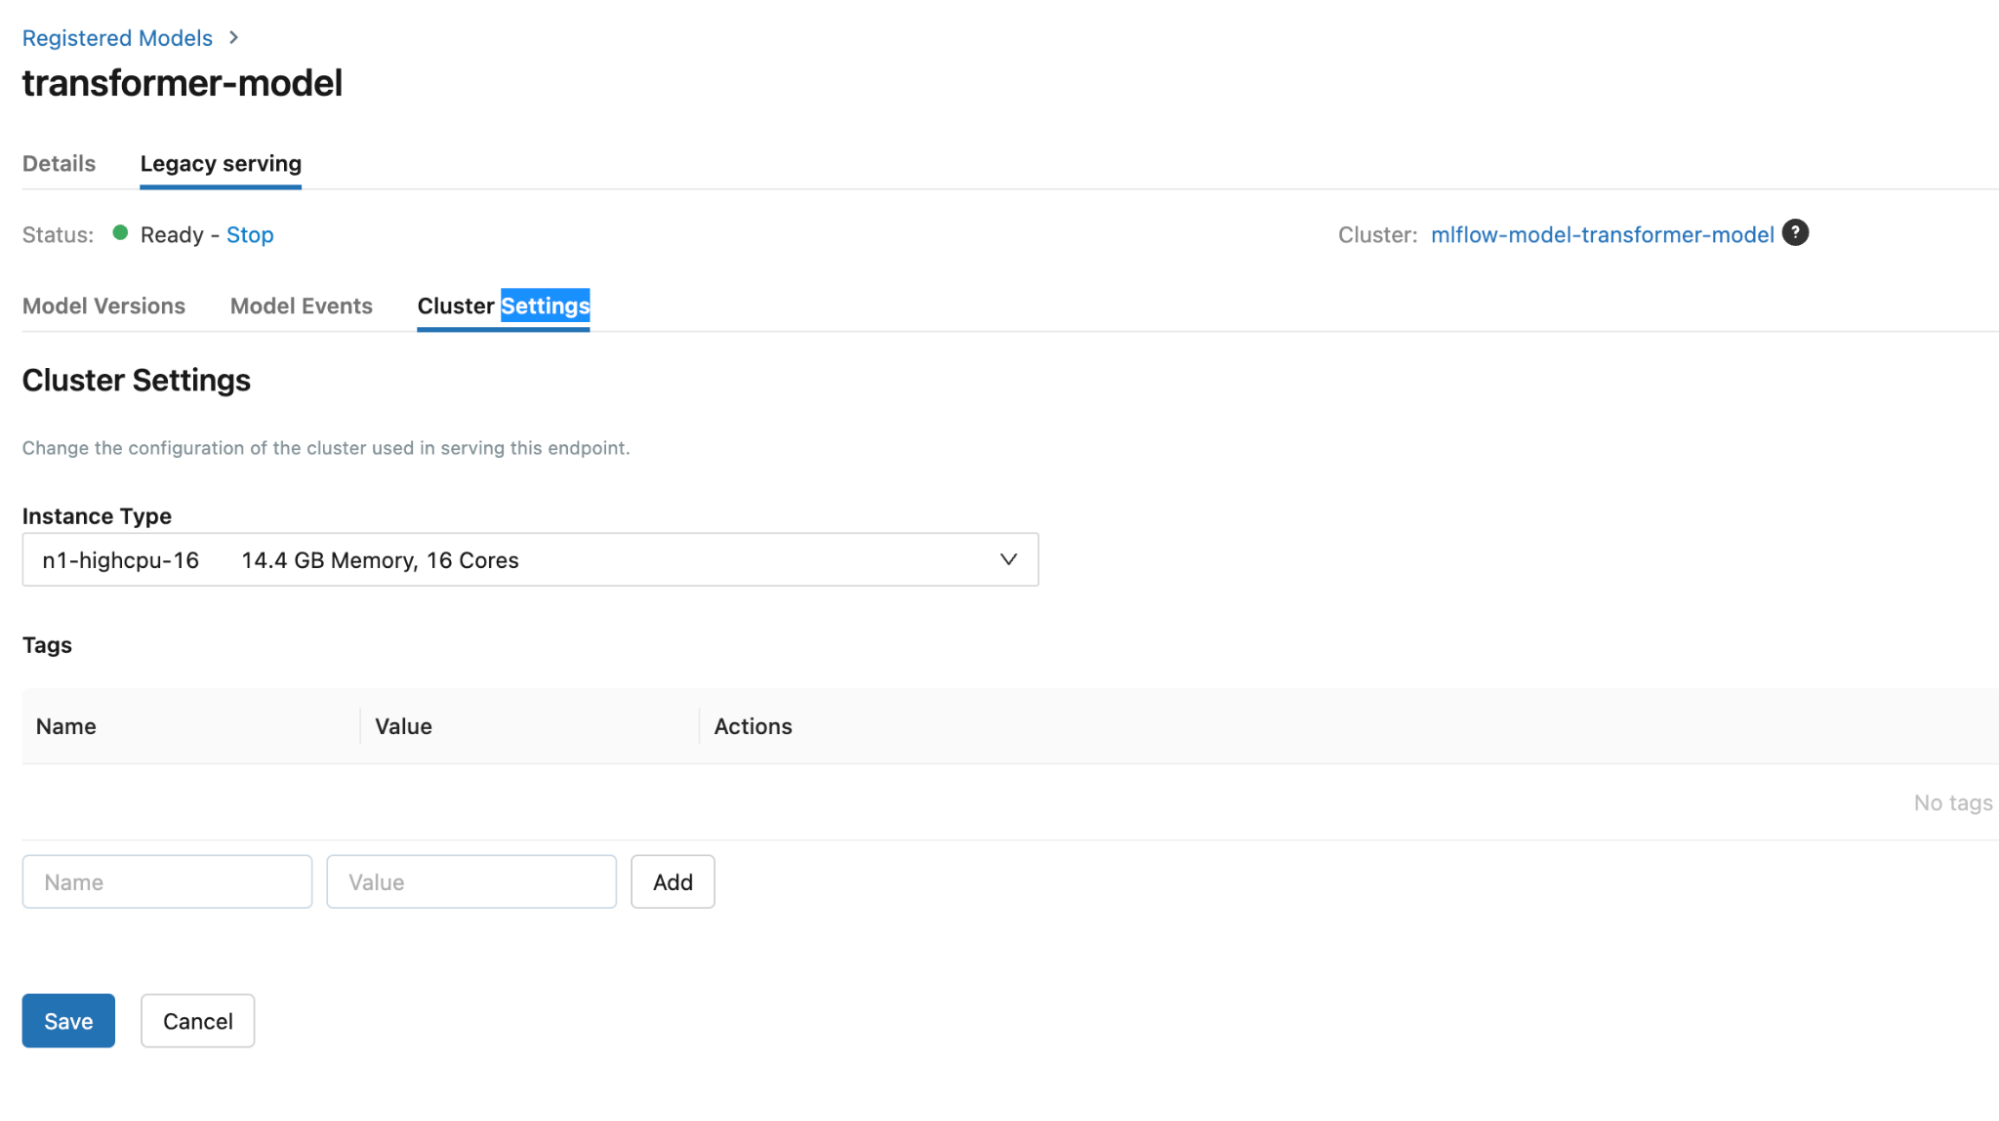
This operation will need extra permissions from the current user to be able to create a cluster. To configure the cluster you can navigate to the Cluster Settings tab and pick node of your choice:
Overall this operation will take a while. Once model is deployed, the model screen will look like this:
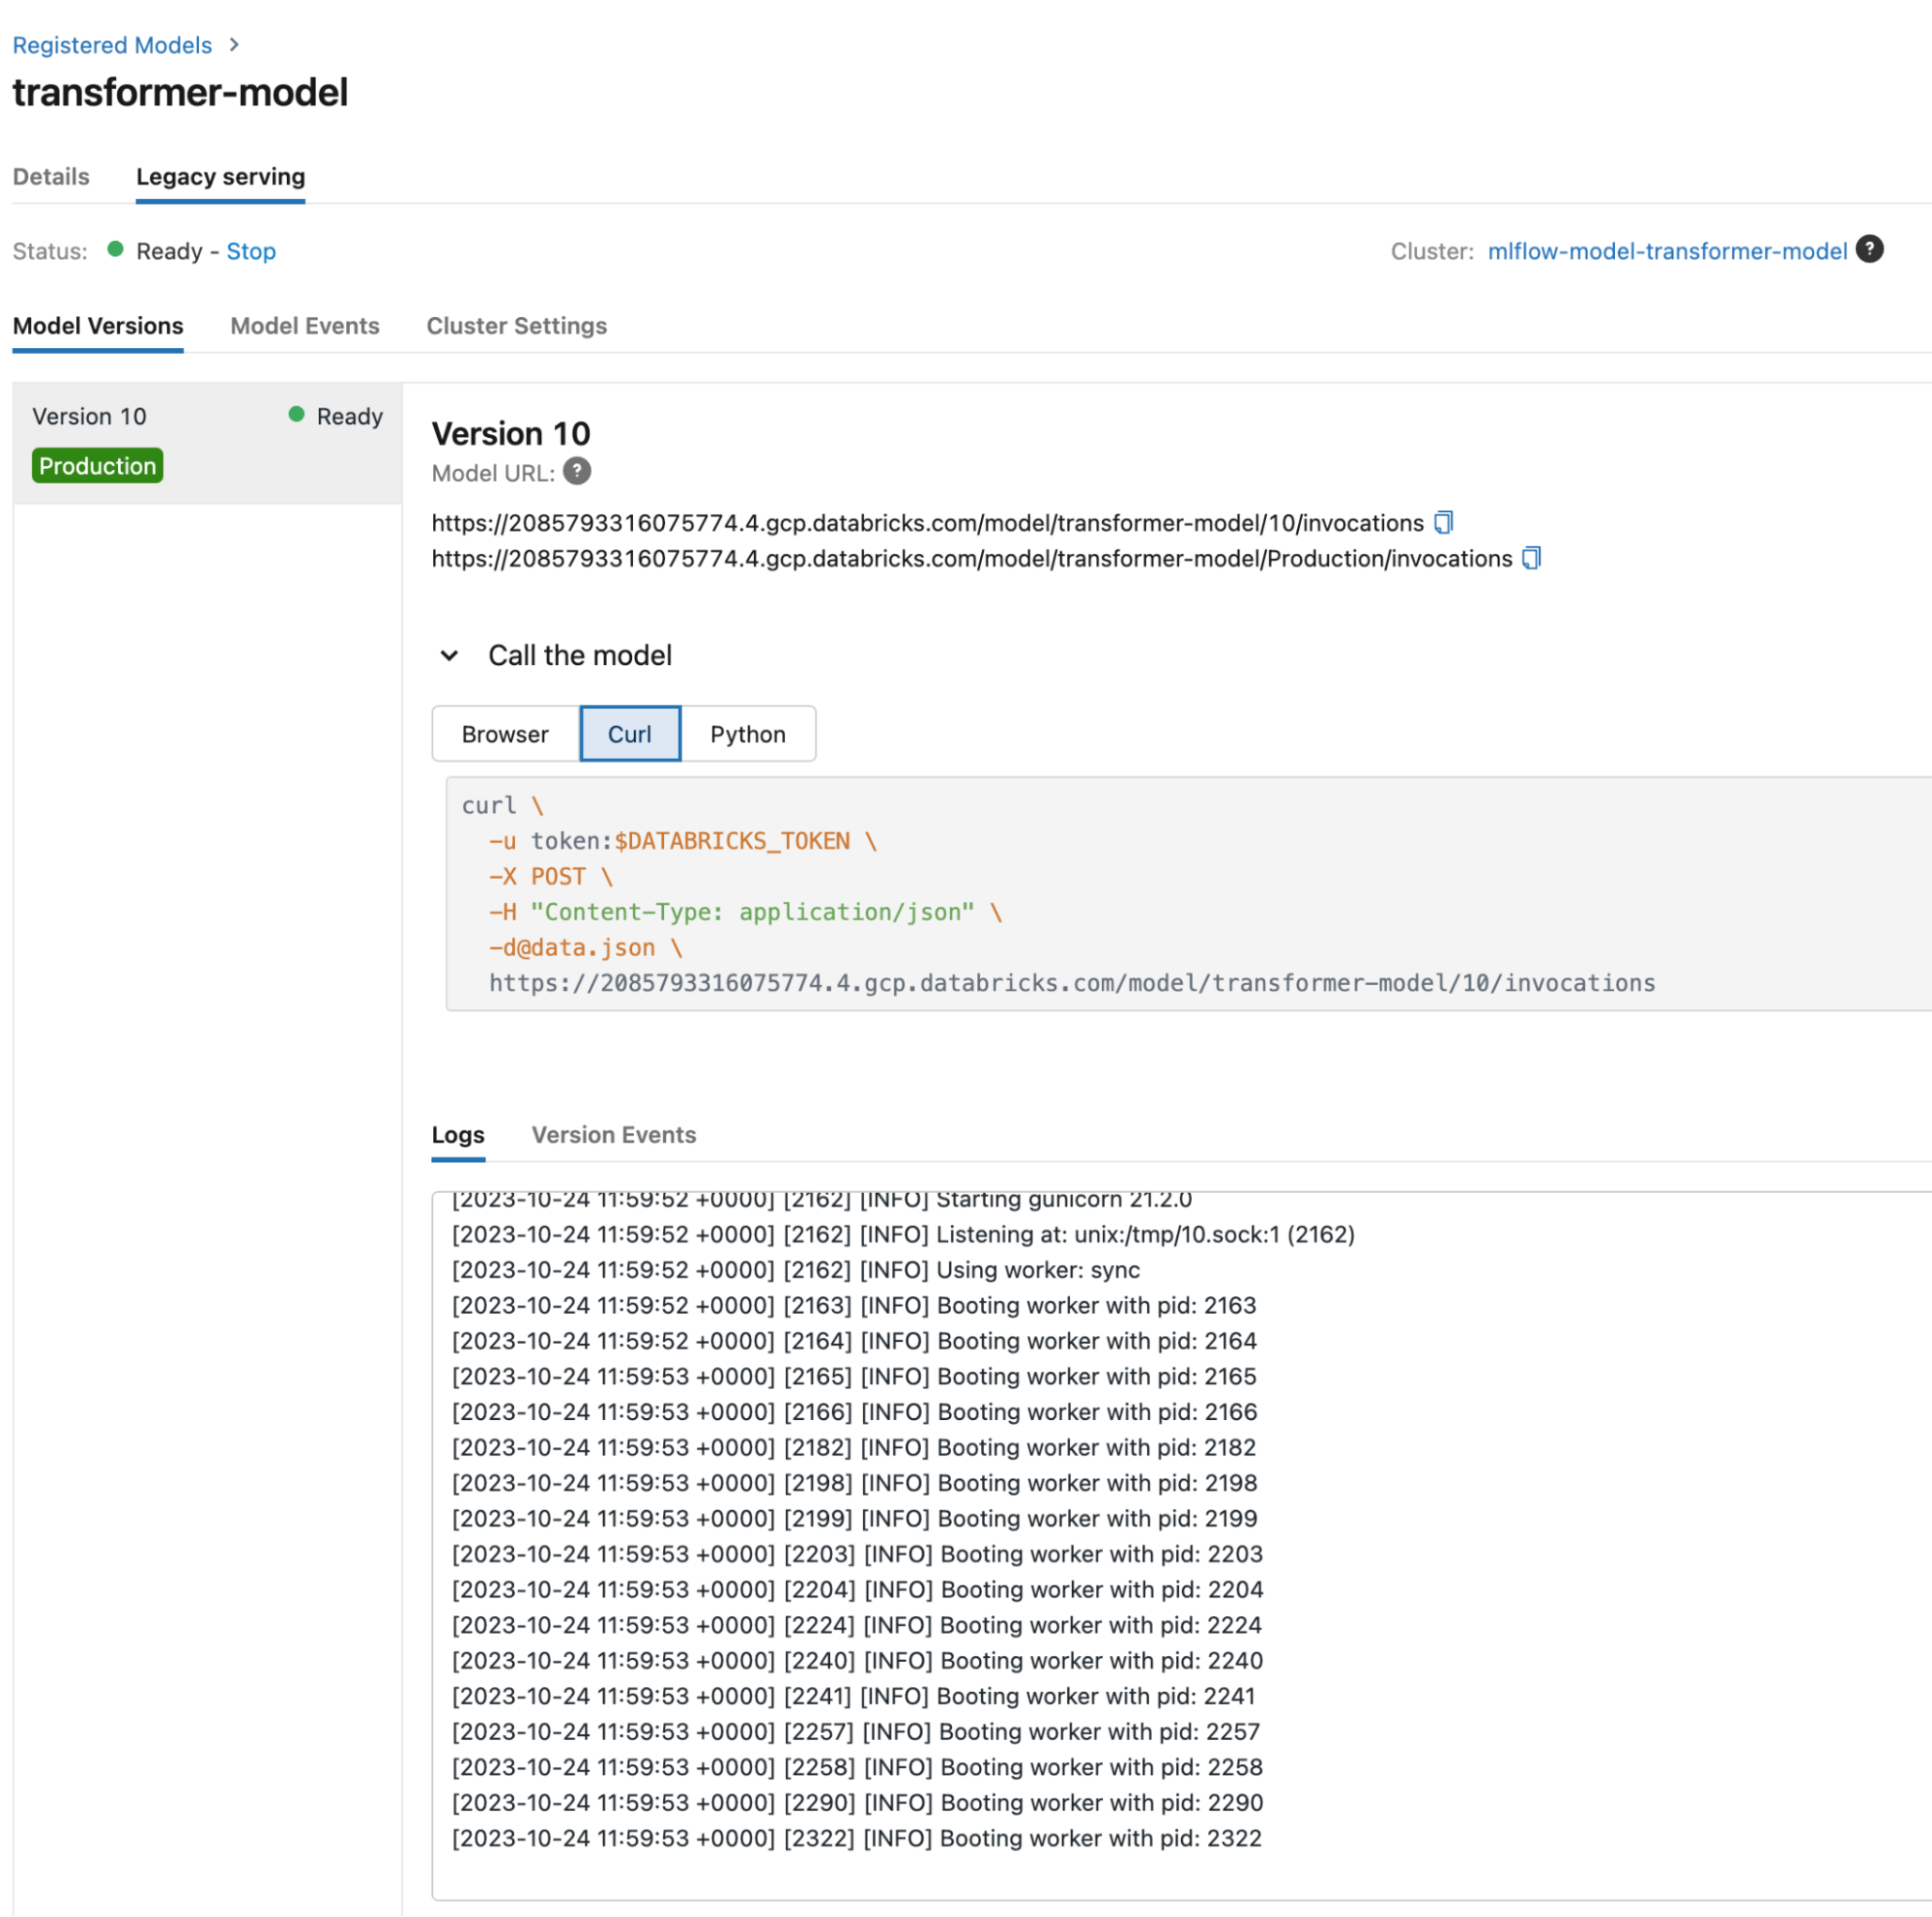
We see that the model is Ready, logs are clear of errors.
Now, let’s call a restful endpoint using python and request a library. Important: Ensure that your 'DATABRICKS_TOKEN' is configured as an environment variable before proceeding. You can generate access tokens by navigating to the 'Settings', then 'Developer', and finally the 'Access Tokens' section.
response = requests.post(
   '{databricks_workspace_url}/model/transformer-model/Production/invocations',
   headers={
       'Authorization': f'Bearer {os.environ.get("DATABRICKS_TOKEN")}',
       'Content-Type': 'application/json',
   },
   json={"inputs": {"text": ["hello"]}},
)
After executing this code we can check the status and response body:
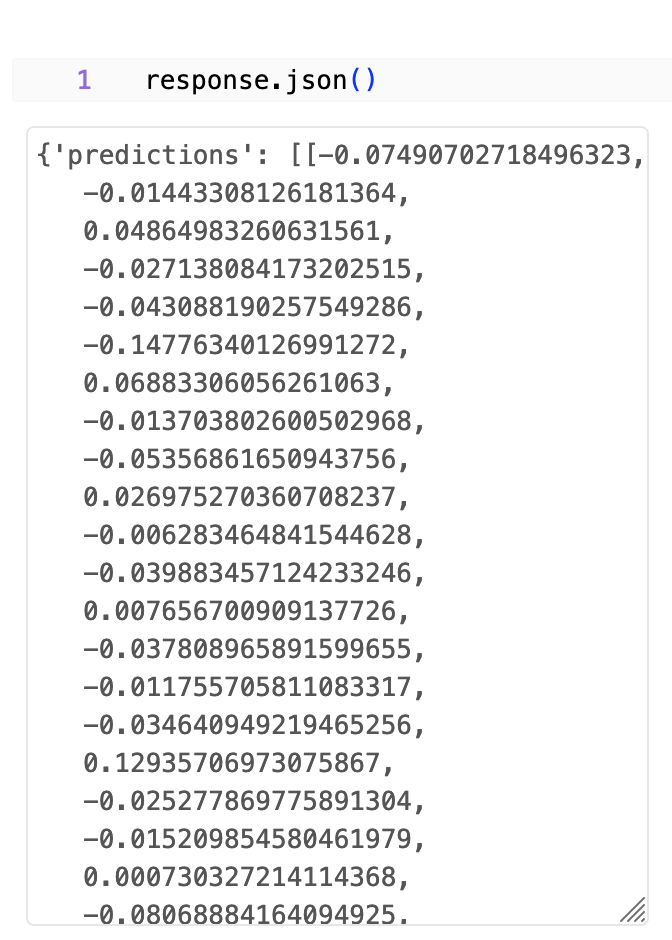
We see that status 200 which is success, and body contains our embeddings.
Full notebook is awailable here.