7. Create Observation Tables
An Observation Table is essentially a collection of historical data points that serve as a foundation for learning. Think of it as the backbone of a training dataset. Its primary role is to process and compute features, which then form the training data for Machine Learning models. For a given use case, the same Observation Table is often employed in multiple experiments. However, the specific features chosen and the Machine Learning models applied may vary between these experiments.
Step 1: Navigate to Observation Table Catalog
From the menu, go to the 'Formulate' section and access the Observation Table catalog.
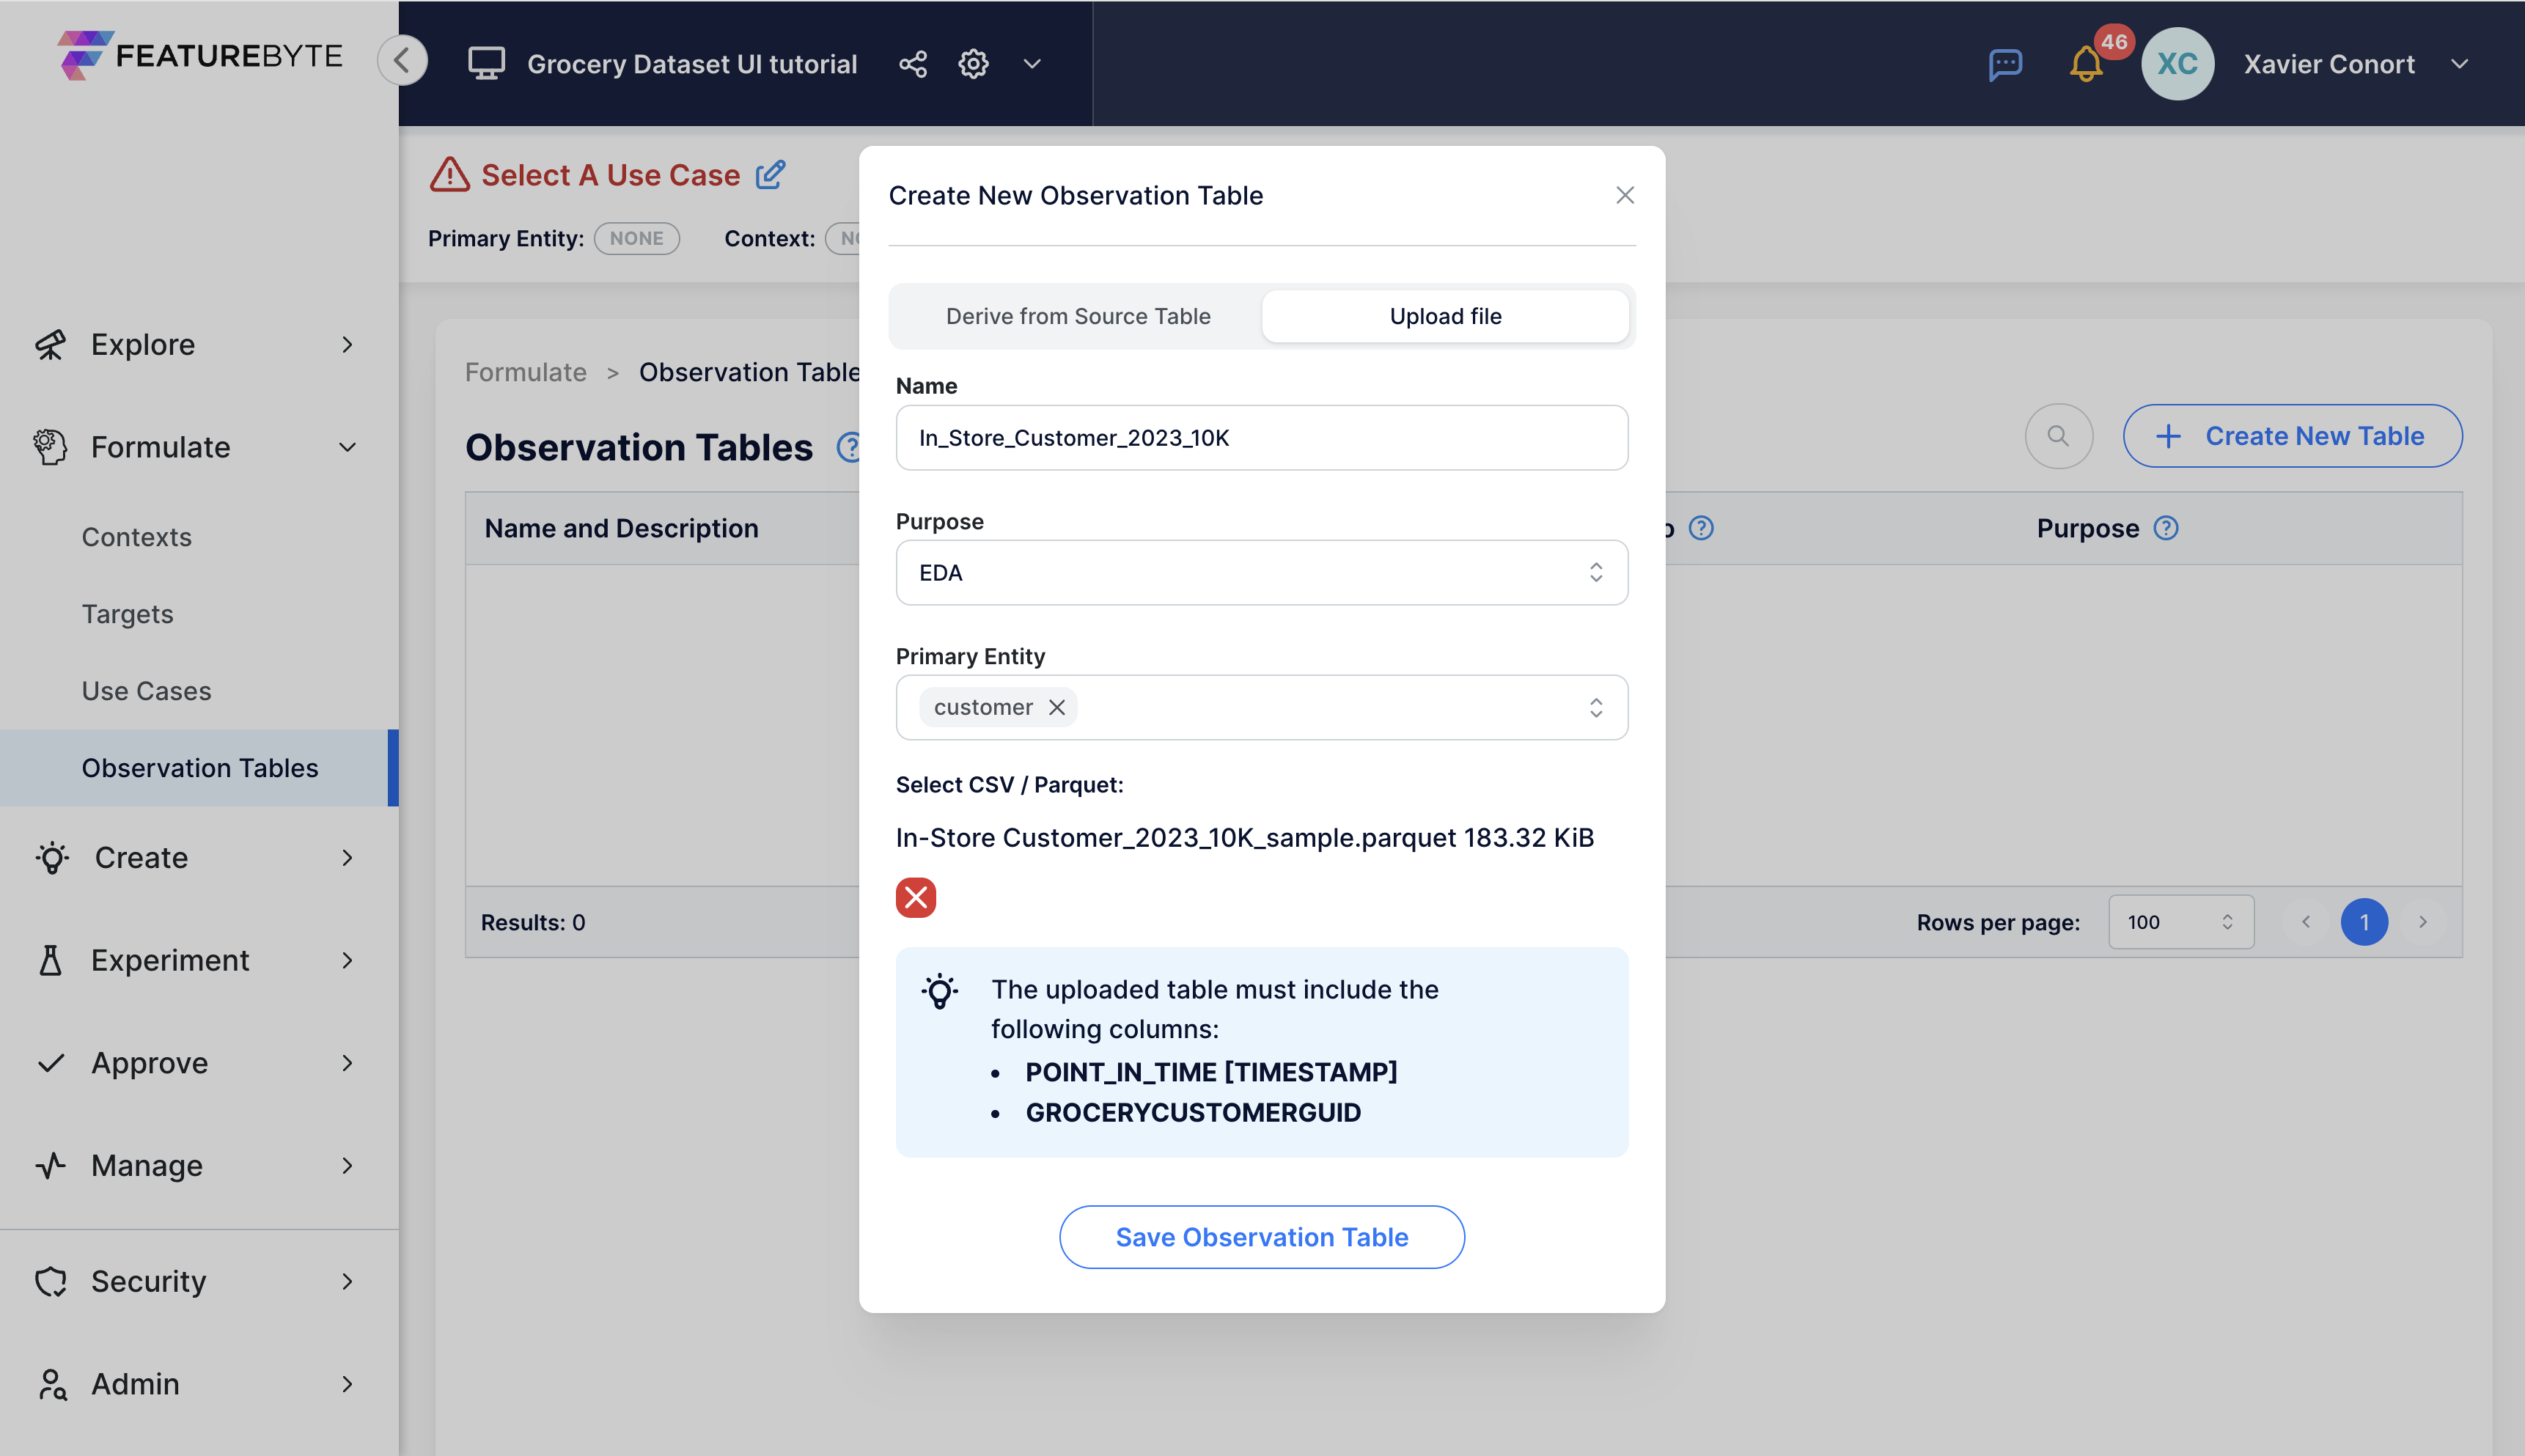
Step 2: Upload Observation Table
Click 'Create New Table'.

Select 'Upload file'.
Our Observation Table can be set as follows:
- Name: "In_Store_Customer_2023_10K"
- Purpose: "EDA" as we will use the table to run EDA analysis
- Primary Entity: "customer"
- CSV/Parquet: "In-Store Customer_2023_10K_sample.parquet" that you can download here.
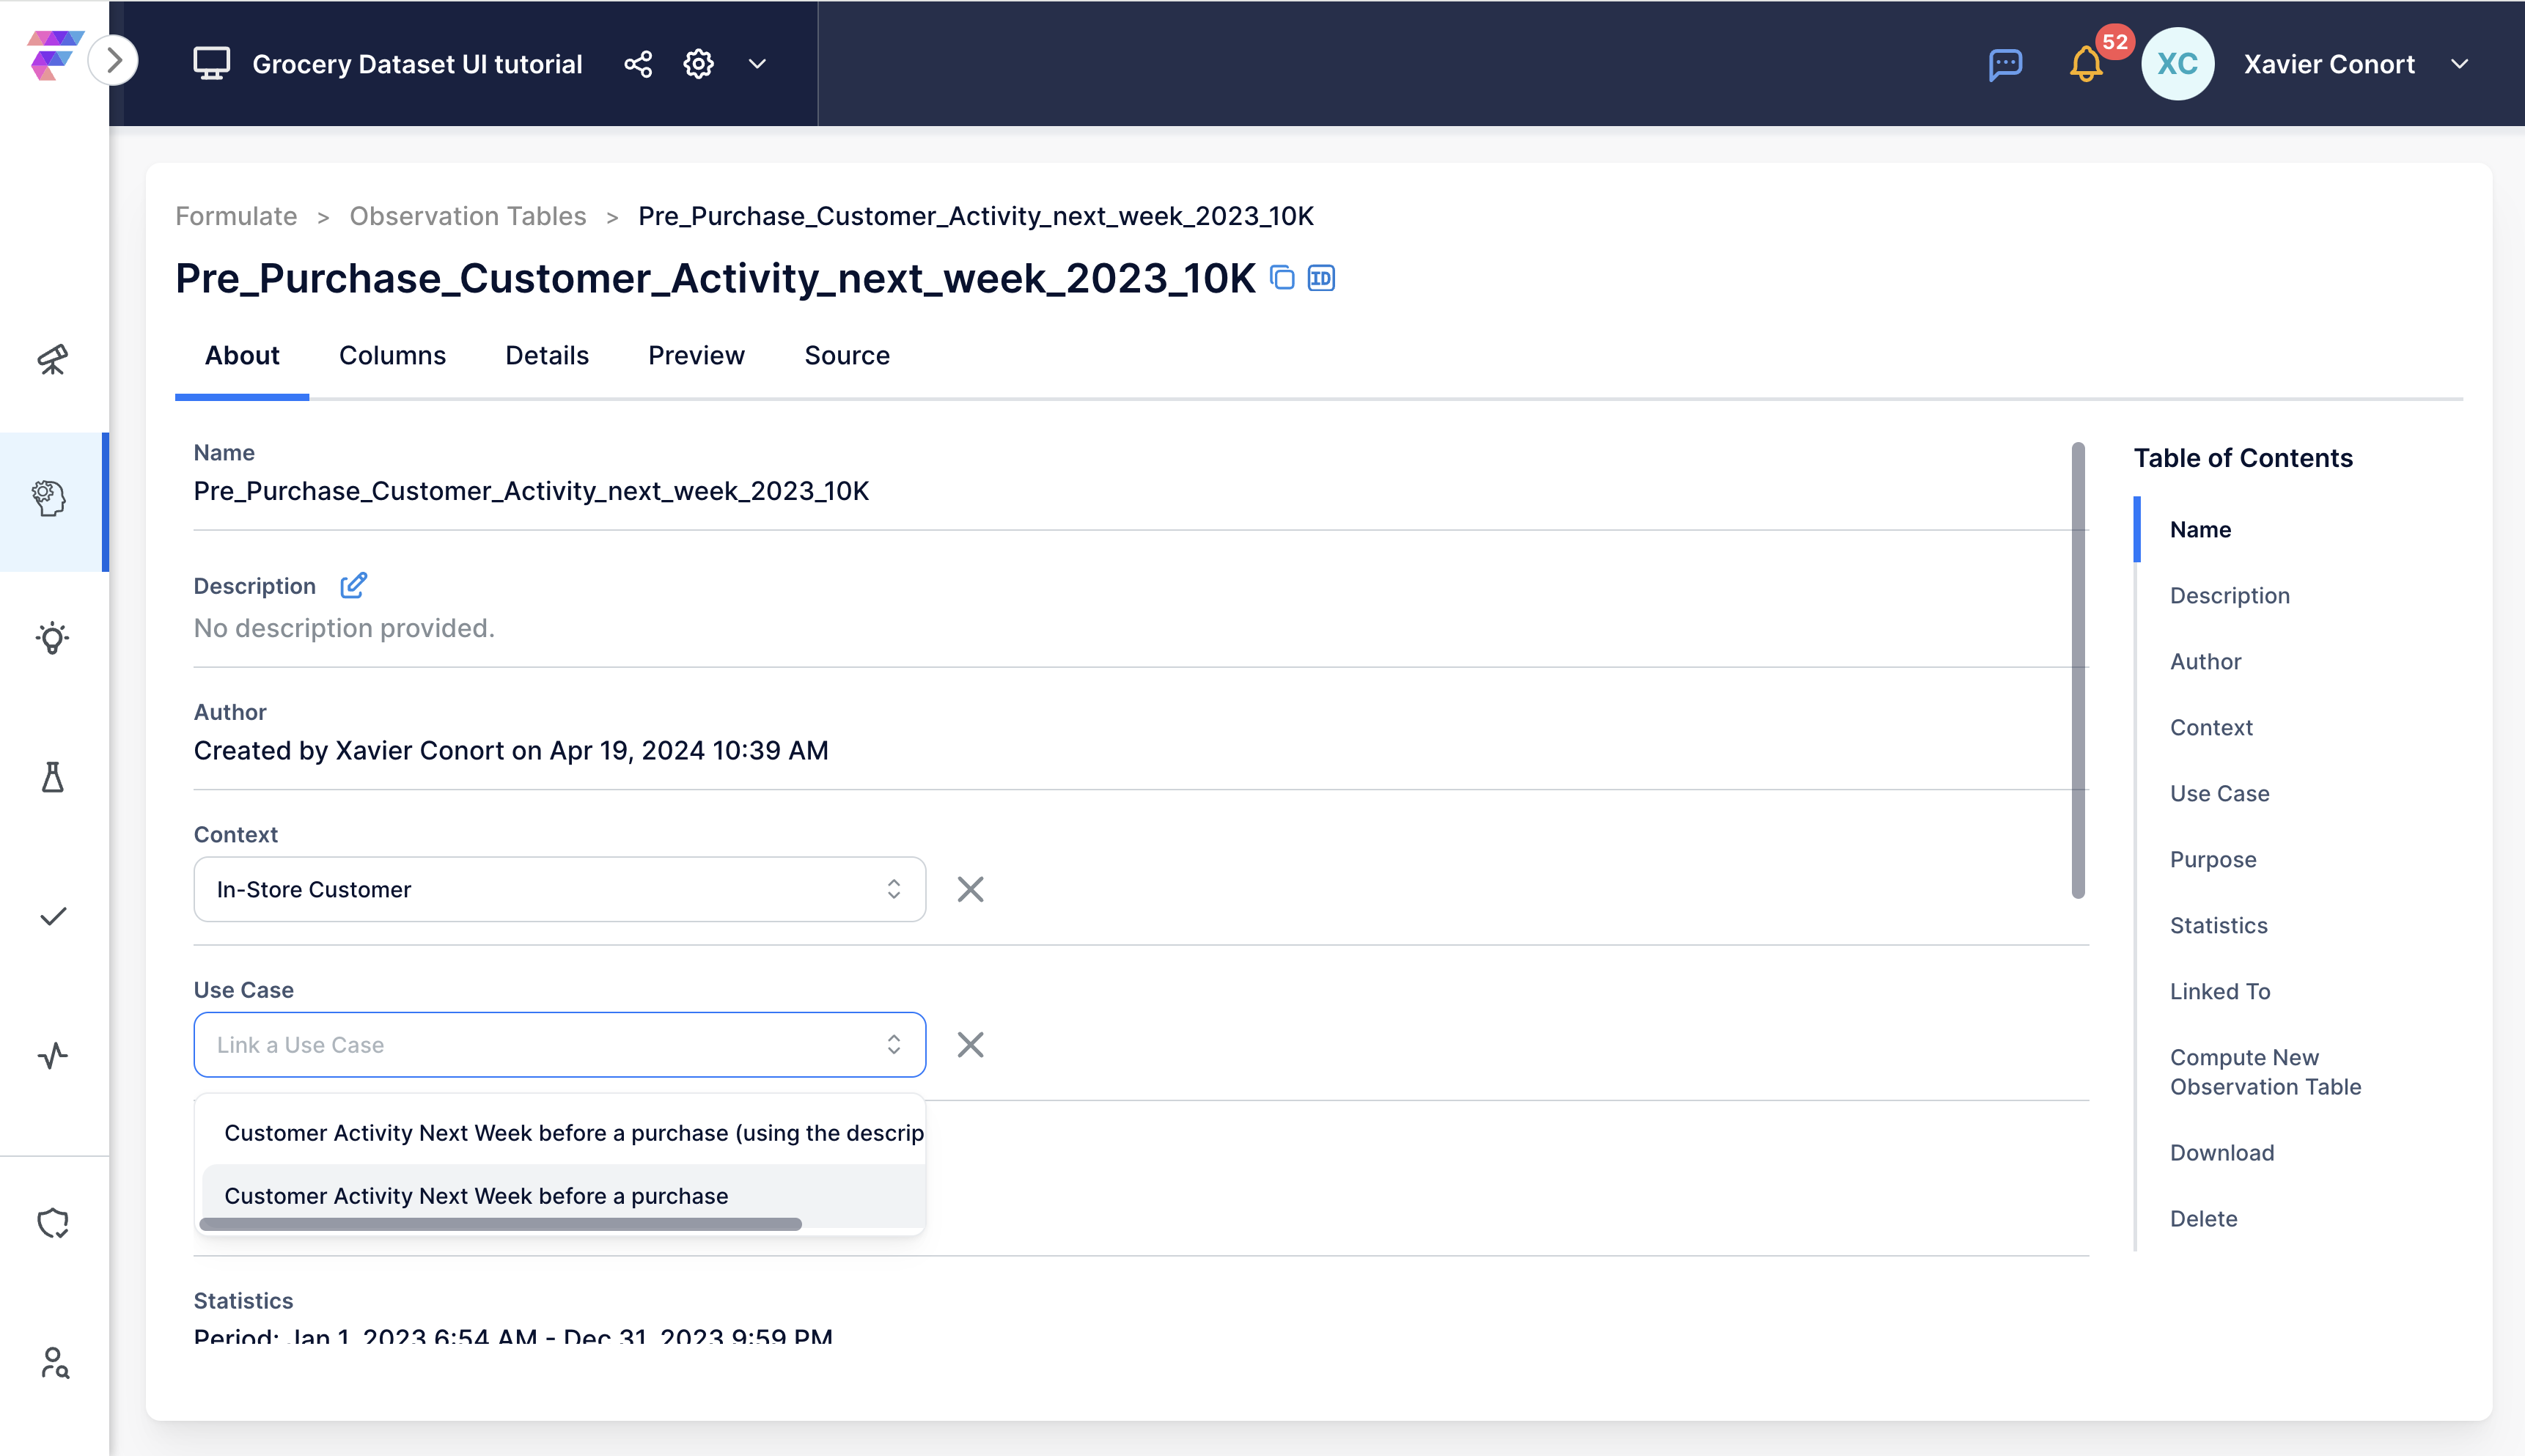
Step 3: Link Observation Table to a Context
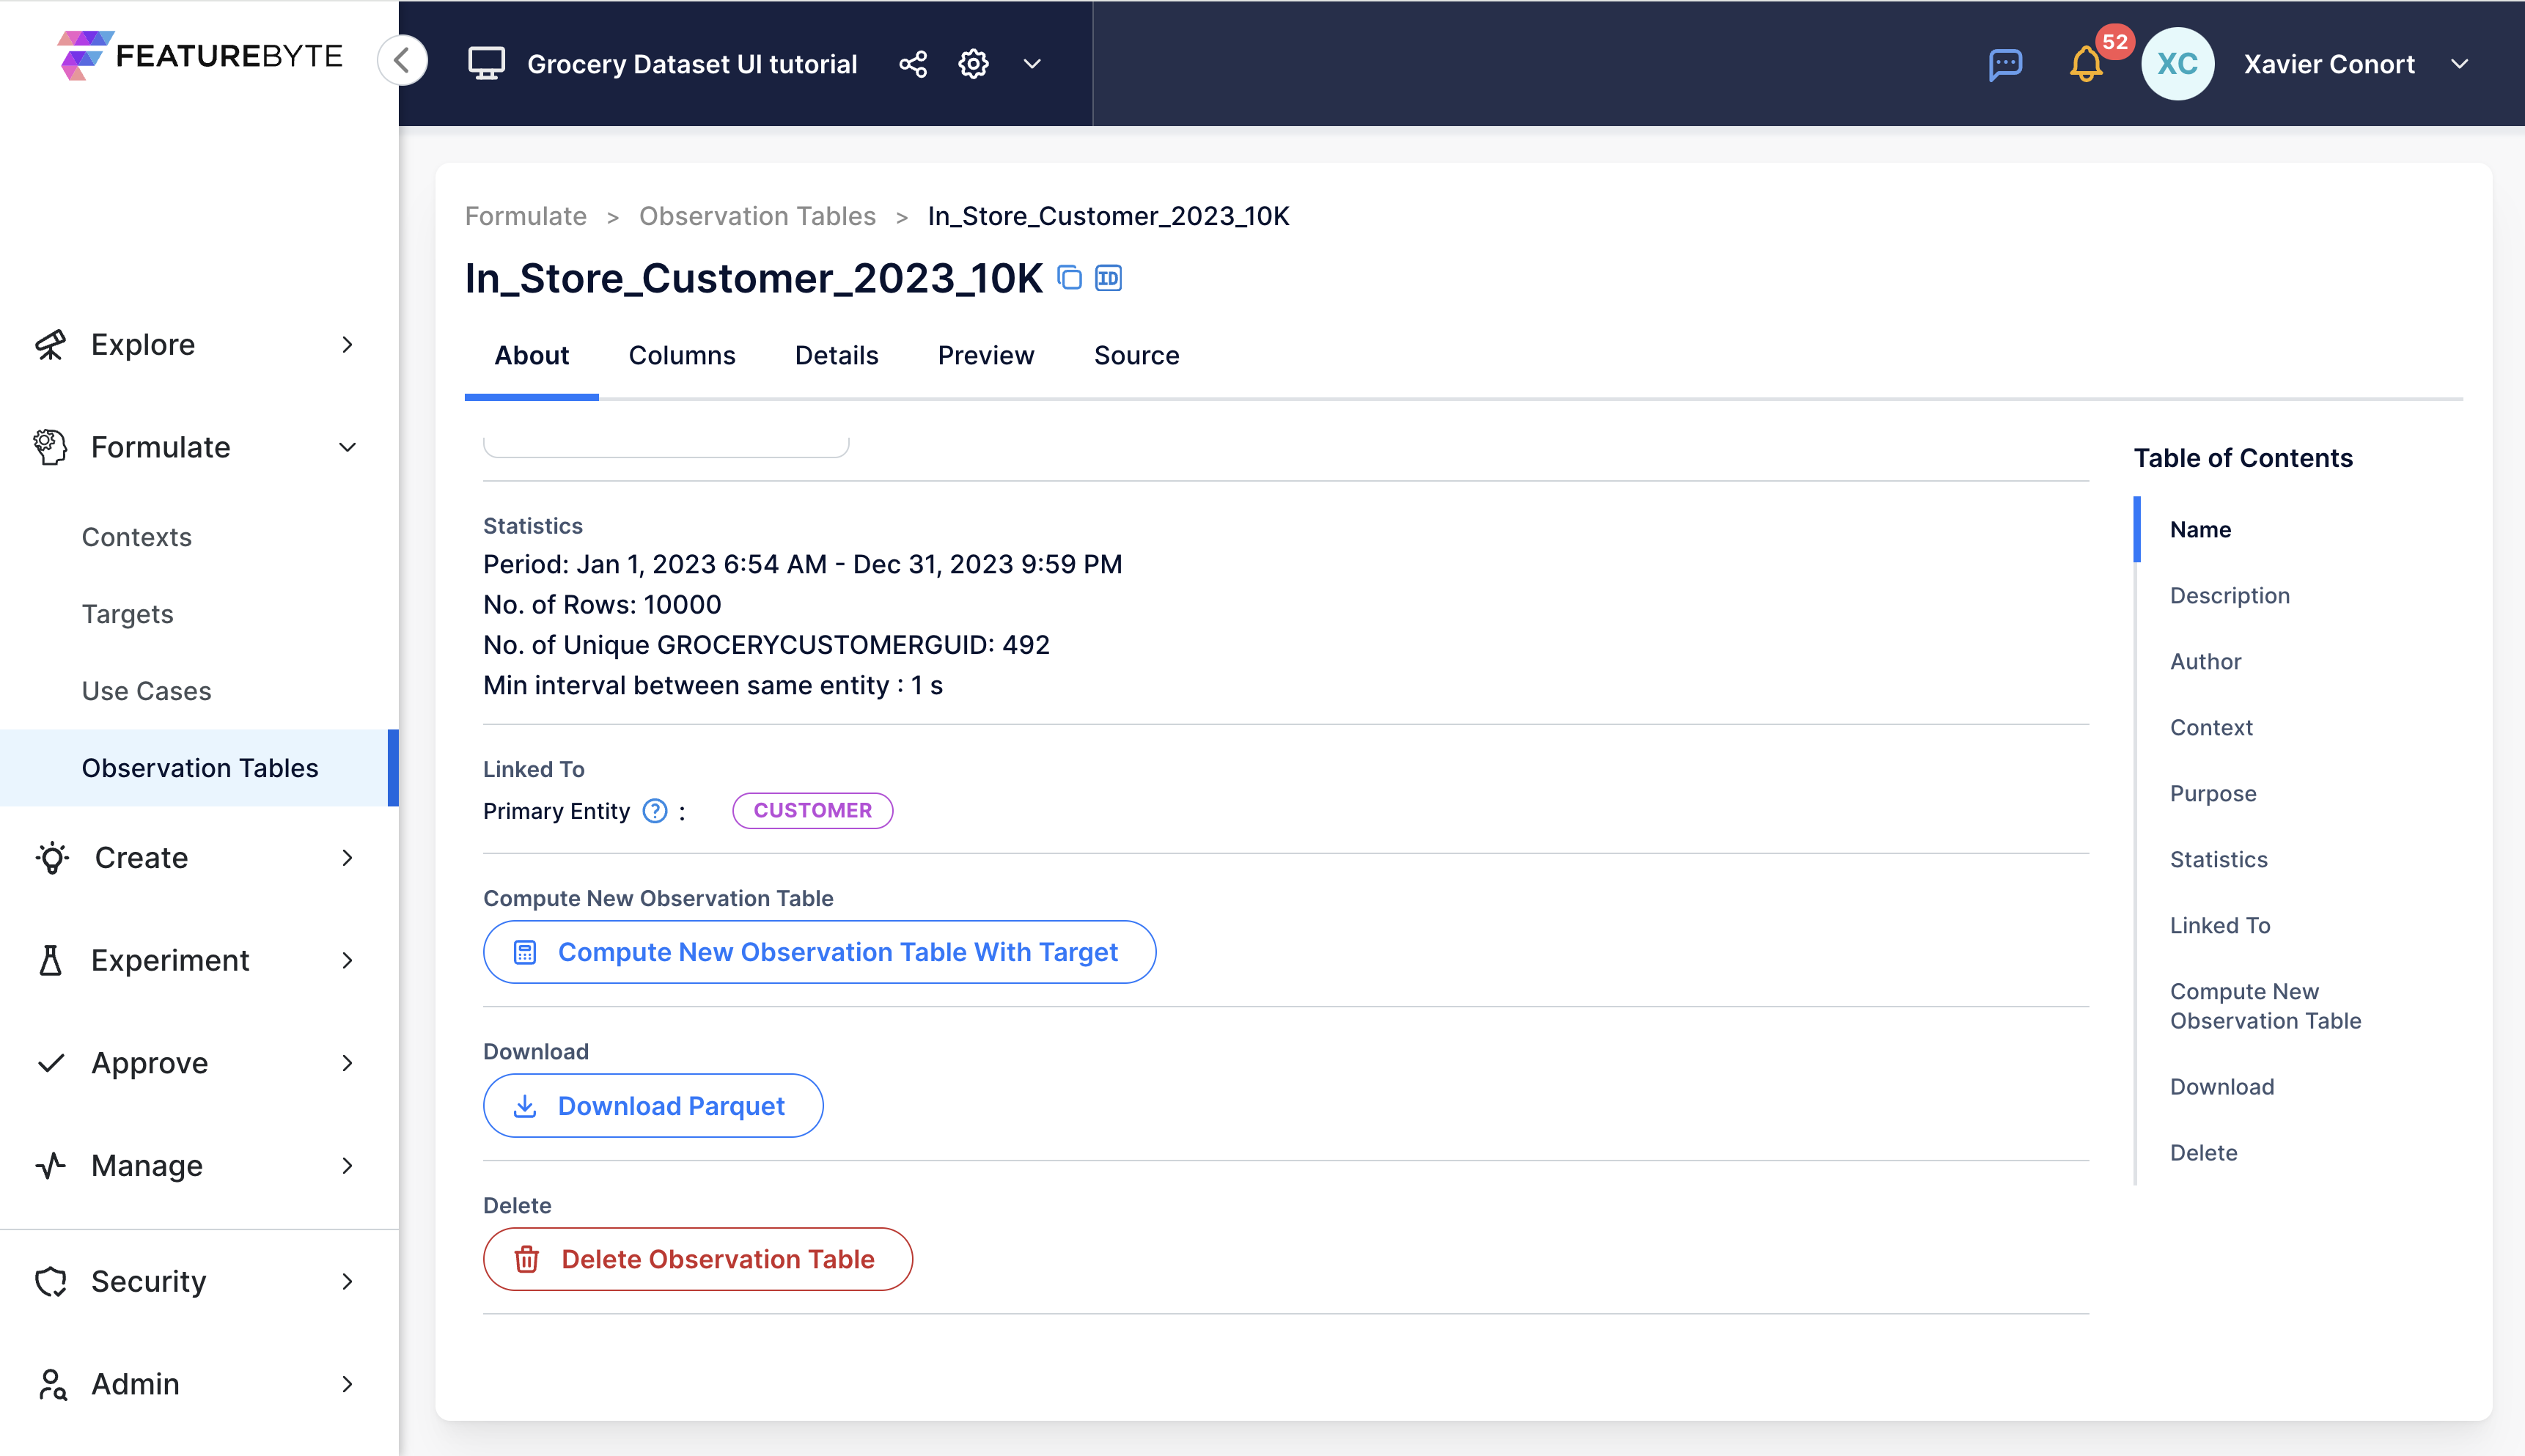
- Select the table from the catalog.
- Go to the 'About' tab.
- Choose "In-Store Customer" in the Context dropdown menu.

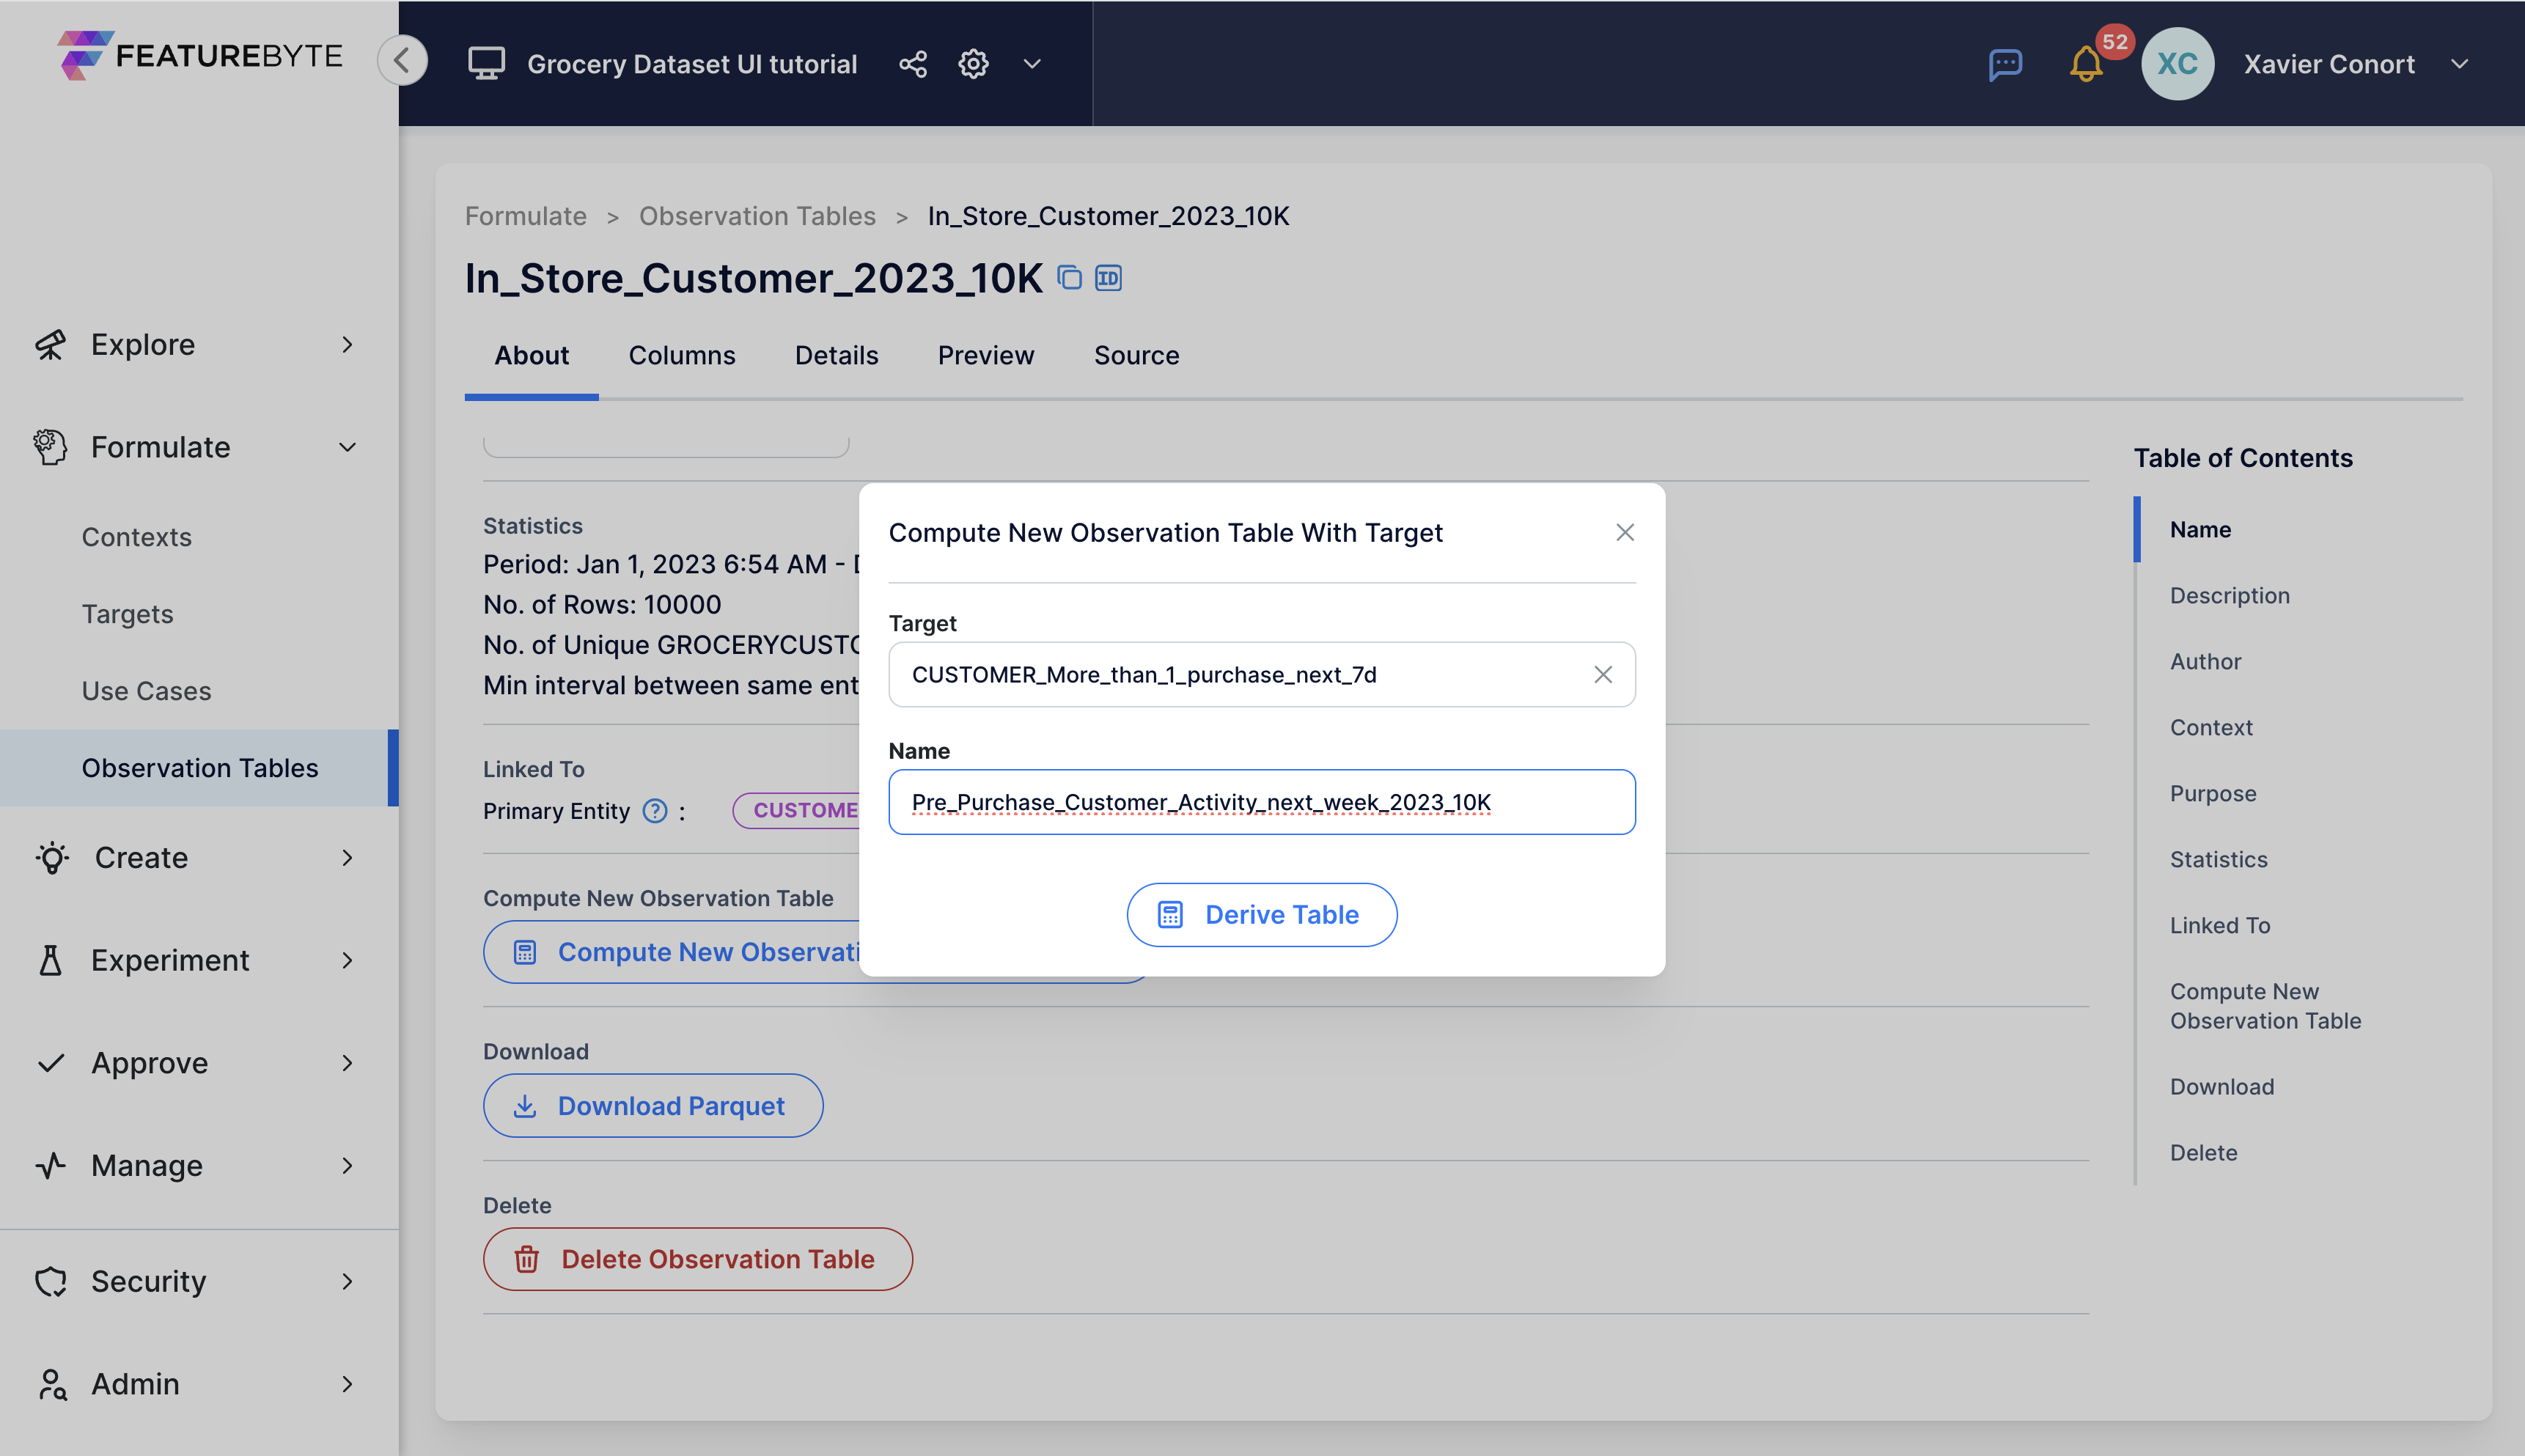
Step 4: Create Observation Table with Target Values
If you have successfully created the "CUSTOMER_More_than_1_purchase_next_7d" target using the FeatureByte SDK, follow these steps:
- In the same 'About' tab, scroll down and click "Compute New Observation Table With Target"
- Choose the specific target you intend to use
- Assign a name to your newly created table. For example, you can name it "Pre_Purchase_Customer_Activity_next_week_2023_10K".
If you haven't created the target using the SDK, no worries. We will upload an observation table with the pre-populated target.
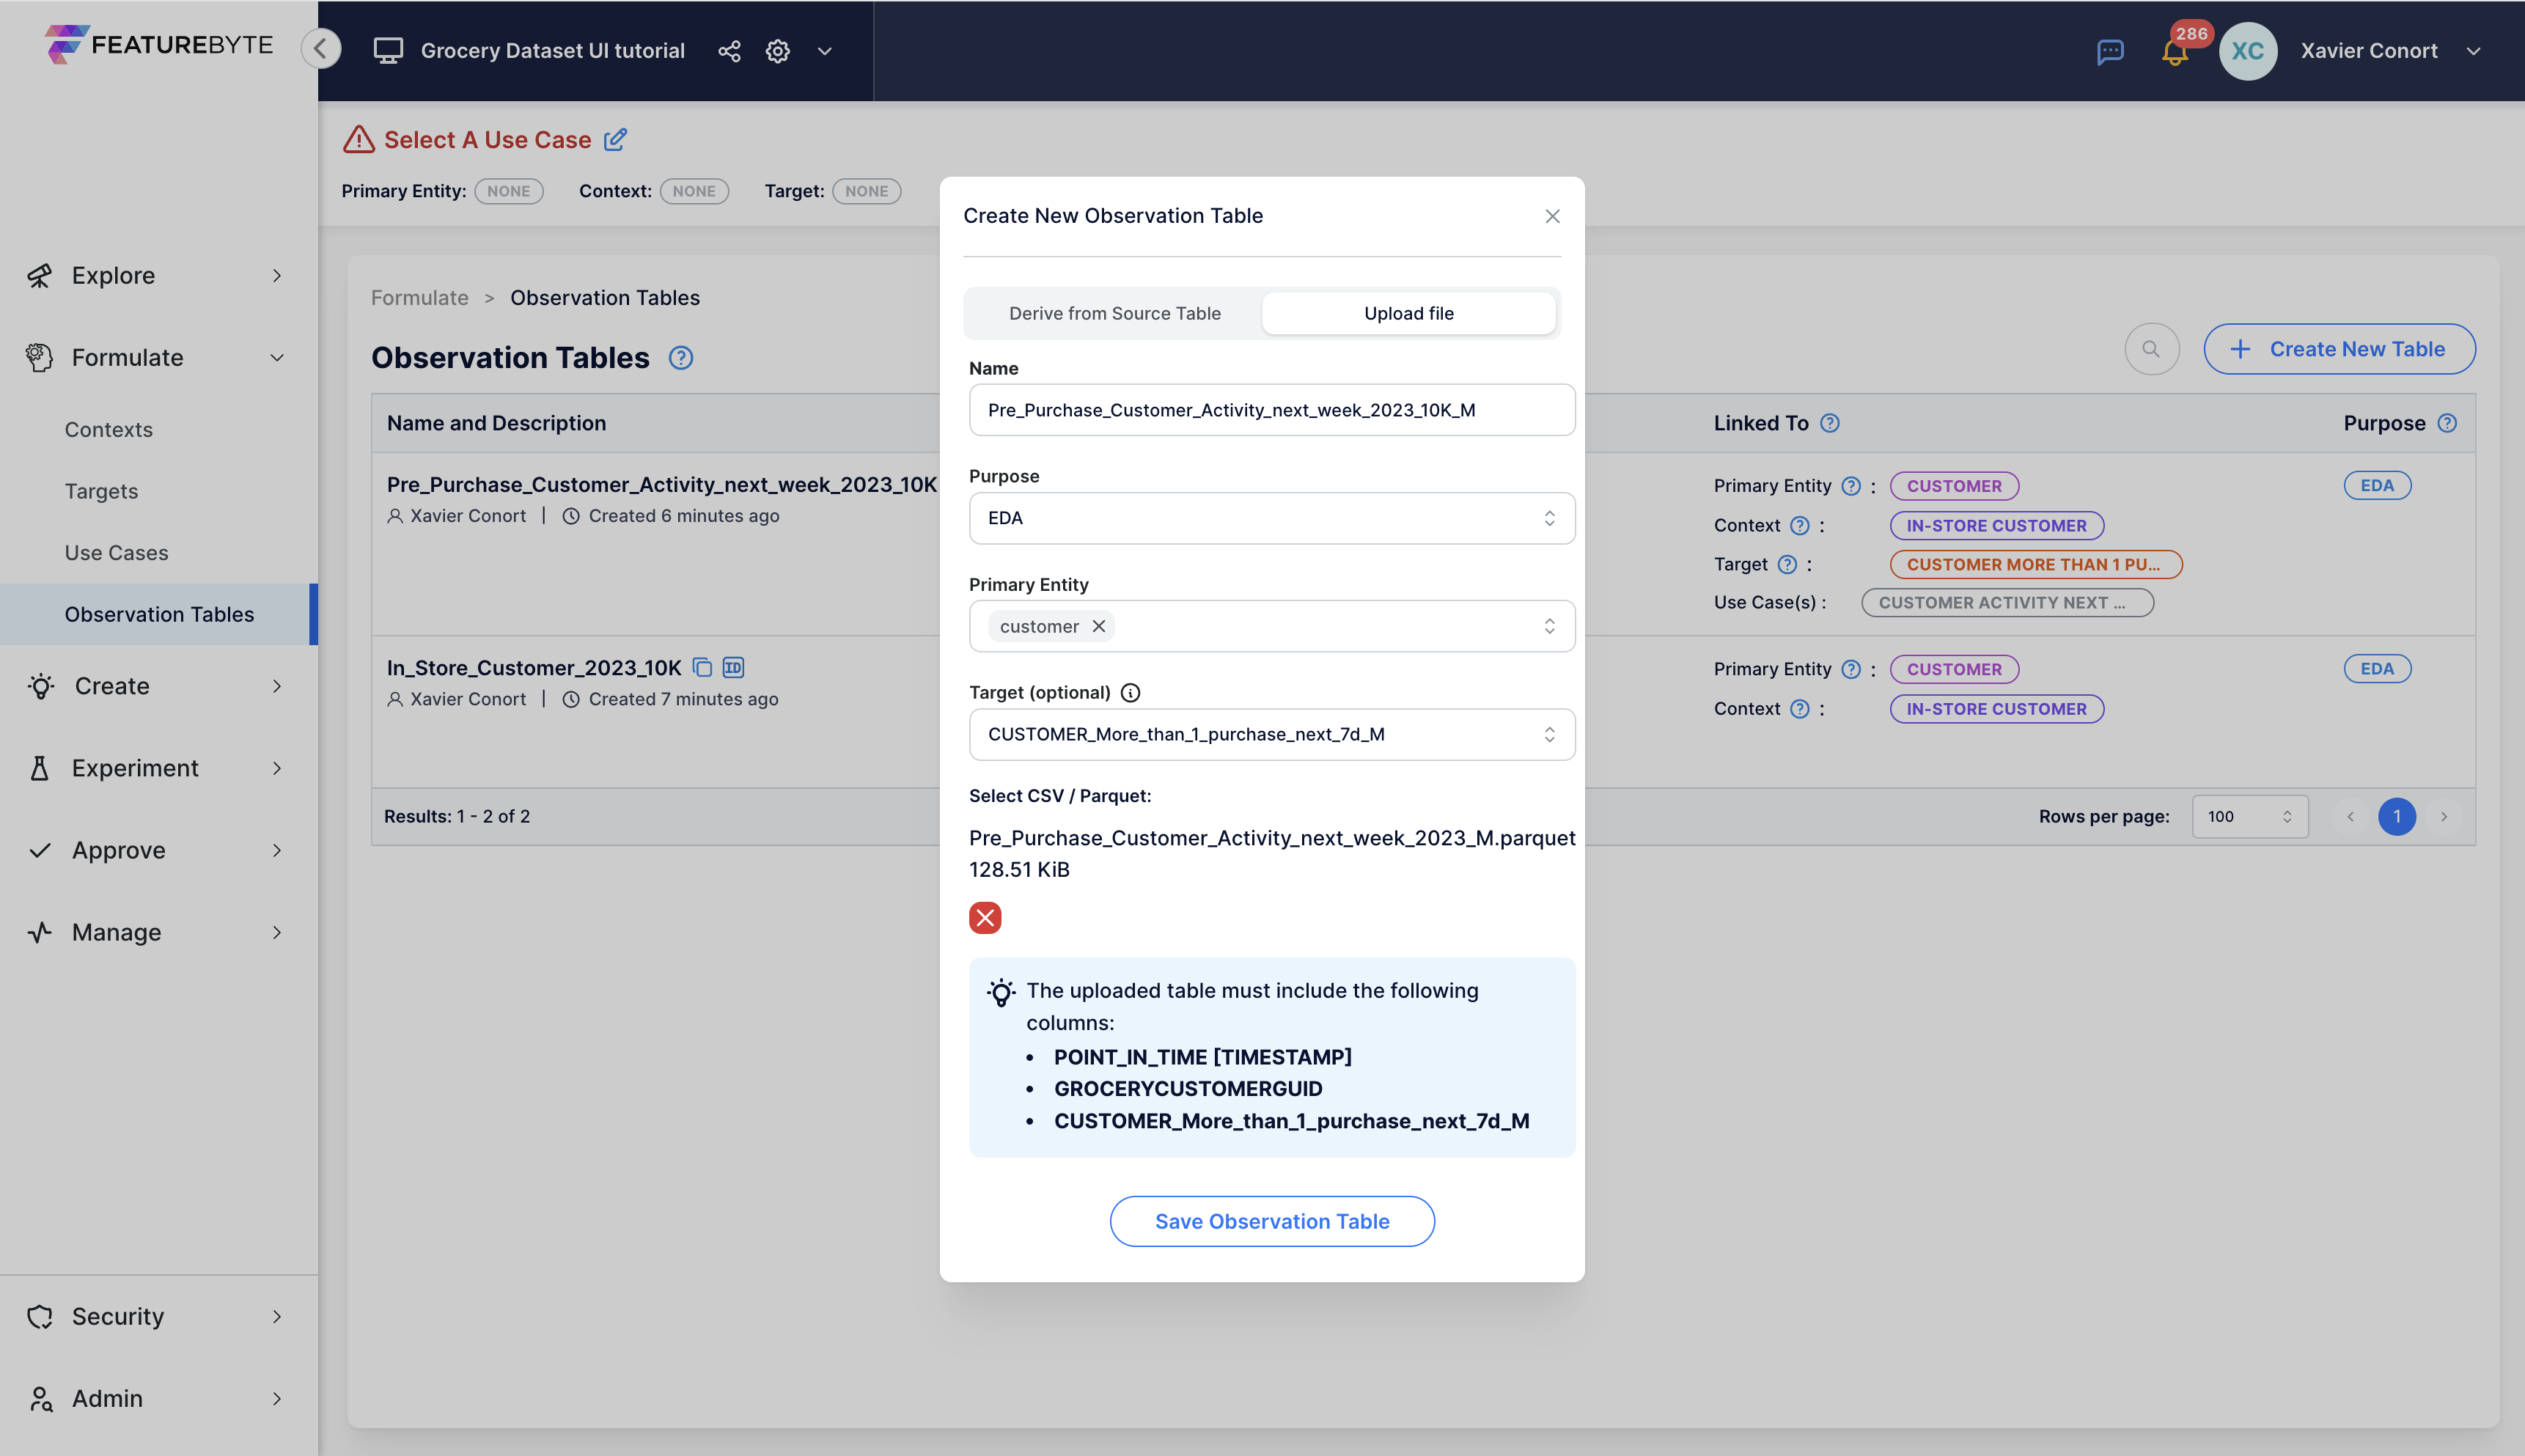
Step 4 (manual): Upload Observation Table with Target Values
If you don't have access to the FeatureByte SDK, follow these steps.
Click 'Create New Table'.
The Observation Table with Target can be set as follows:
- Name: "Pre_Purchase_Customer_Activity_next_week_2023_10K_M"
- Purpose: "EDA" as we will use the table to run EDA analysis
- Primary Entity: "customer"
- Target: "CUSTOMER_More_than_1_purchase_next_7d_M"
- CSV/Parquet: "Pre_Purchase_Customer_Activity_next_week_2023_M.parquet" that you can download here.
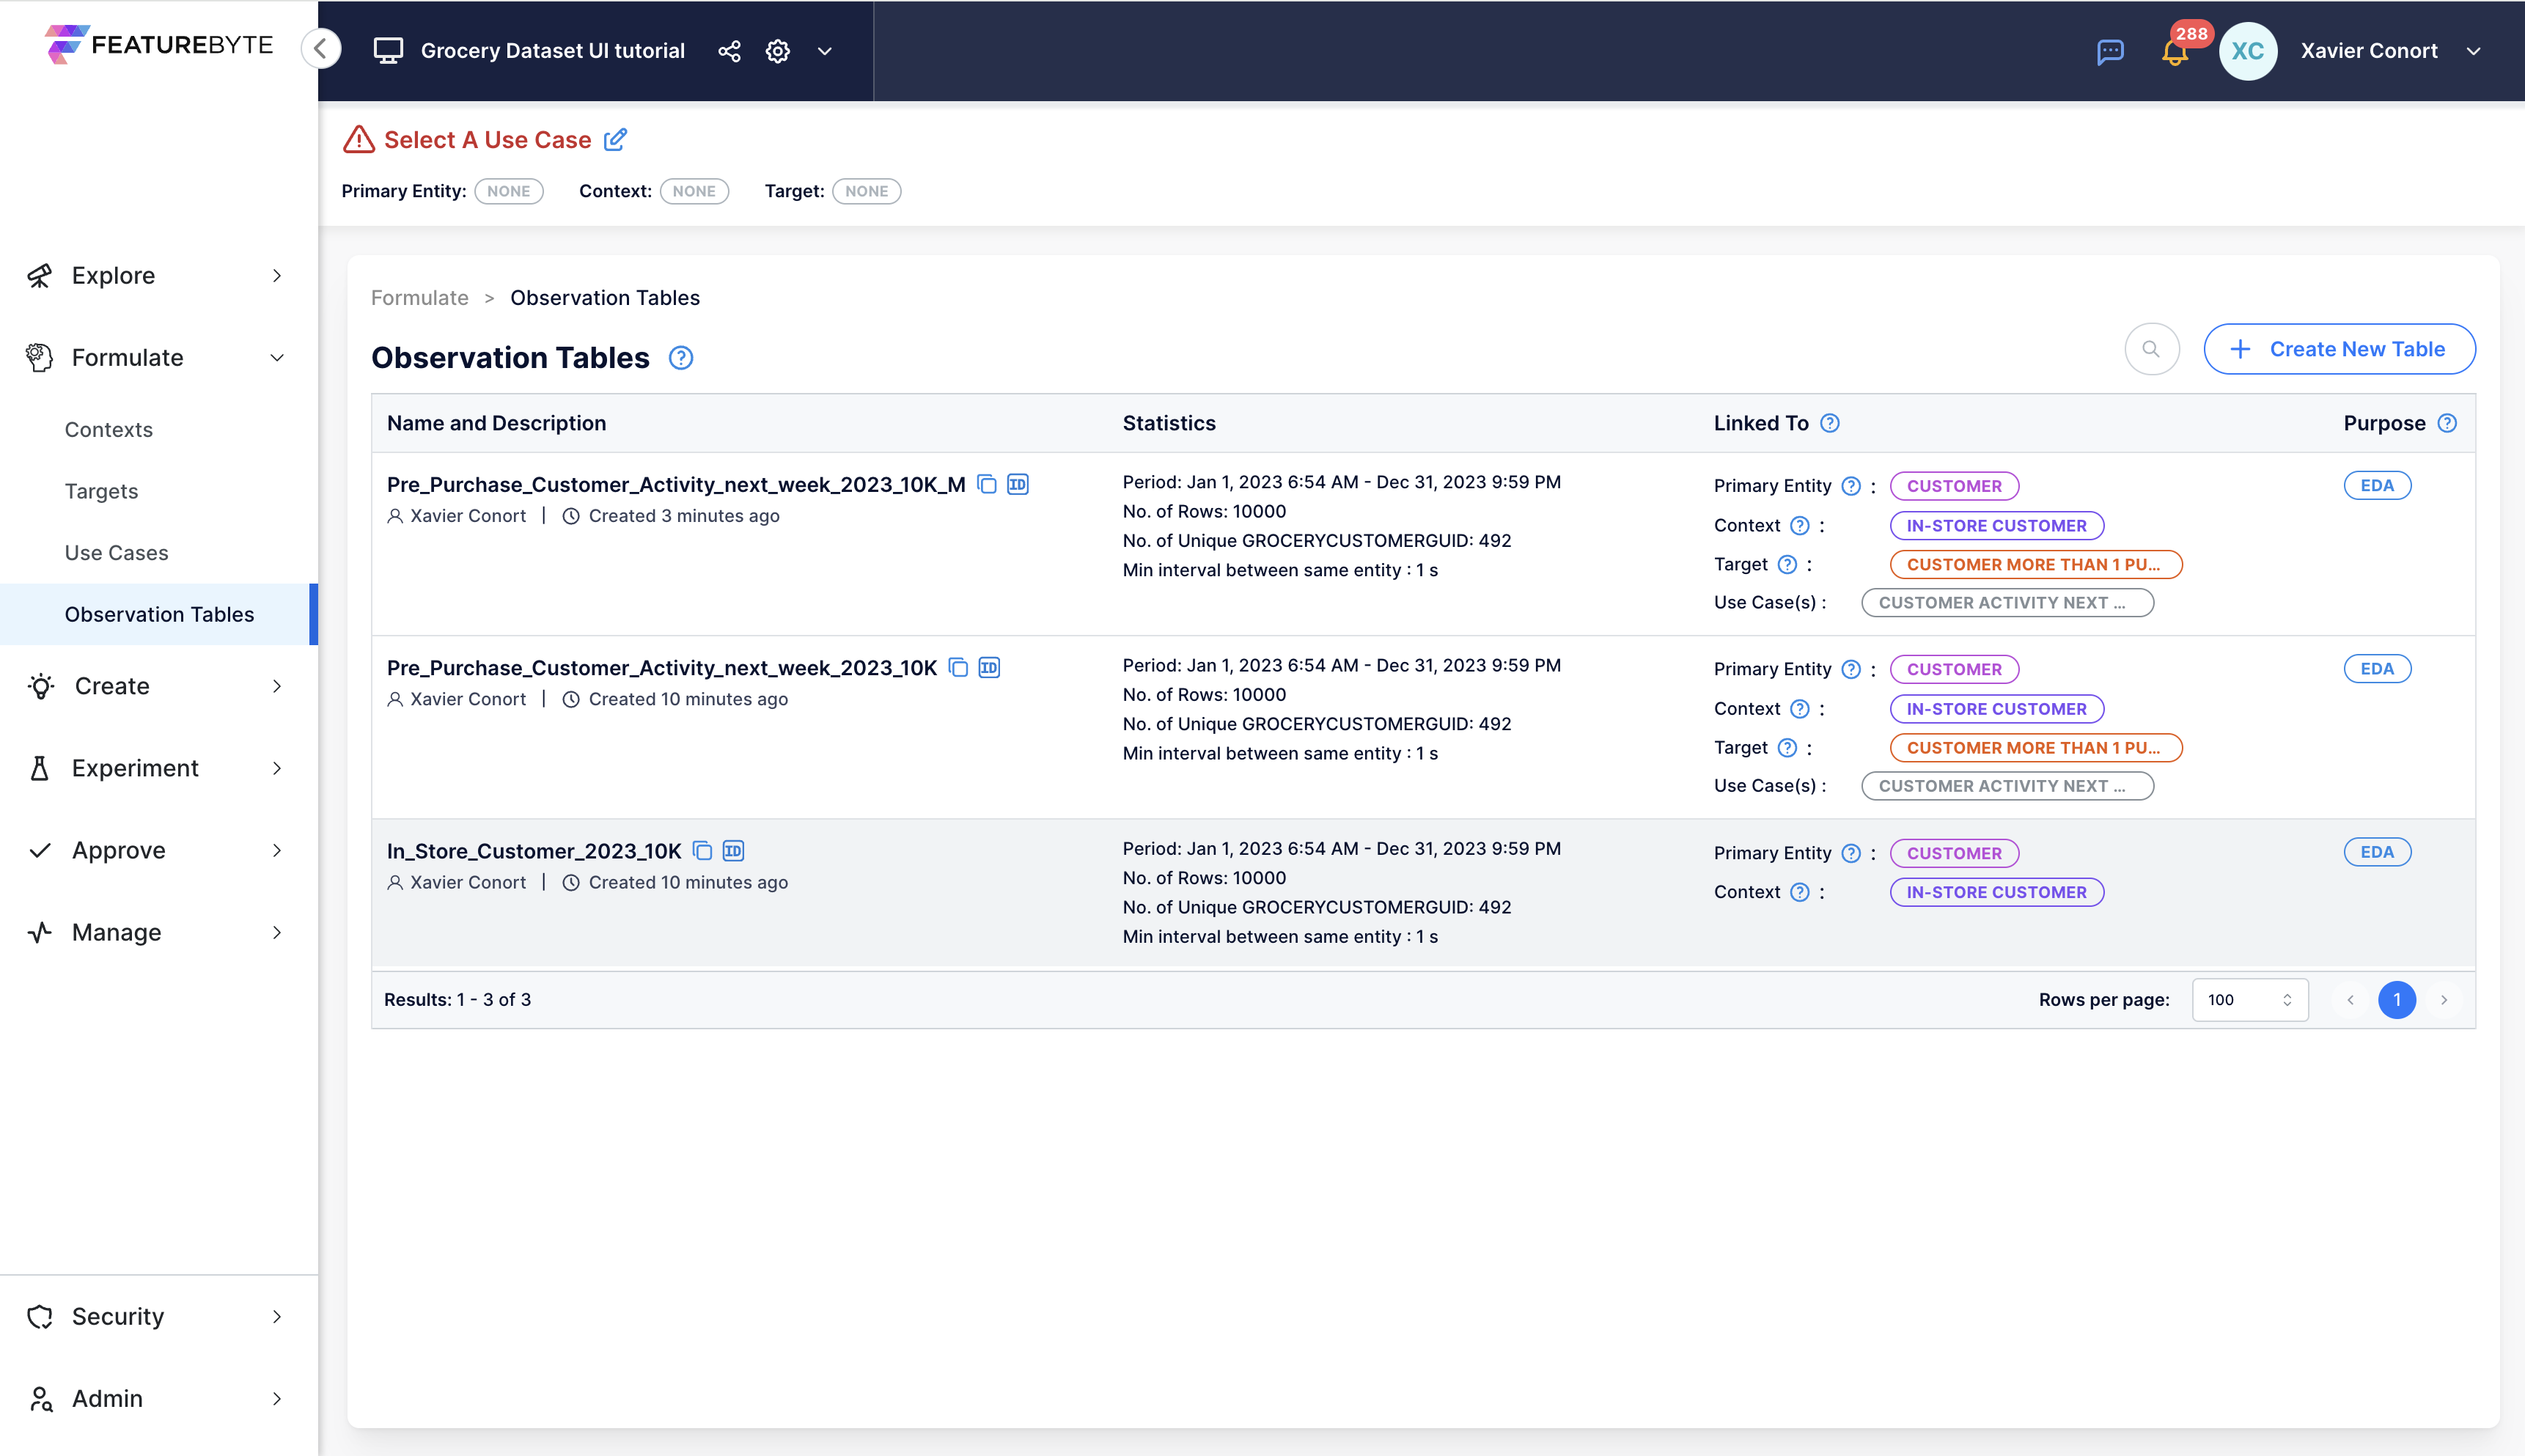
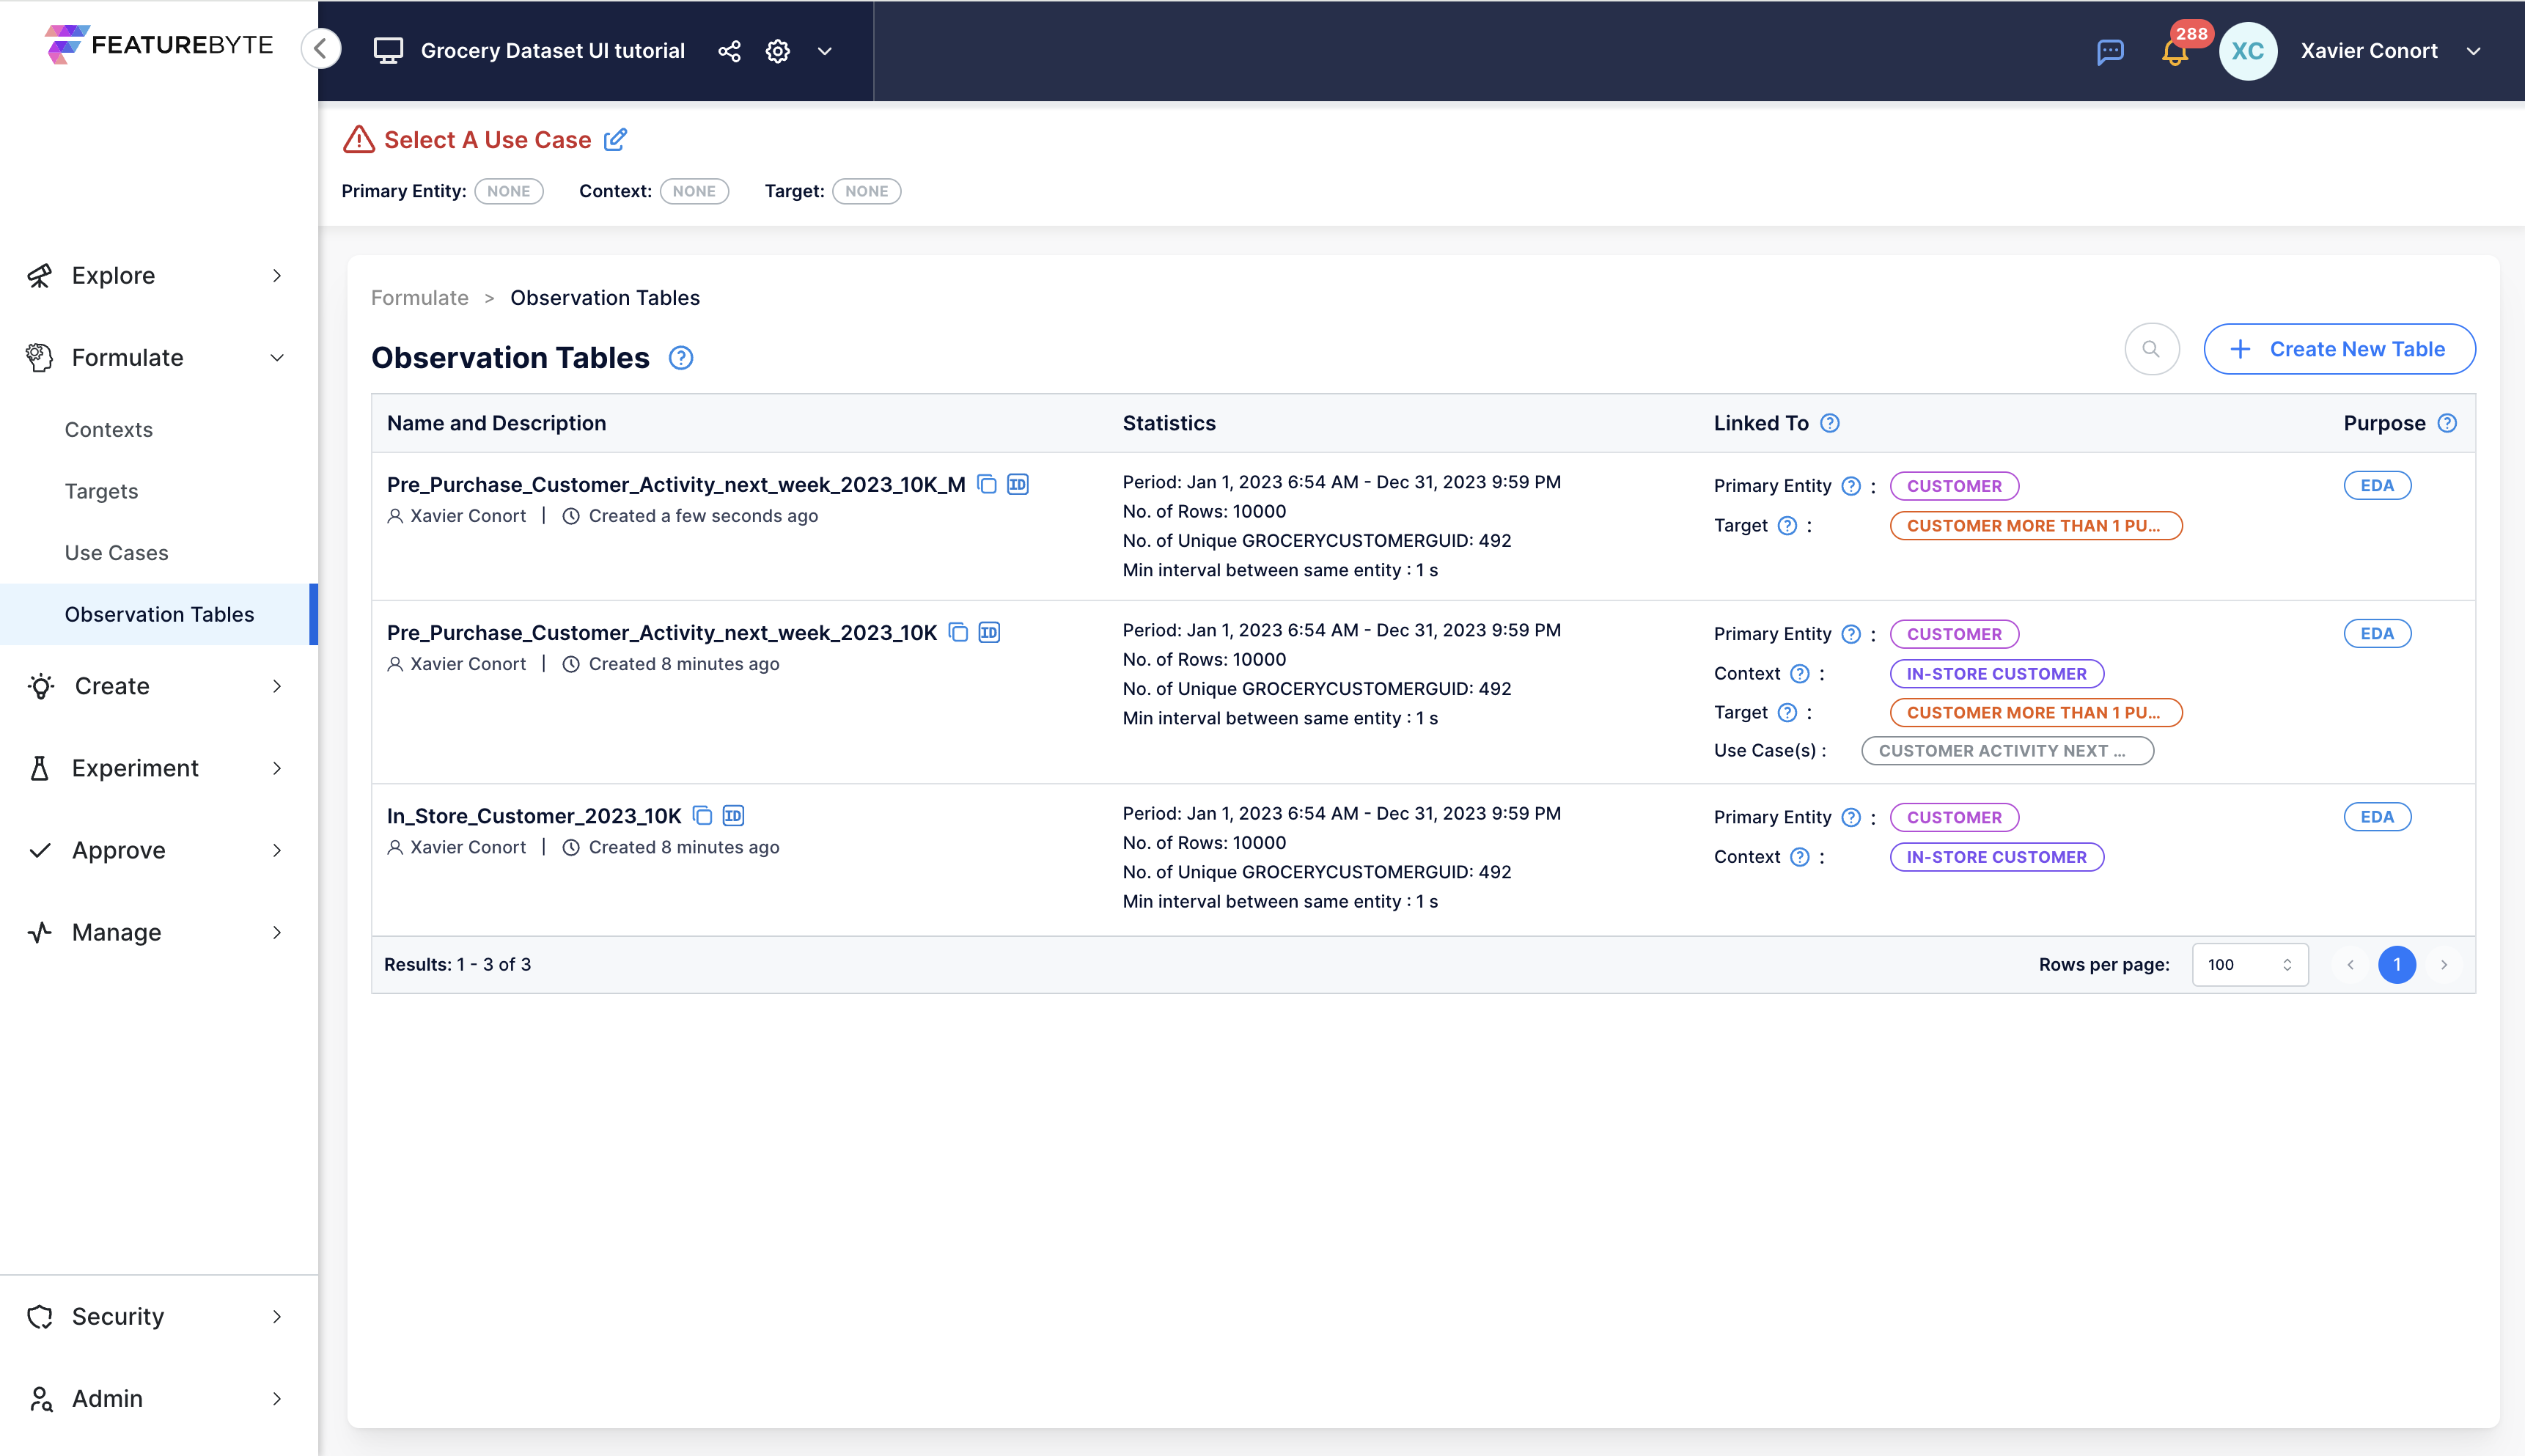
Step 5: Check Observation Tables
Verify the registration by checking the Observation Table Catalog.
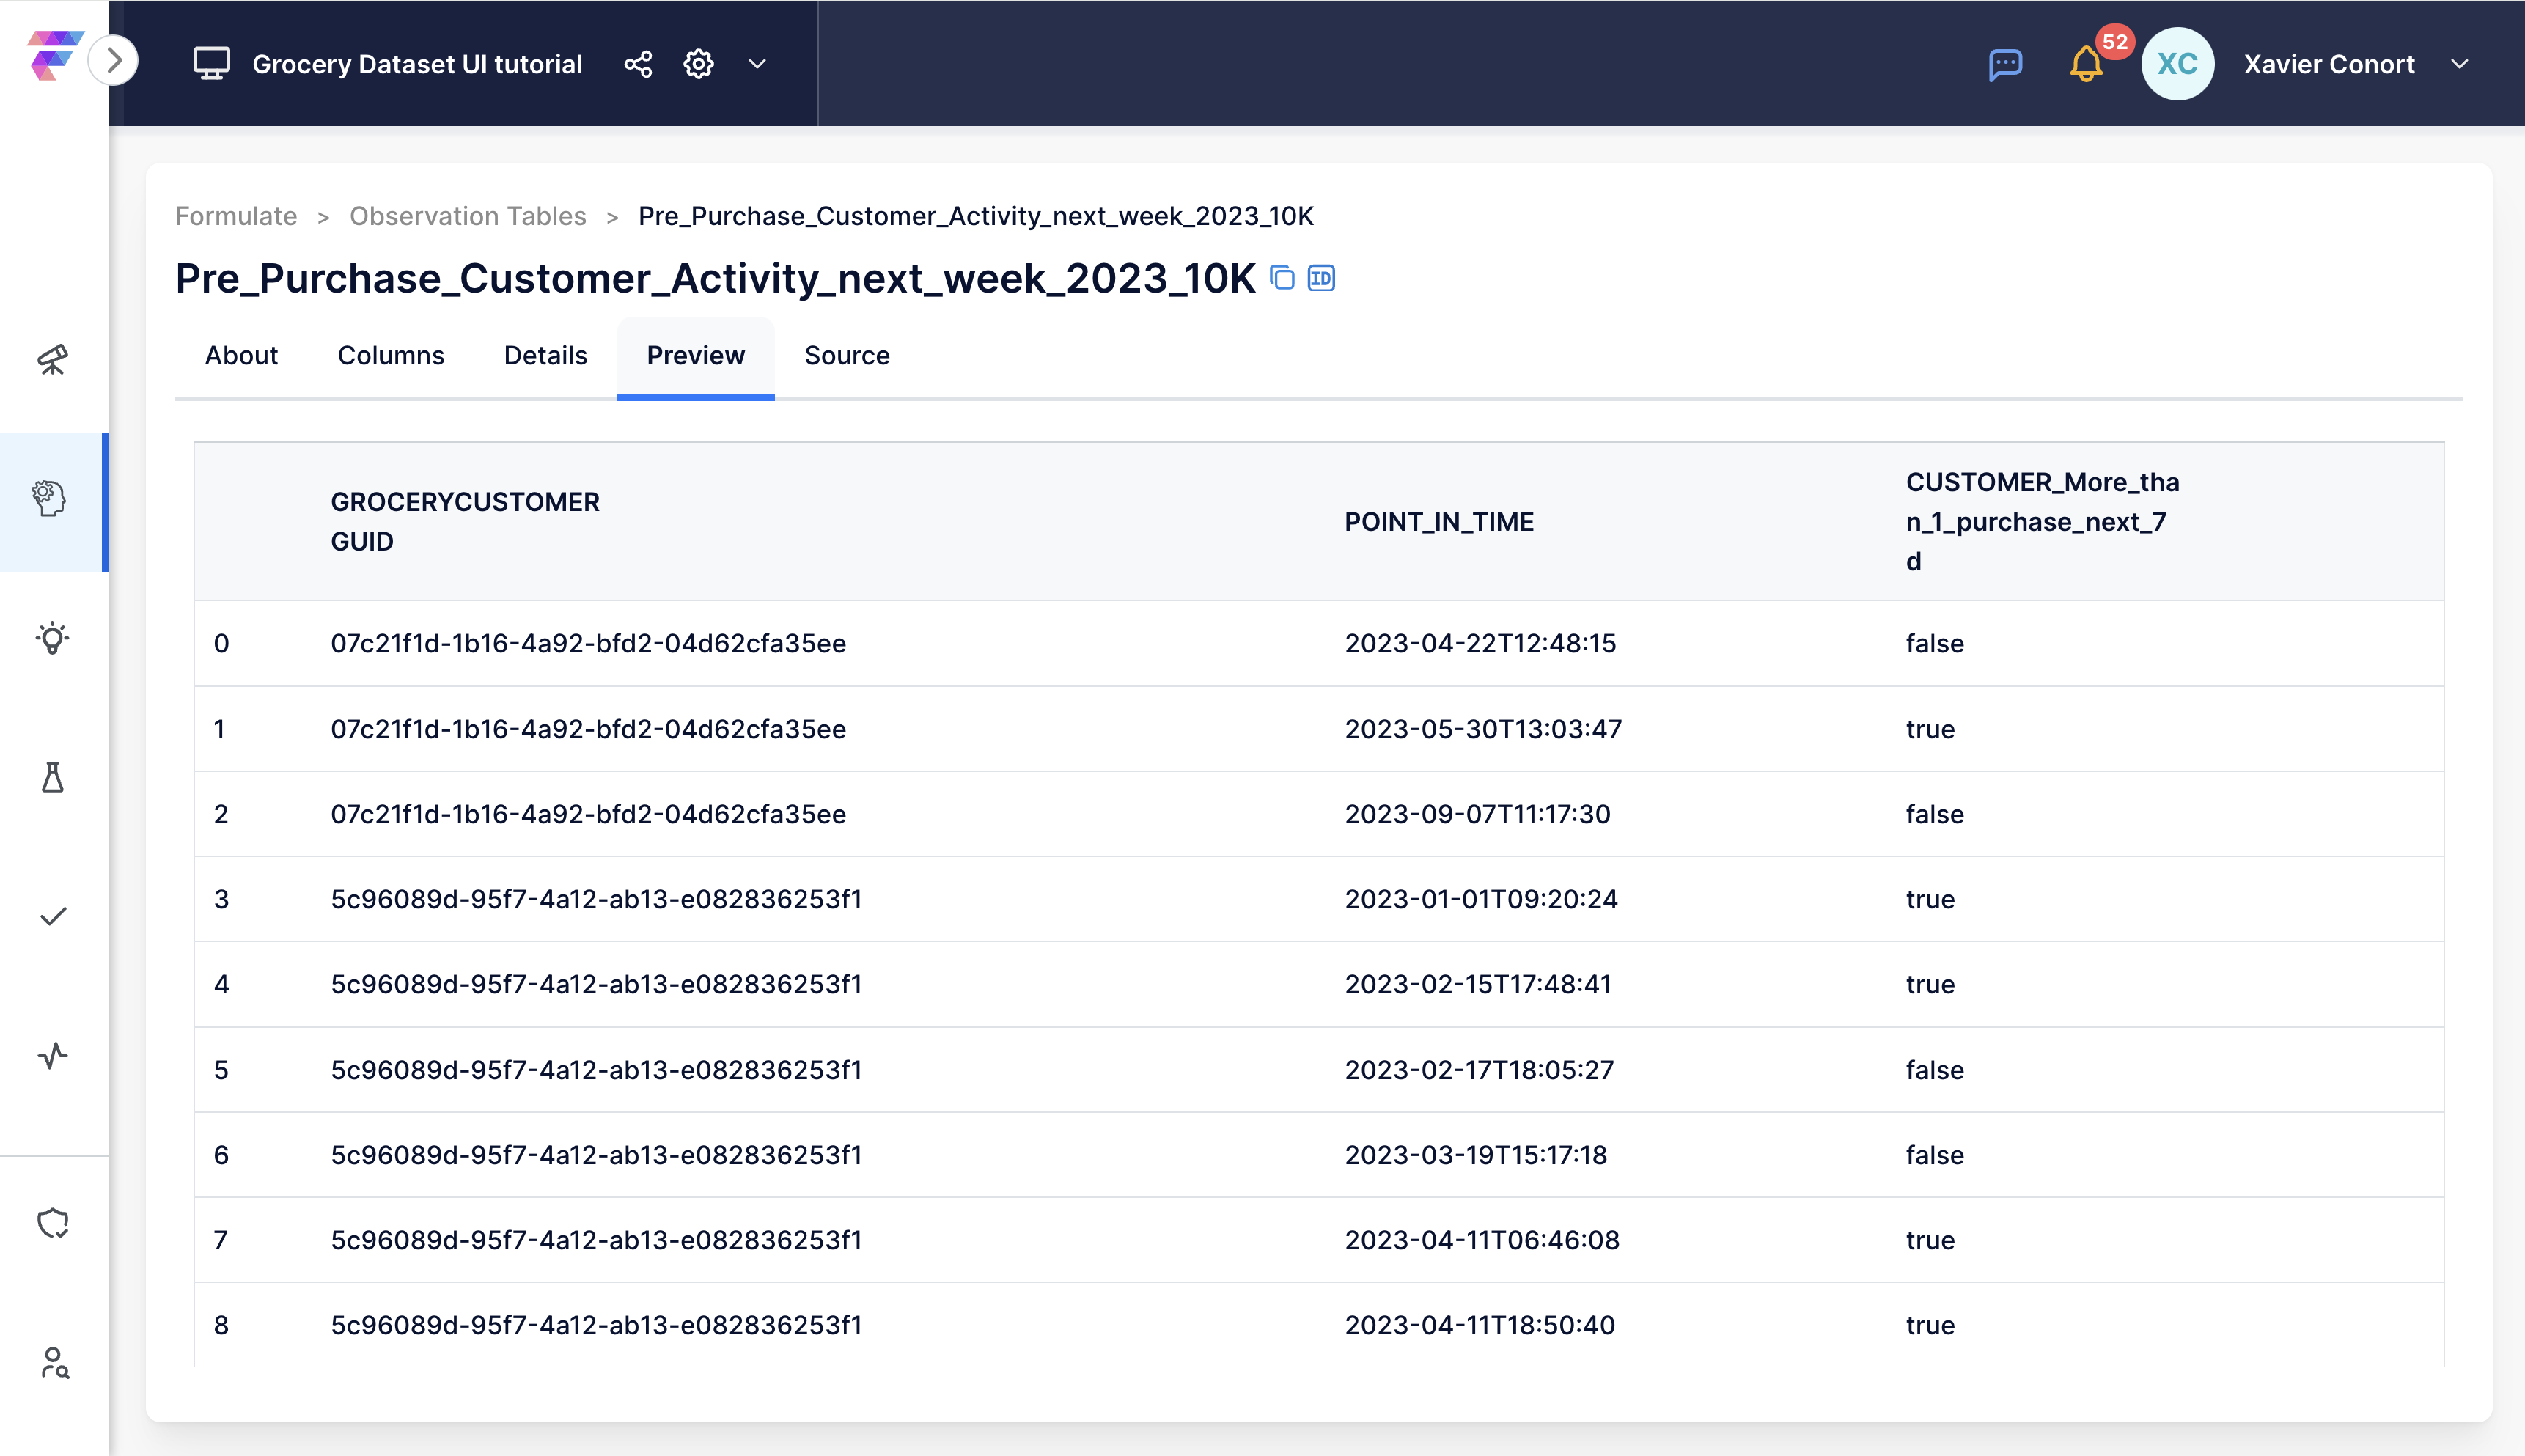
Step 6: Preview Observation Table
If you made the target using the SDK, follow these steps to preview the table. If not, follow them for "Pre_Purchase_Customer_Activity_next_week_2023_10K_manual_version":
- Find and select 'Pre_Purchase_Customer_Activity_next_week_2023_10K' in the catalog.
- Click on the 'Preview' tab.
- Check the target appears in the table.
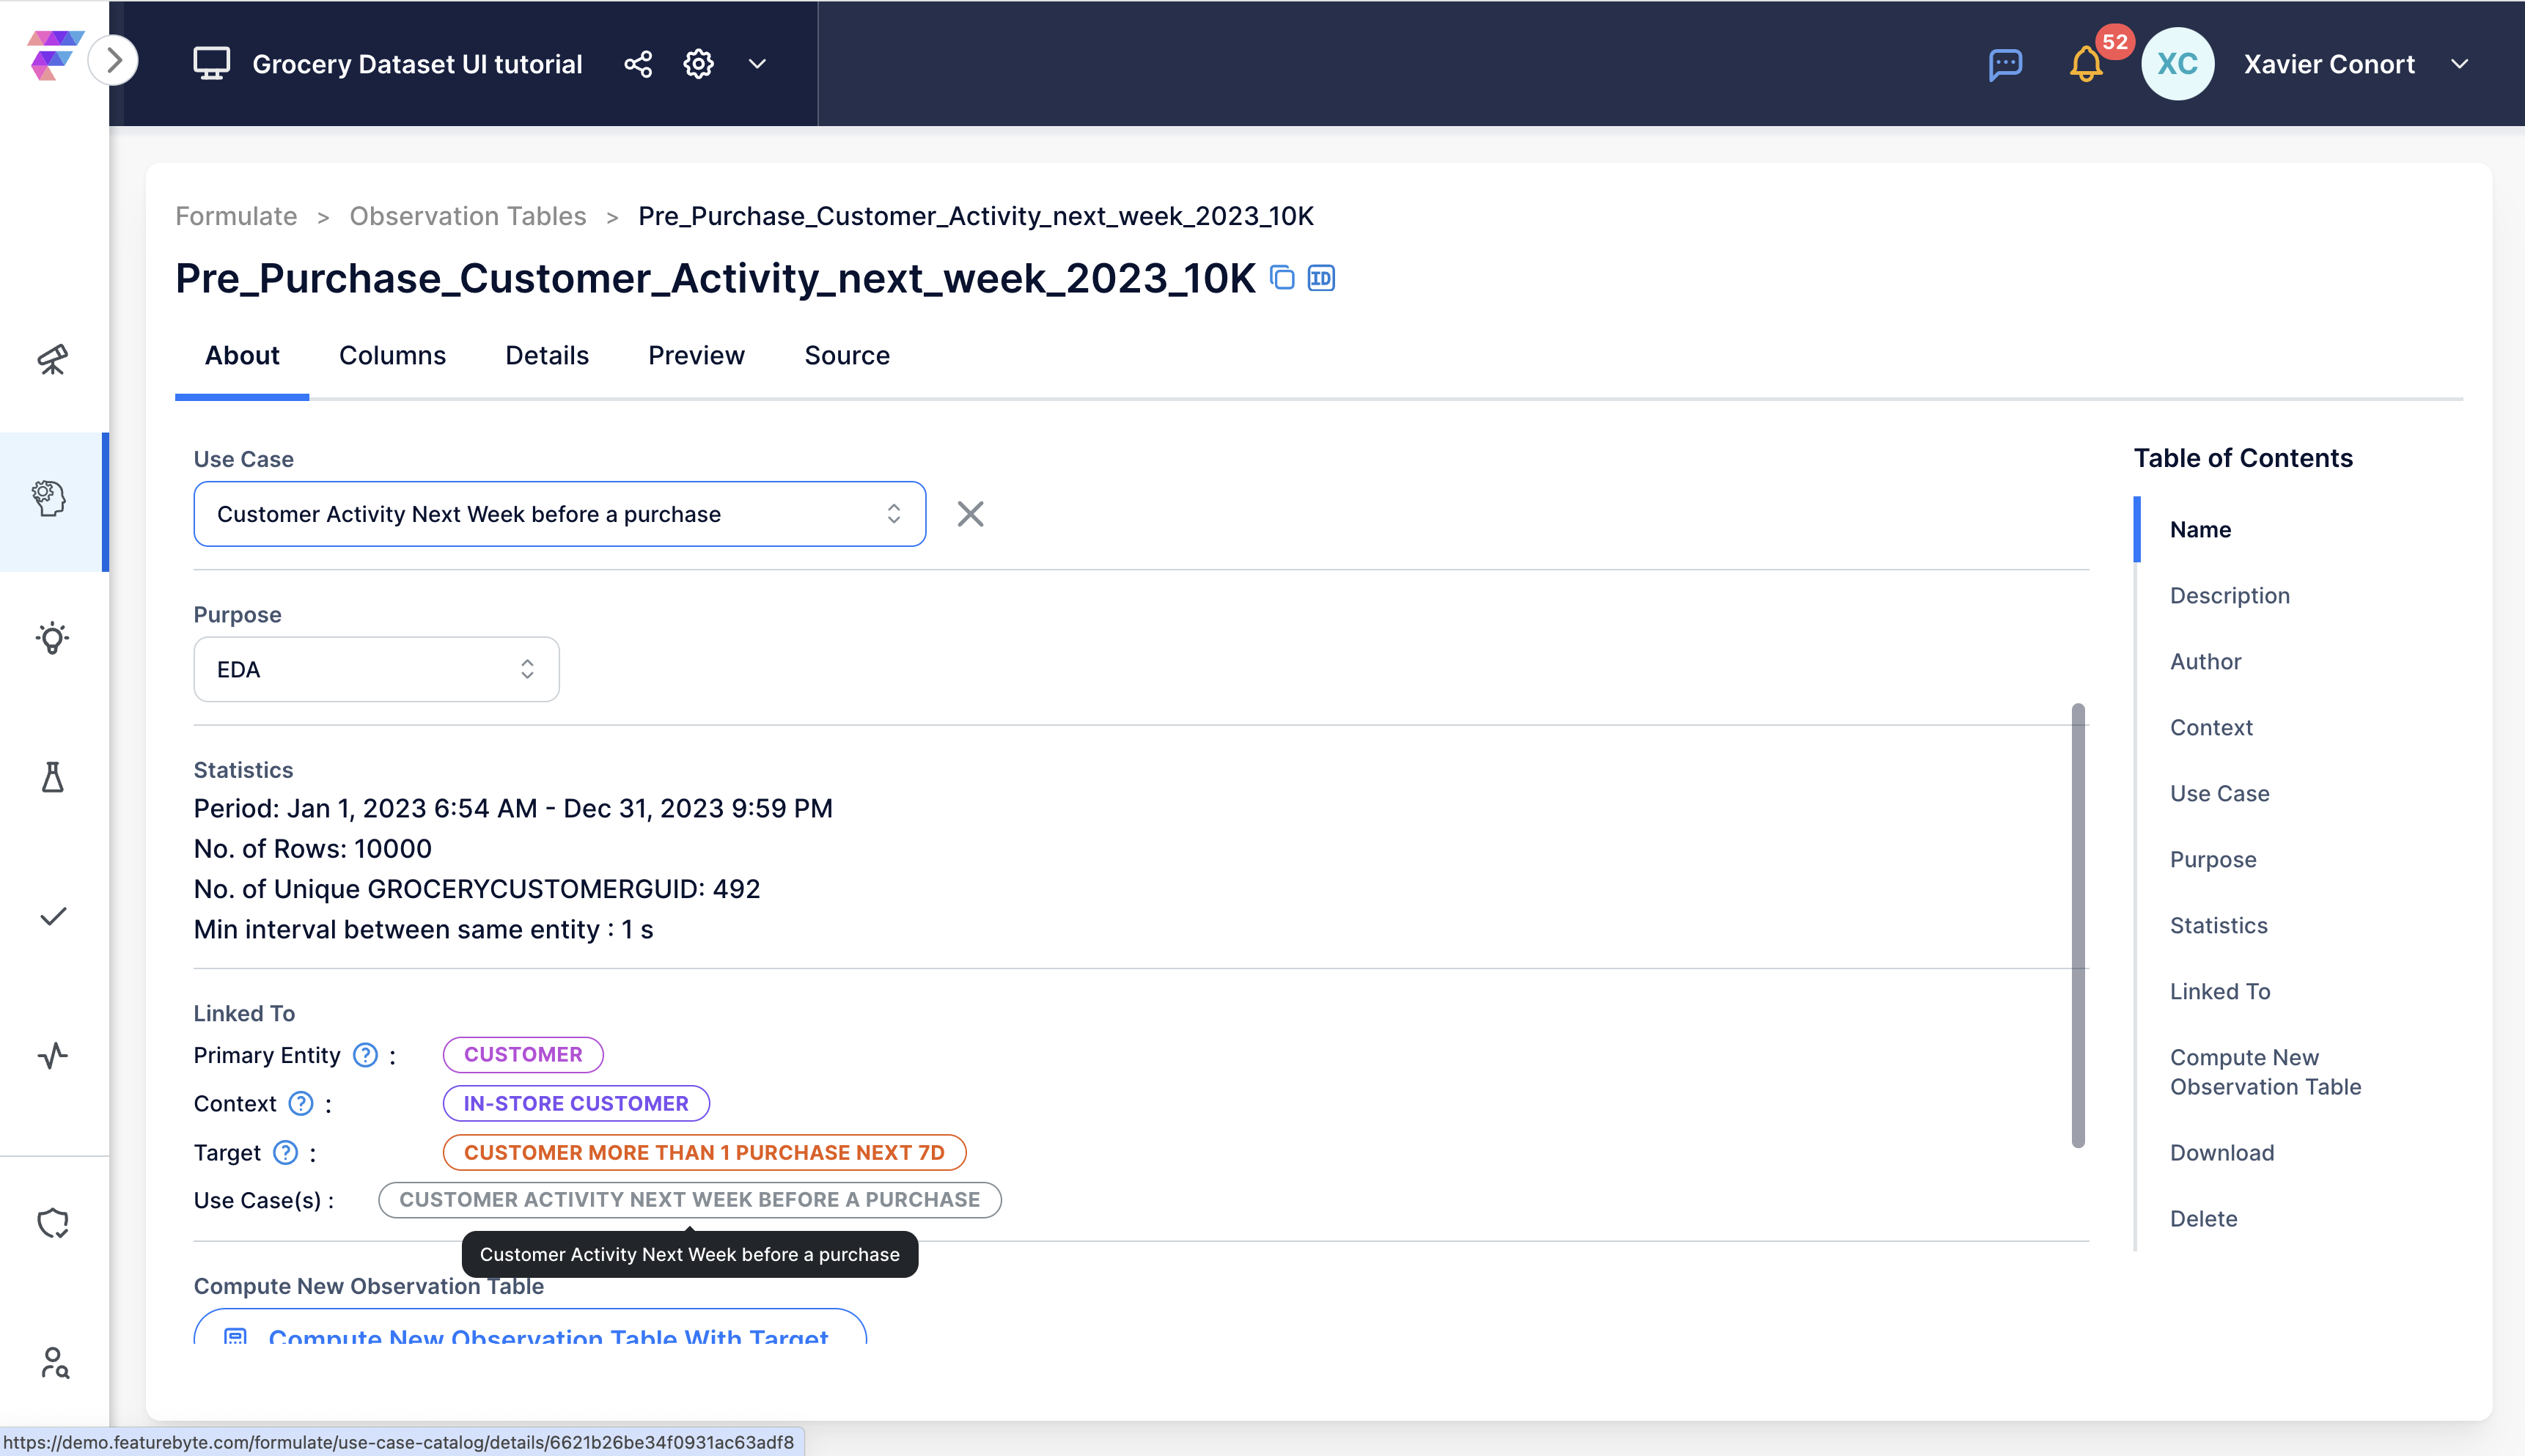
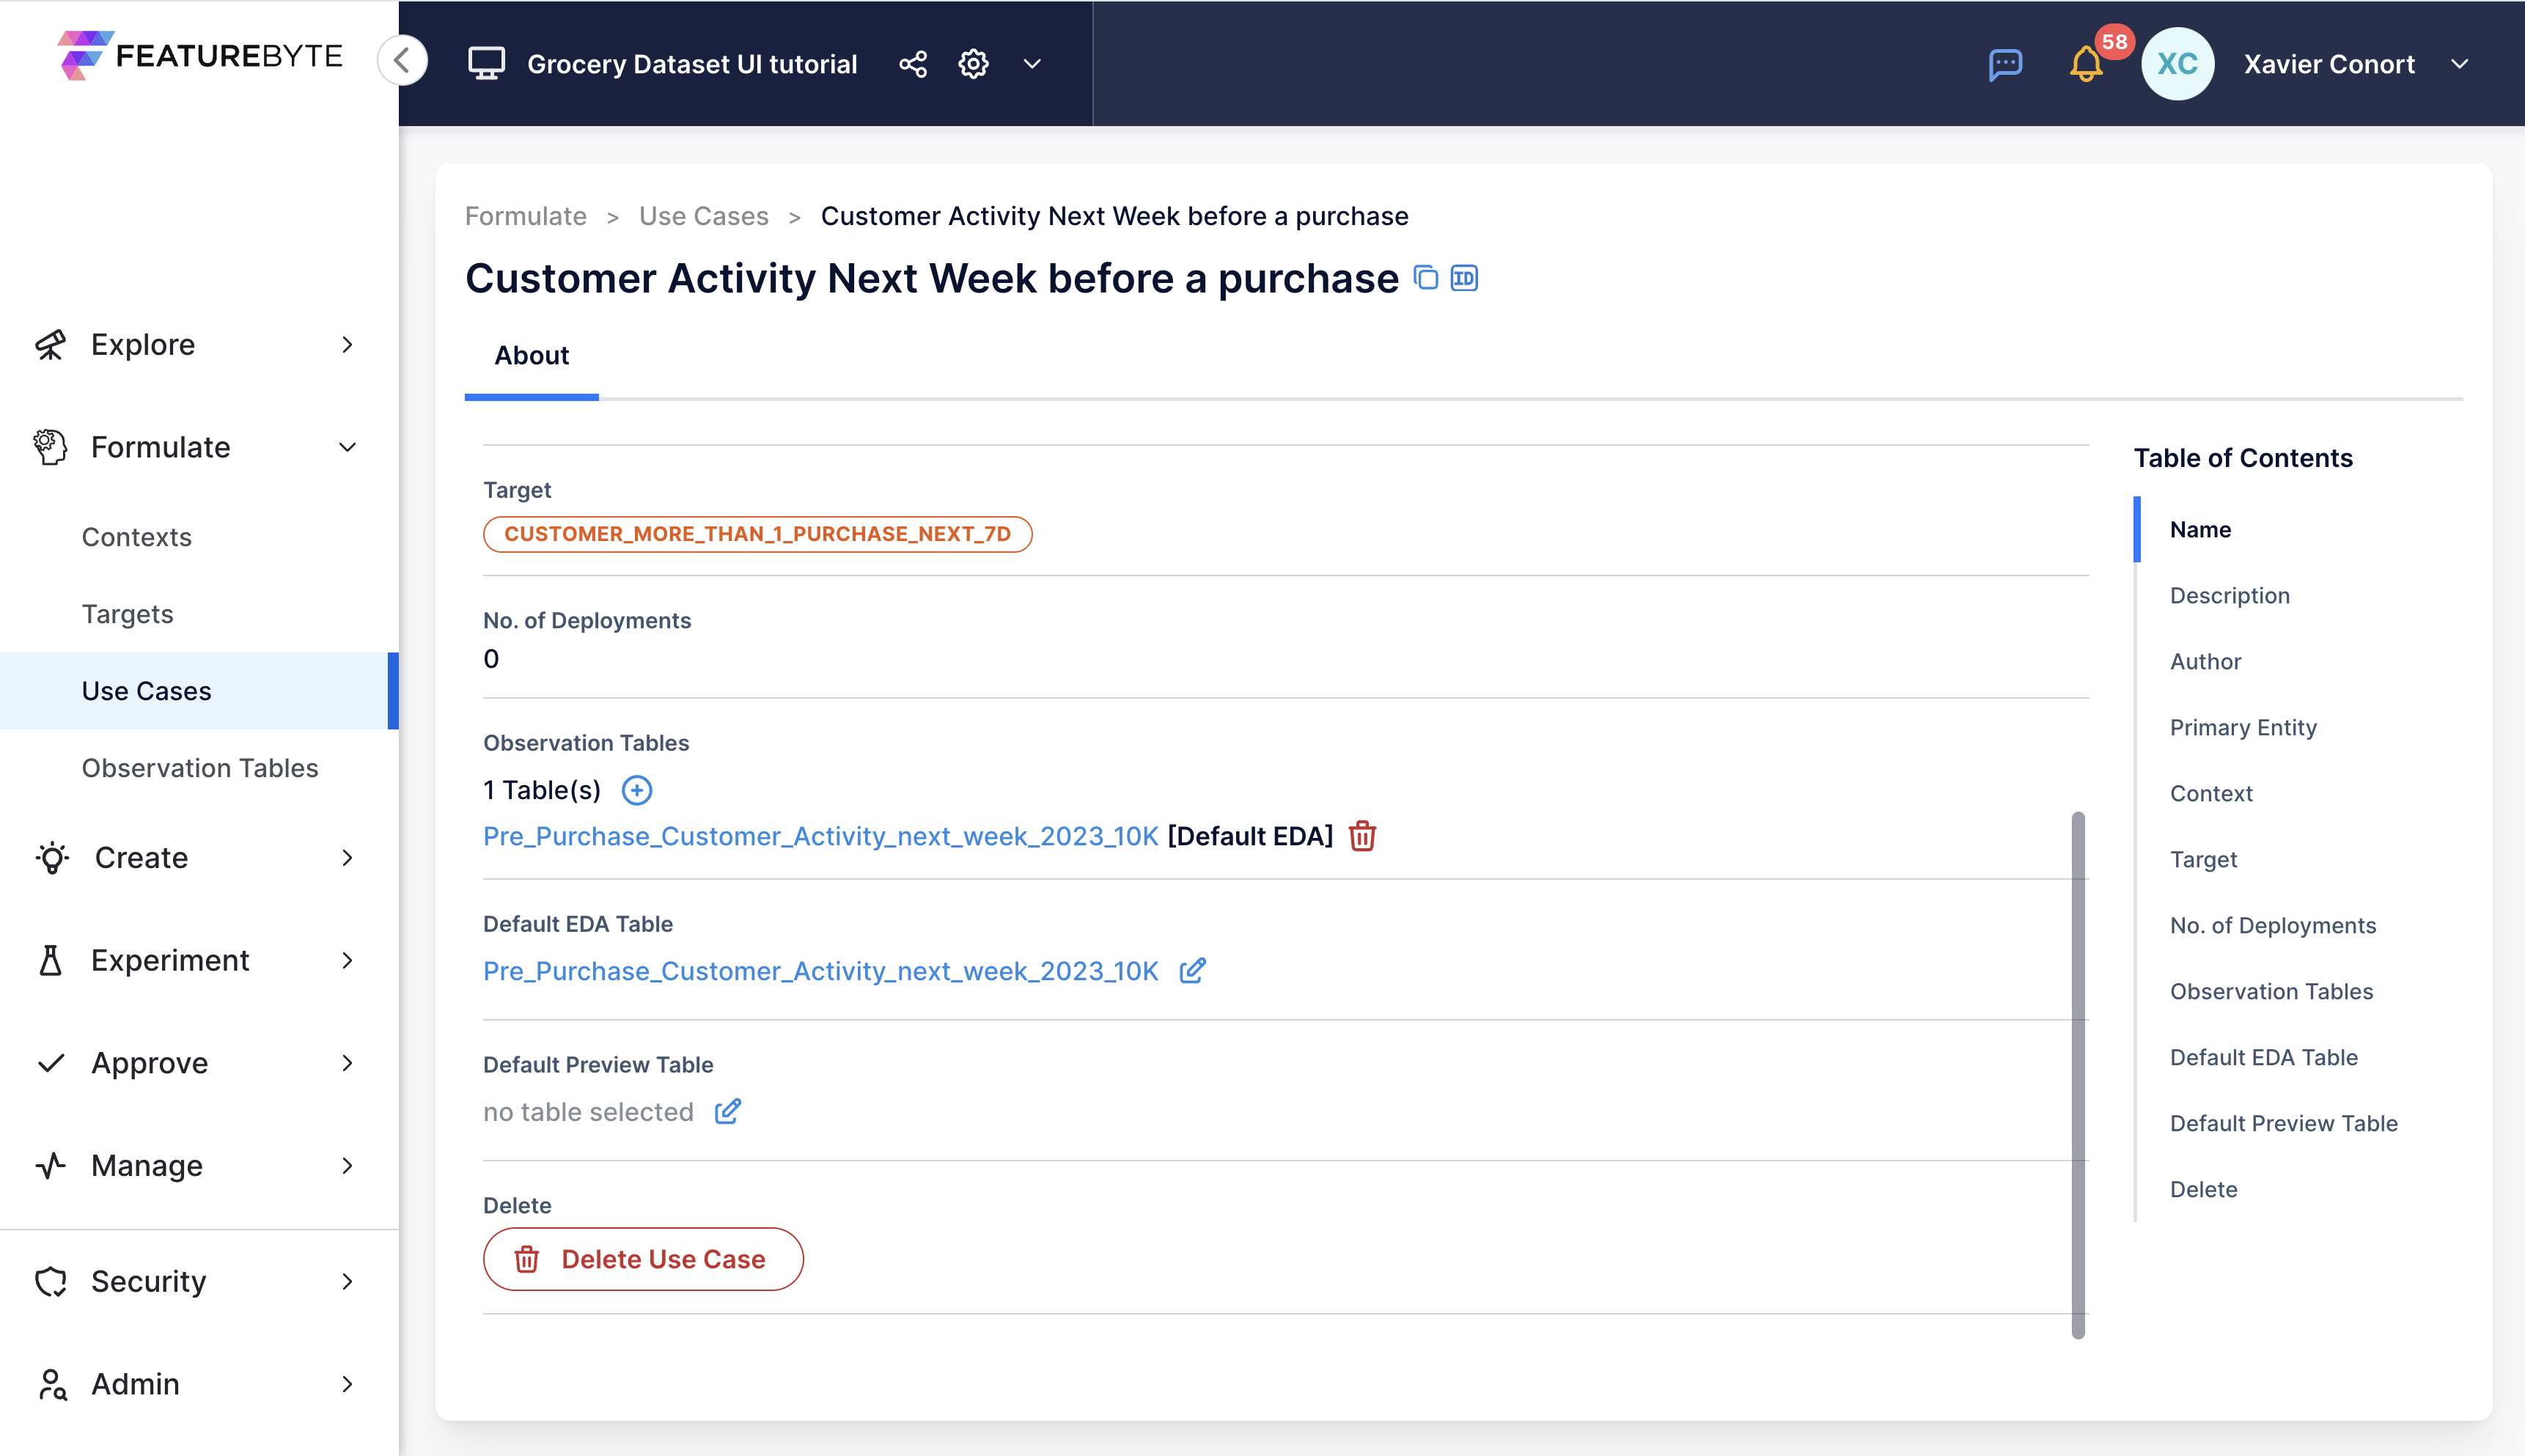
Step 7: Set Observation Table as the Default EDA Table for the Use Case
The Default EDA Table will be used to run EDA Analysis for the features generated for the use case.
If you made the target using the SDK
Follow these steps to set the Default EDA Table.
Navigate back to the 'About' tab.
Ensure table is associated with the use case of the target.
Scroll down and click the Use Case hyperlink to navigate to the relevant Use Case.
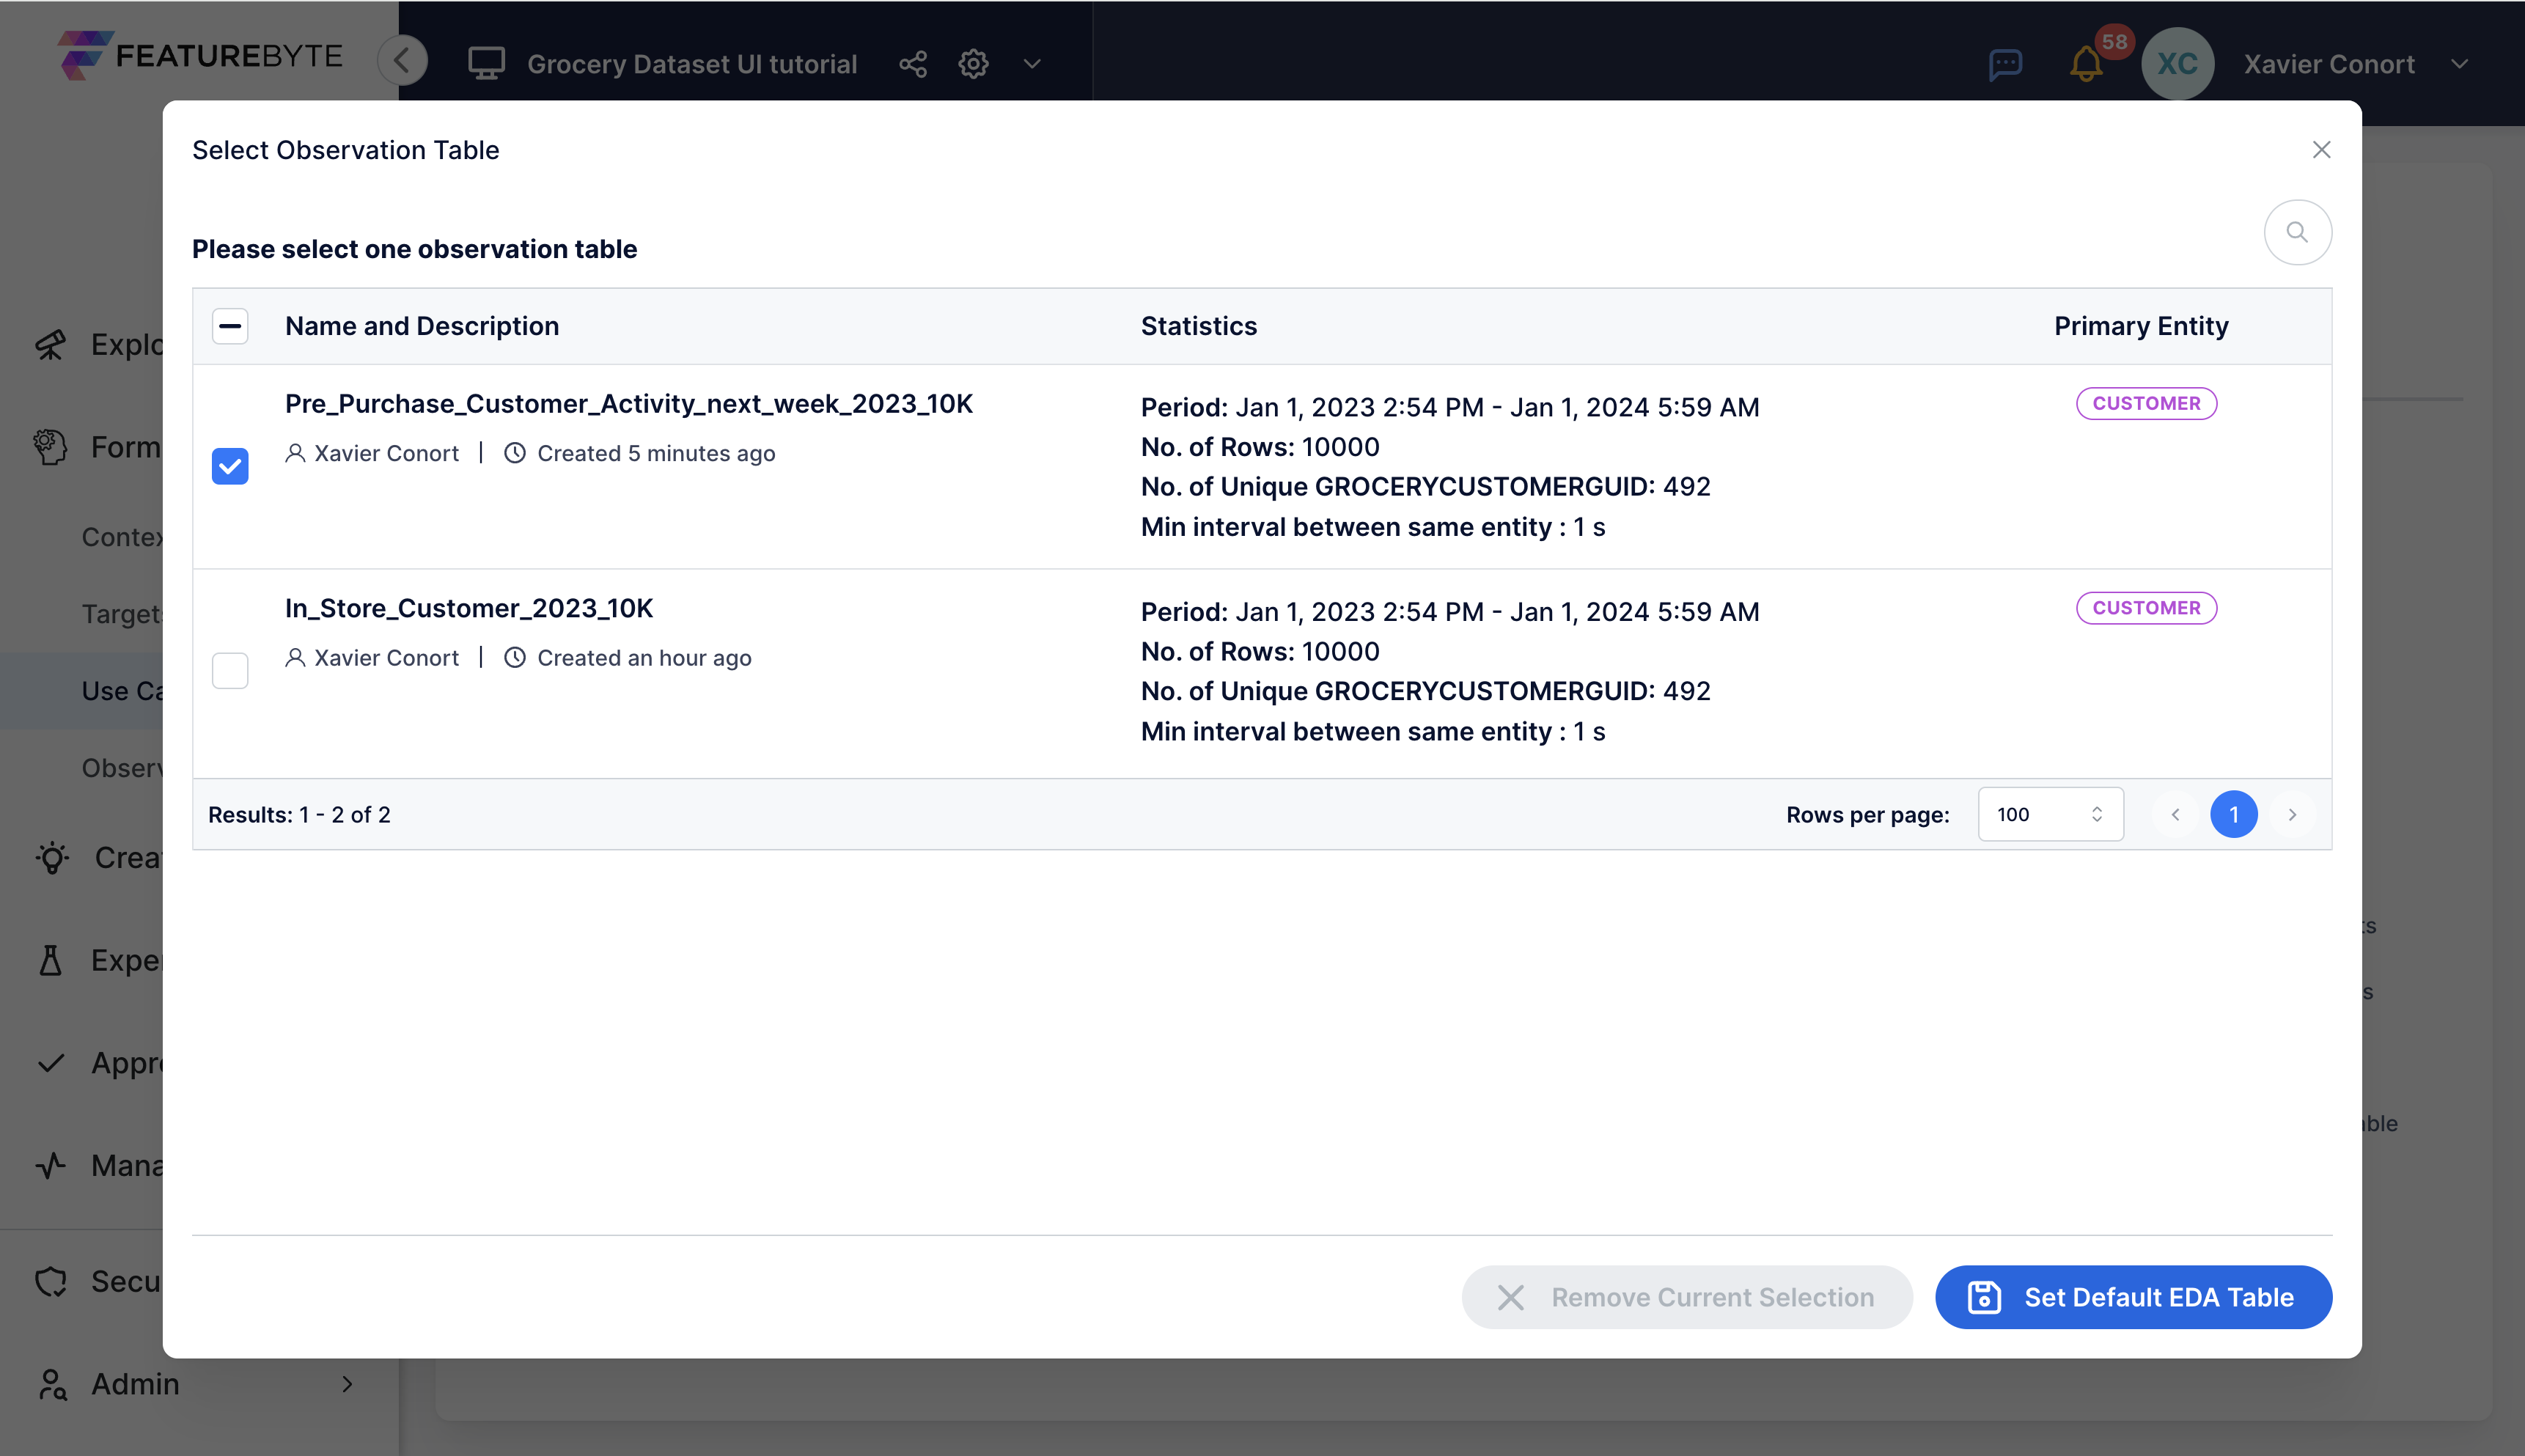
This should open a new tab in your browser. Scroll down and edit the Default EDA Table for the use case. If none is selected yet, it should be blank.
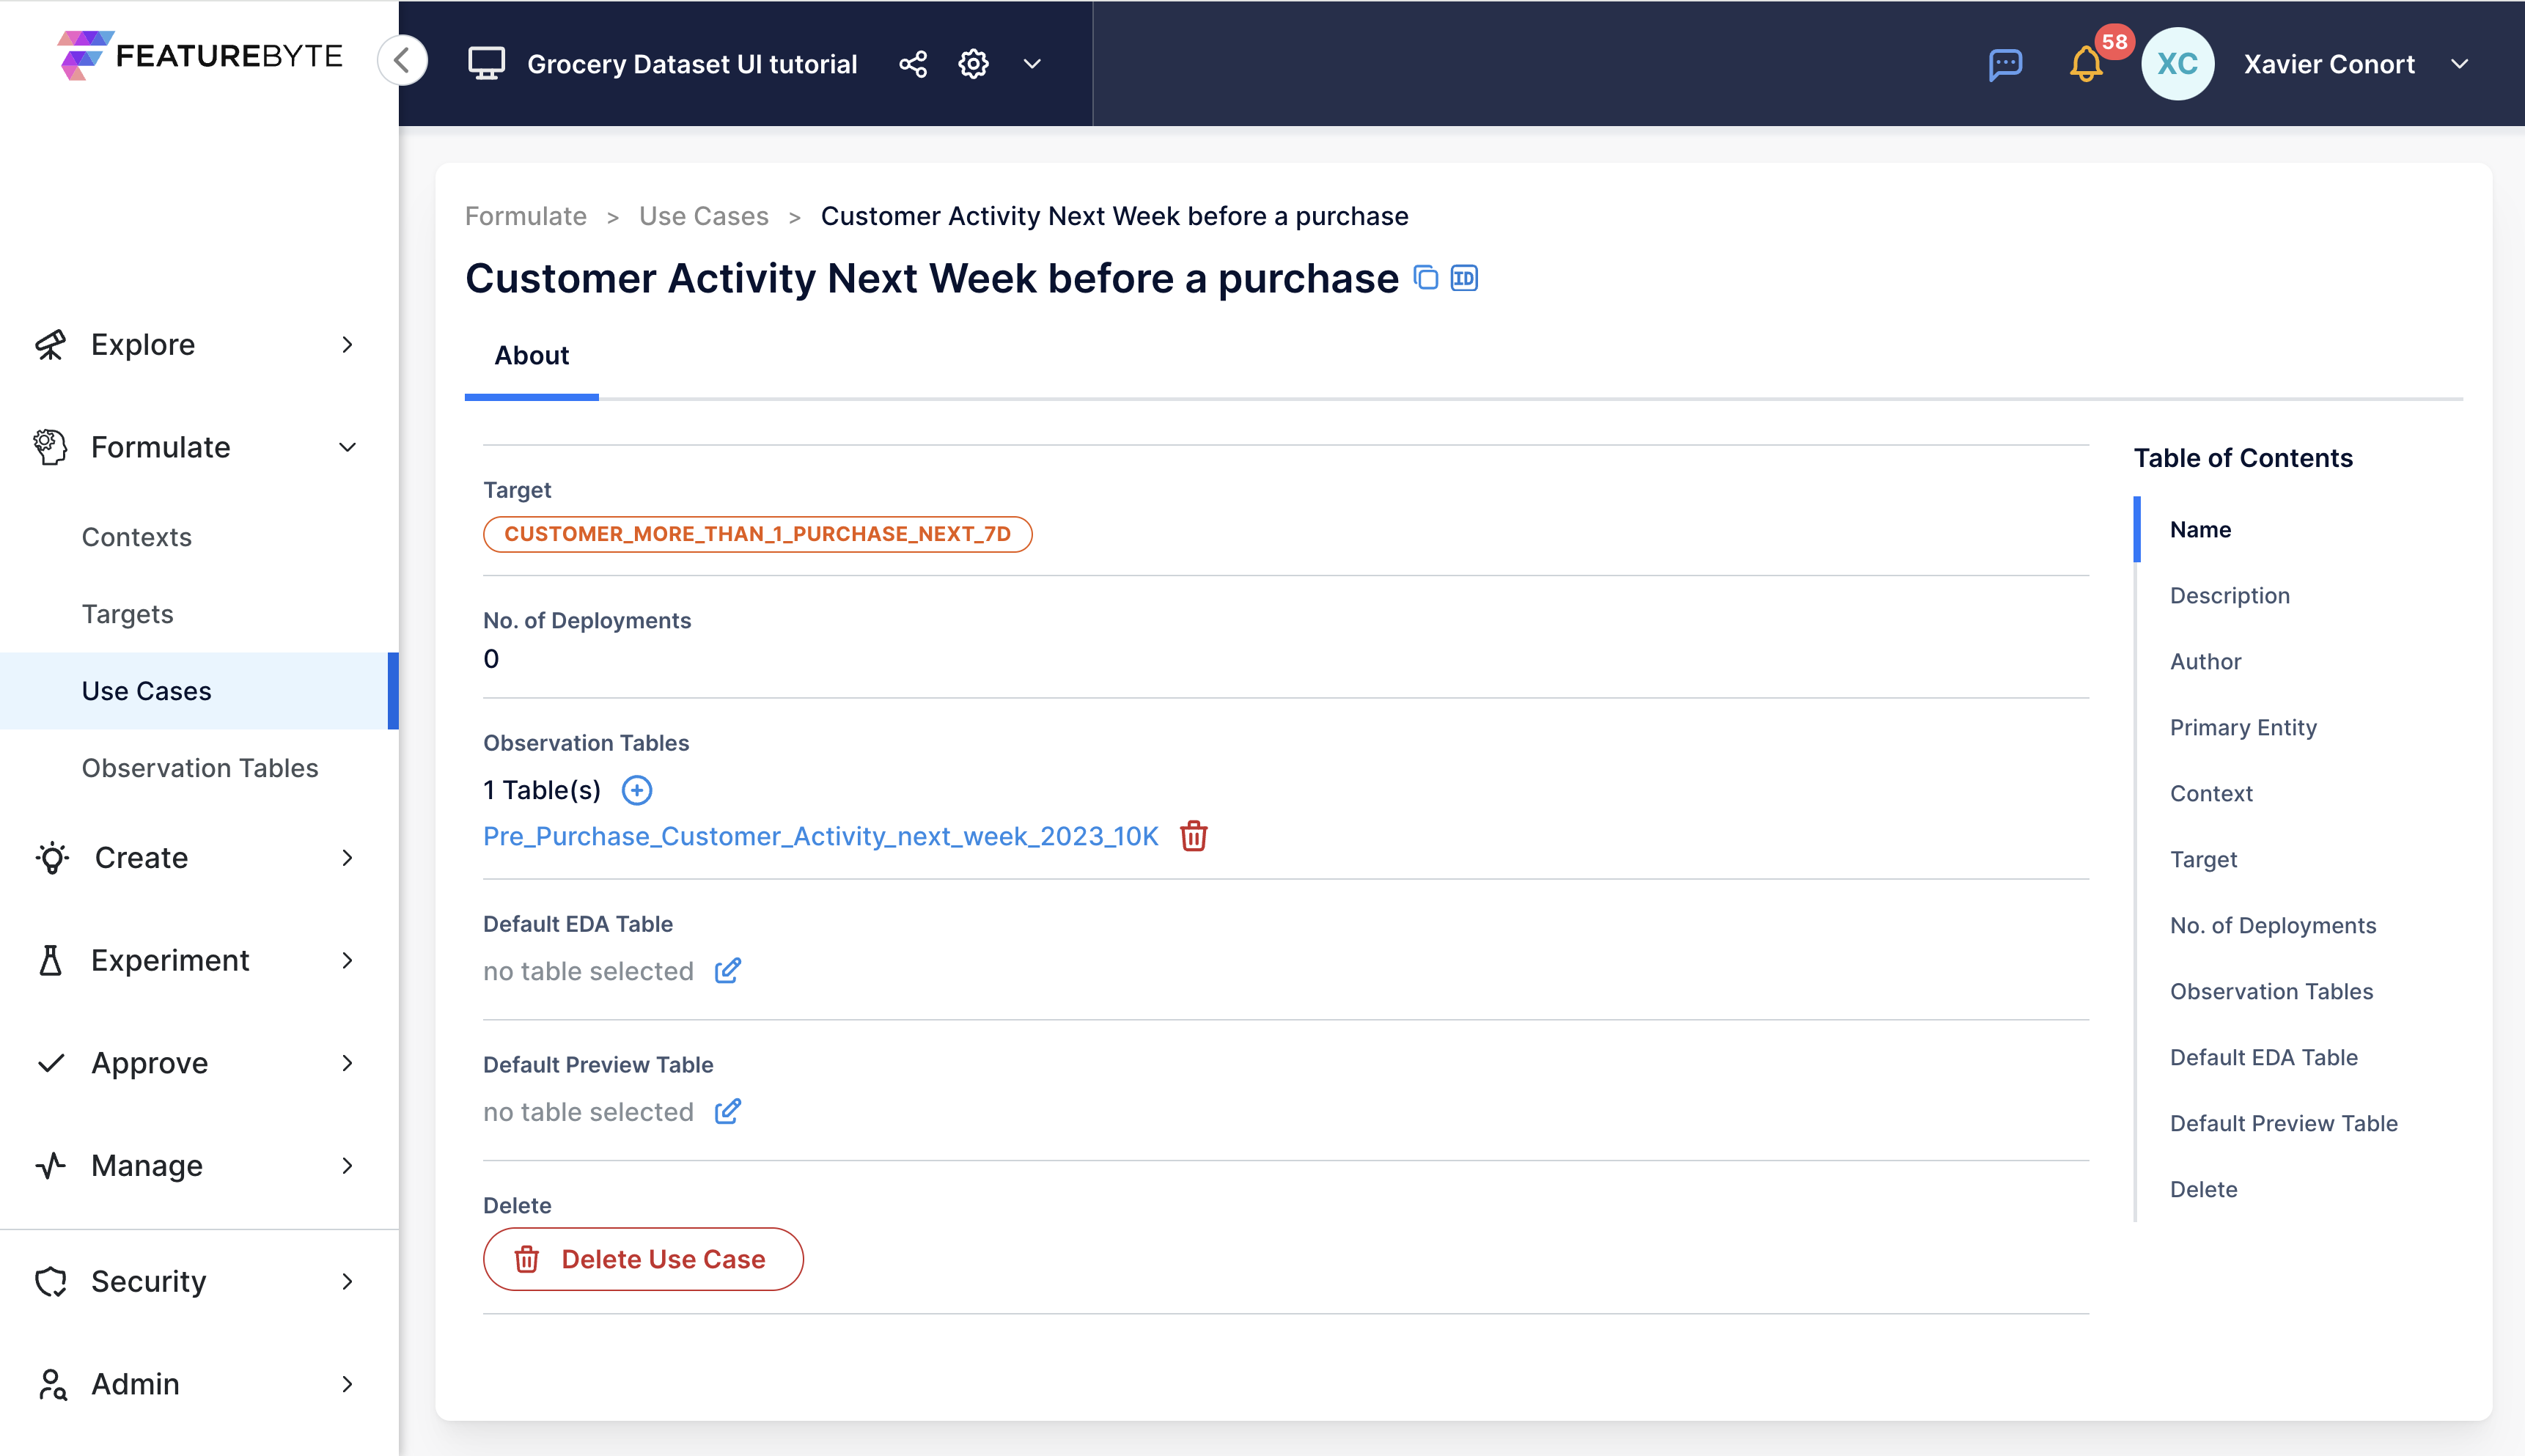
Select "Pre_Purchase_Customer_Activity_next_week_2023_10K".
Once completed, your setup should resemble the image below.
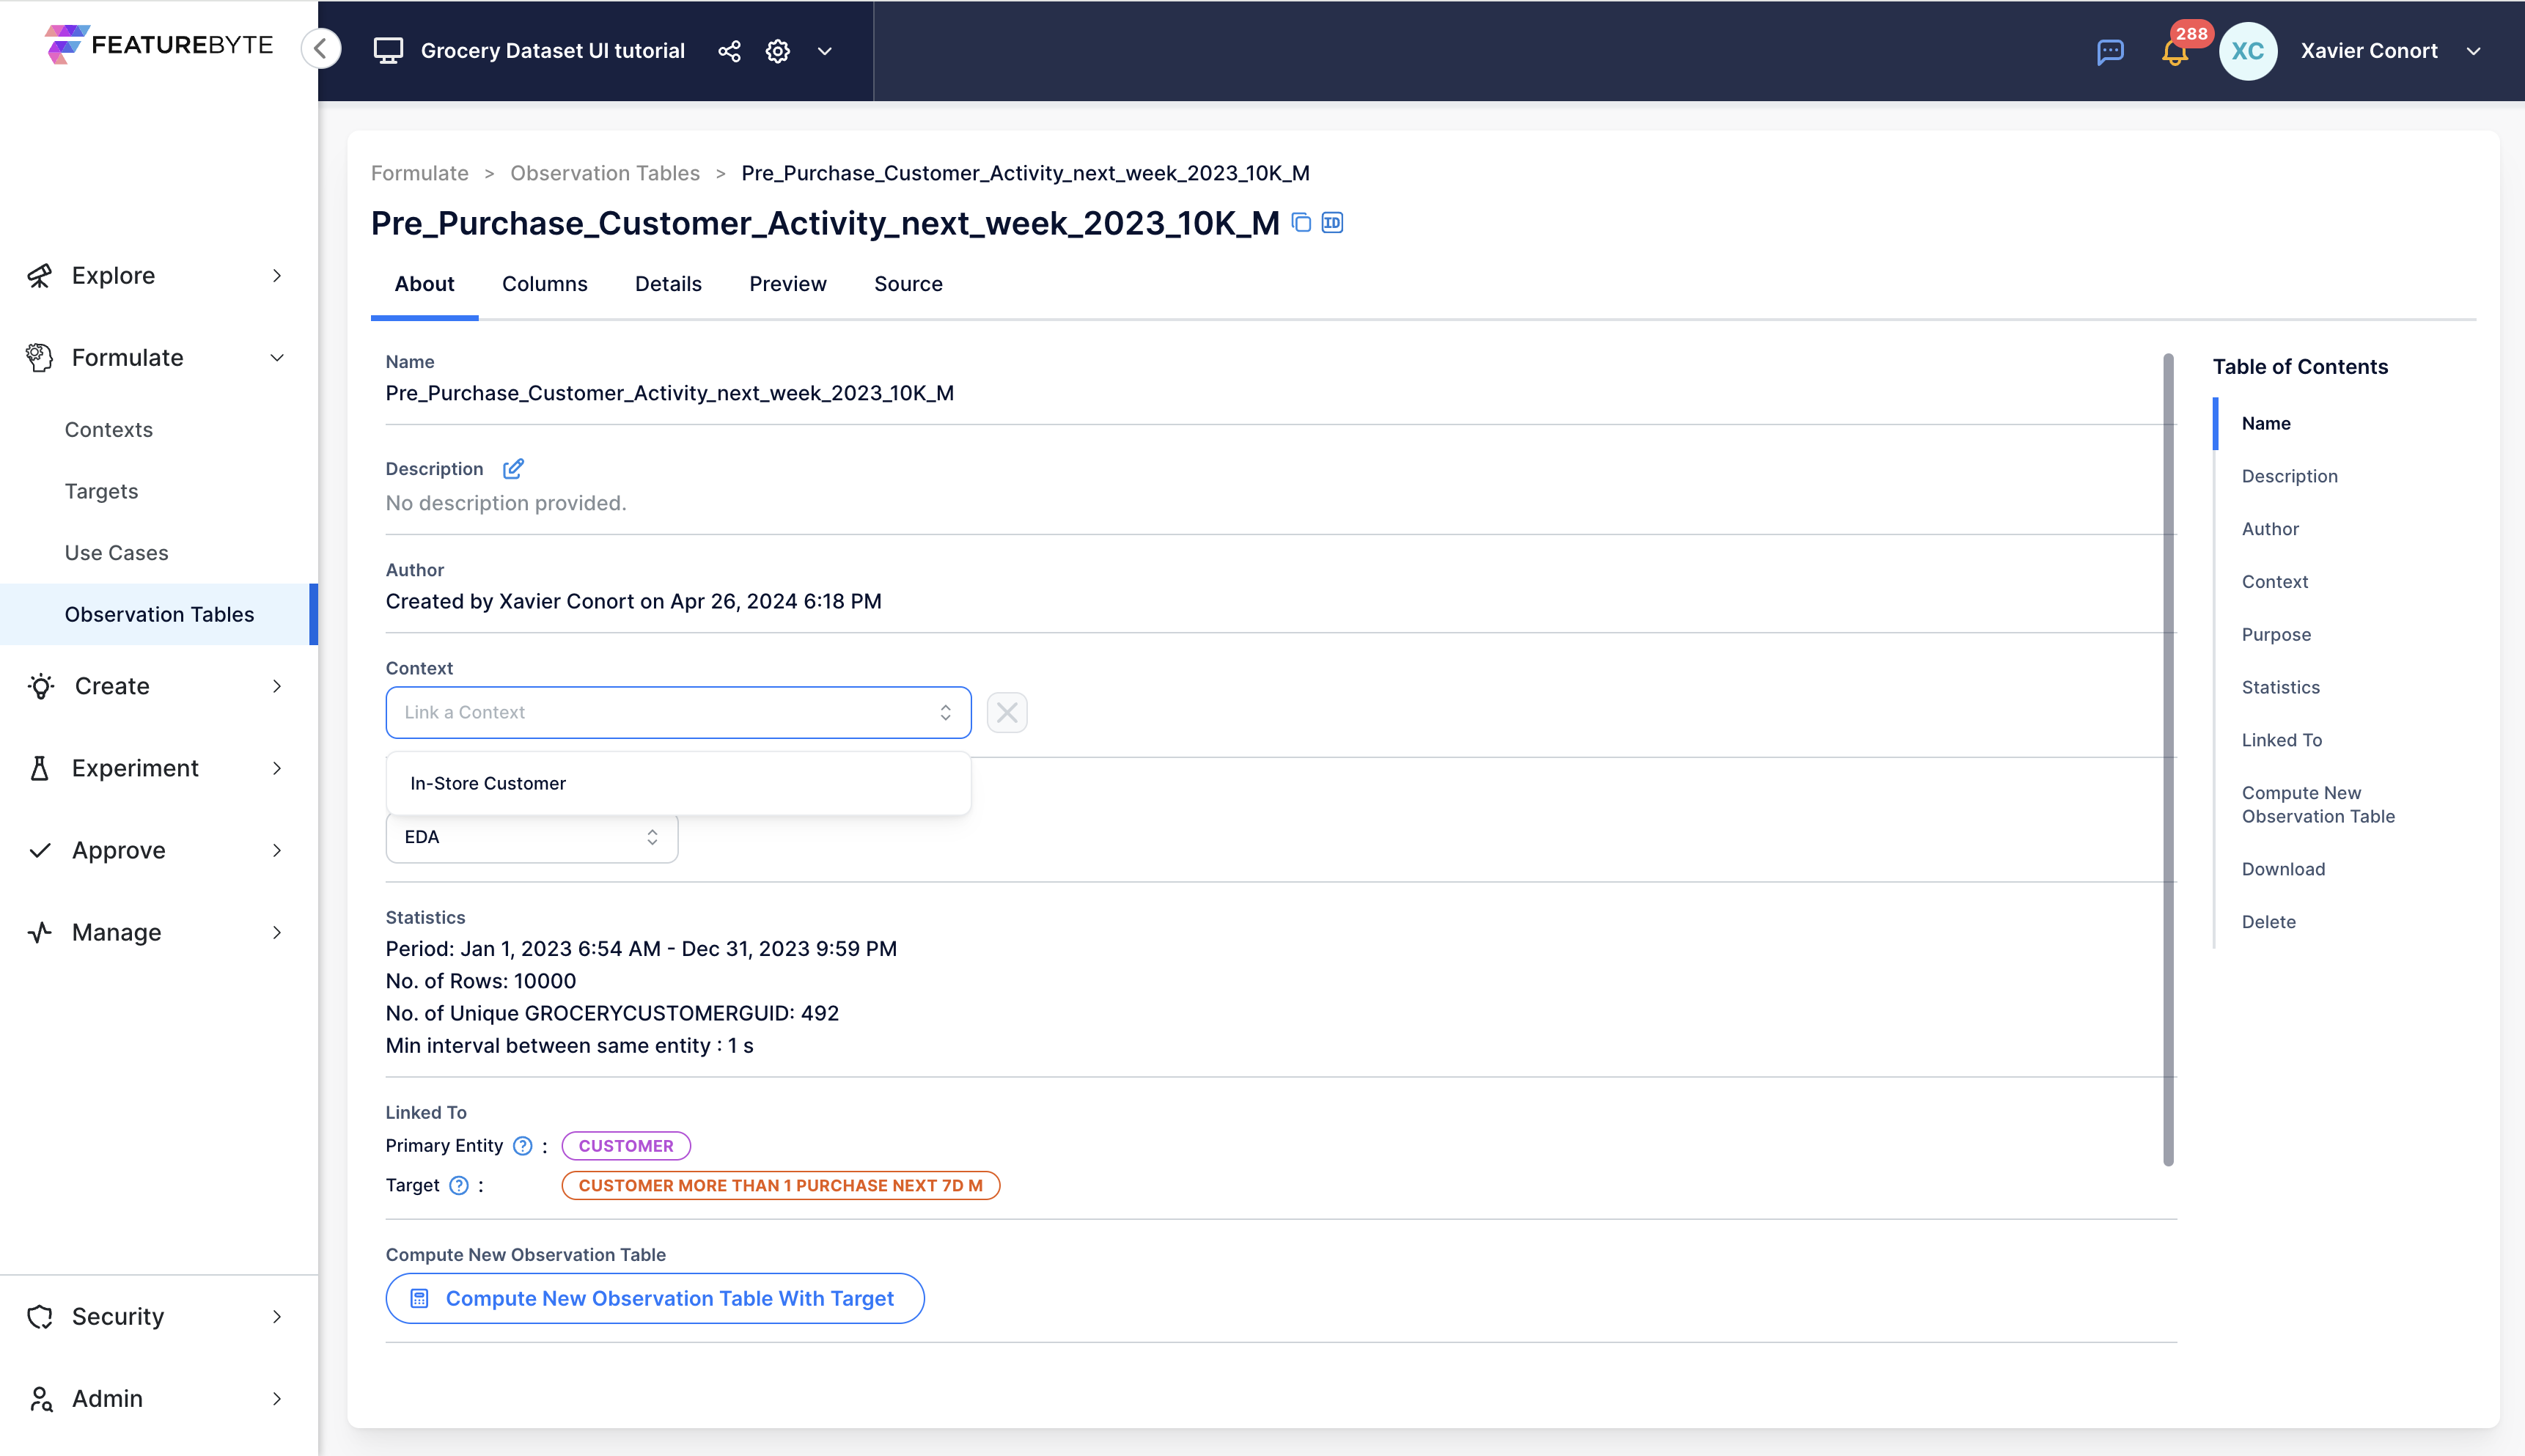
If you created the target using the UI
Follow these steps to set the Default EDA Table.
Select "Pre_Purchase_Customer_Activity_next_week_2023_10K_M" and link the Observation Table to the "In-Store Customer" Context.
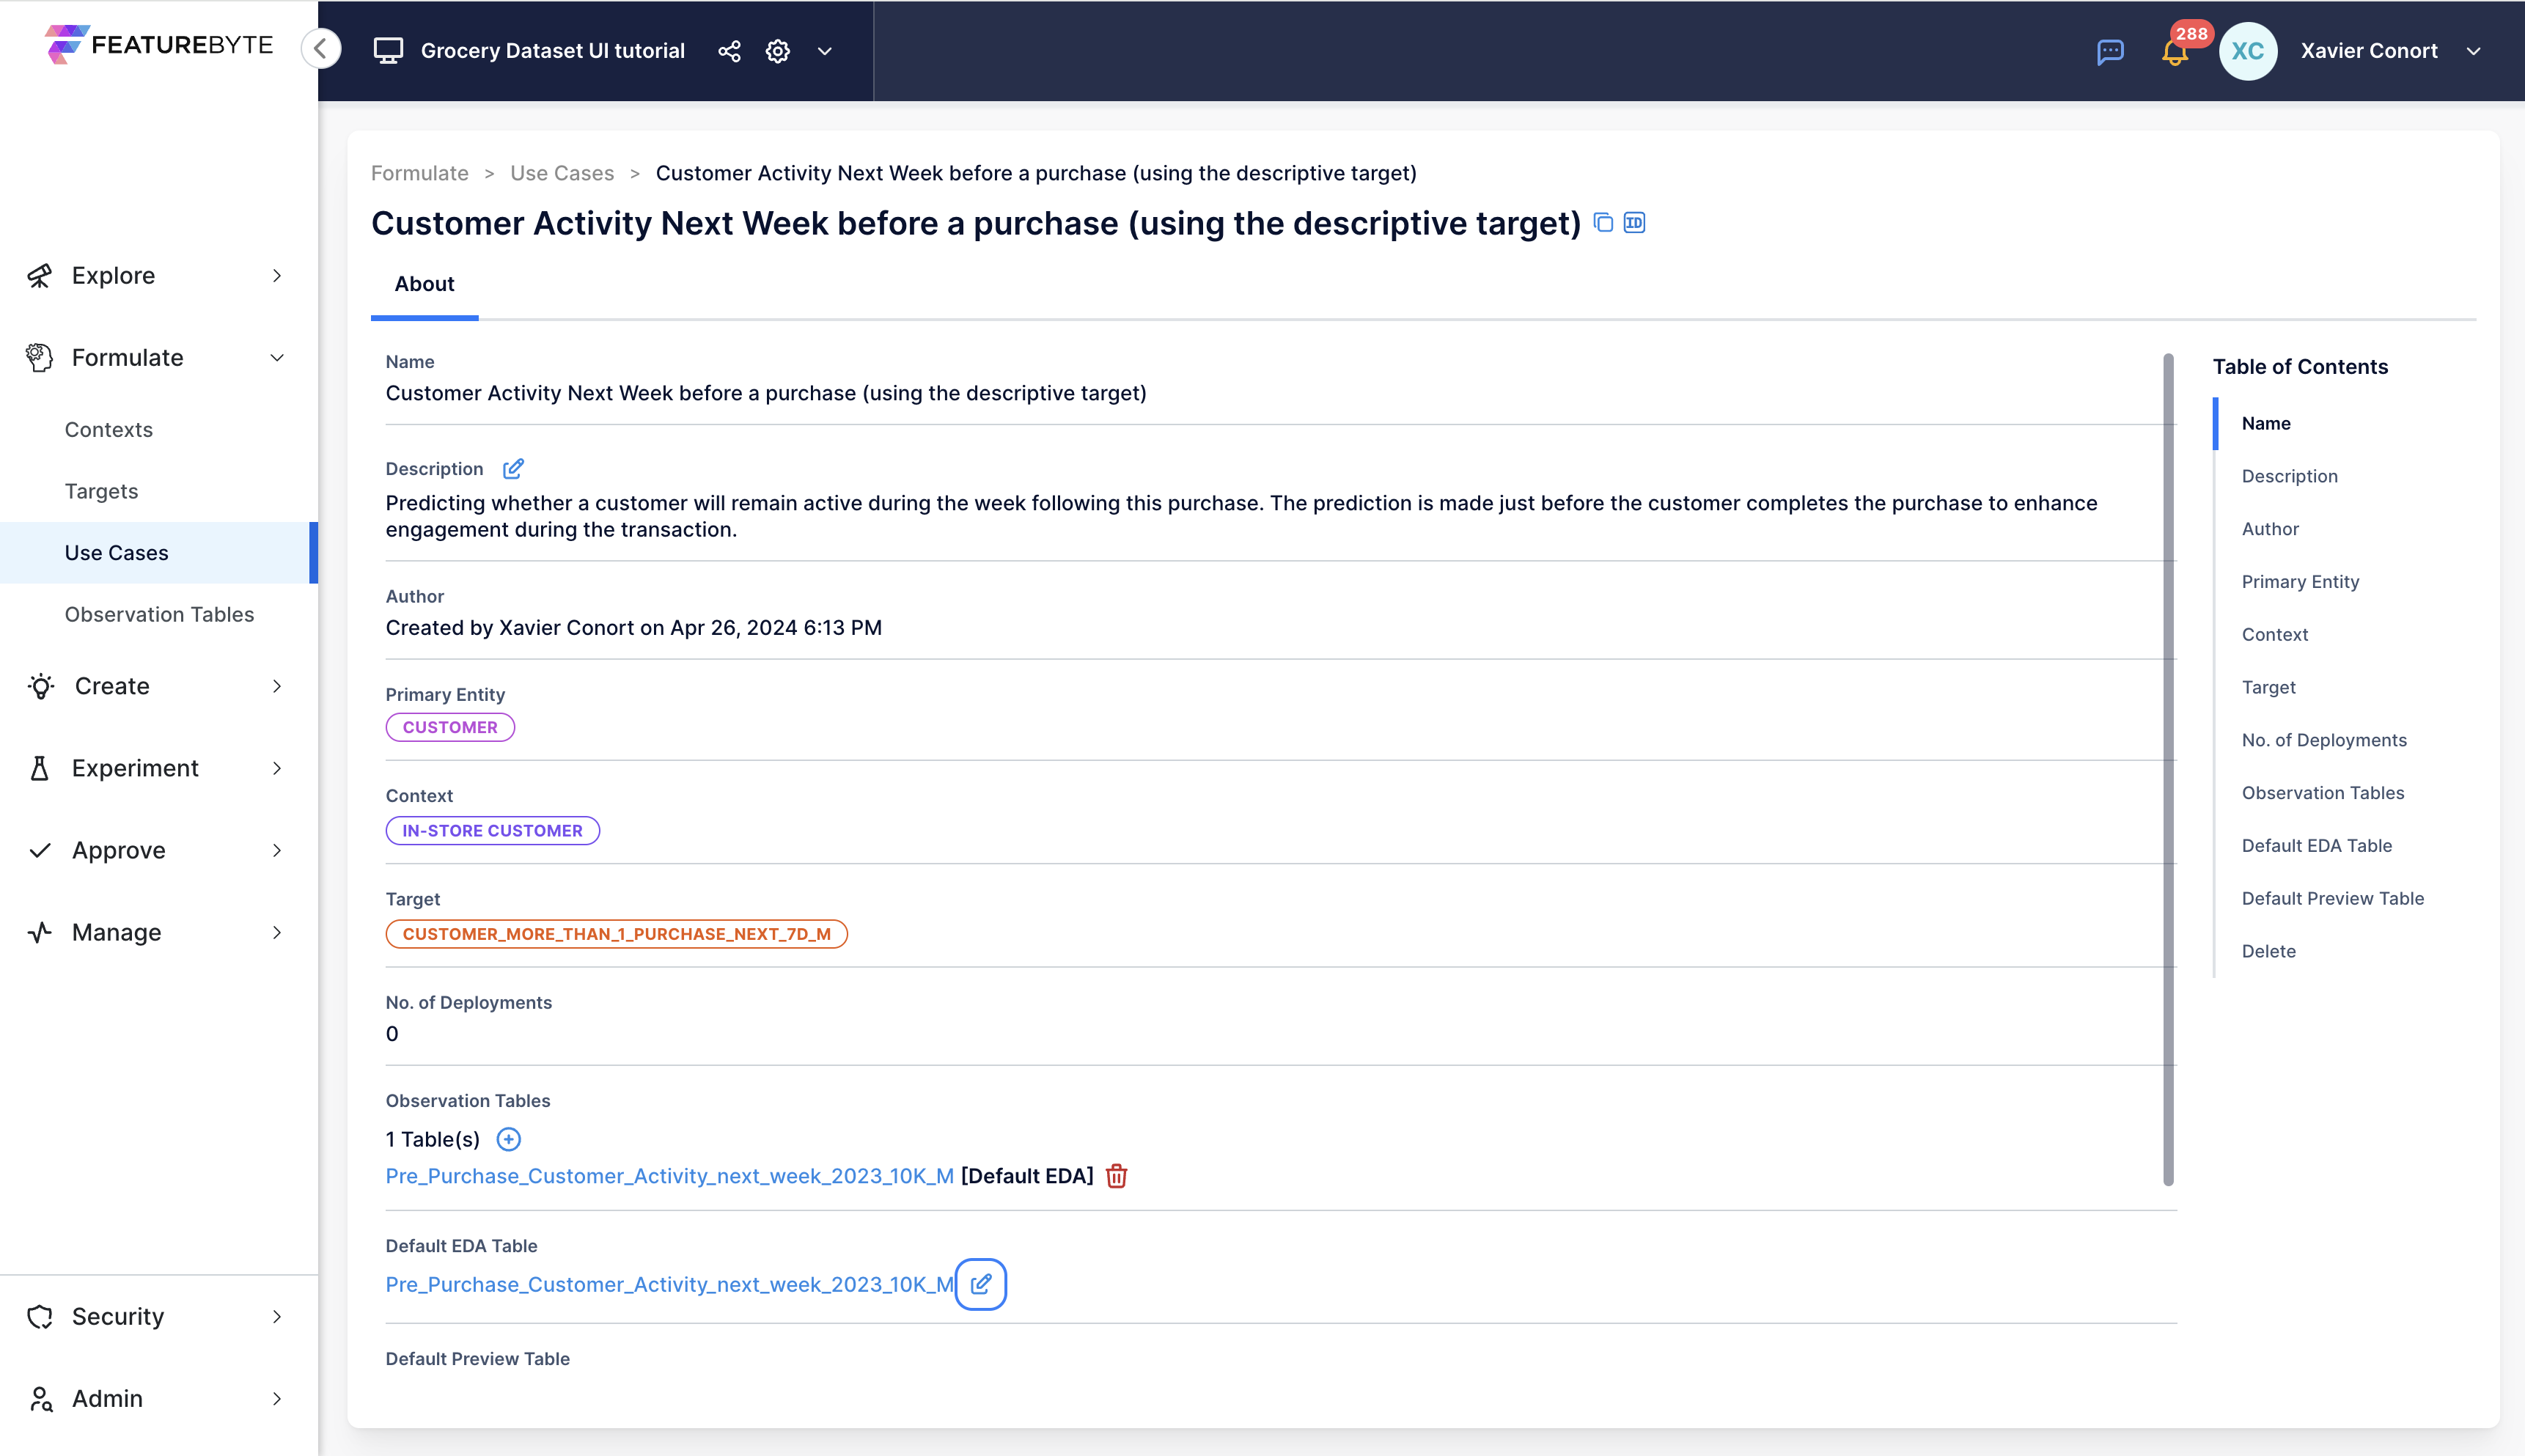
Navigate to the Use Case Catalog and select "Customer Activity Next Week before a purchase (using the descriptive target)".
Set "Pre_Purchase_Customer_Activity_next_week_2023_10K_M" as the Default EDA Table.
Verify the setting by checking the Observation Table Catalog. This may need a browser refresh.