12. Manage feature life cycle
This tutorial teaches you how to adjust features as data changes. We'll explore two types of changes:
- Data Distribution Changes: These necessitate new cleaning operations.
- Data Availability Changes: These require updating the feature job settings.
If your catalog has an Approval Flow enabled, any such changes must be approved. This process also triggers the creation of new feature versions and updates the lists connected to these tables. This ensures that new deployments are equipped to handle these data changes.
After these changes are approved and new versions are generated, you can set up new deployments. Additionally, you can deactivate old deployments that use outdated versions if they are no longer necessary.
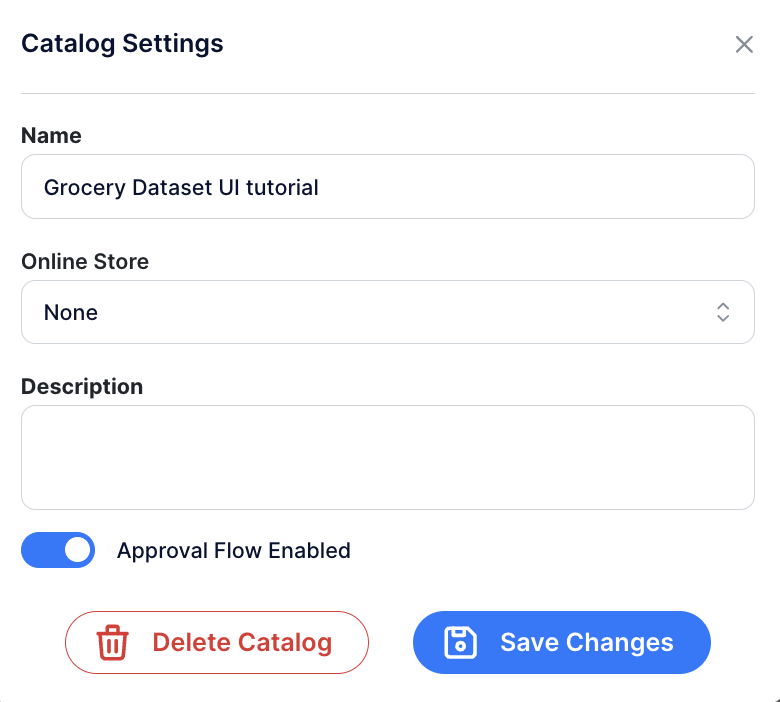
Step 1: Ensure Approval Flow is enabled
Check for Approval Flow Activation: Look for a validation mark next to the Catalog name. This indicates the Approval Flow is enabled.
![]()
If you don't see the validation mark, click on the settings icon located next to the Catalog name at the top of the screen.

Inside the catalog settings, locate and enable the 'Approval Flow' option.
Step 2: Update Cleaning Operations
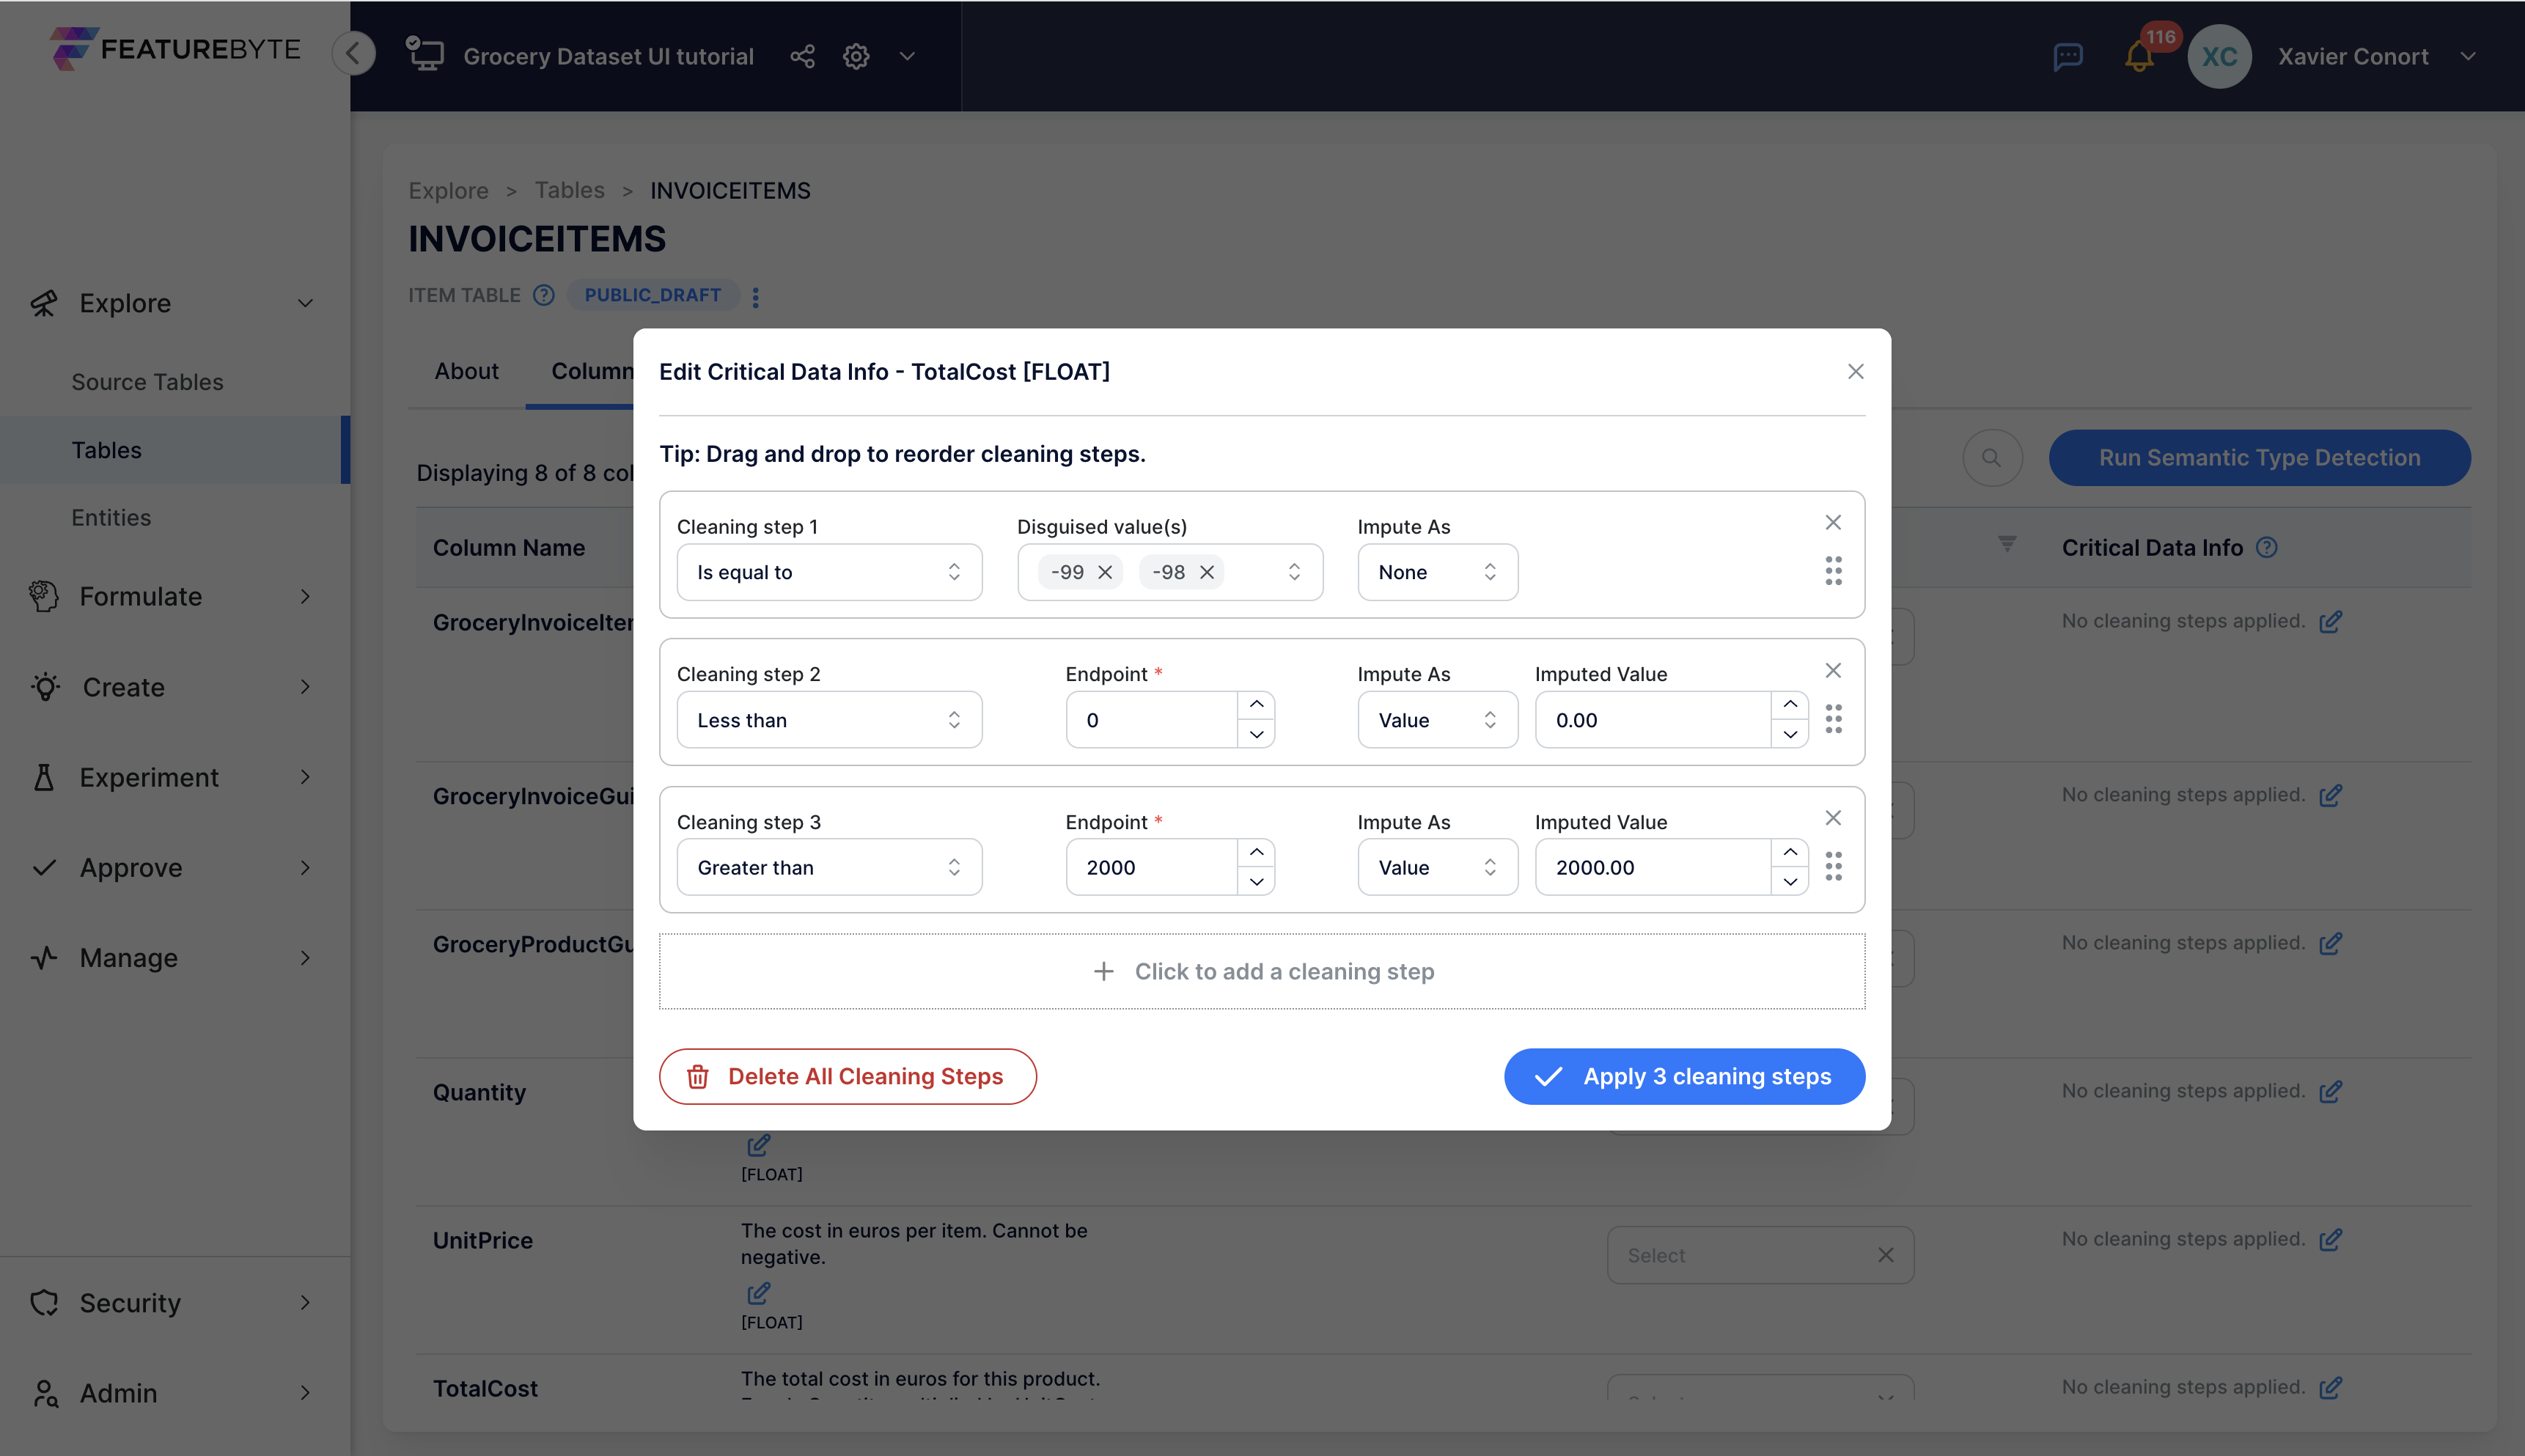
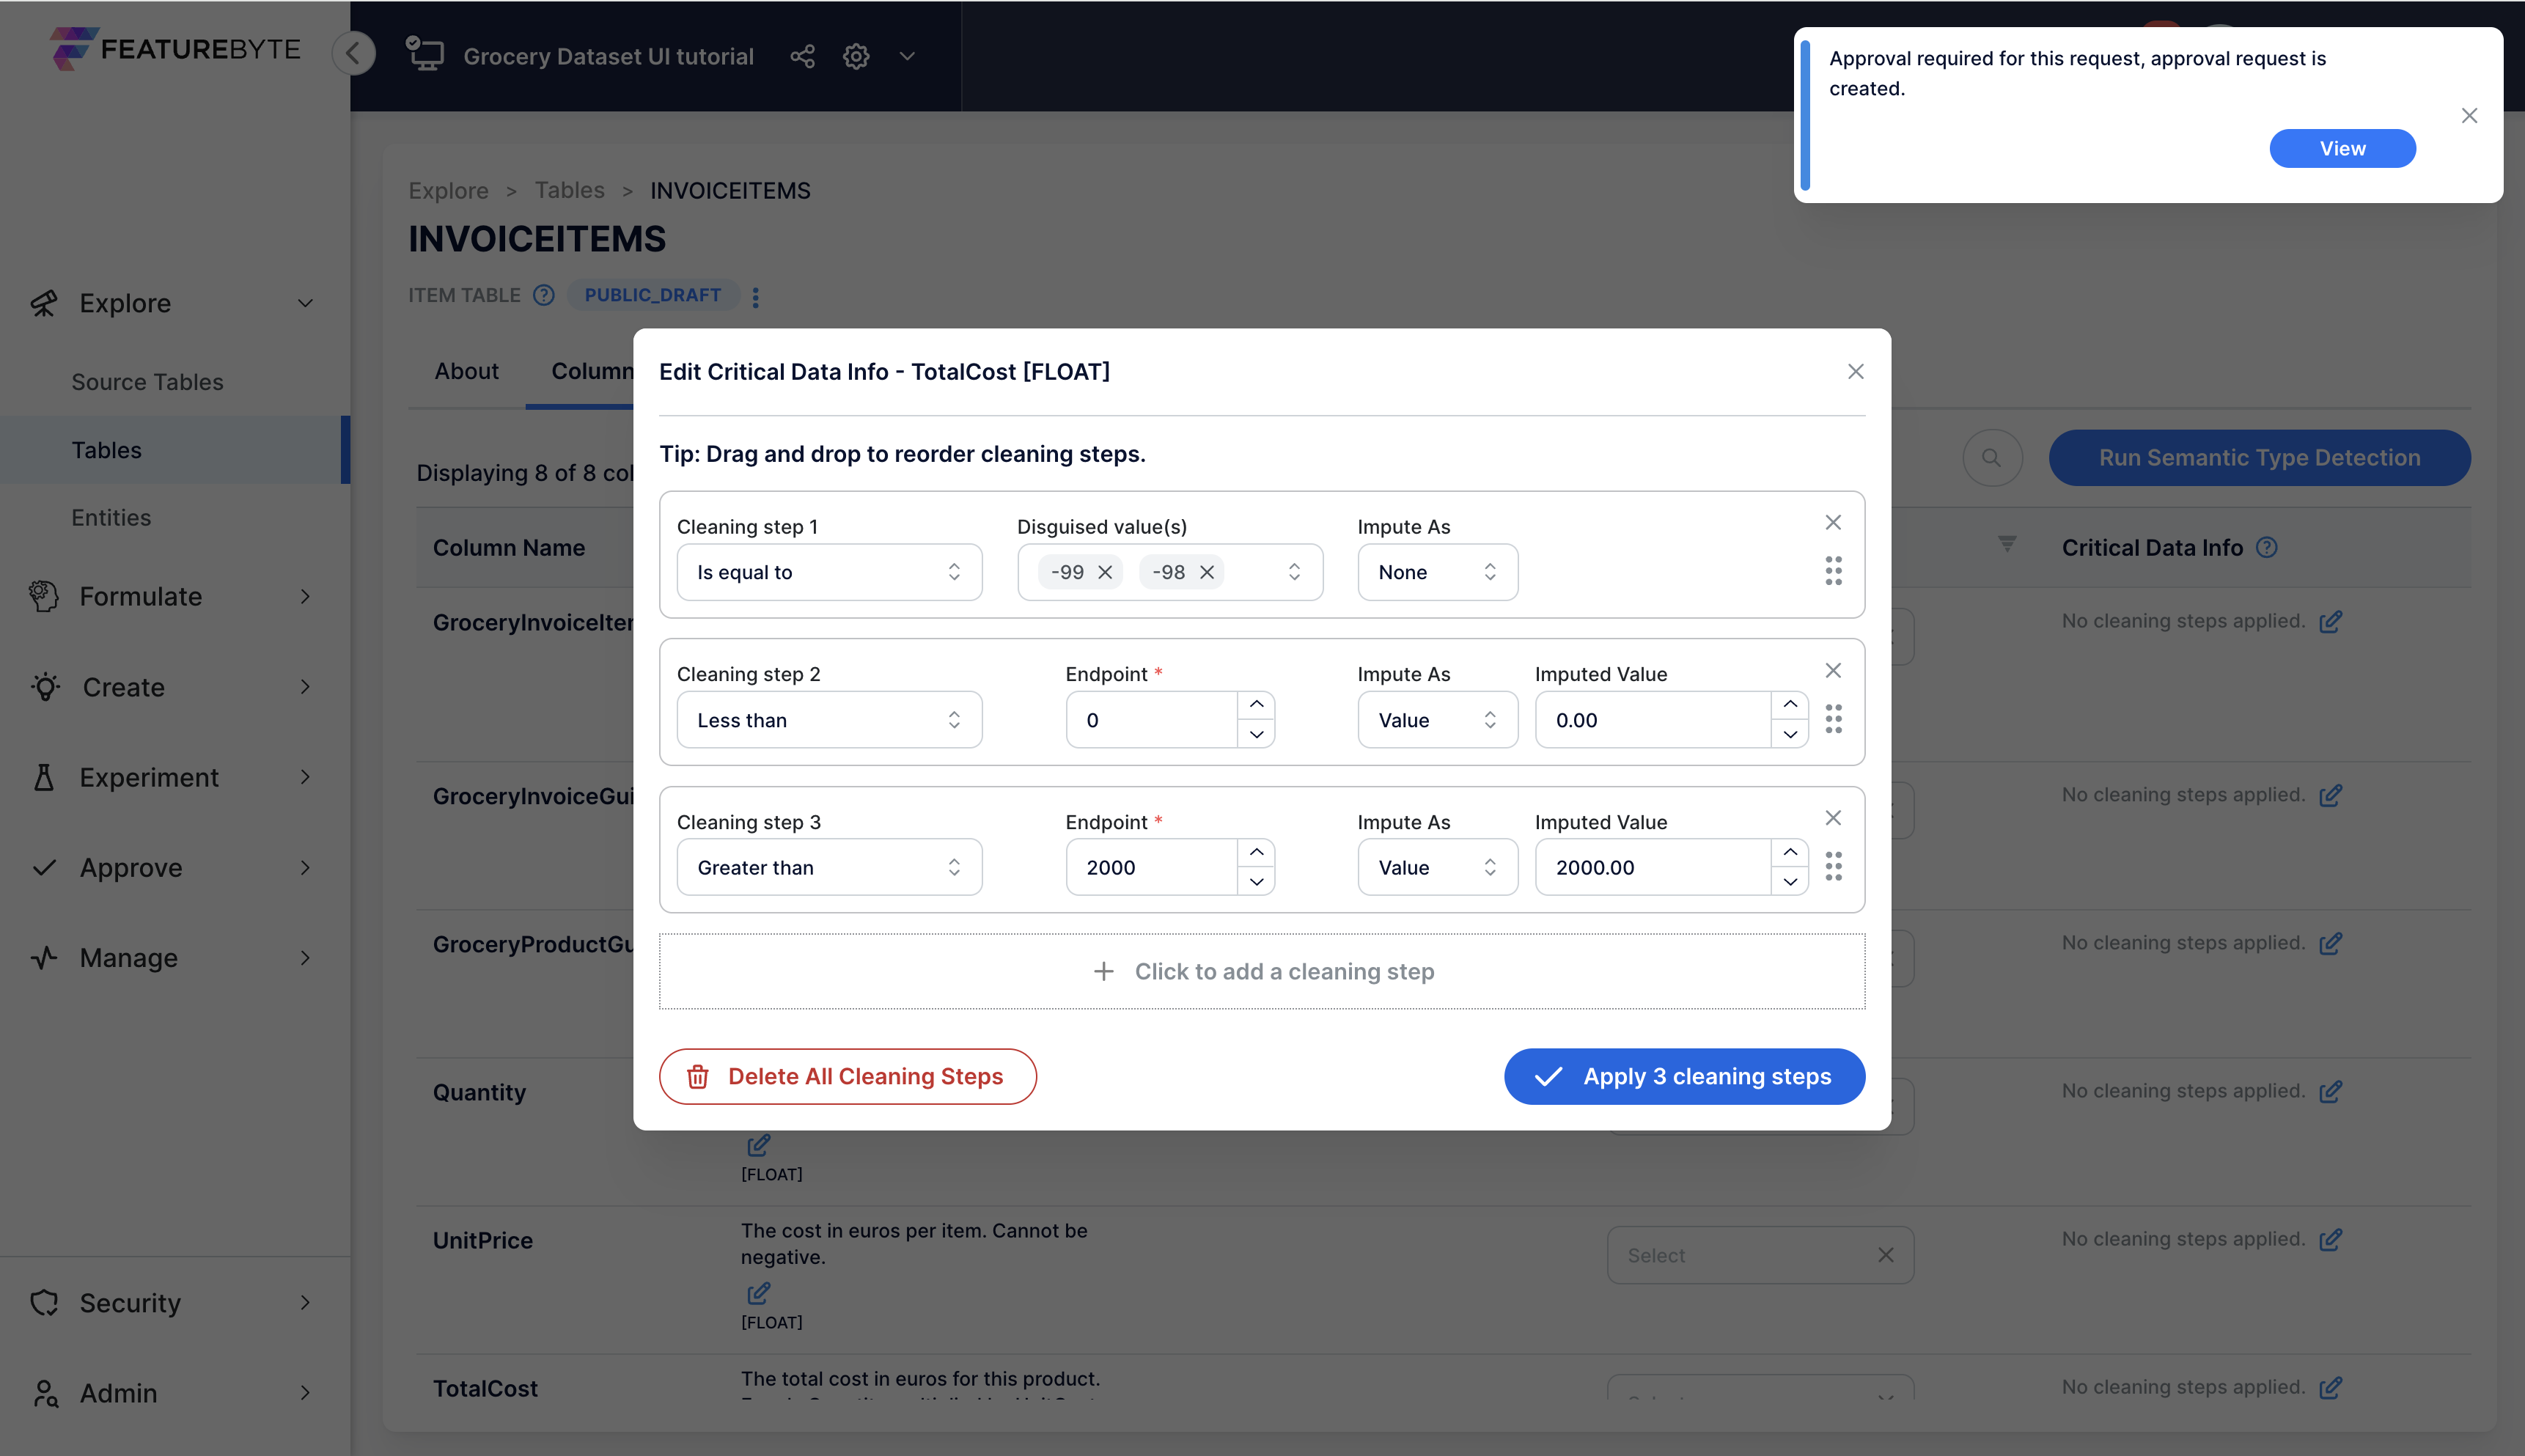
This step involves updating the cleaning operations for the TotalCost column in the 'INVOICEITEMS' table:
- ignore disguised missing values equal to -99 and -98.
- cap any amount less than 0 Euro.
- cap any amount greater than 2000 Euros.
Follow these steps:
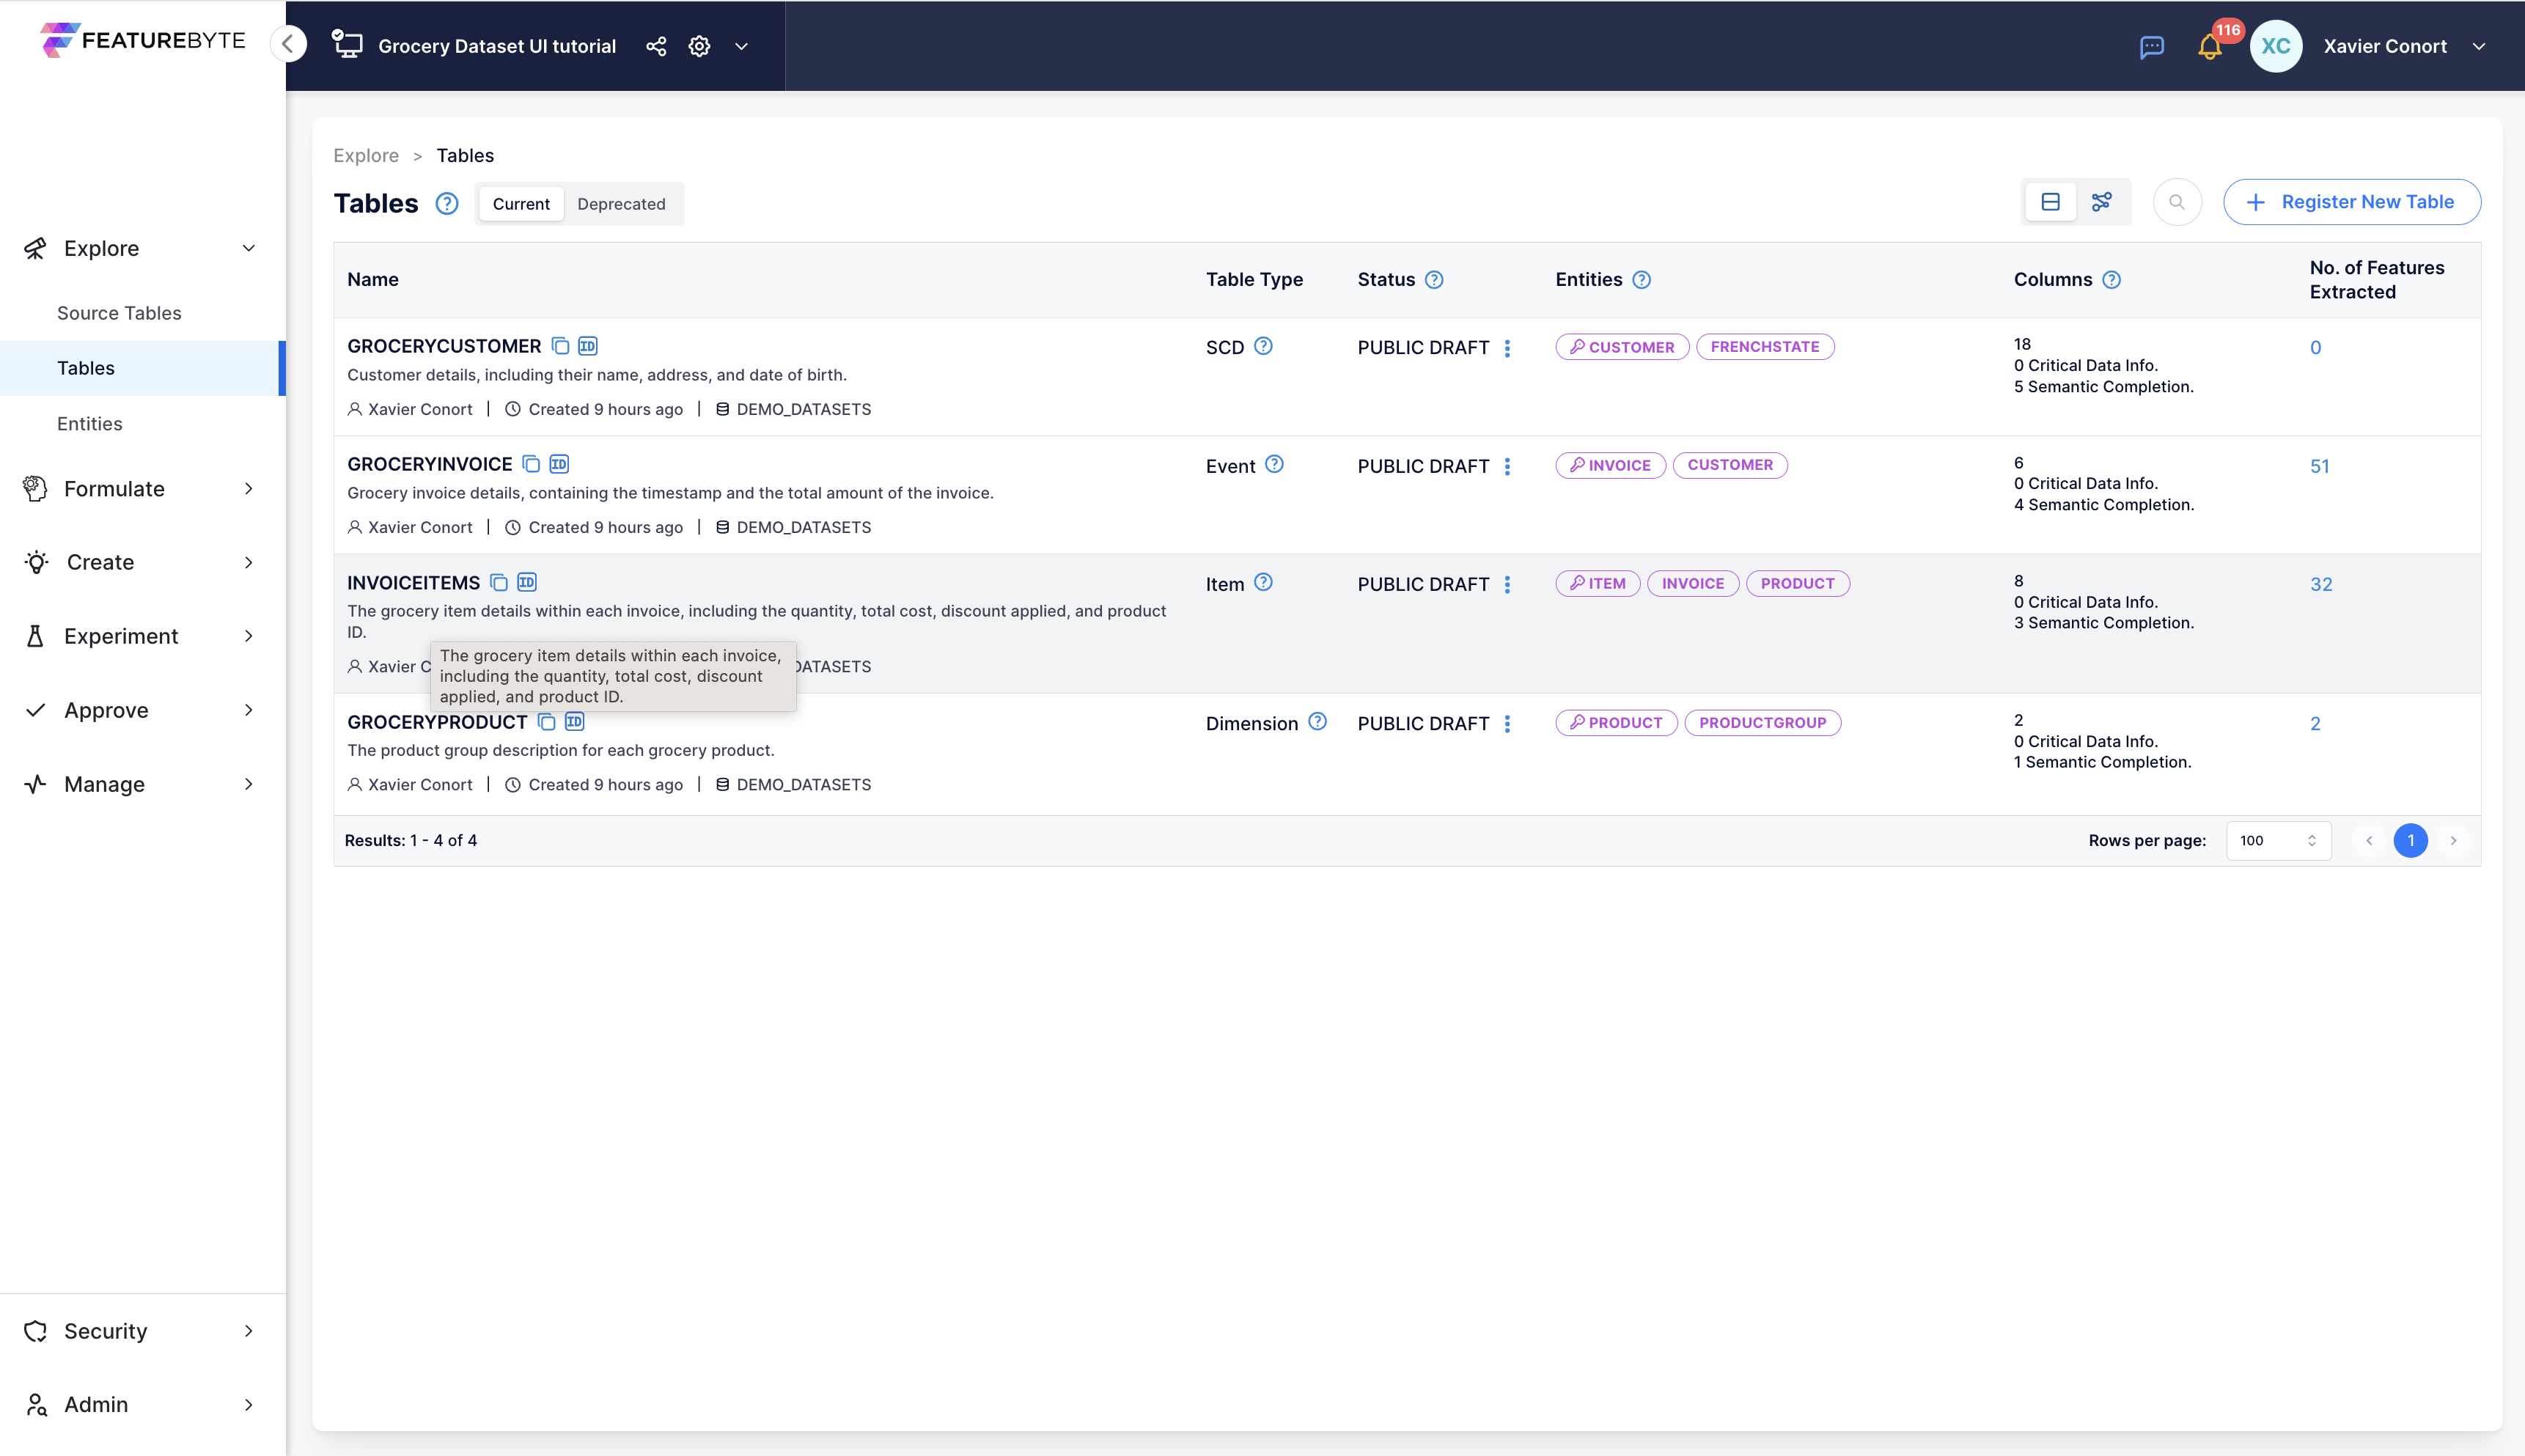
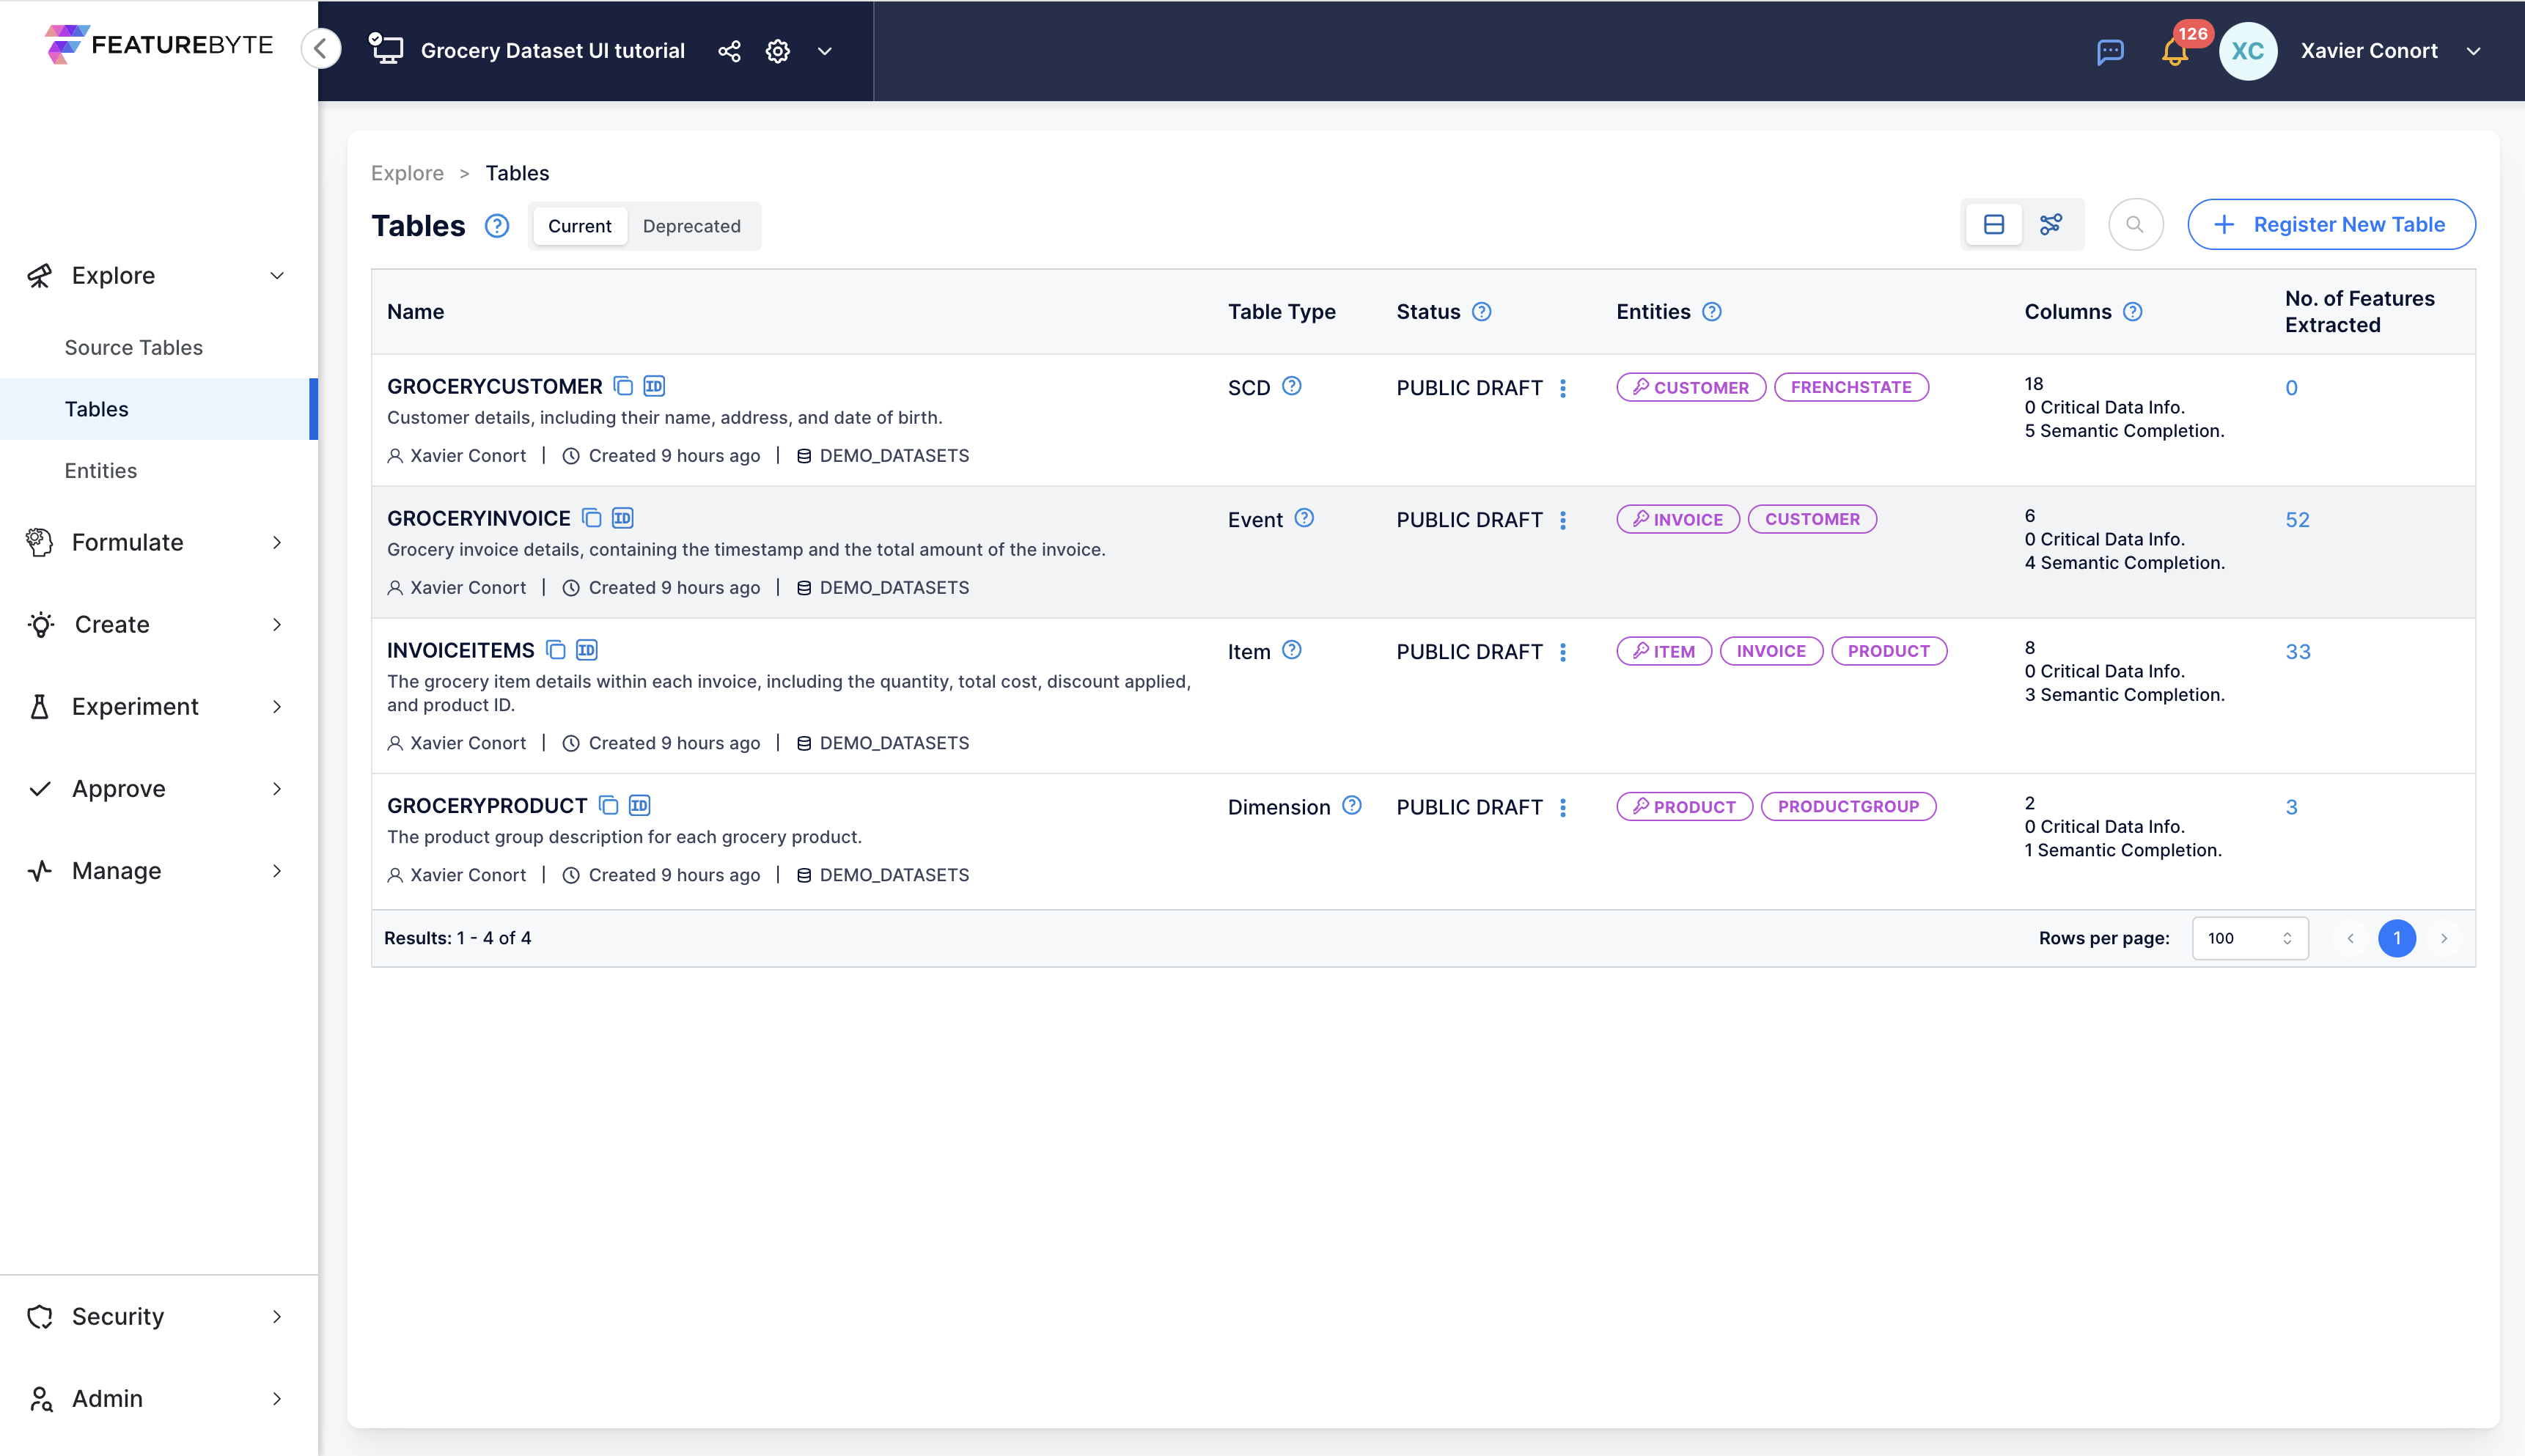
- Access Table Catalog: Go to the Explore section in the menu and select the Table Catalog.
- Select Table: Choose the 'INVOICEITEMS' table.
- Edit Column: Navigate to the “Columns” tab and click the "critical data info" edit button for TotalCost.
- Apply Cleaning Steps: Implement the new cleaning operations.
- Confirm Changes: Click the "Apply 3 cleaning steps" button.
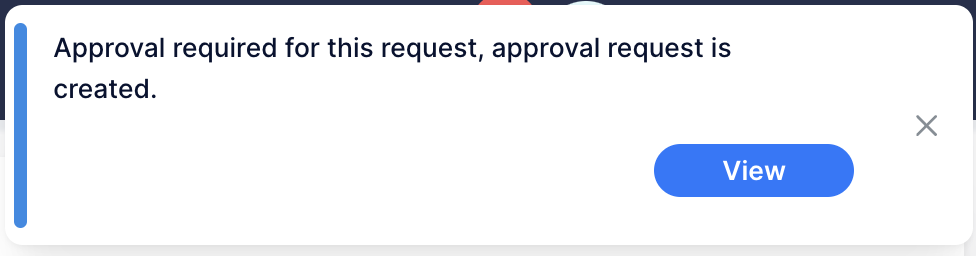
Approval Request: This creates an approval request. Click 'View' to review it.
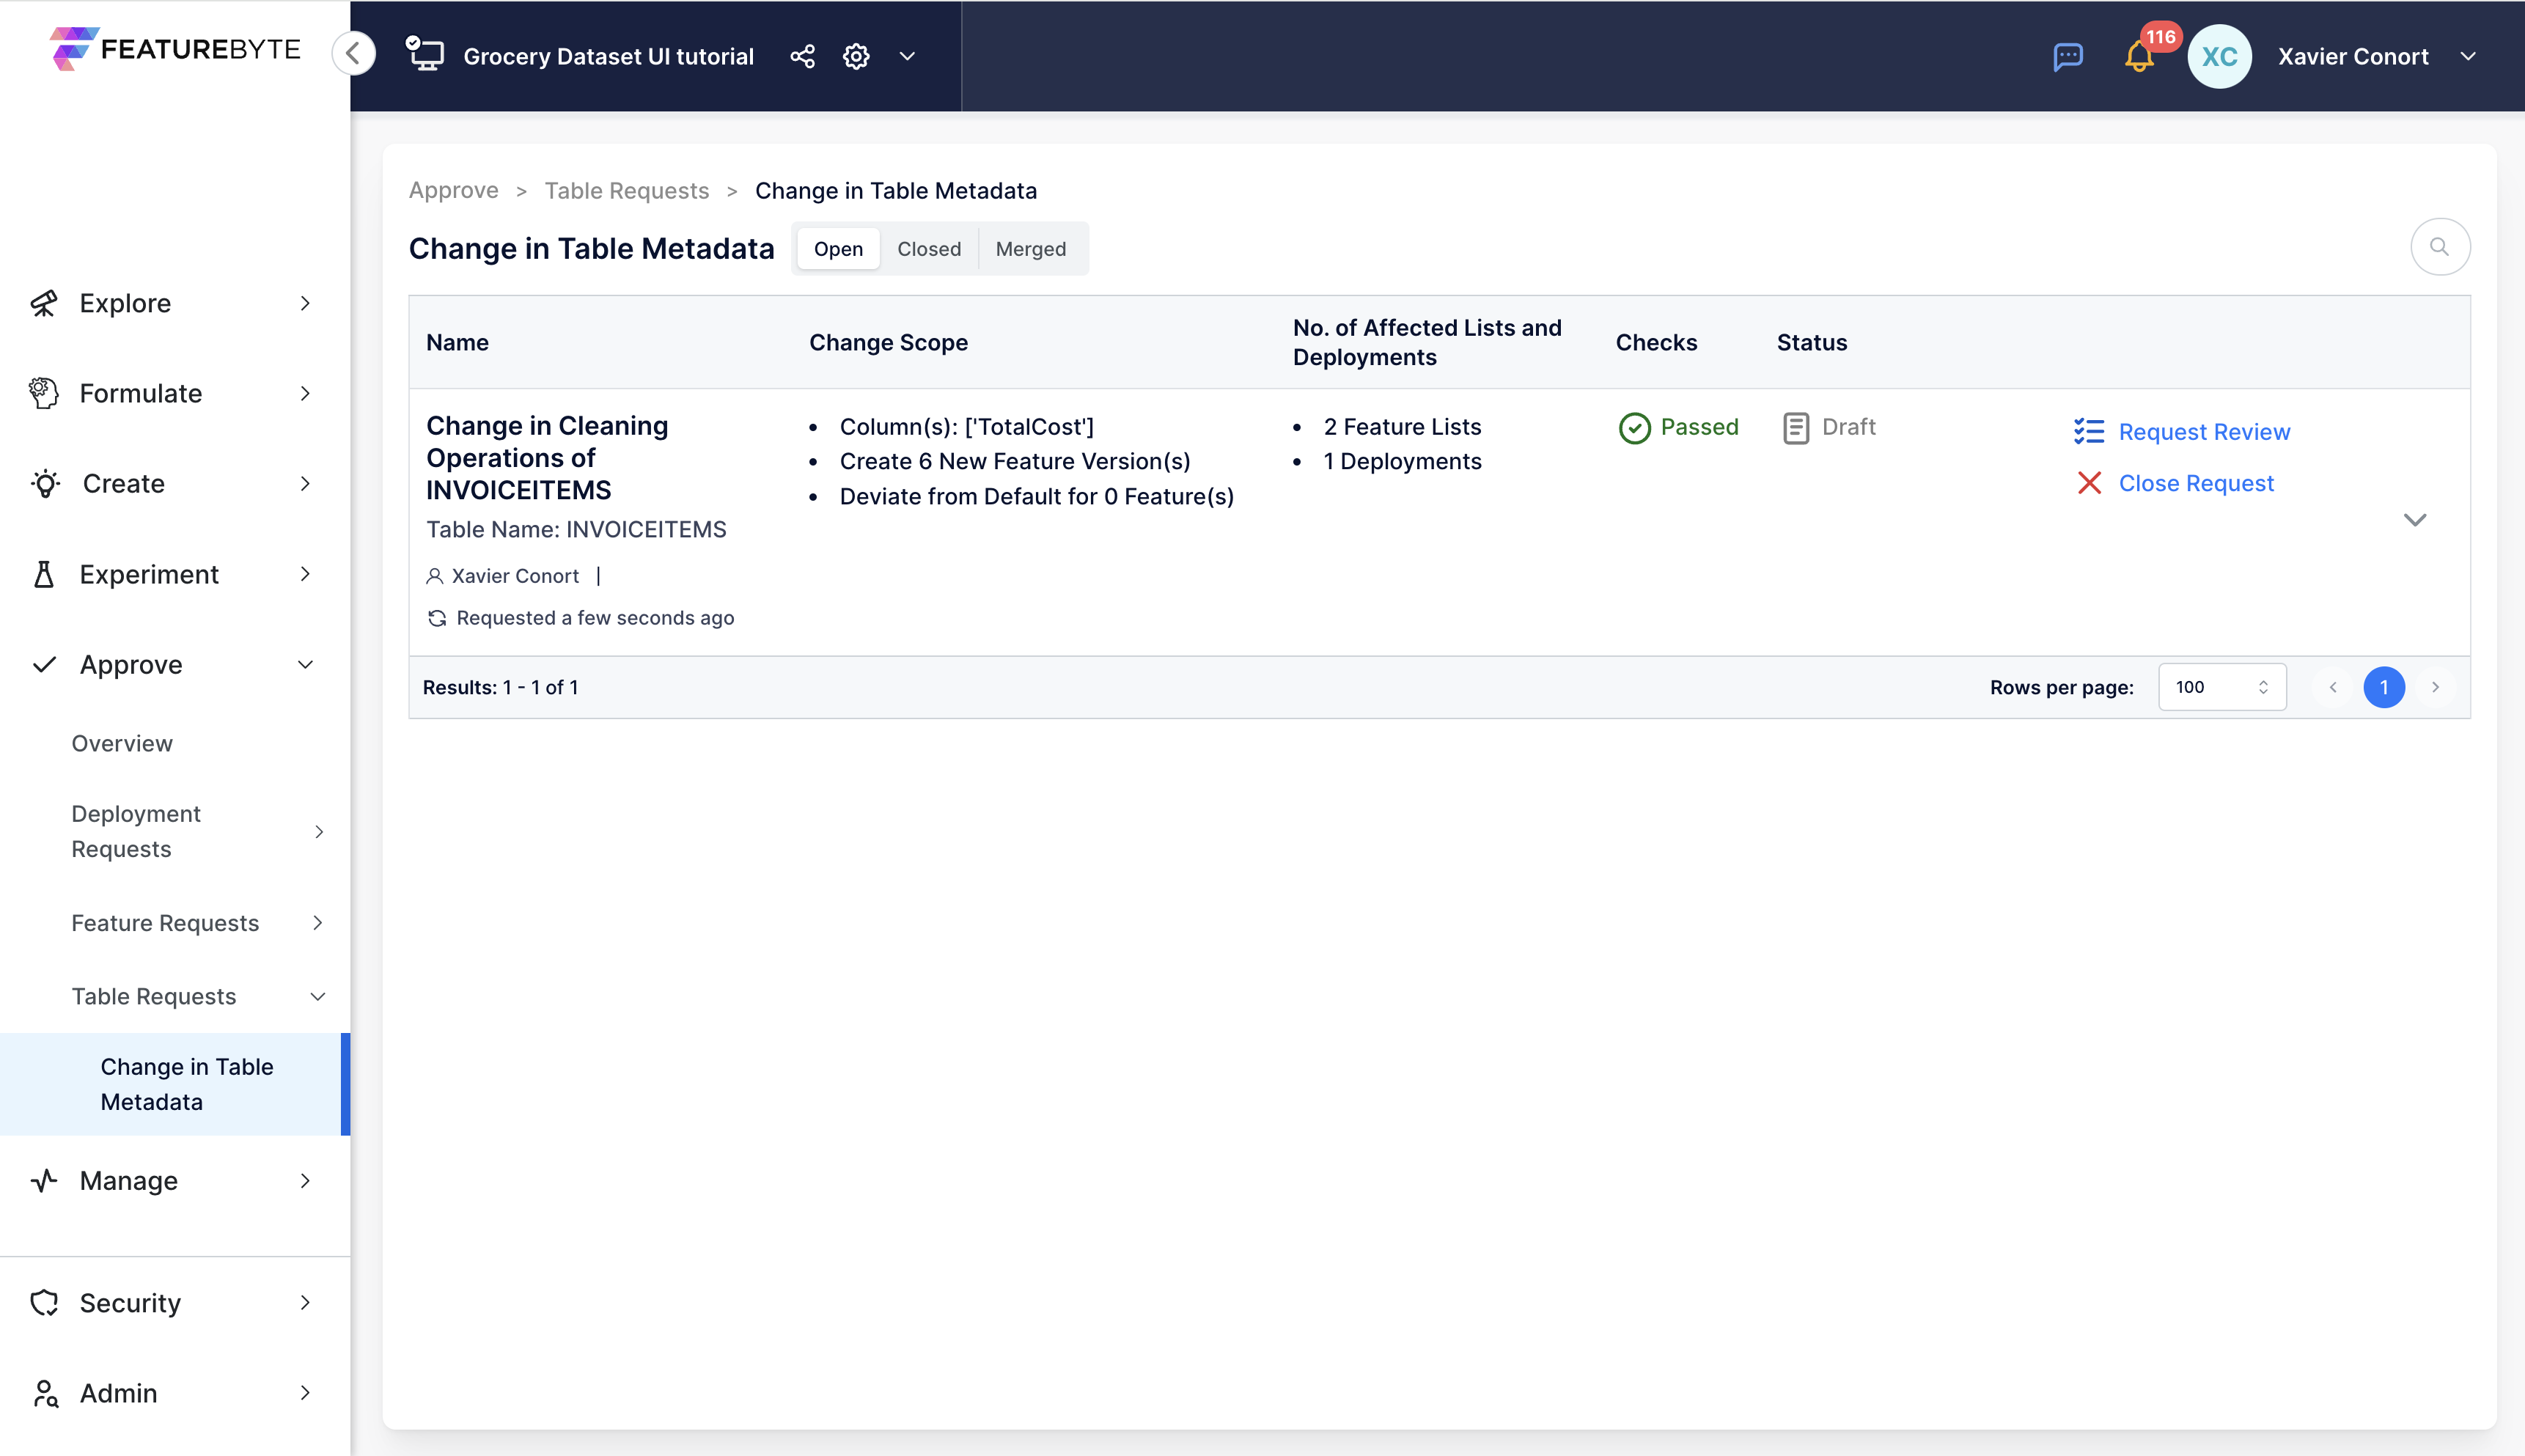
Review Request: The request appears with other open requests under 'Change in Table Metadata'.
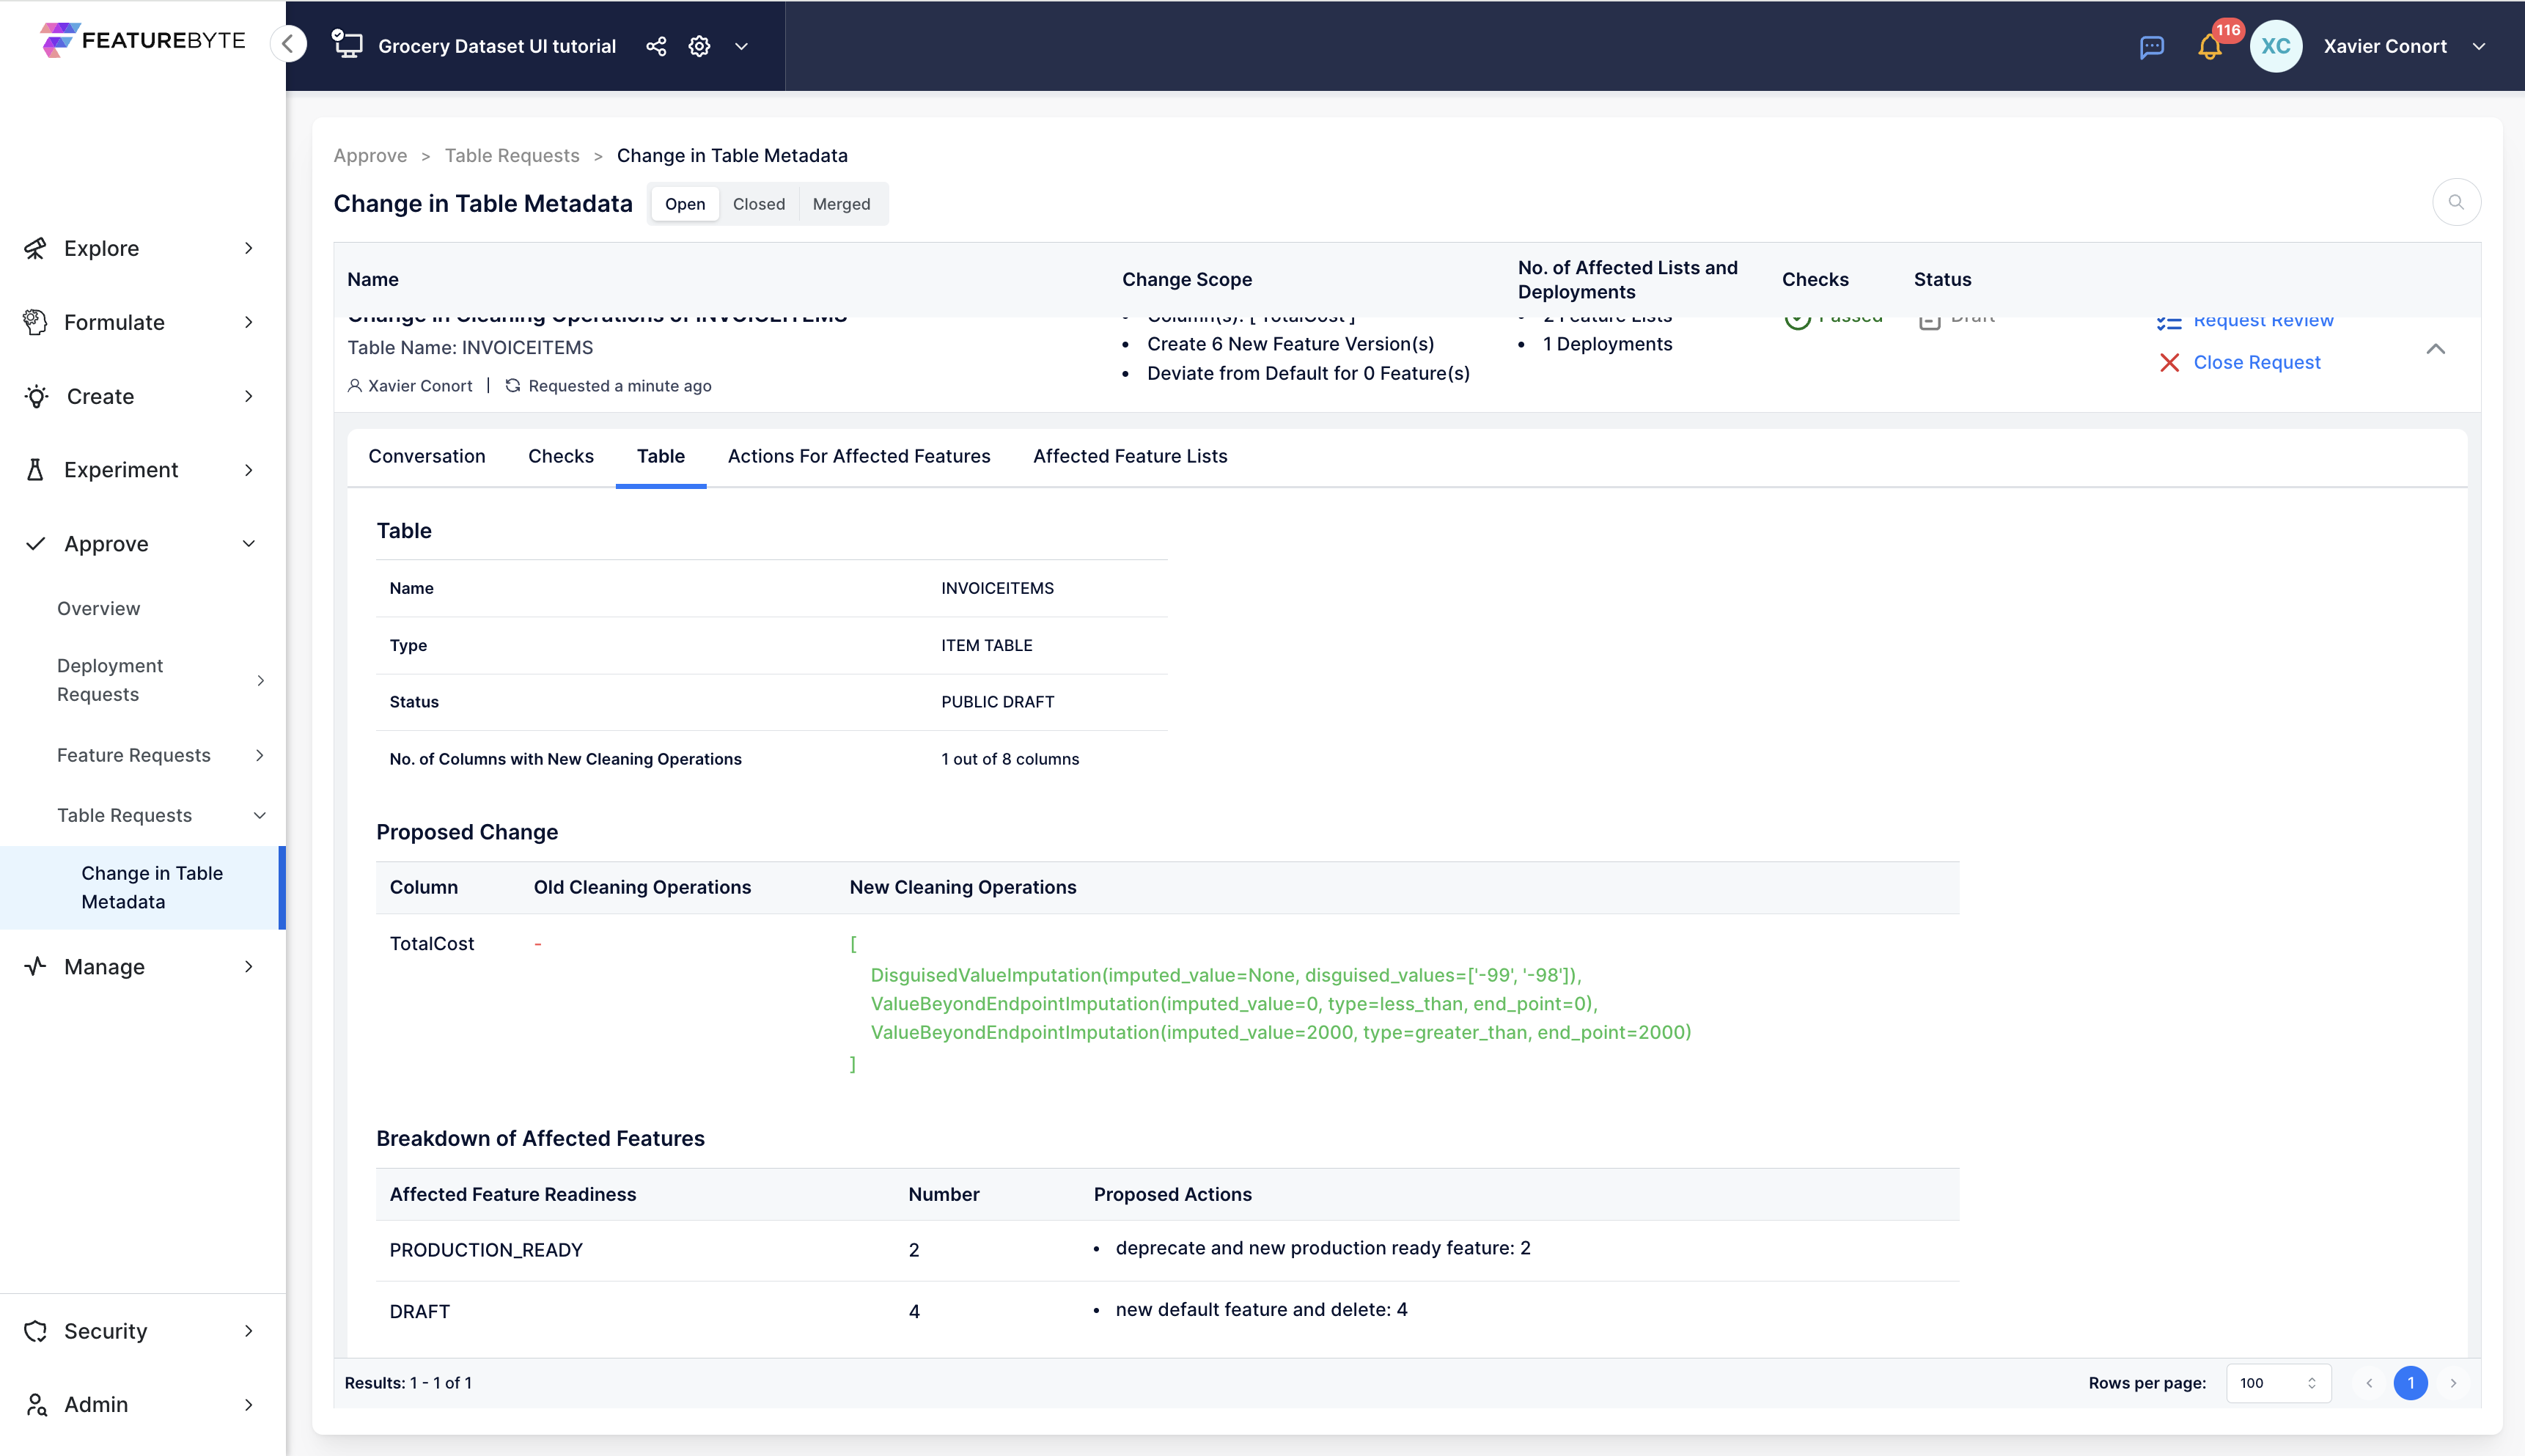
Check Table Summary: Select the request and go to the 'Table' tab to see a summary of changes, including the impact on features using TotalCost.
Affected Feature Lists: Visit 'Affected Feature Lists' to see which feature lists are impacted. Merging the request will create new versions to incorporate the newest default versions of the features in these feature lists.

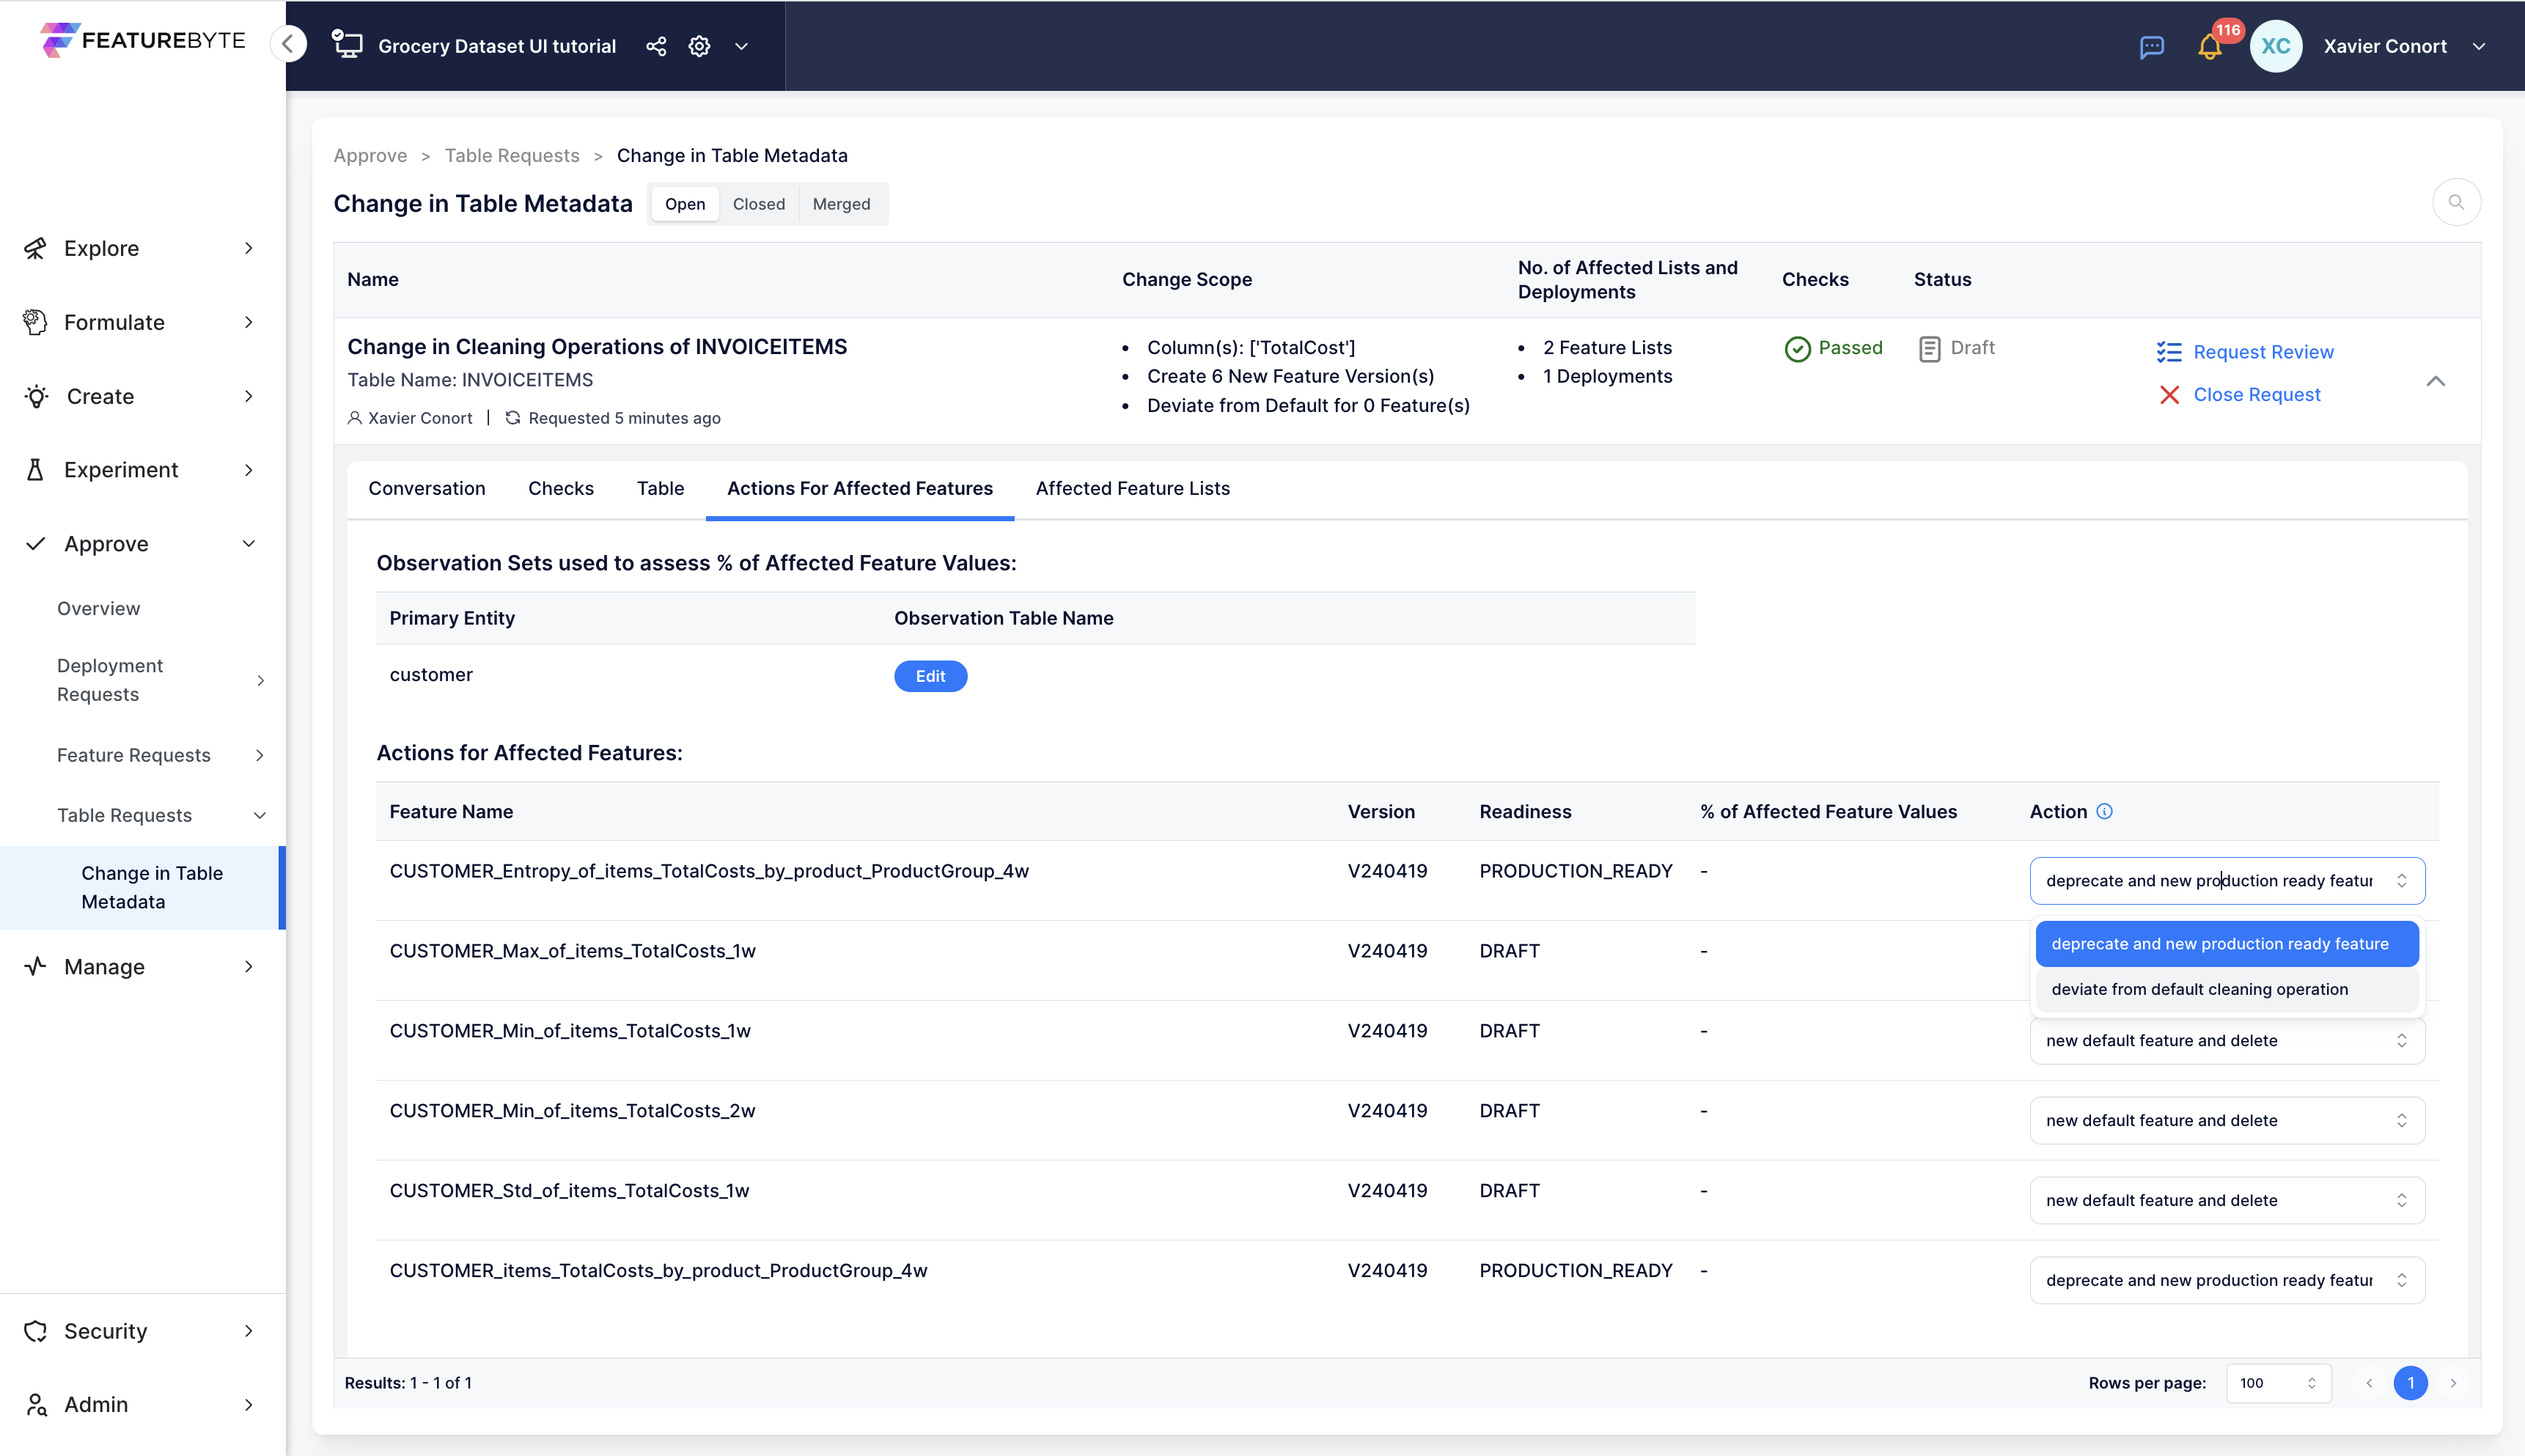
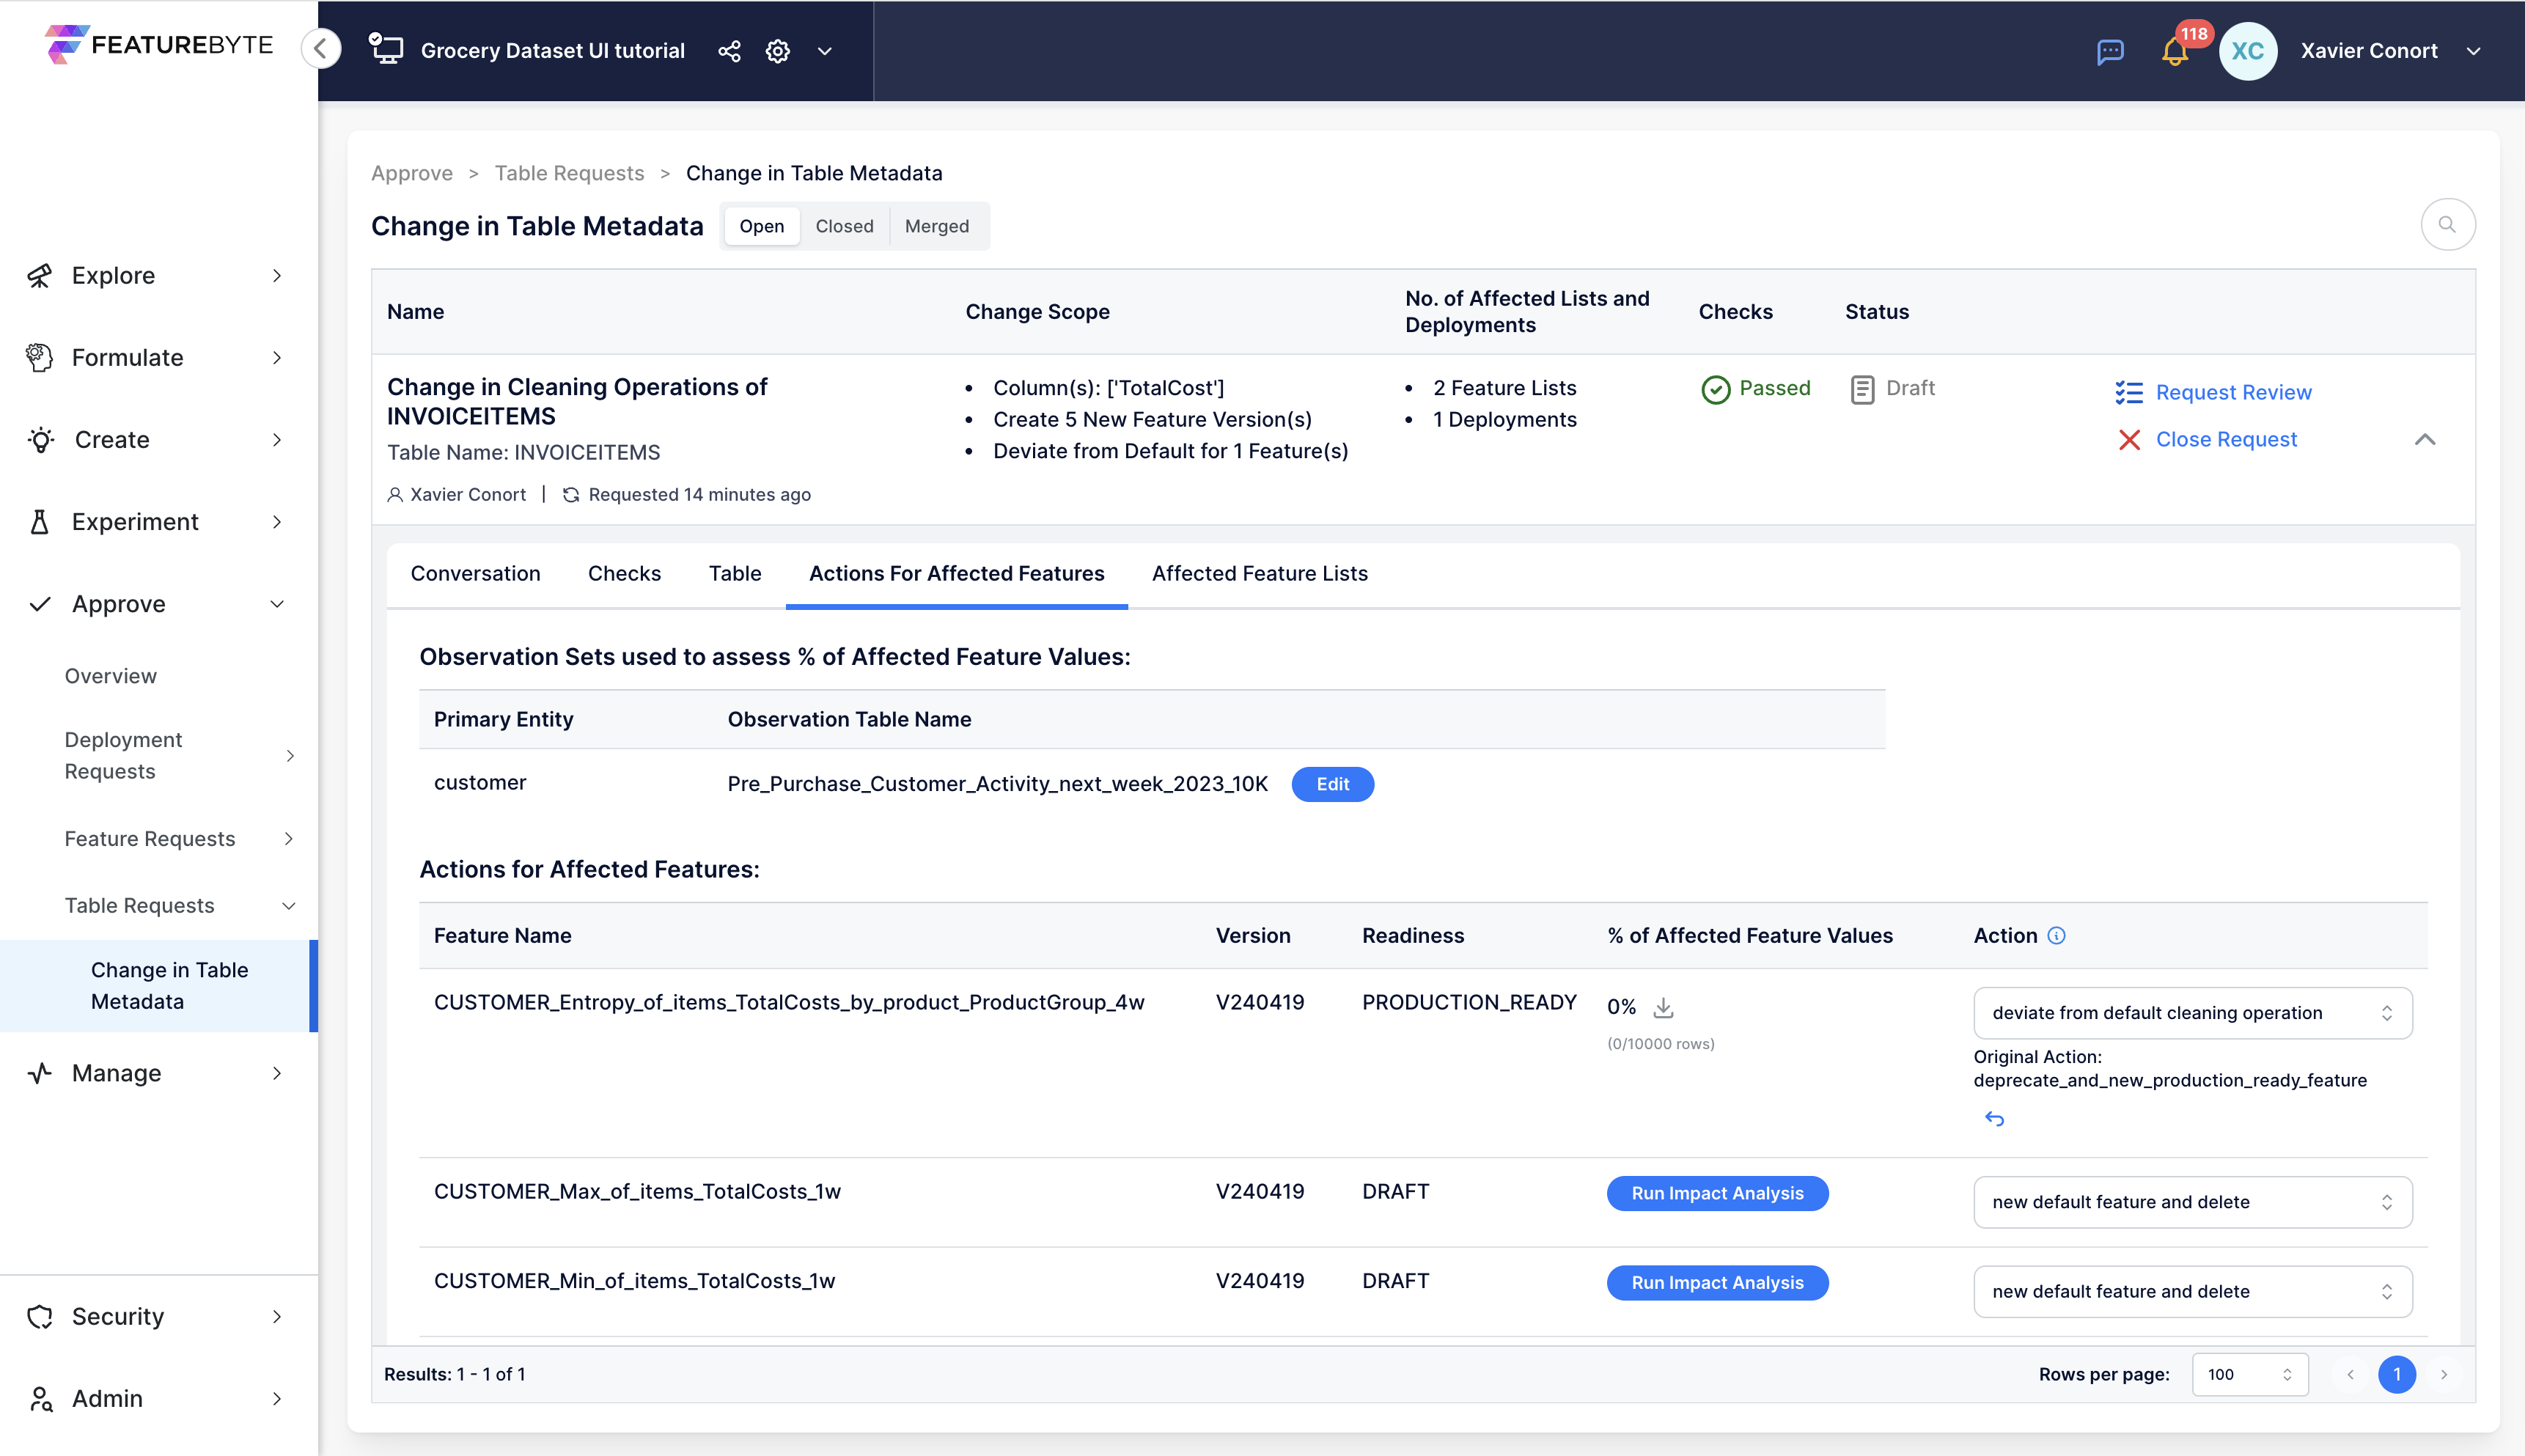
Adjust Feature Actions: Go to 'Actions For Affected Features' tab to modify actions for affected features. By default, after merging, old versions are deprecated (or deleted) in favor of new versions to align with the new cleaning operations of TotalCost column.
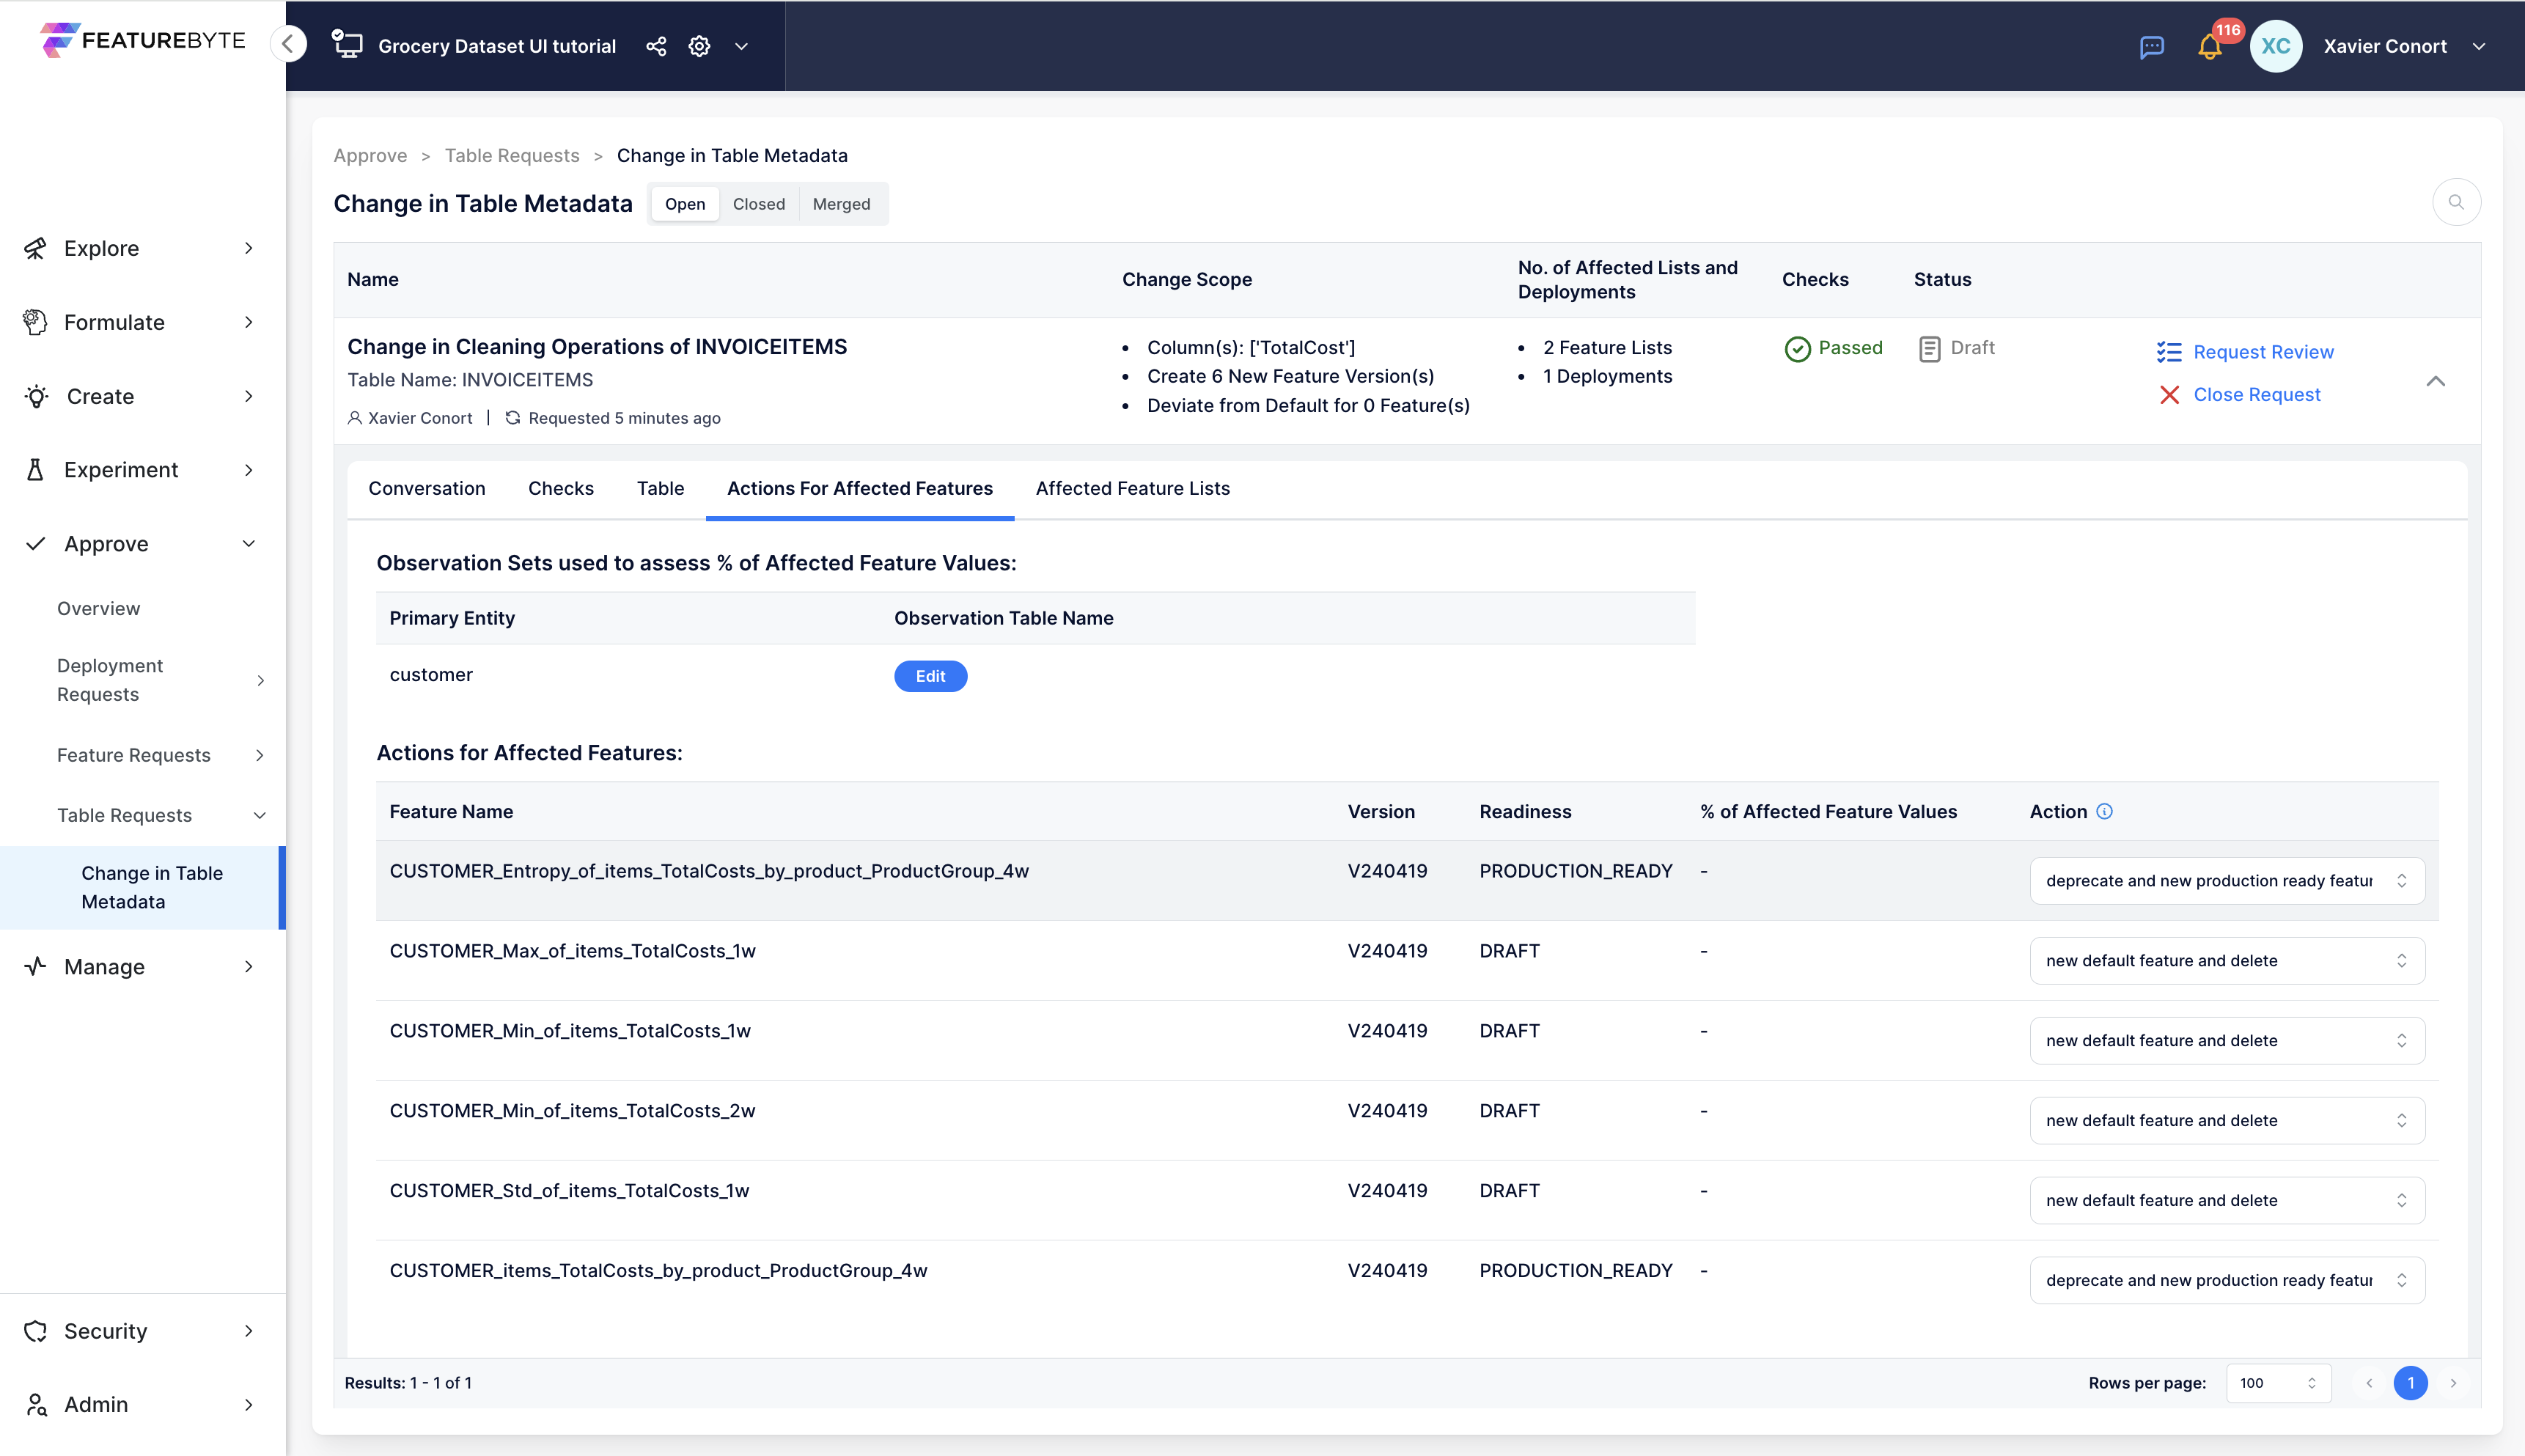
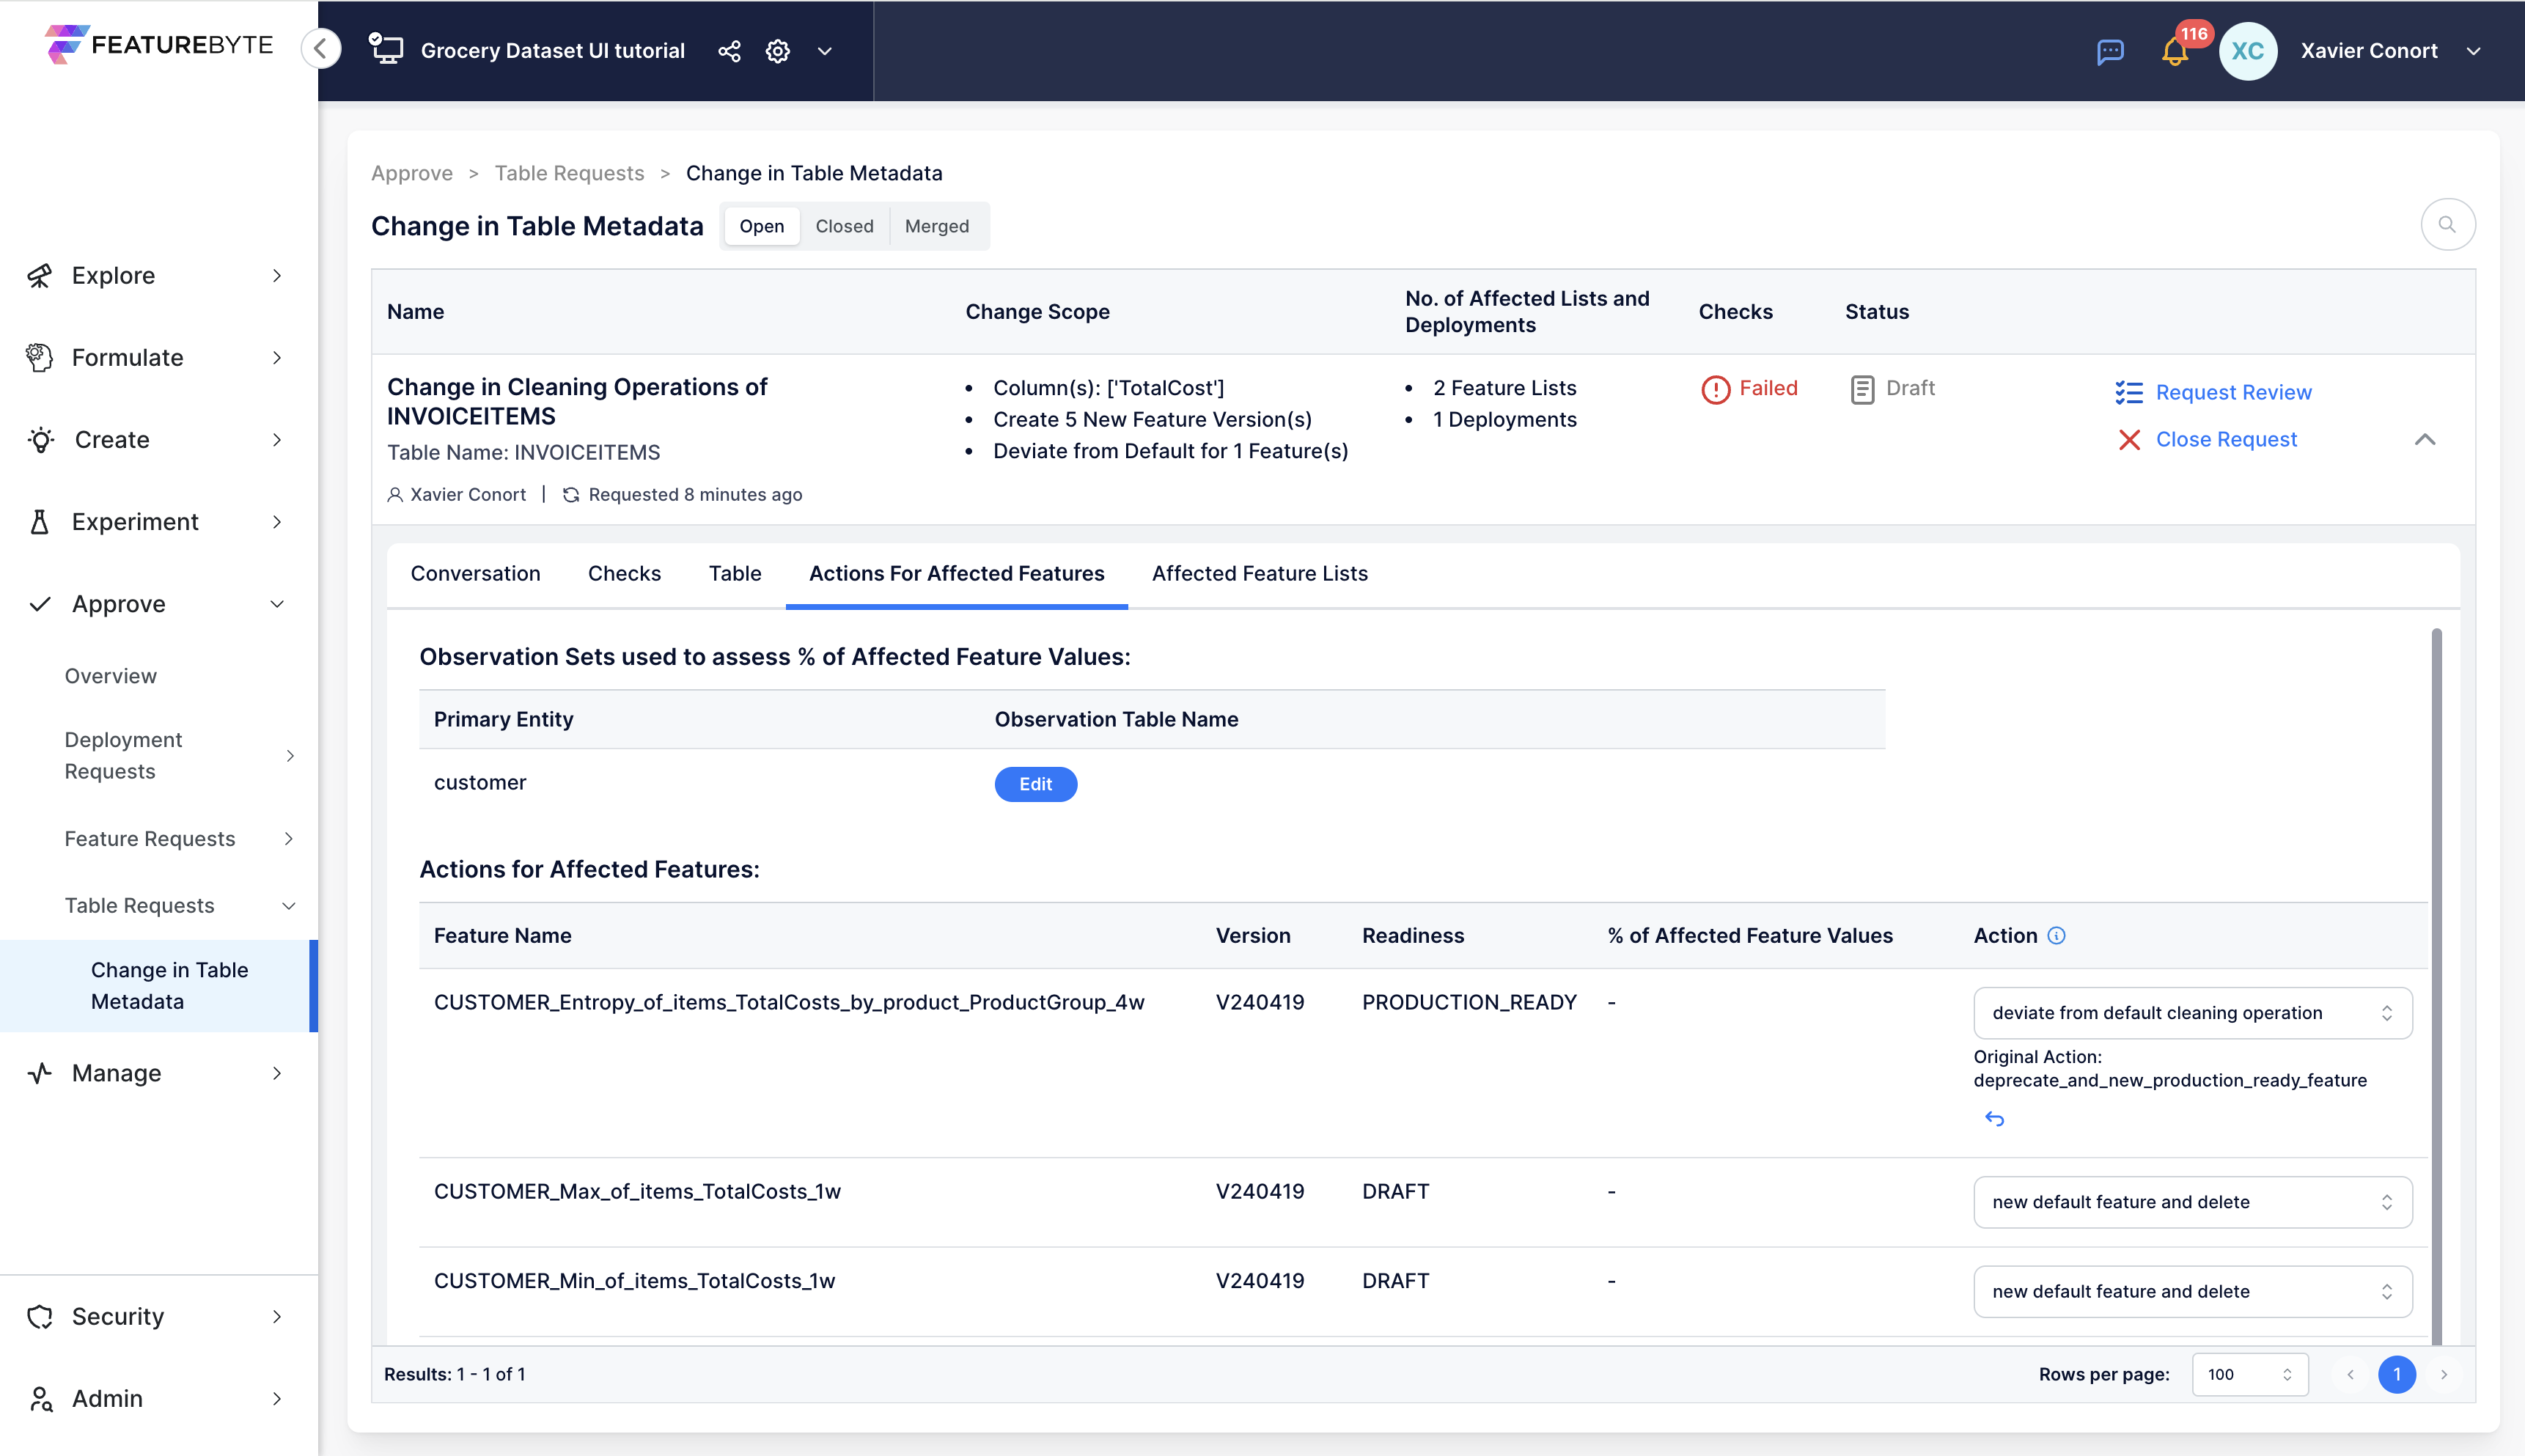
Deviate from Default Operations: Change action for a specific feature, like "CUSTOMER_Entropy_of_items_TotalCosts_by_product_ProductGroup_4w" to deviate from default cleaning operations.
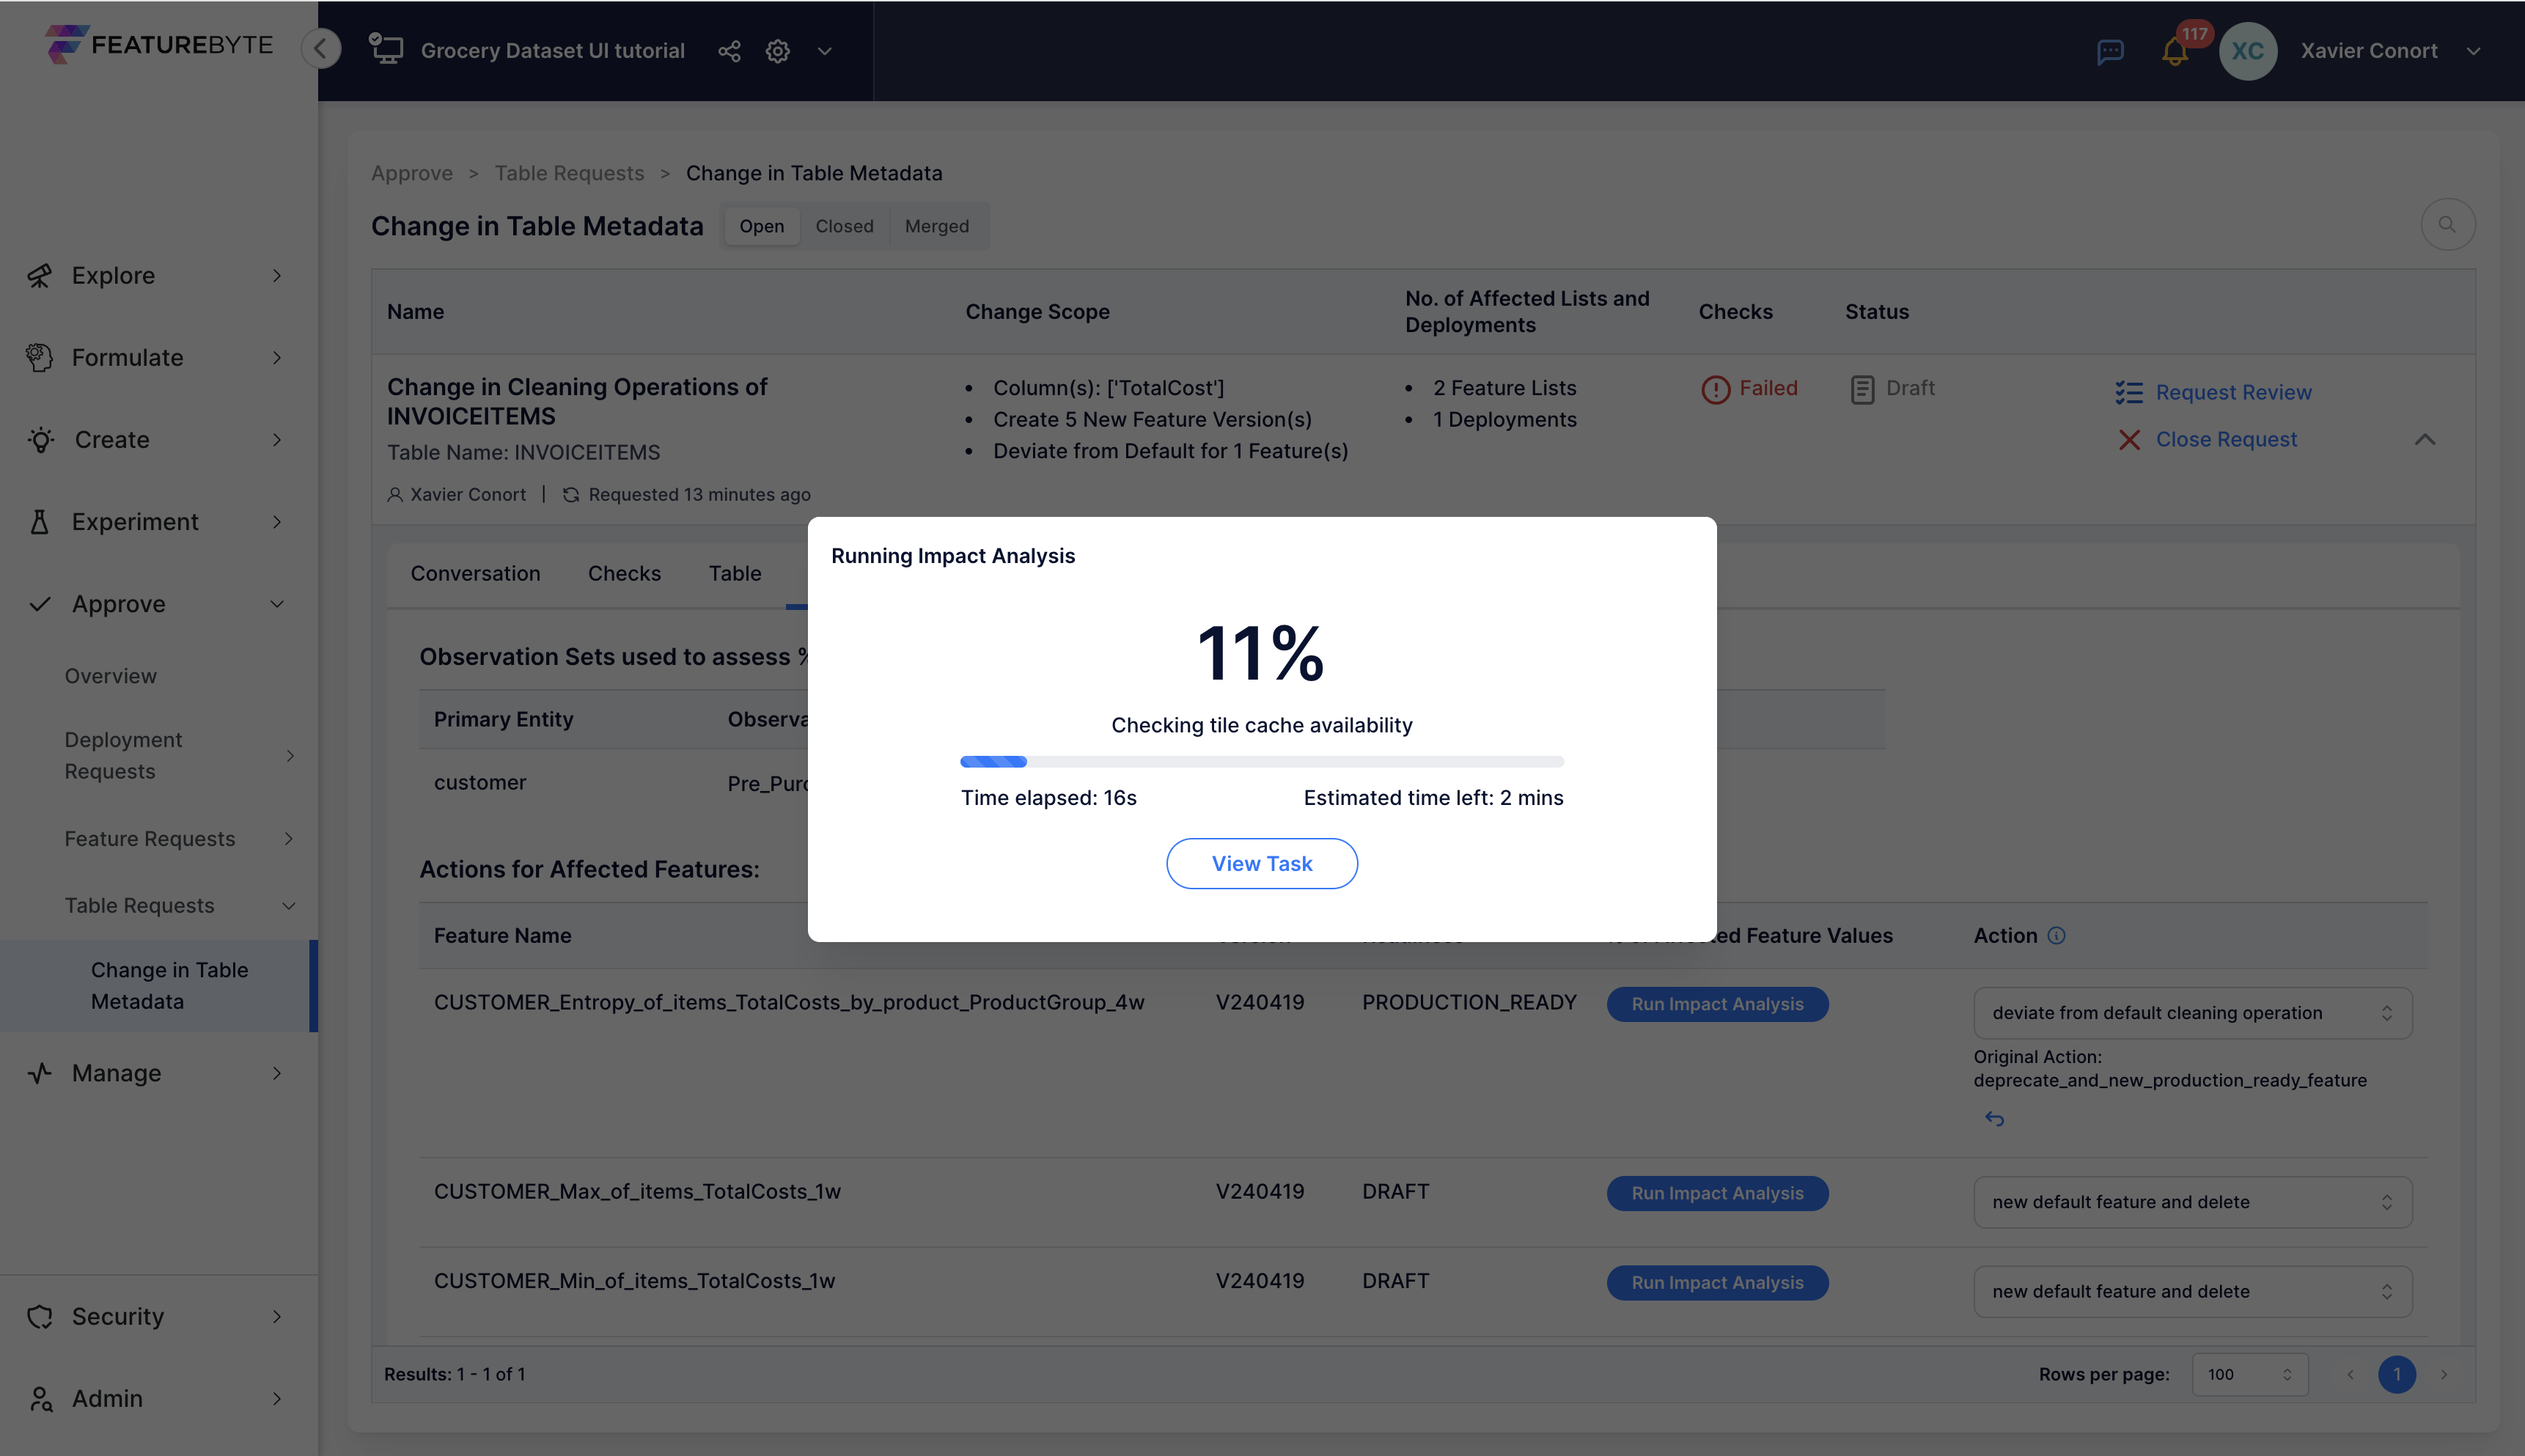
Analysis for Deviation: If there's a failed check due to lack of impact analysis, go to 'Actions For Affected Features' tab and provide an observation table and run the analysis.
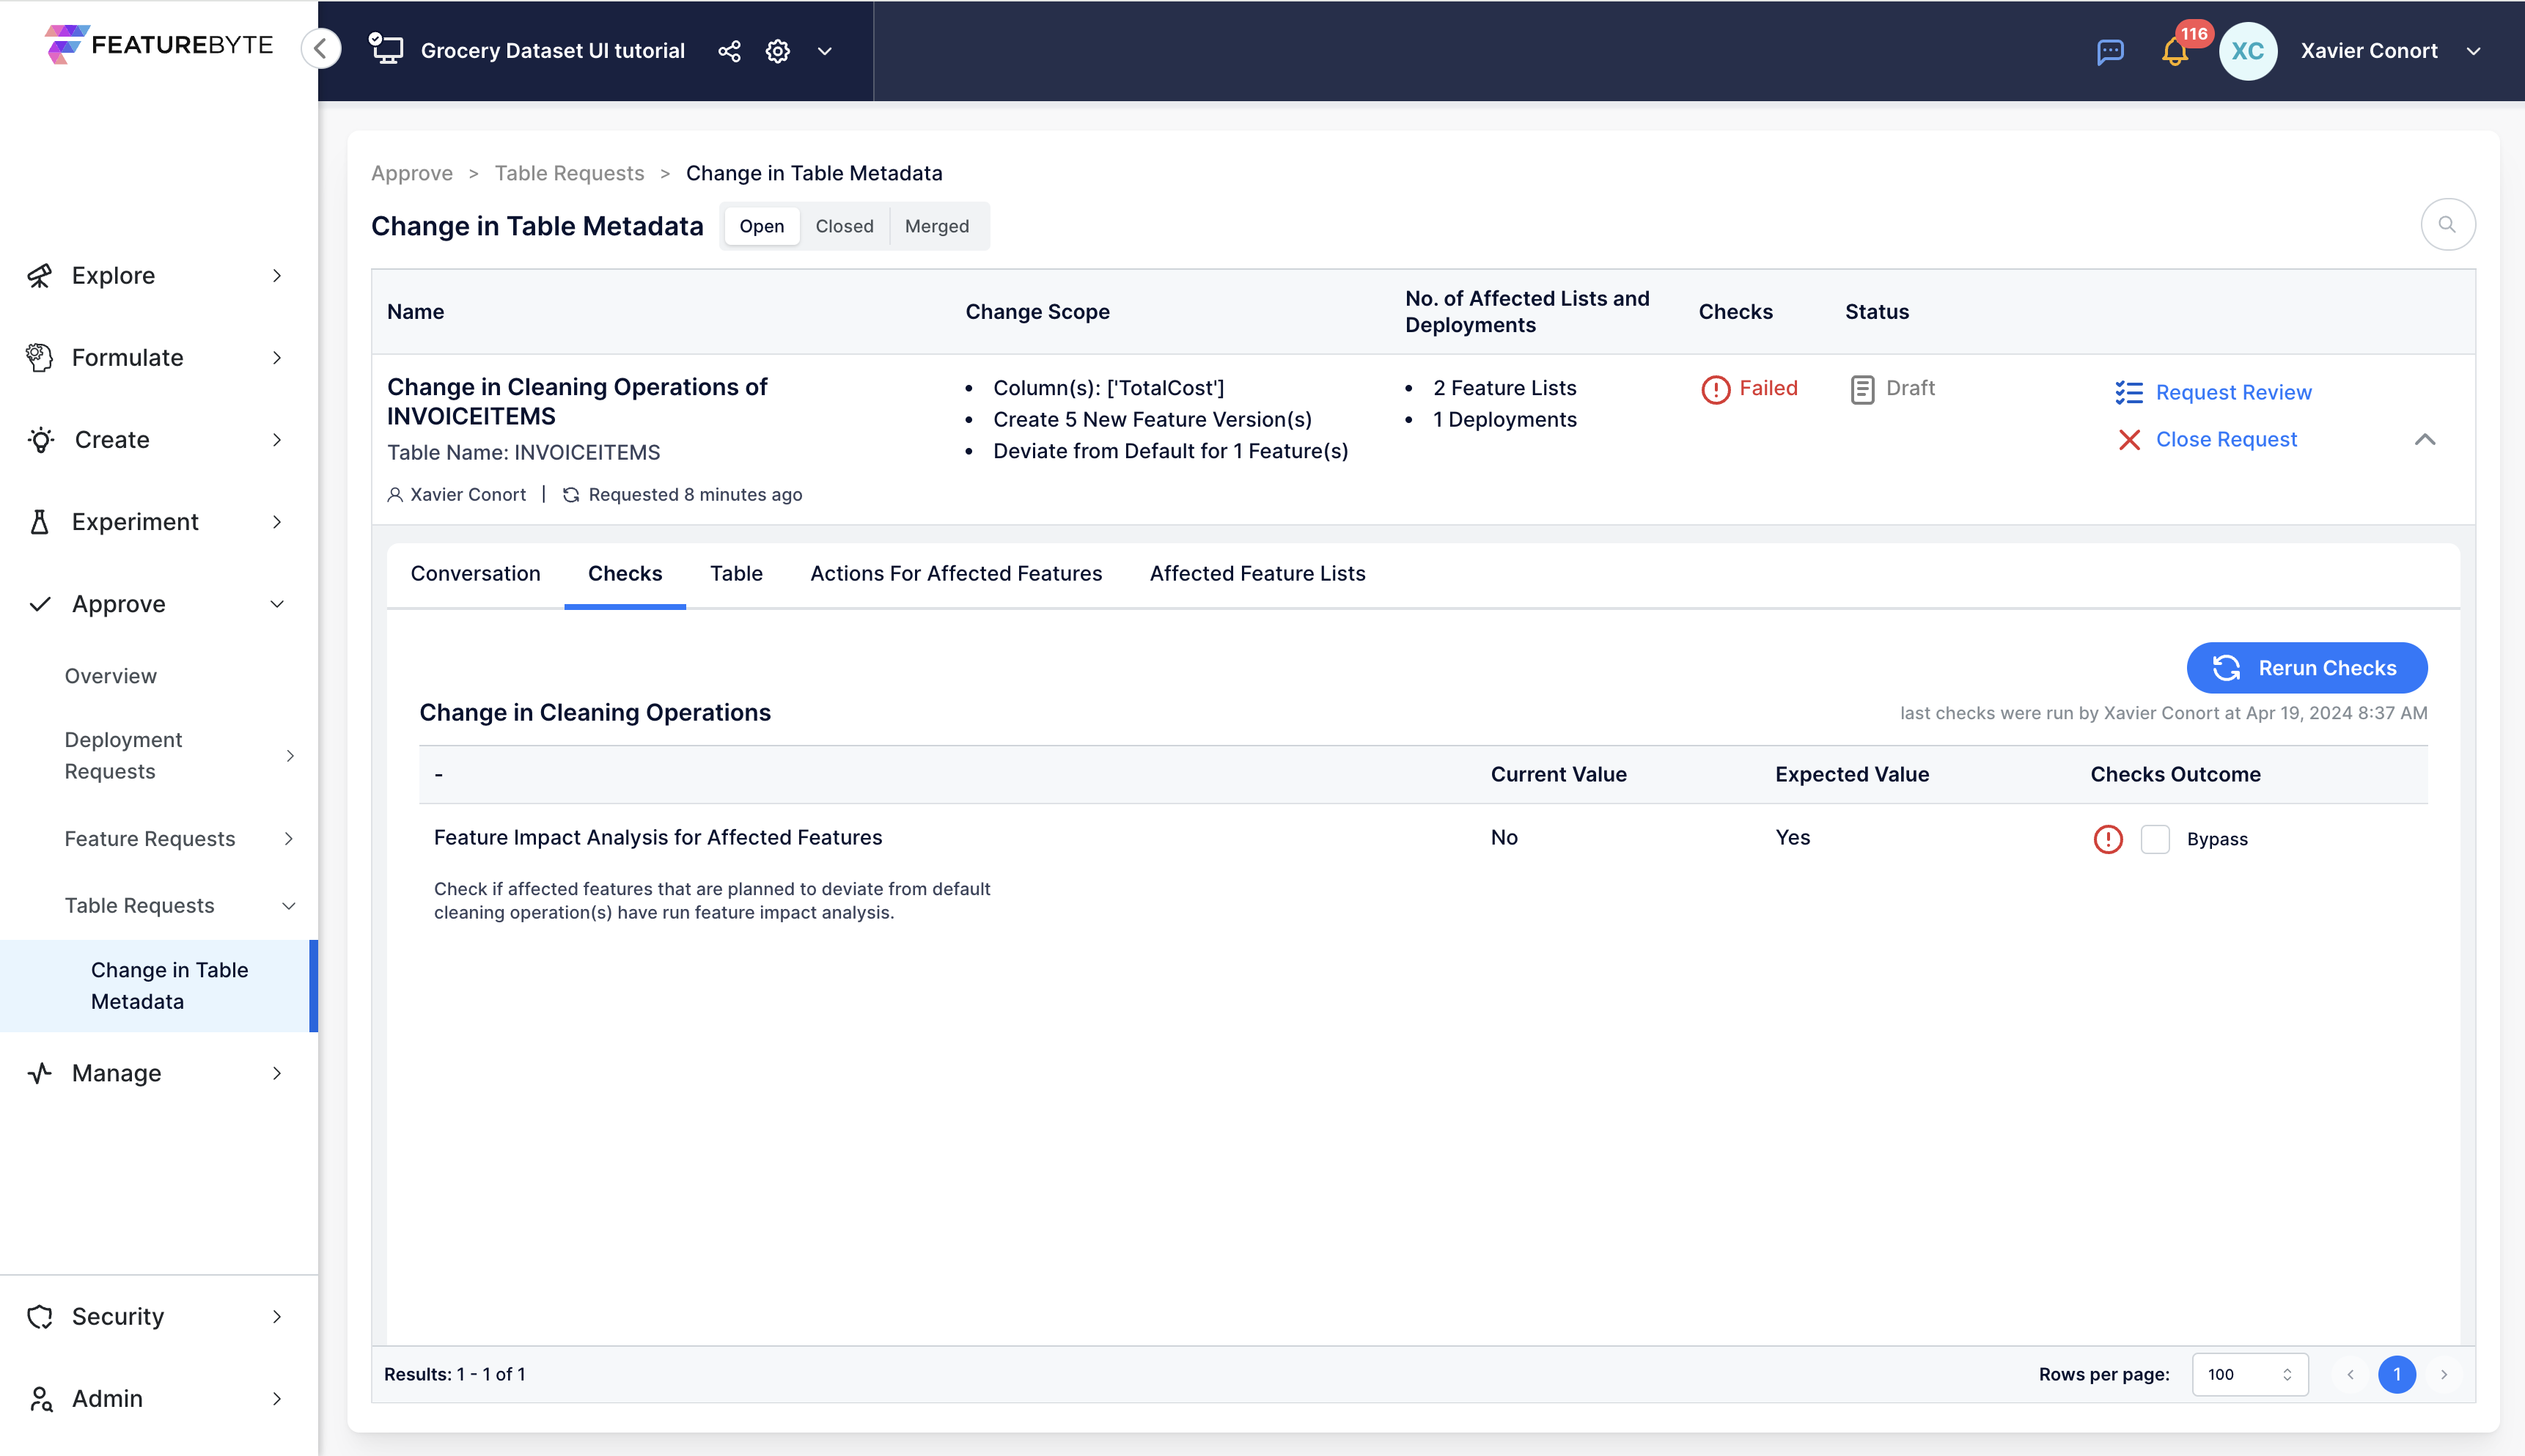
For the analysis, provide an observation table.
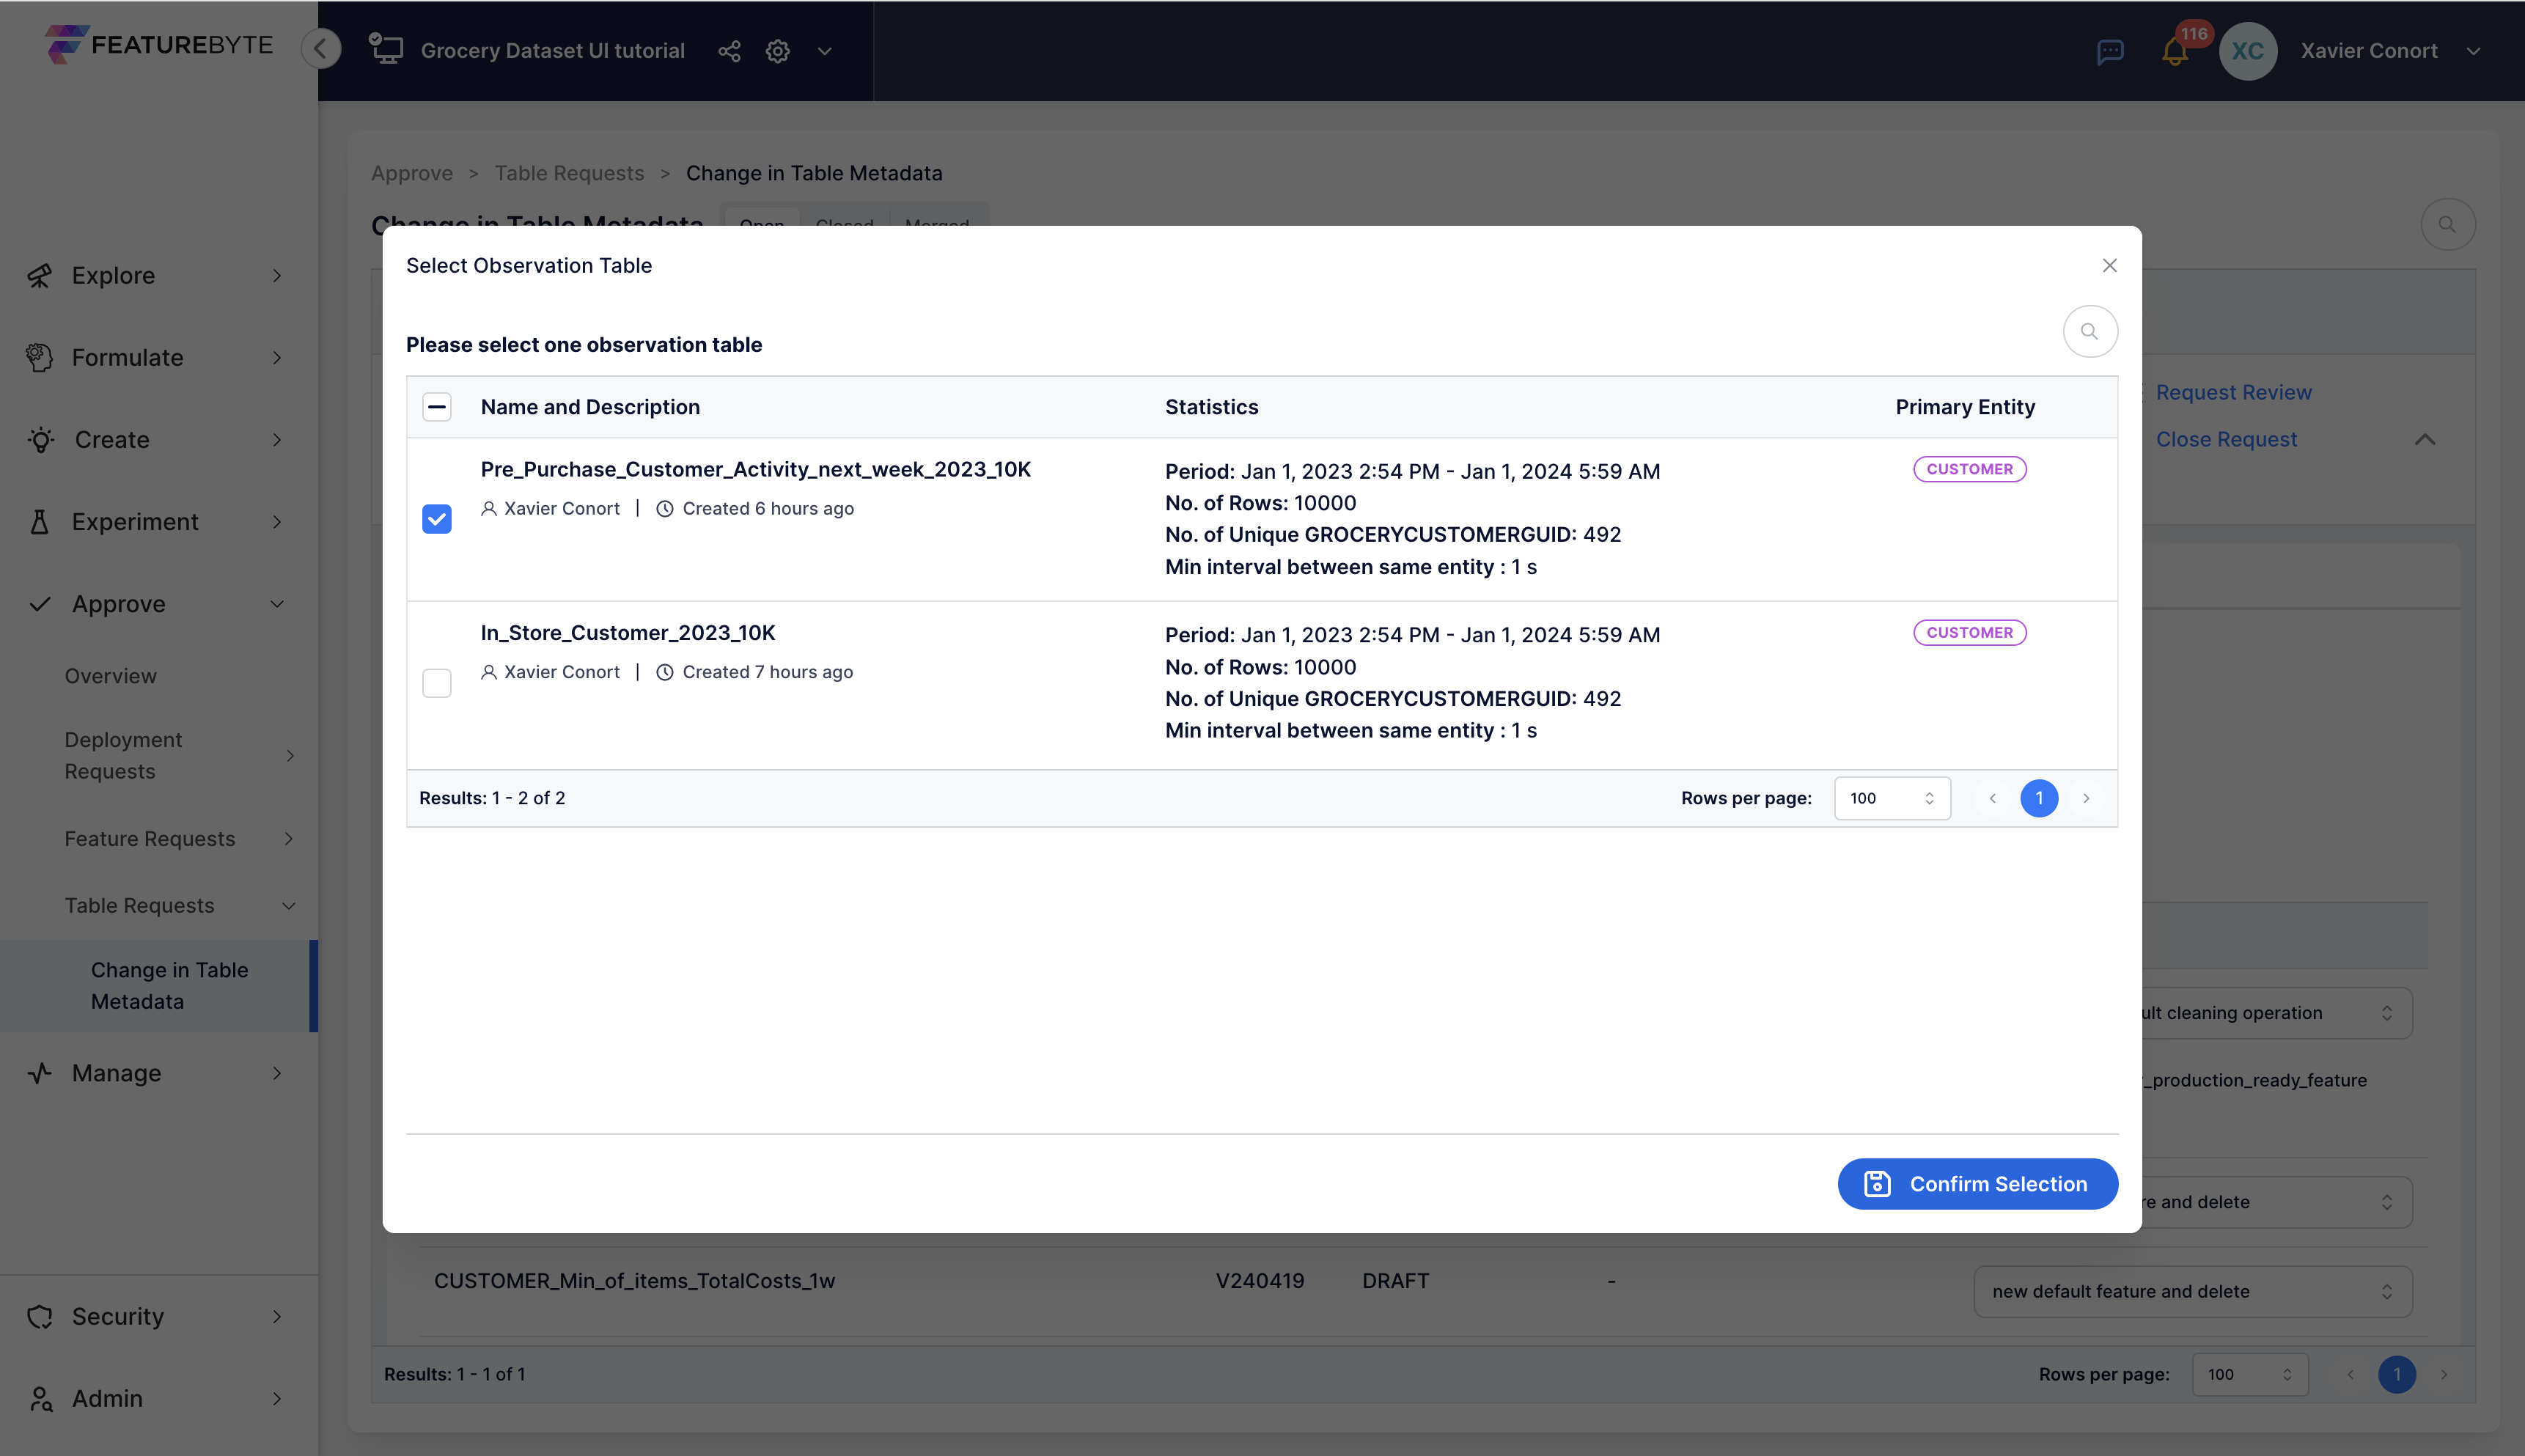
Run the impact analysis for "CUSTOMER_Entropy_of_items_TotalCosts_by_product_ProductGroup_4w".
Review Analysis for Deviation: The analysis reveals that altering the cleaning operations does not result in any significant change in the feature values. This suggests that the new cleaning operations might not be essential for this particular feature.
Completing the analysis changes the status checks to green, regardless of the outcome. The key is to ensure that you are informed about the implications of both the original and the updated cleaning operations.
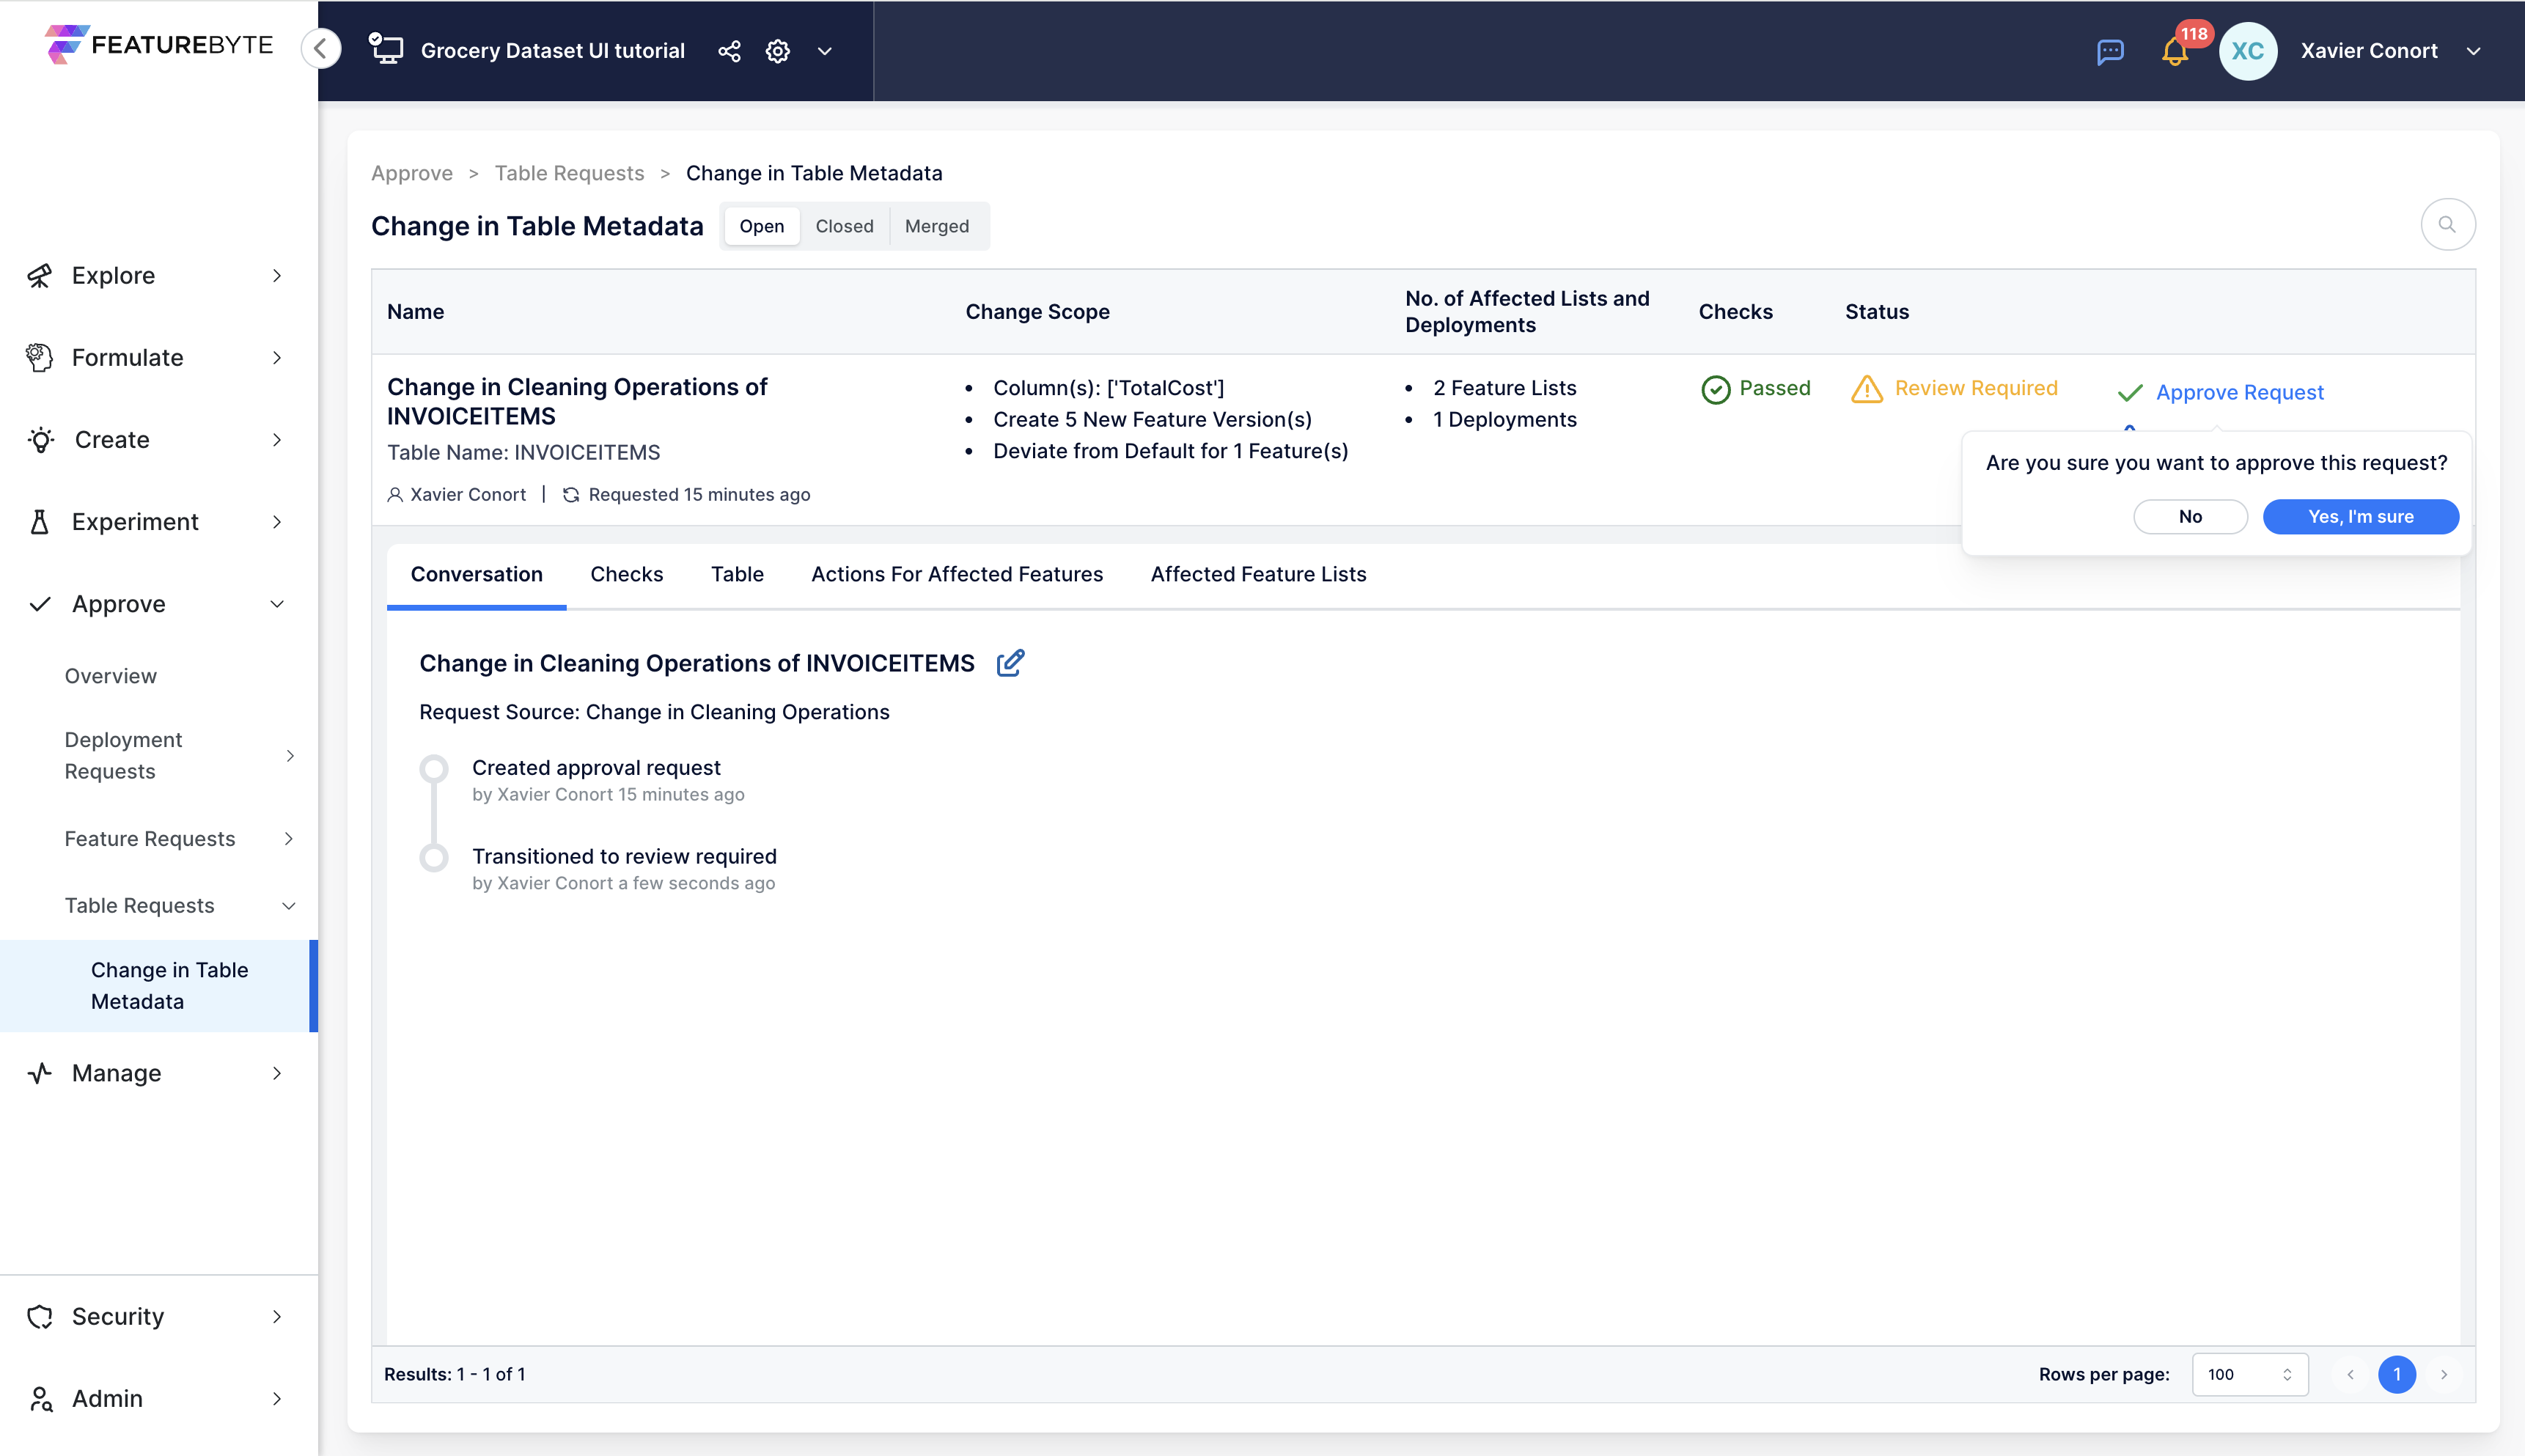
Request Review: Once the request is ready for review, request it.
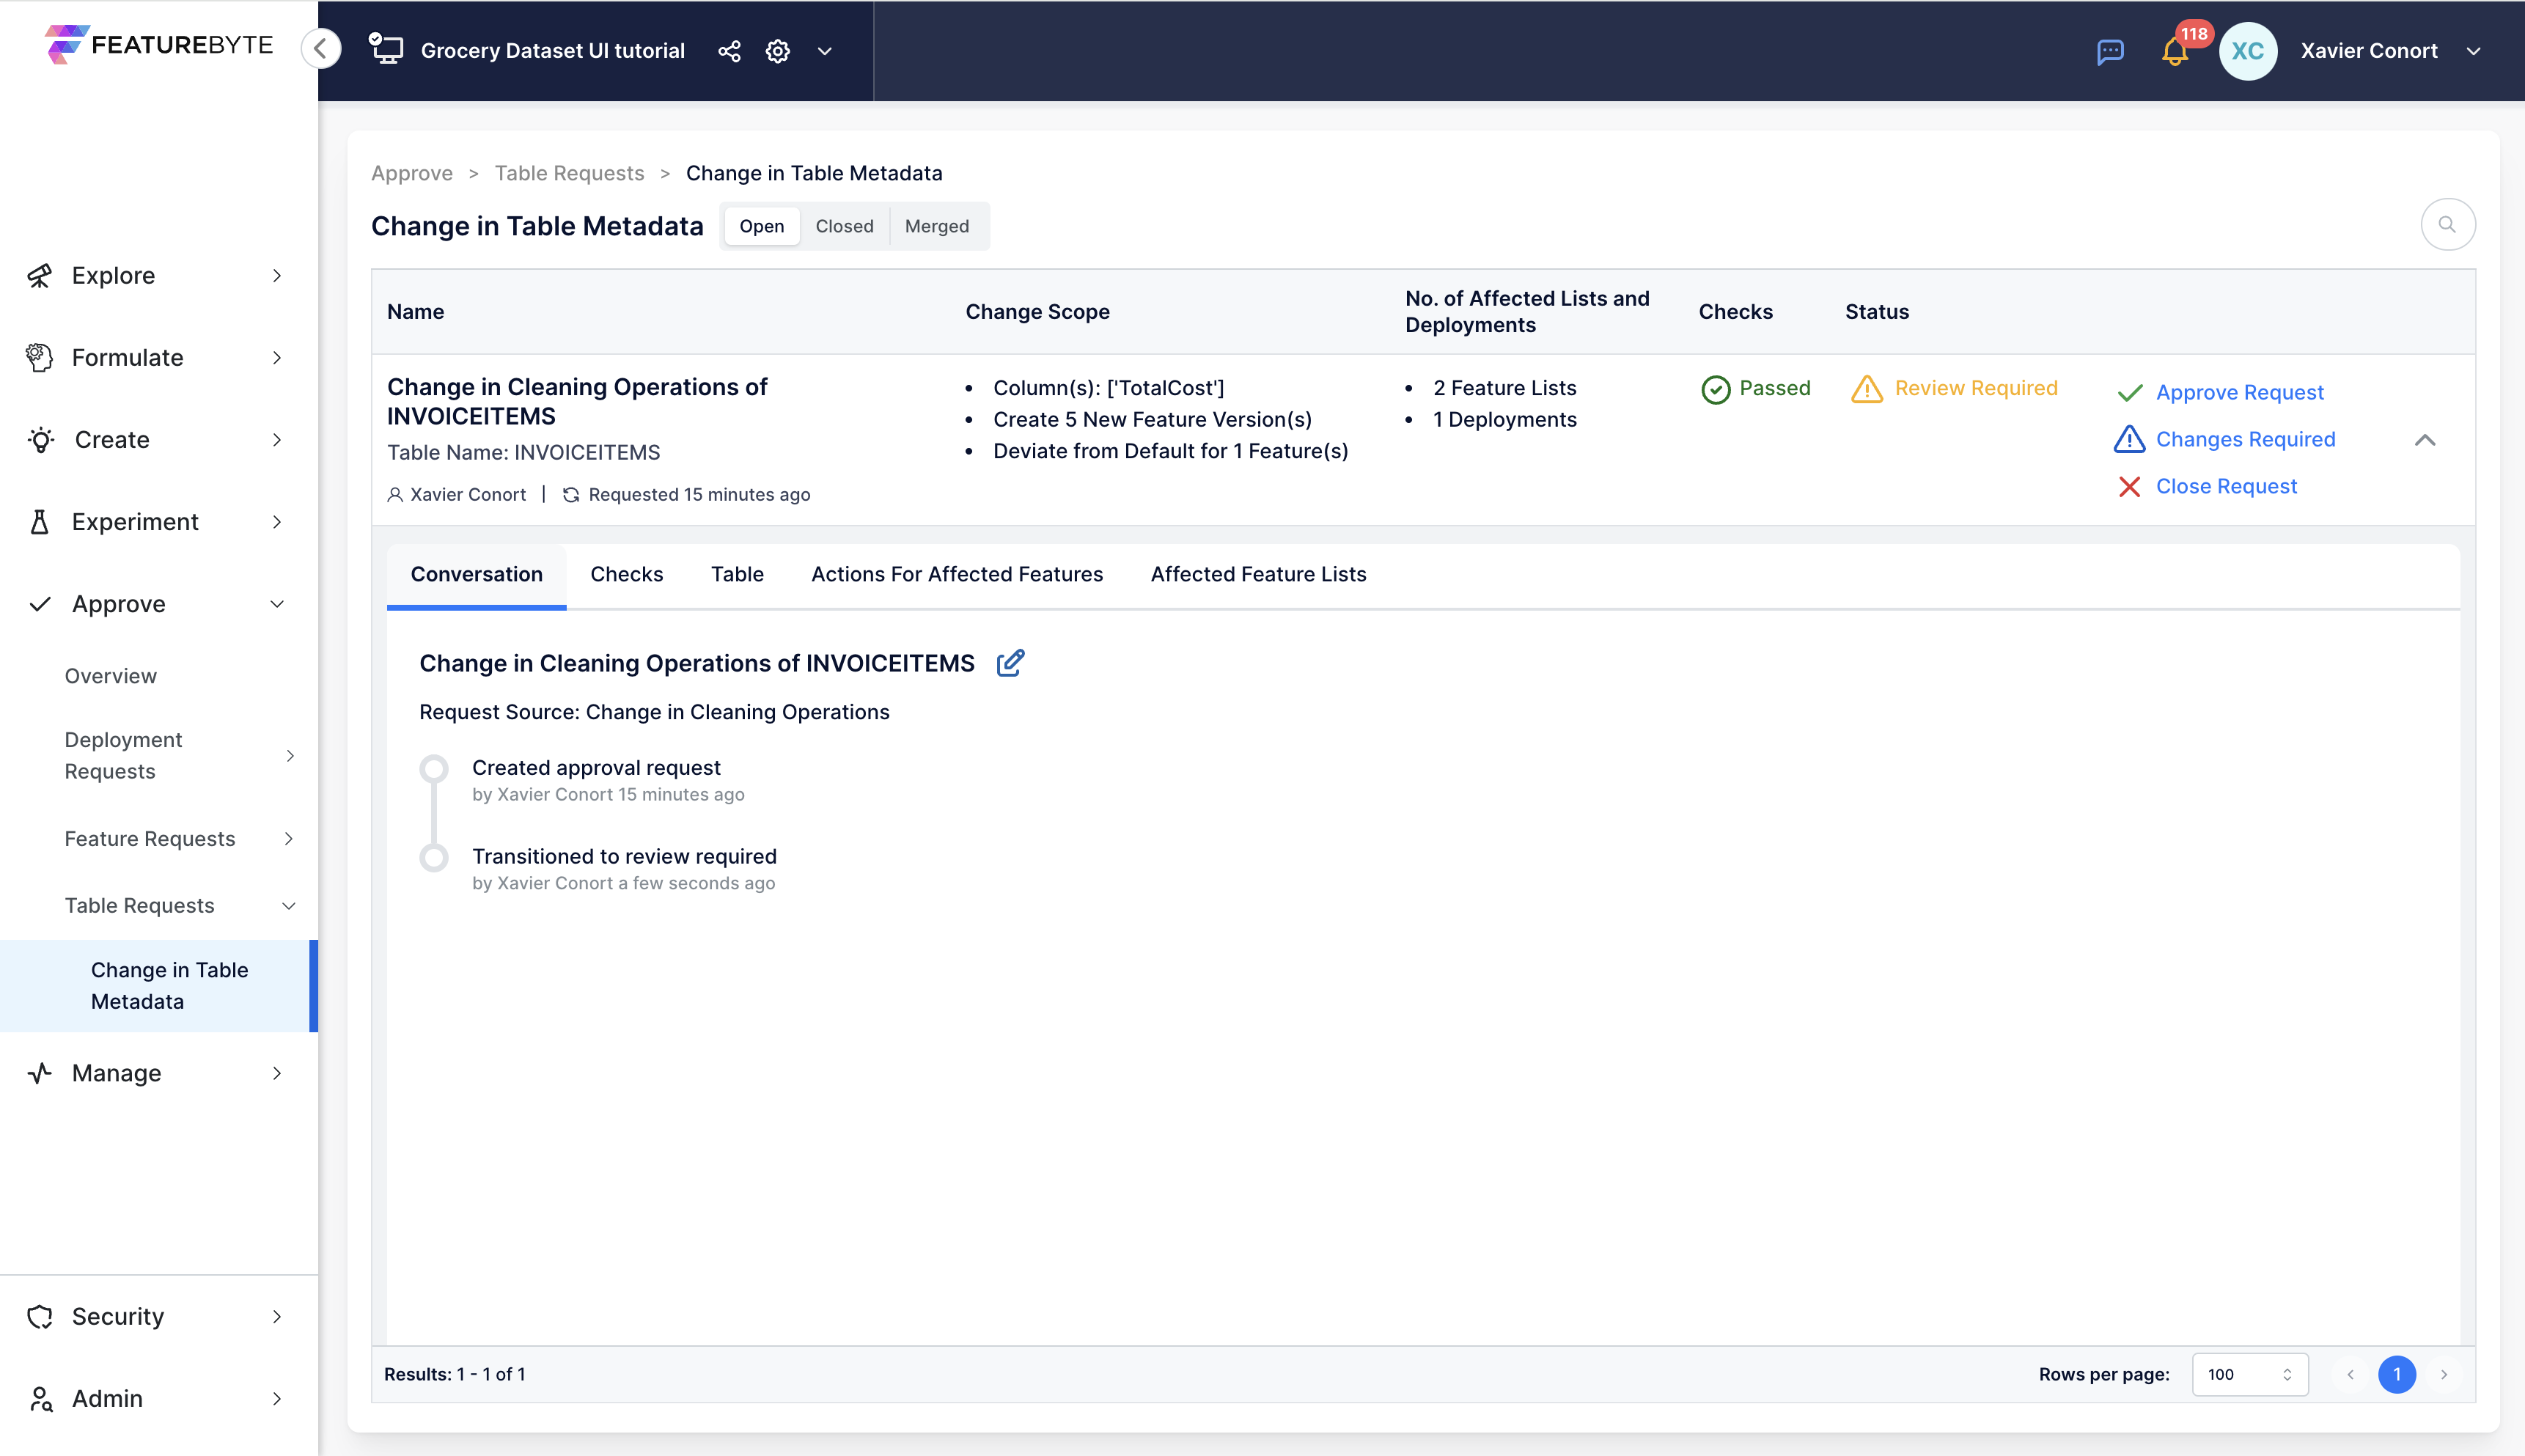
Approve the request.
Merge the request.
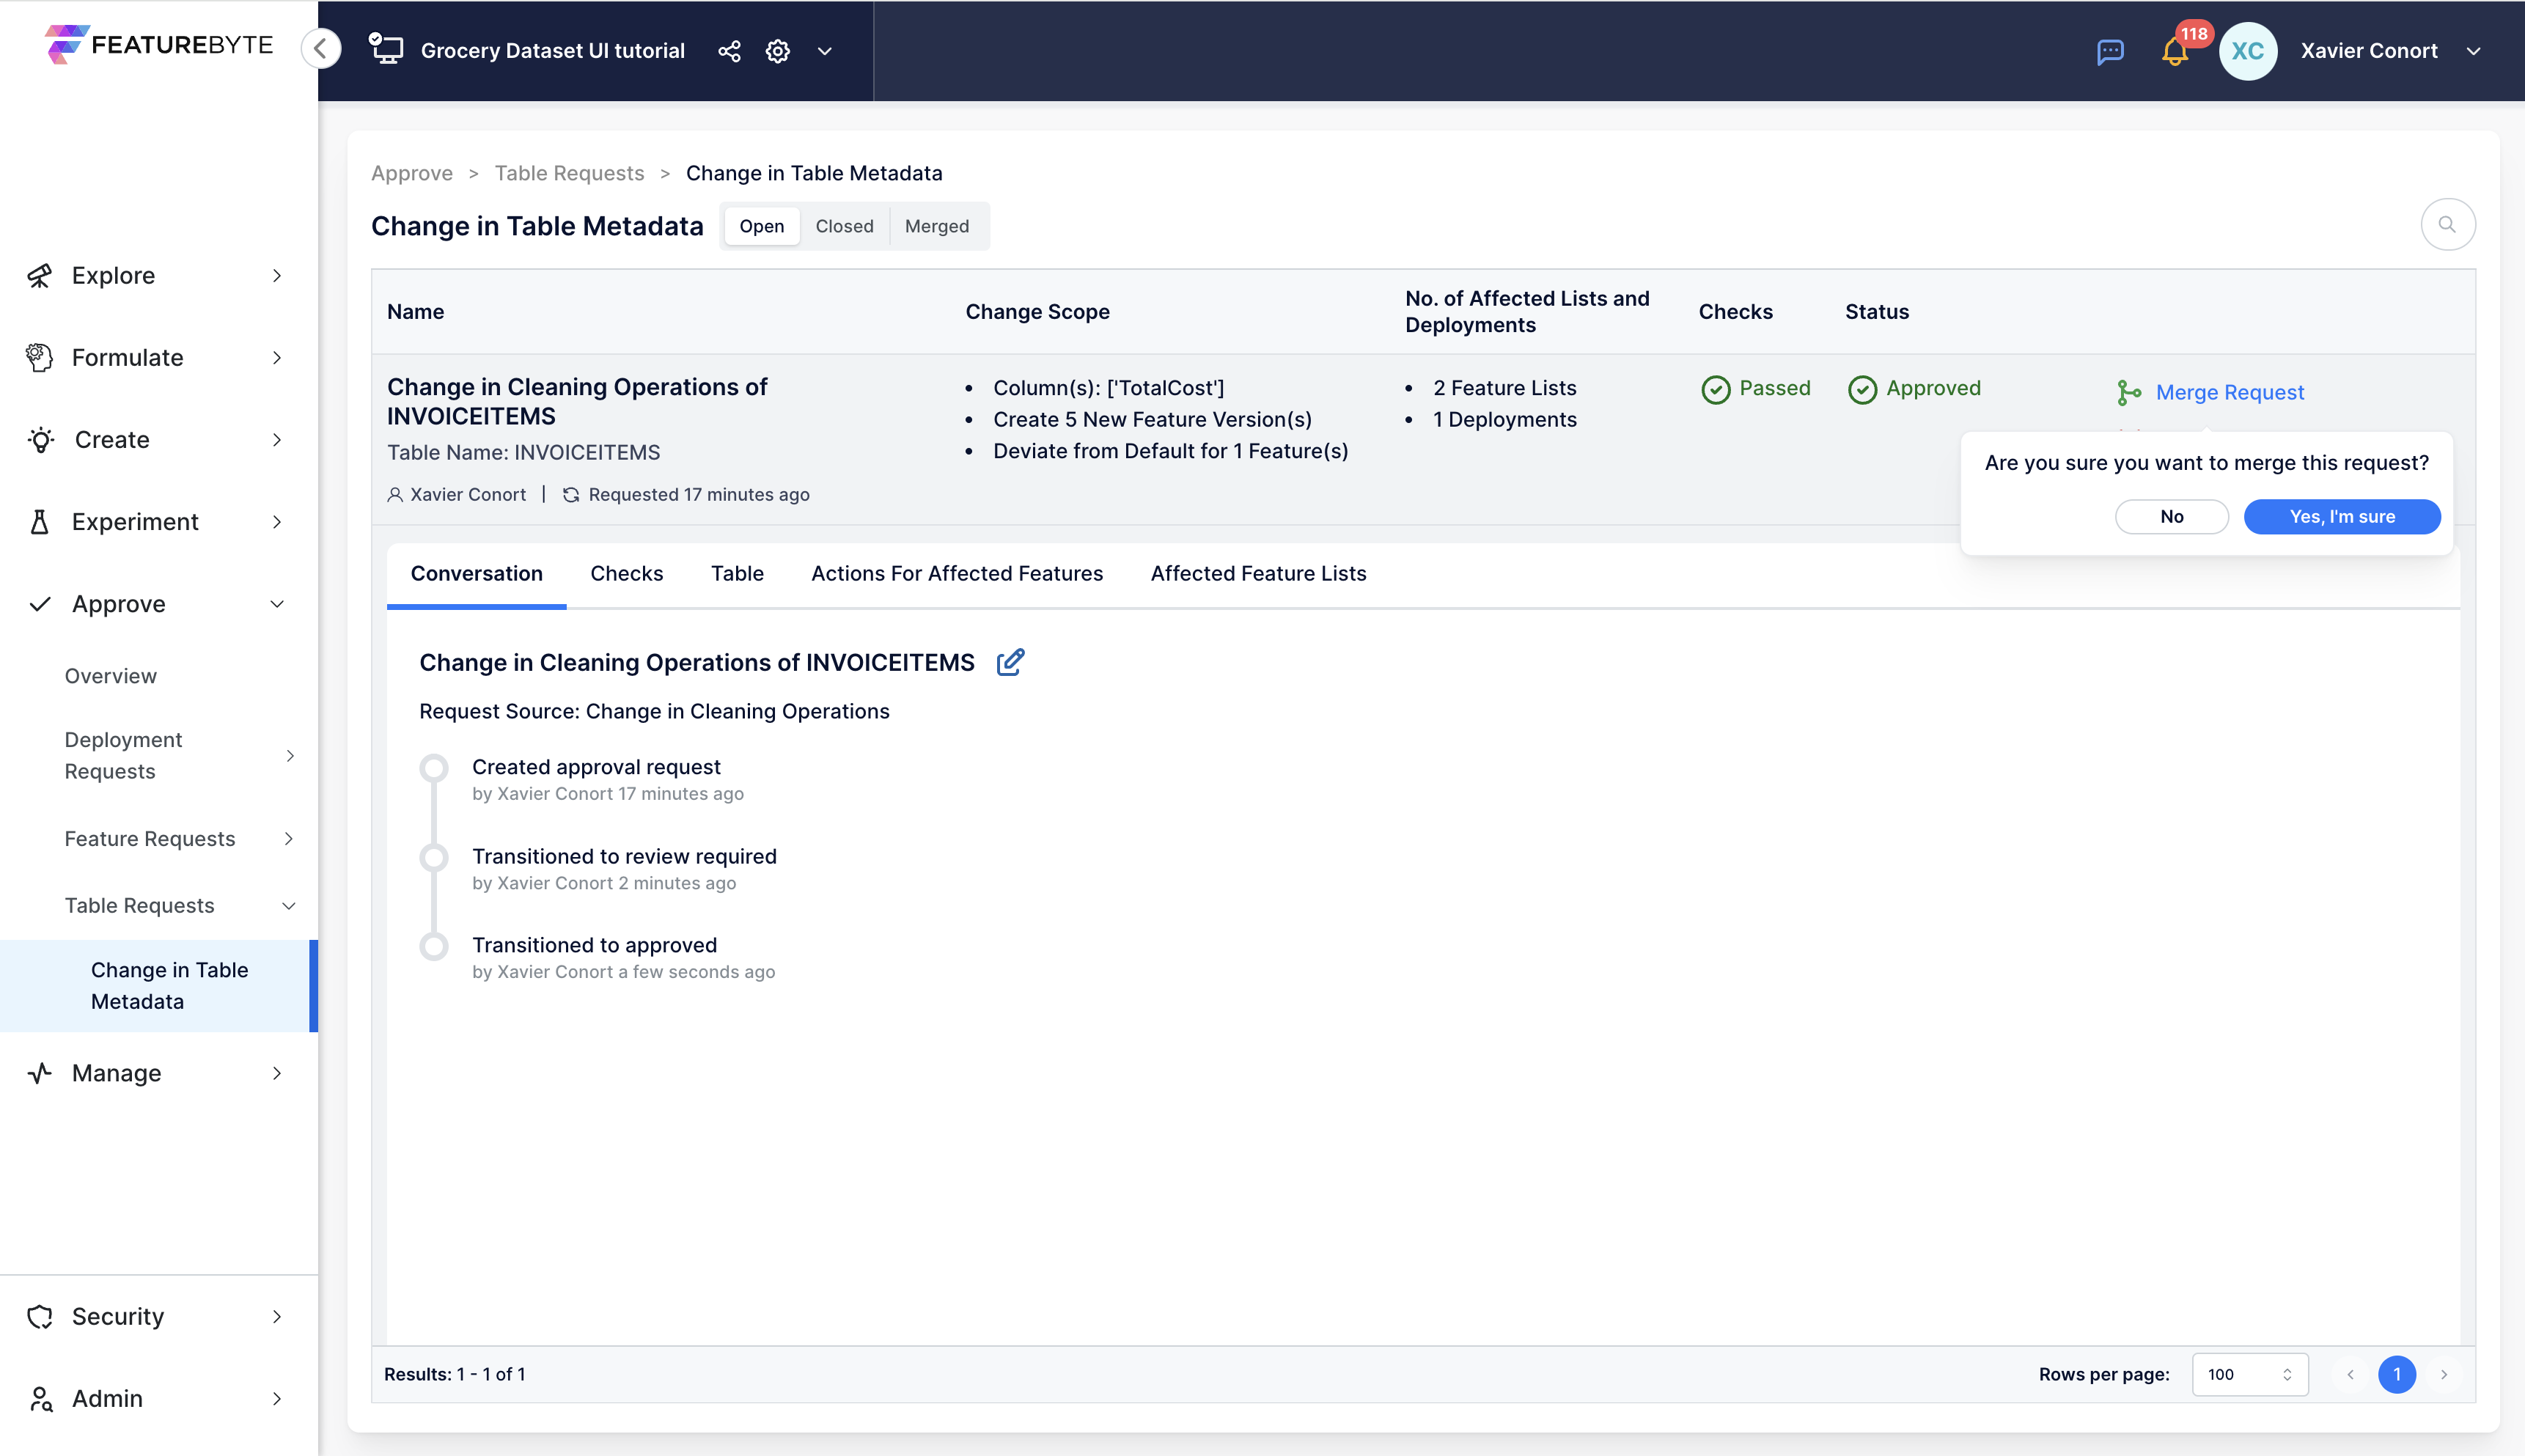
View Merged Requests: Merged requests can be viewed under the 'Merged' tab in the request catalog.

Post-Merge Actions: Following the merge, address any new requests that arose as a result of the merging process.
Within the 'Approve' section overview, two new requests have emerged:
- Upgrade Feature Version: 1 request to mark newly updated feature version as ready for production.
- Deviation from Default Cleaning Operations: 1 request to implement a deviation from the default cleaning operations.

Review Upgrade of Feature Version: Click 'New Production-Ready Features'
Verify Request Source: In the request, go to the 'Request Source' tab to confirm that the request is associated with the recent changes in table metadata.
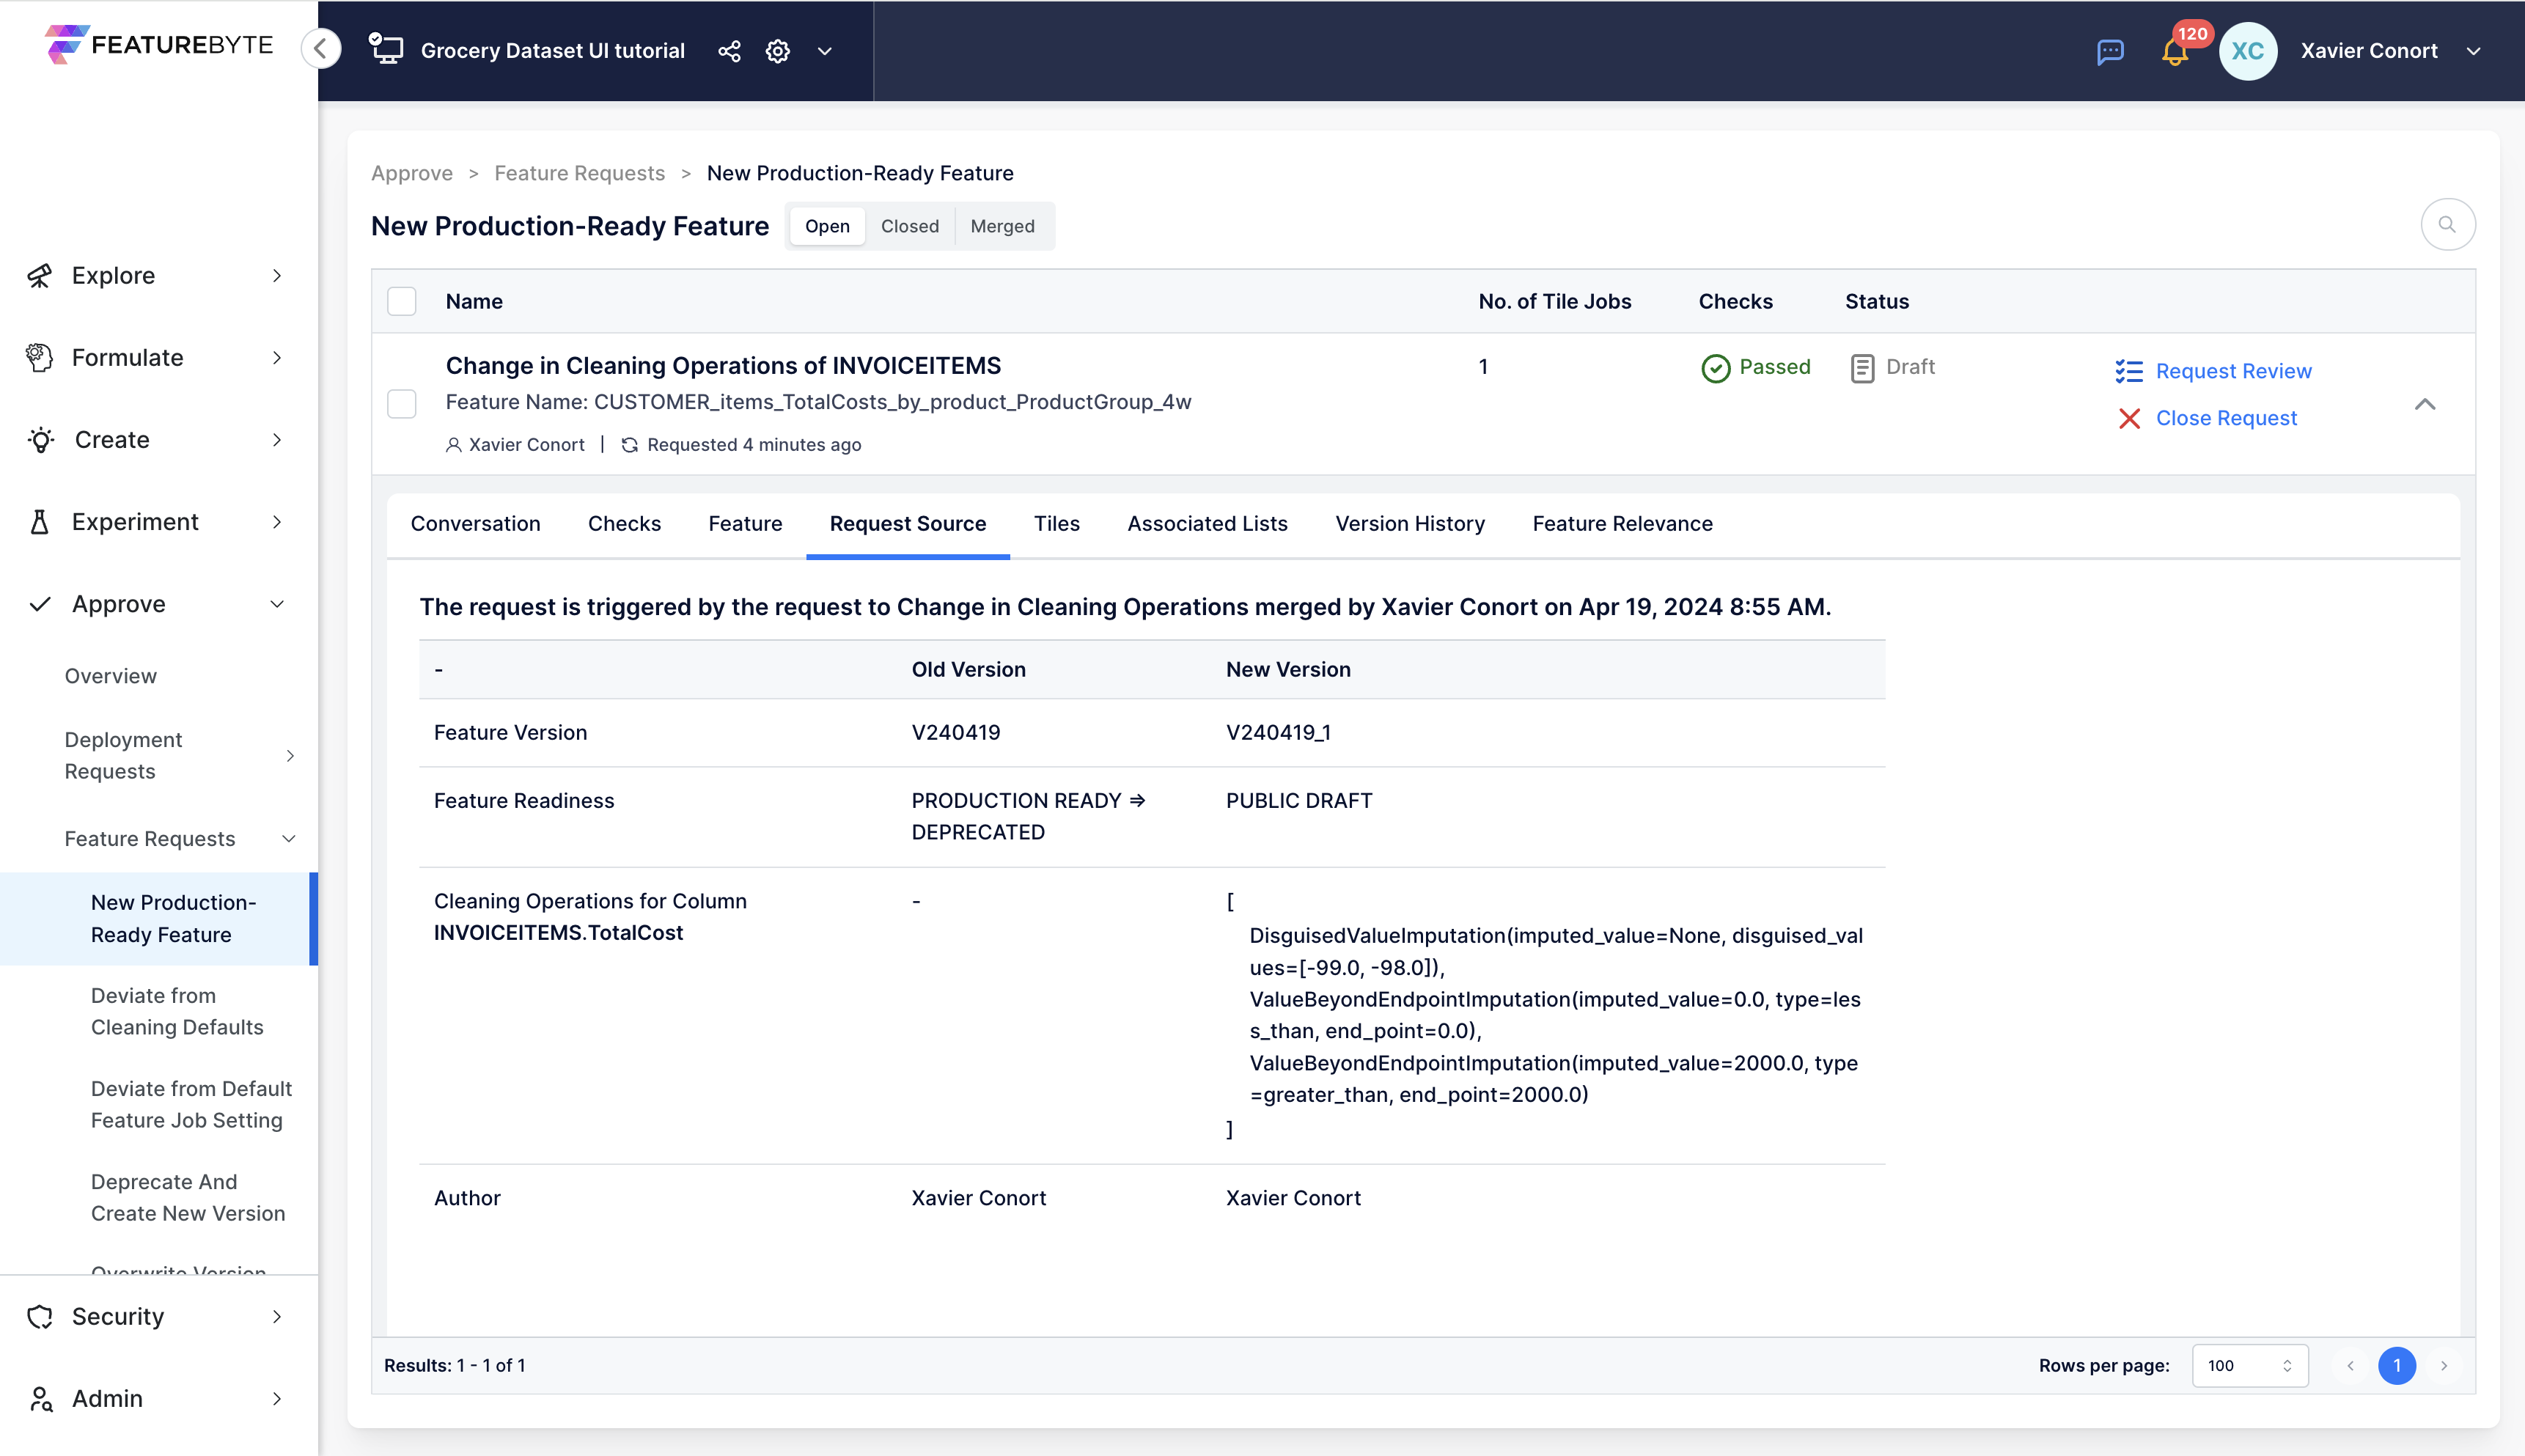
Complete Request Process: Proceed to request a review, then approve and finally merge the request.
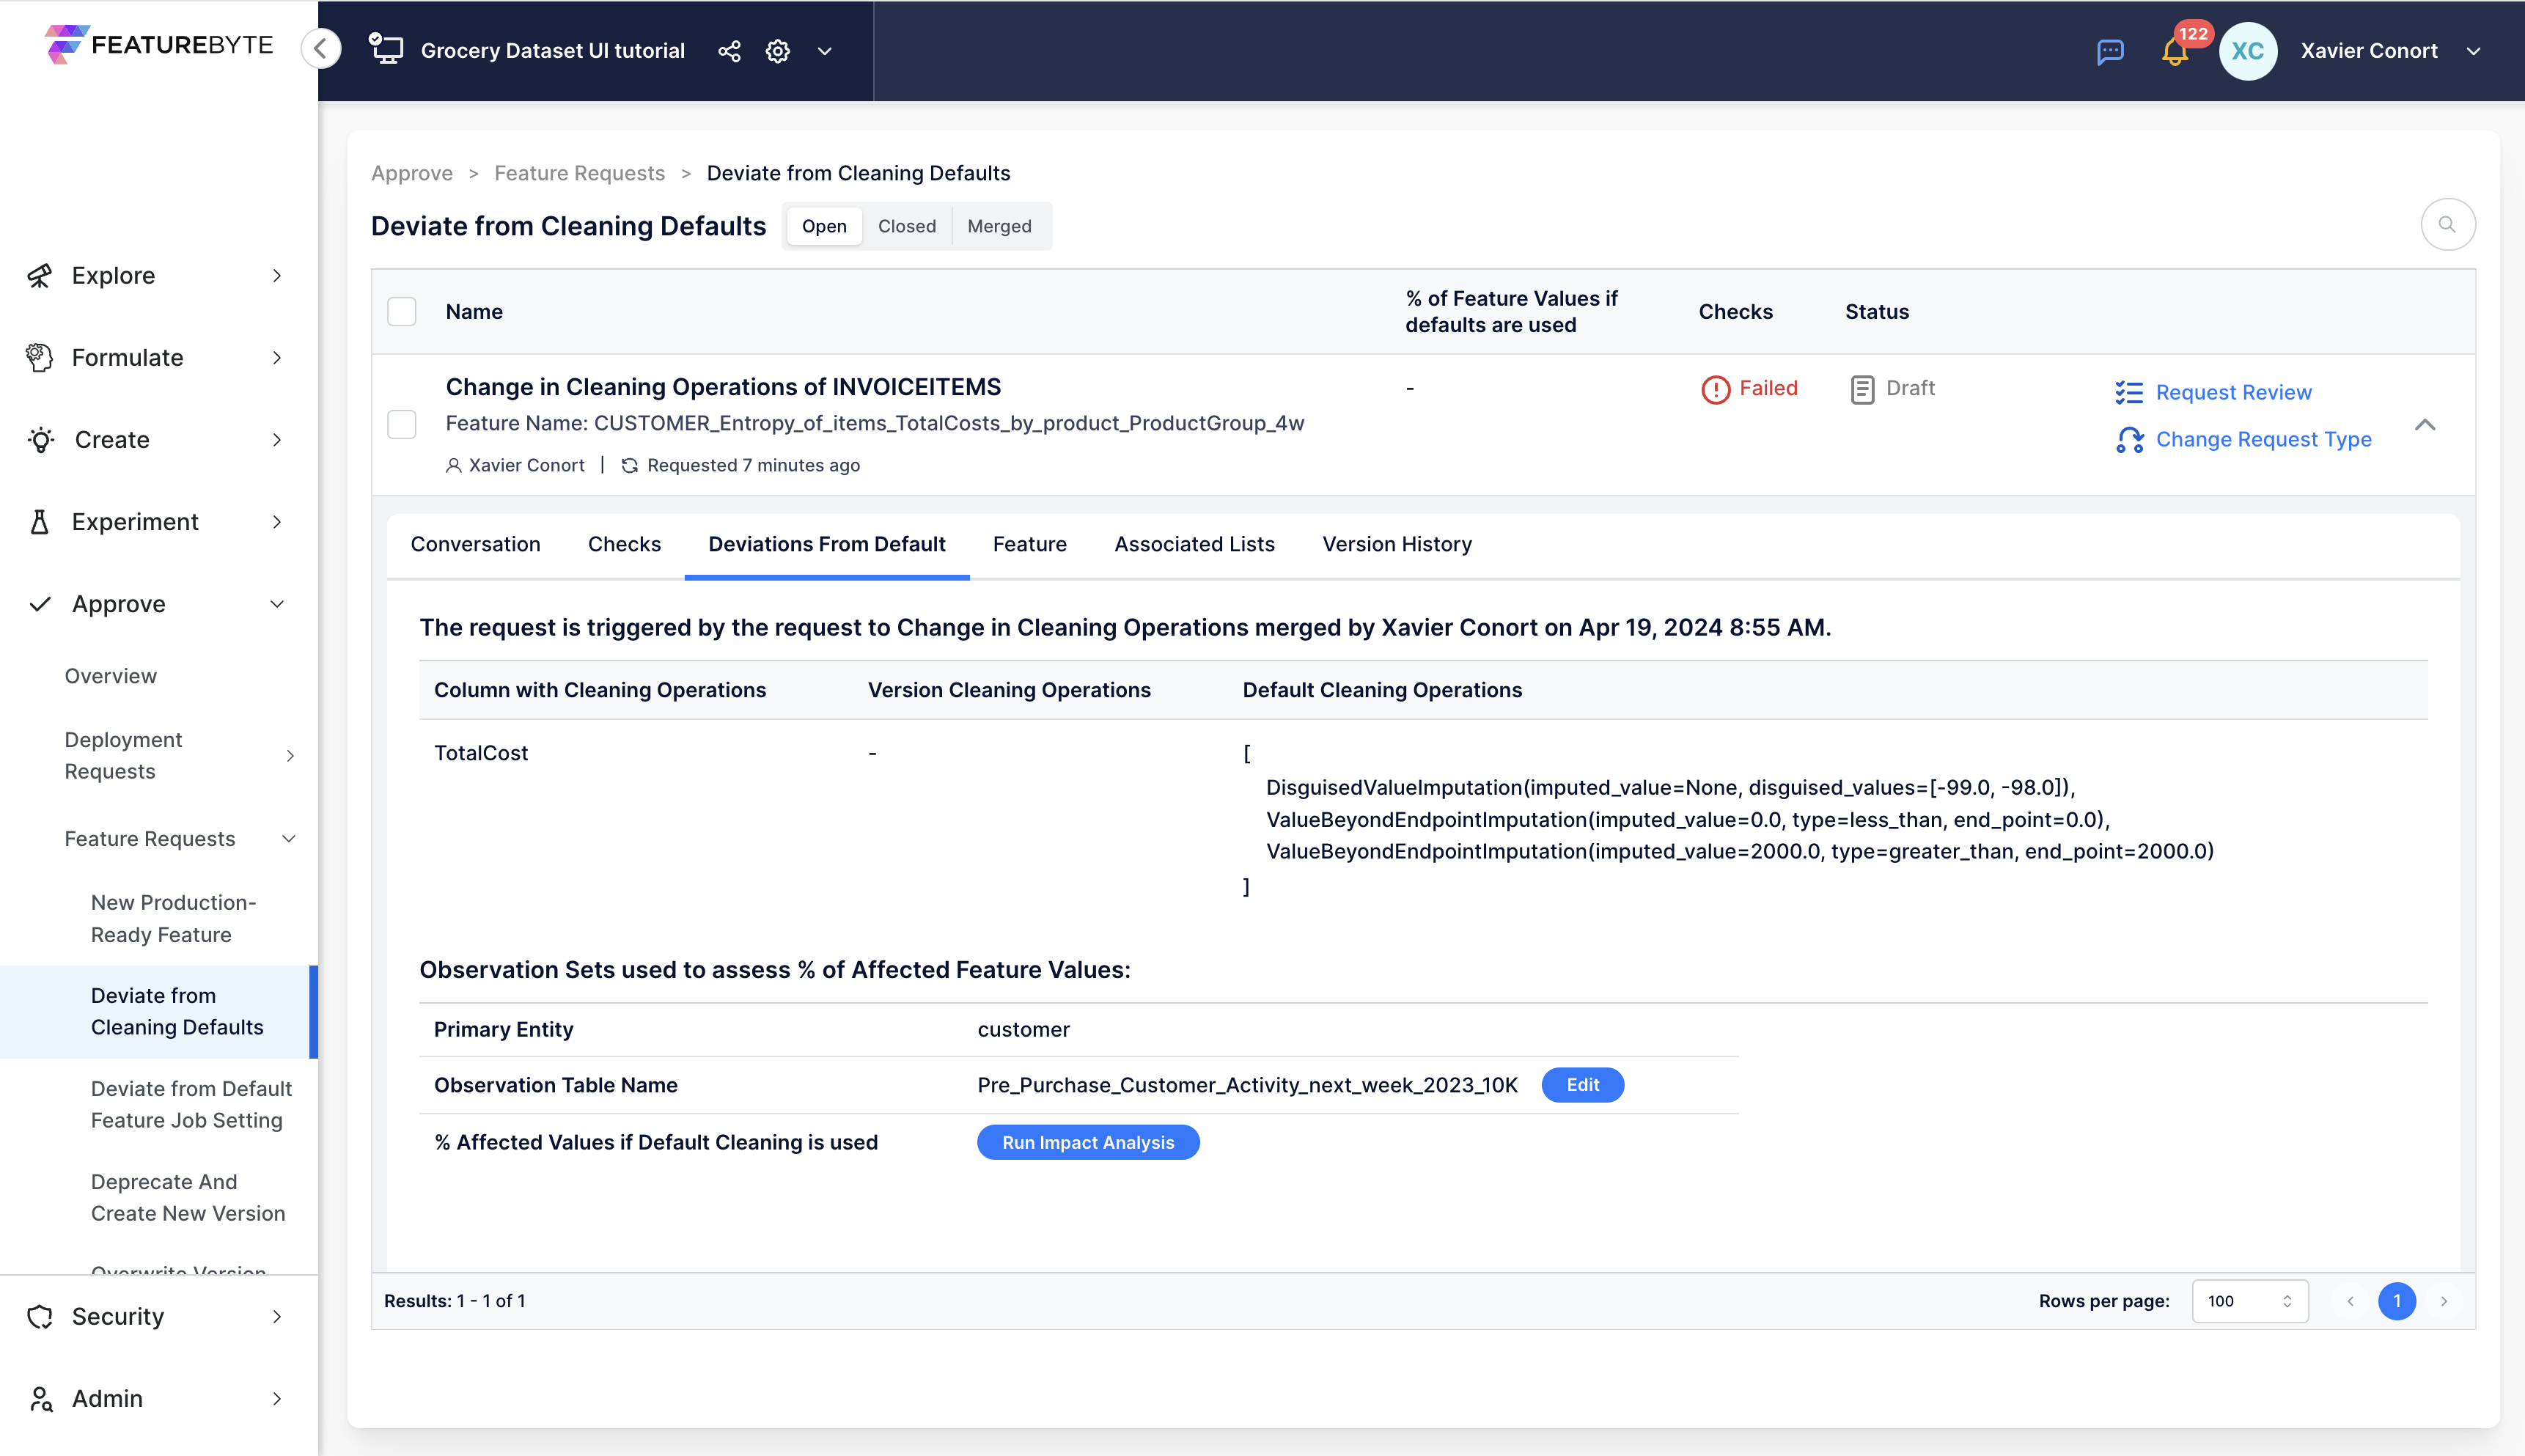
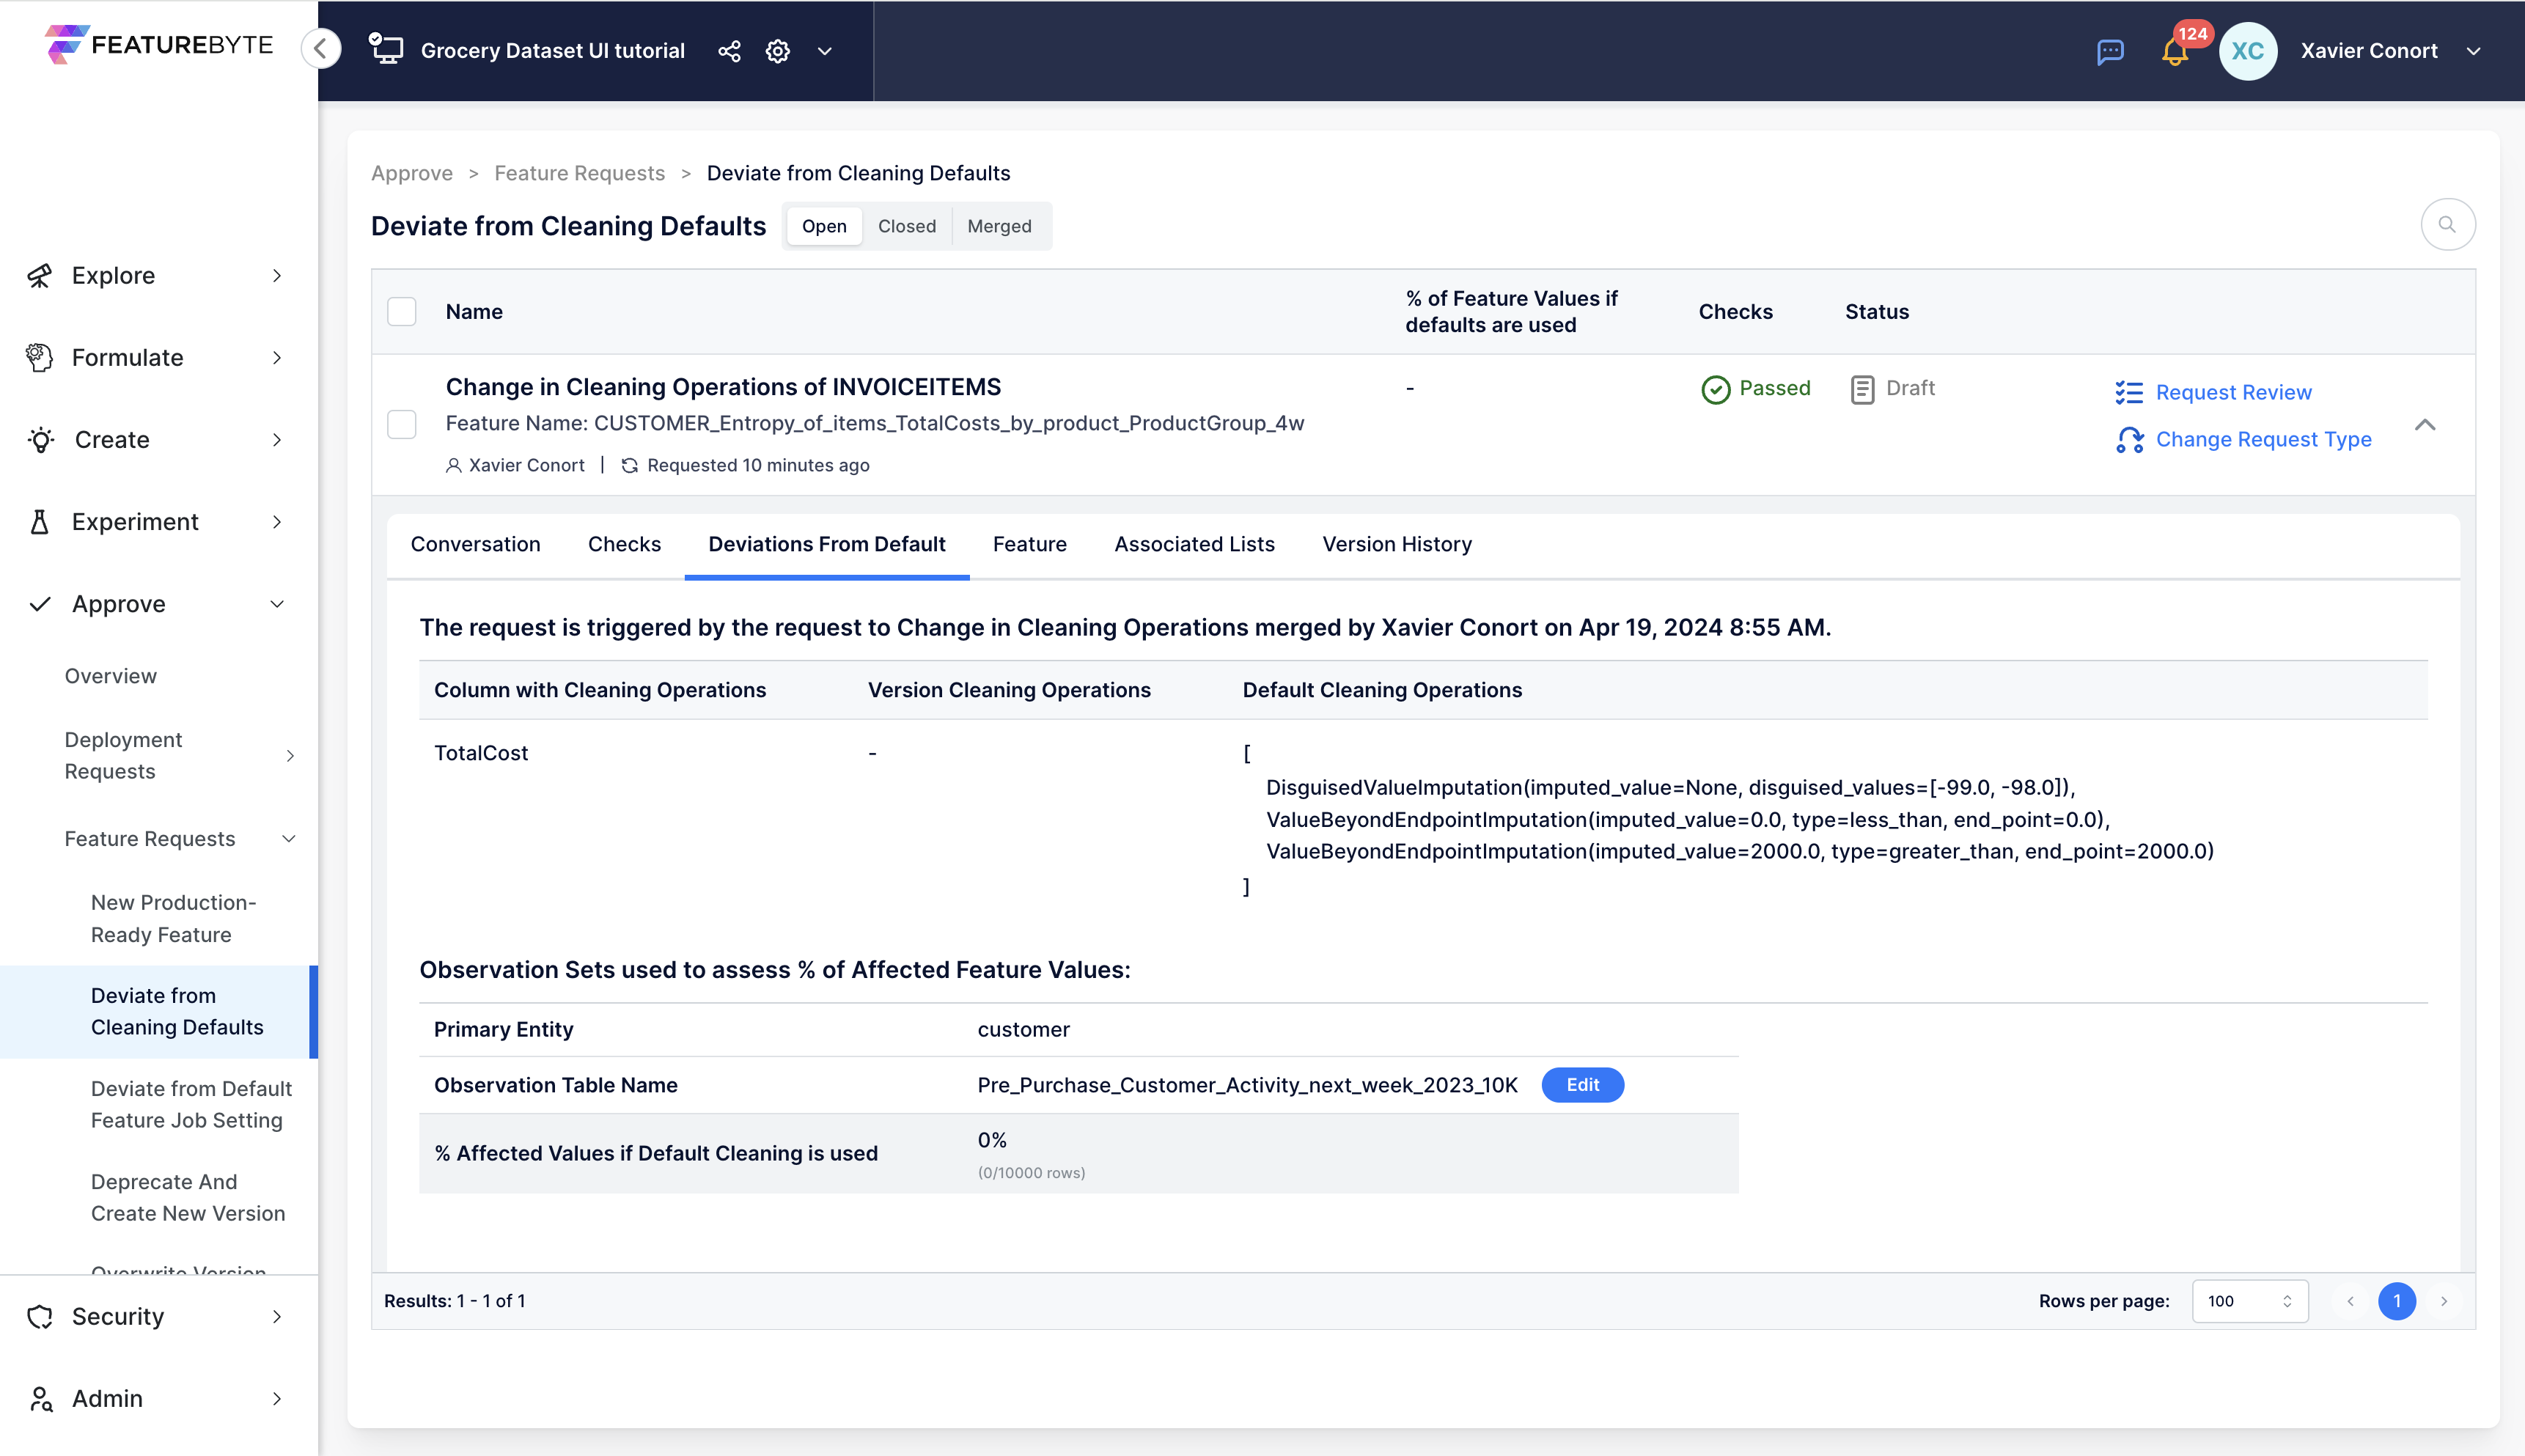
Review Deviation from Default: Navigate back to the overview and select 'Deviate from Cleaning Operations' to handle this specific request.
In the request, go to the 'Deviations From Default' tab to view more information.

Provide an observation table as required and run the necessary impact analysis to assess the effects of the deviation.
Finalize Request: Once the analysis is complete, proceed to request review, approve, and merge the request.
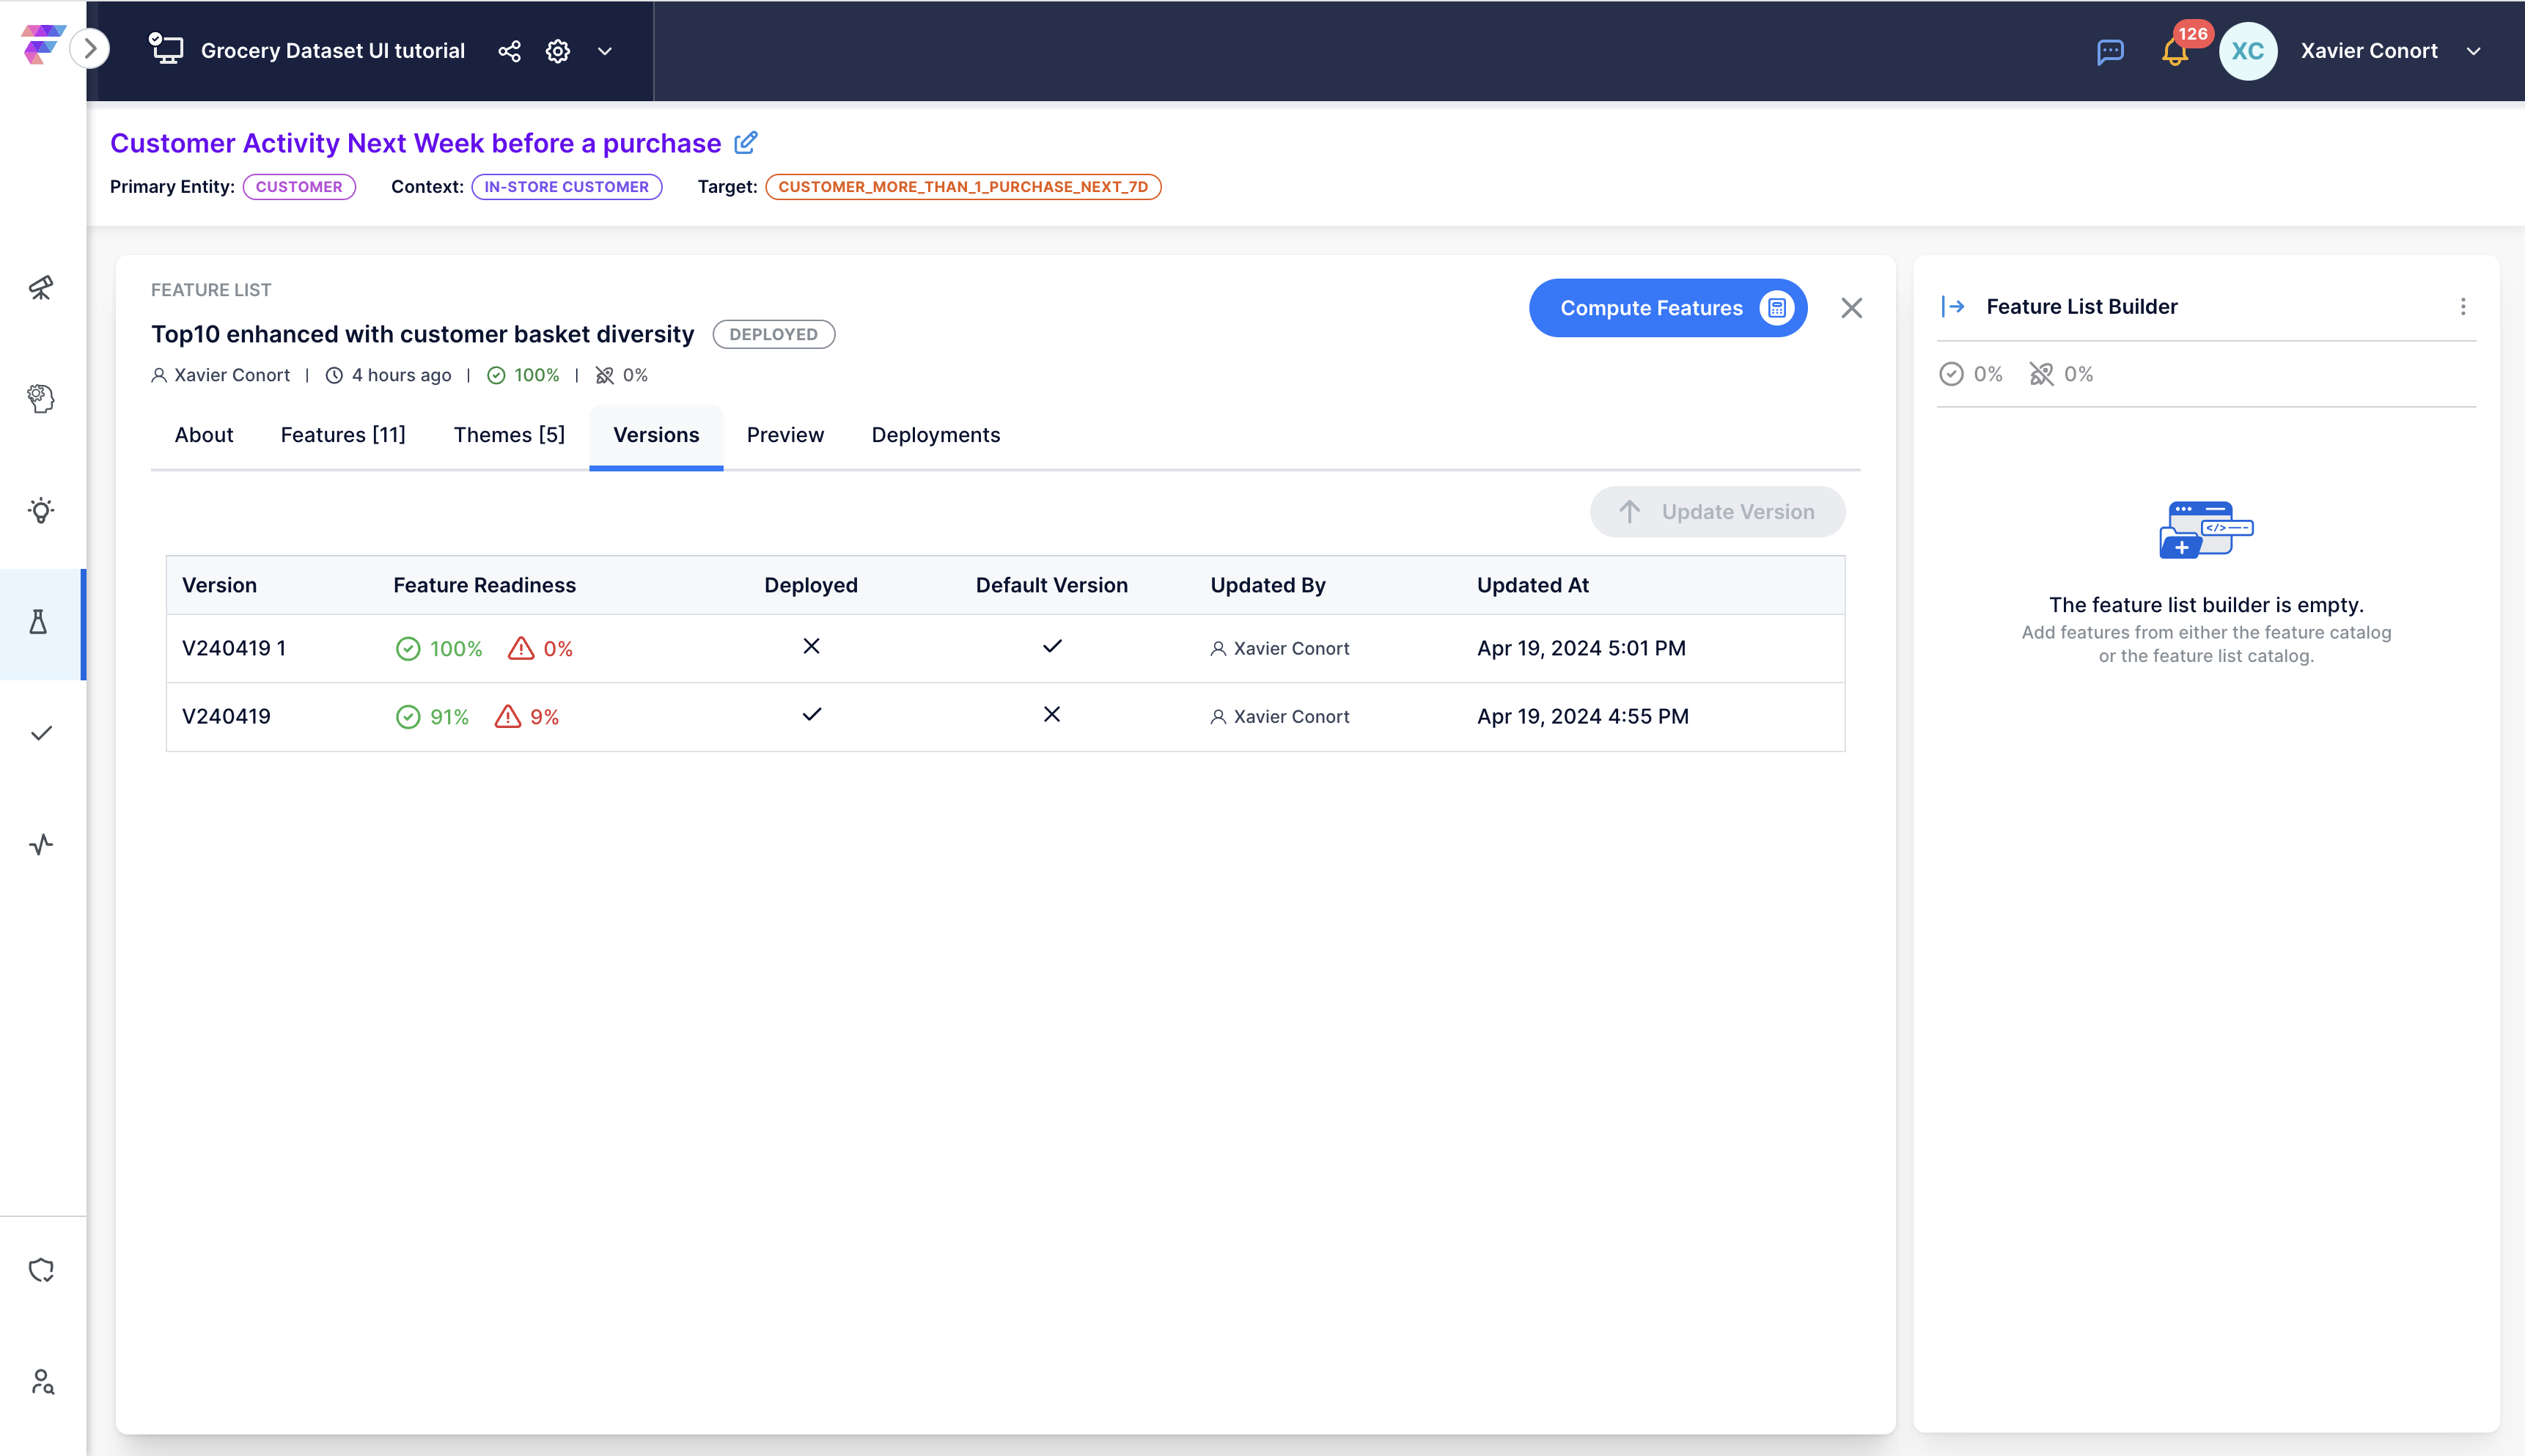
Check Feature List Versions: In the Feature List Catalog, verify the creation of new default versions for affected feature lists.
Check Impact on Deployments: Finally, in the Deployment Catalog, check if the current deployment uses deprecated feature versions and plan for new deployments with updated versions.
Step 3: Update Feature Job Settings
Navigate to the Table Catalog.
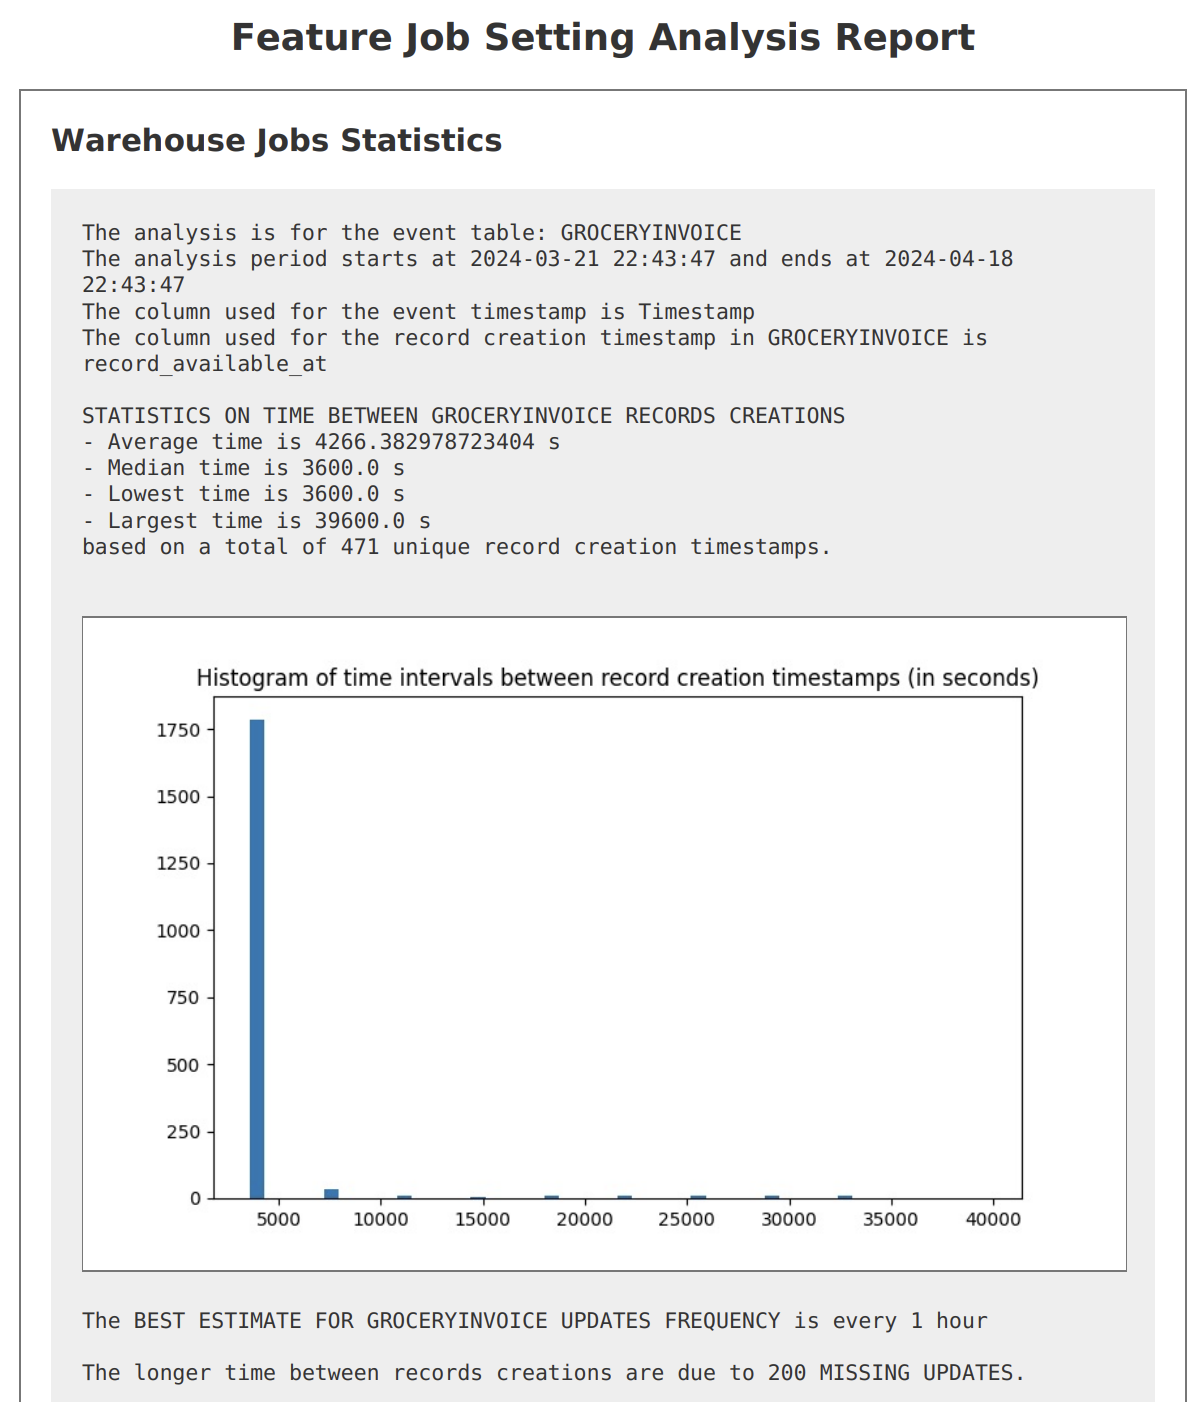
Run Data Availability Analysis:
Select "GROCERYINVOICE" table, go to the 'About' tab, and scroll down to the bottom.
Run new Analysis.

Review Recommendations: The recommendations for the feature job settings of features using this table remain unchanged.

Download Report: You have the option to download the analysis report.
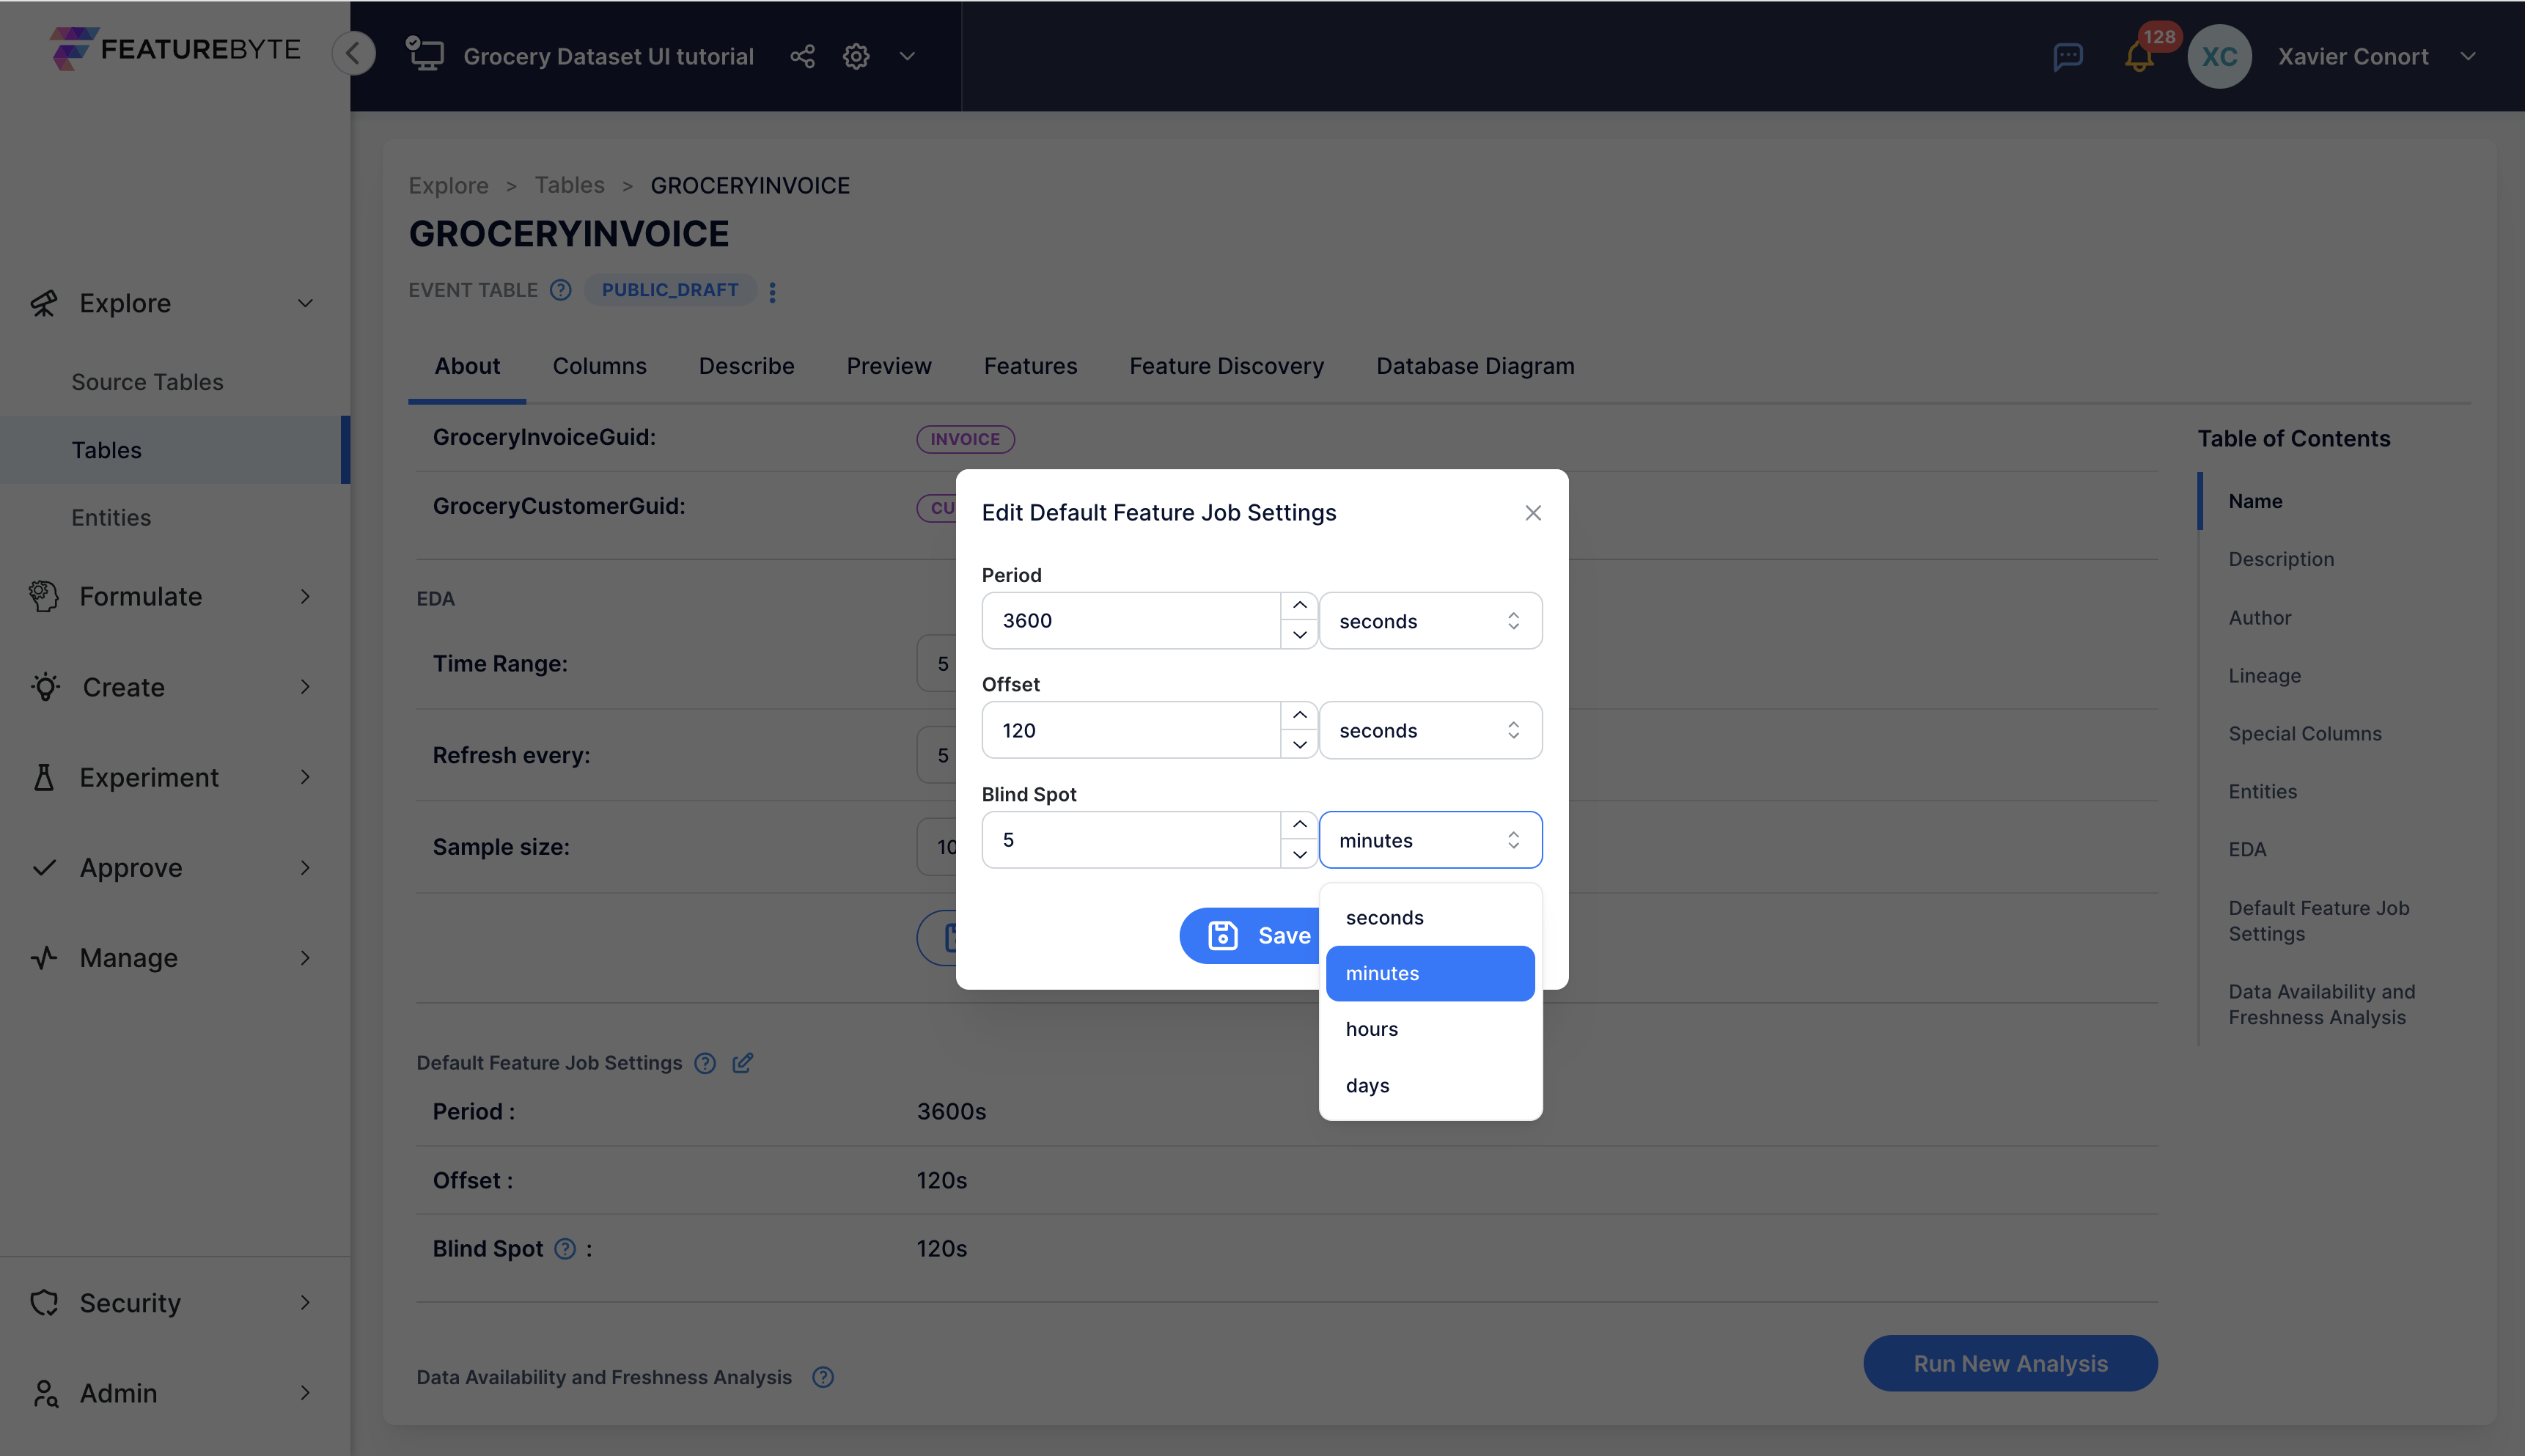
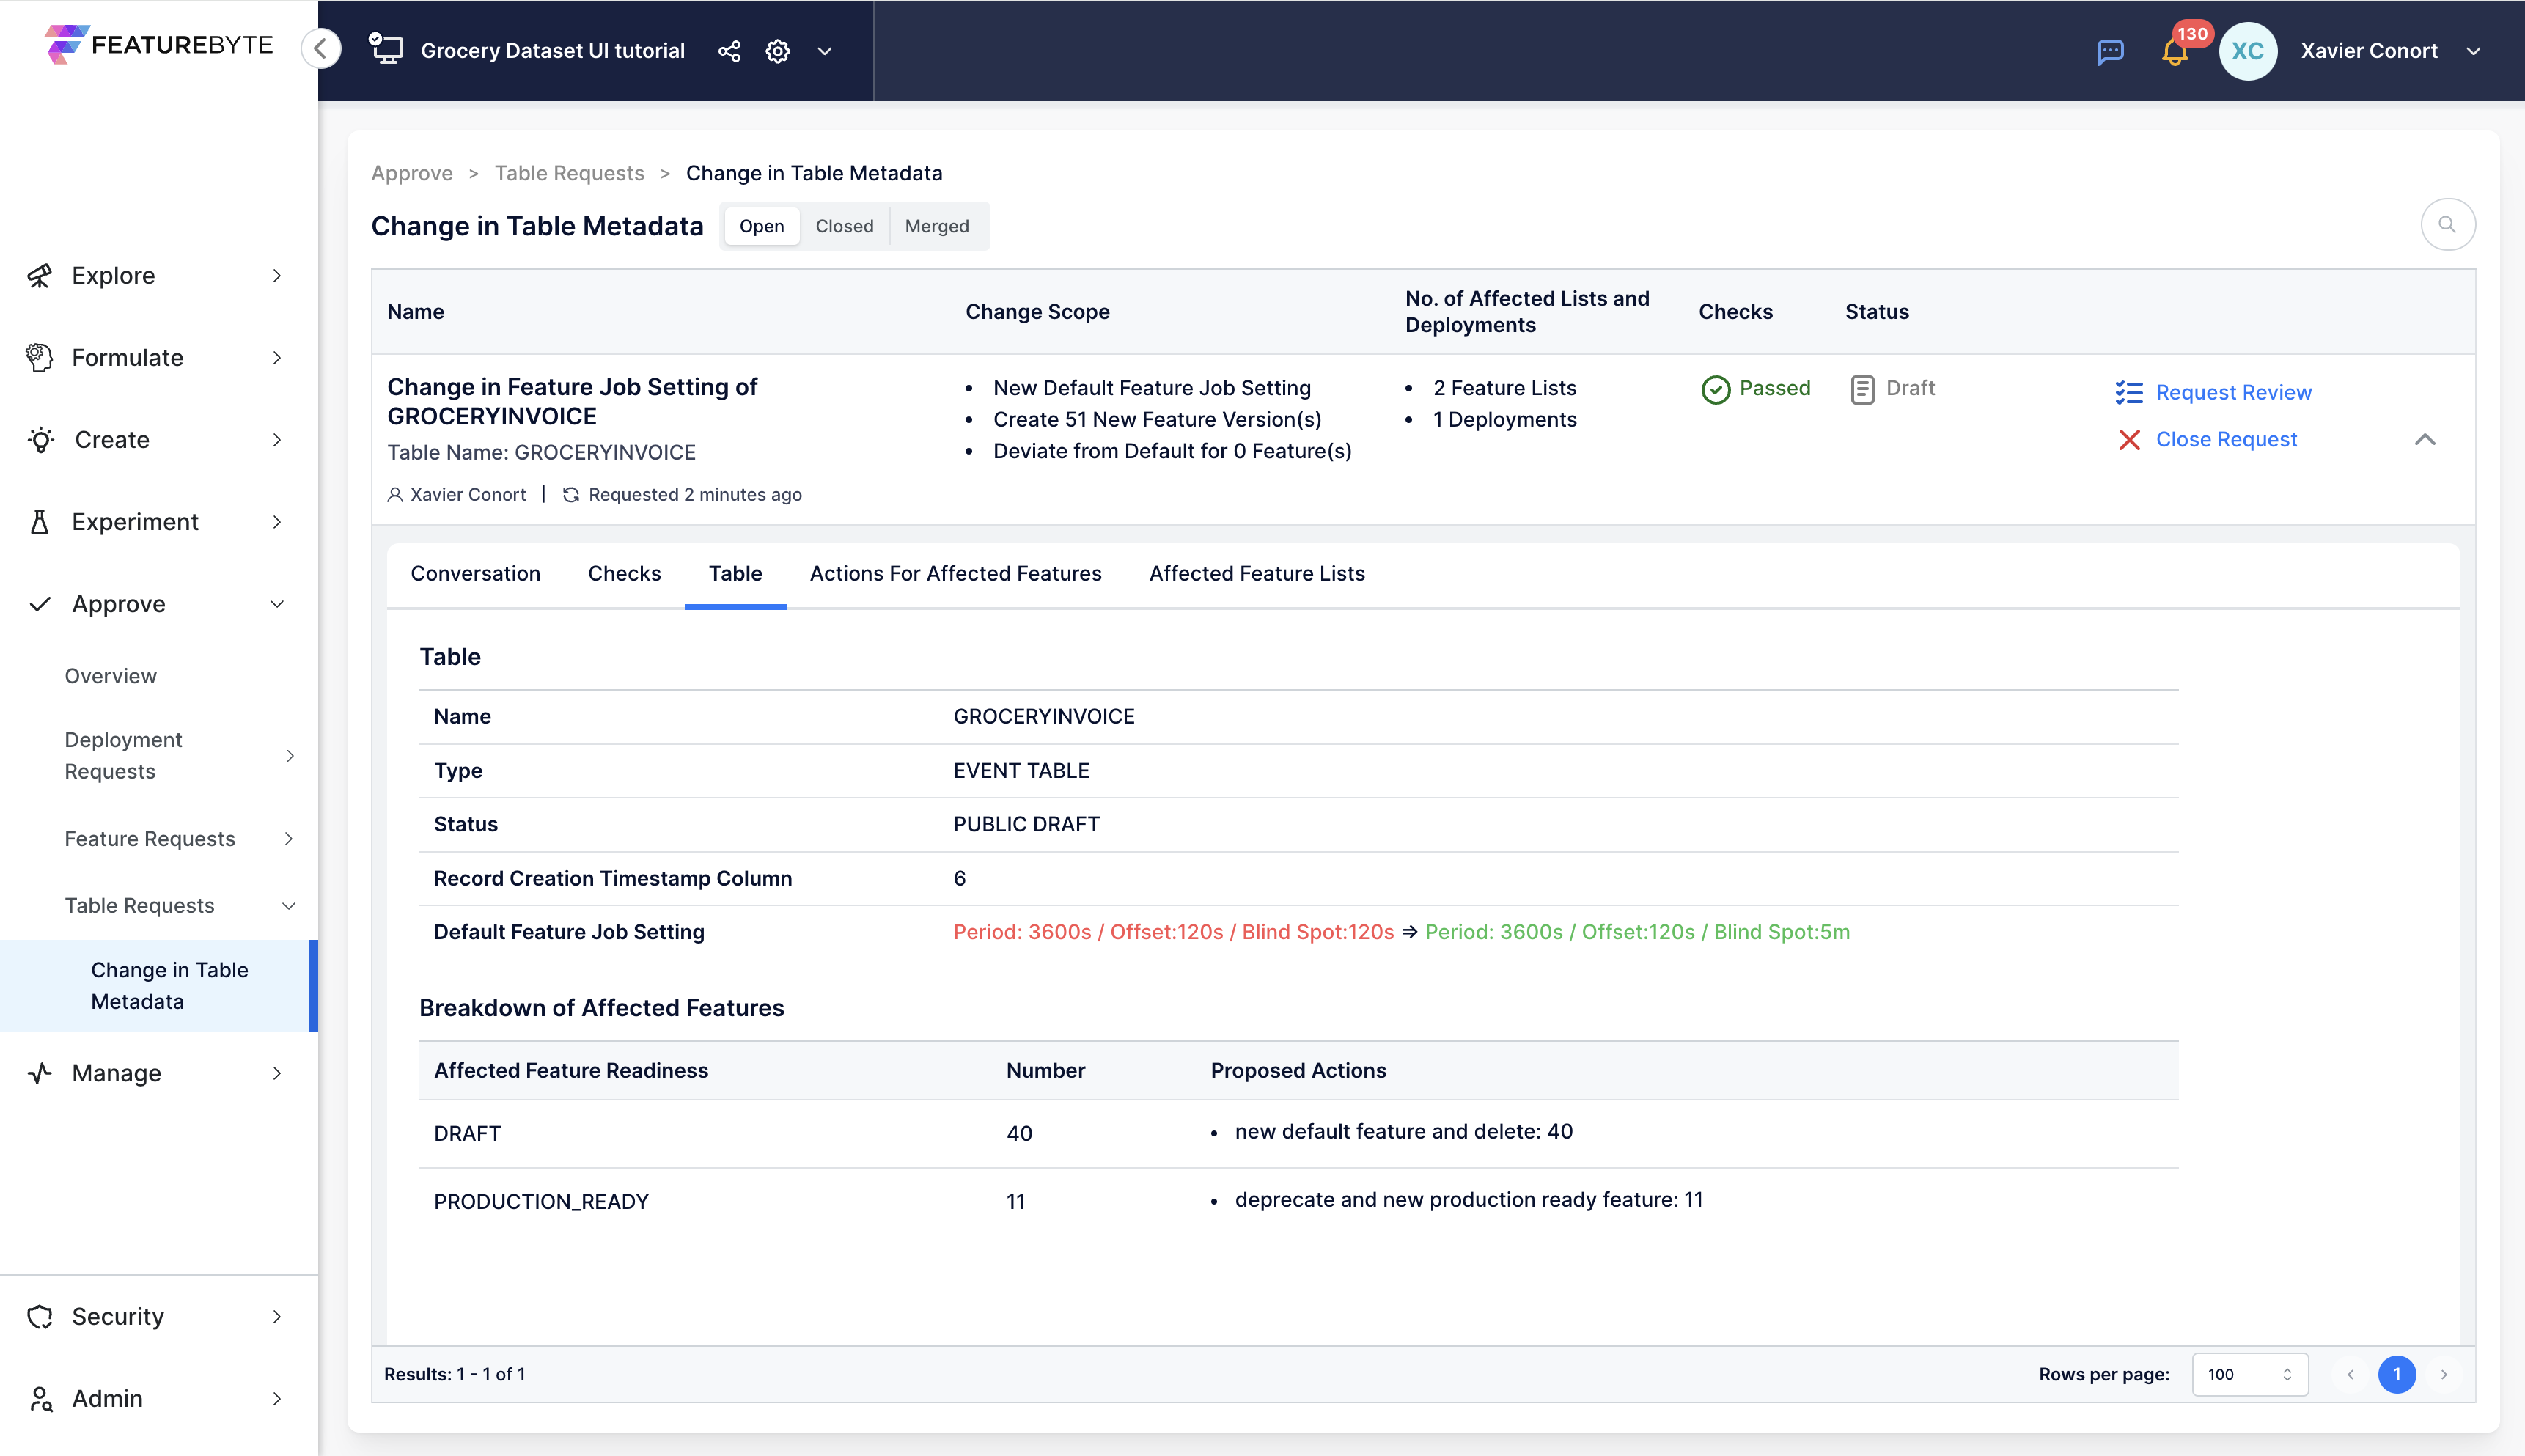
Update Feature Job Setting: Despite the recommendations, opt for a more conservative approach by adjusting the default feature job setting to a 5-minute blind spot.
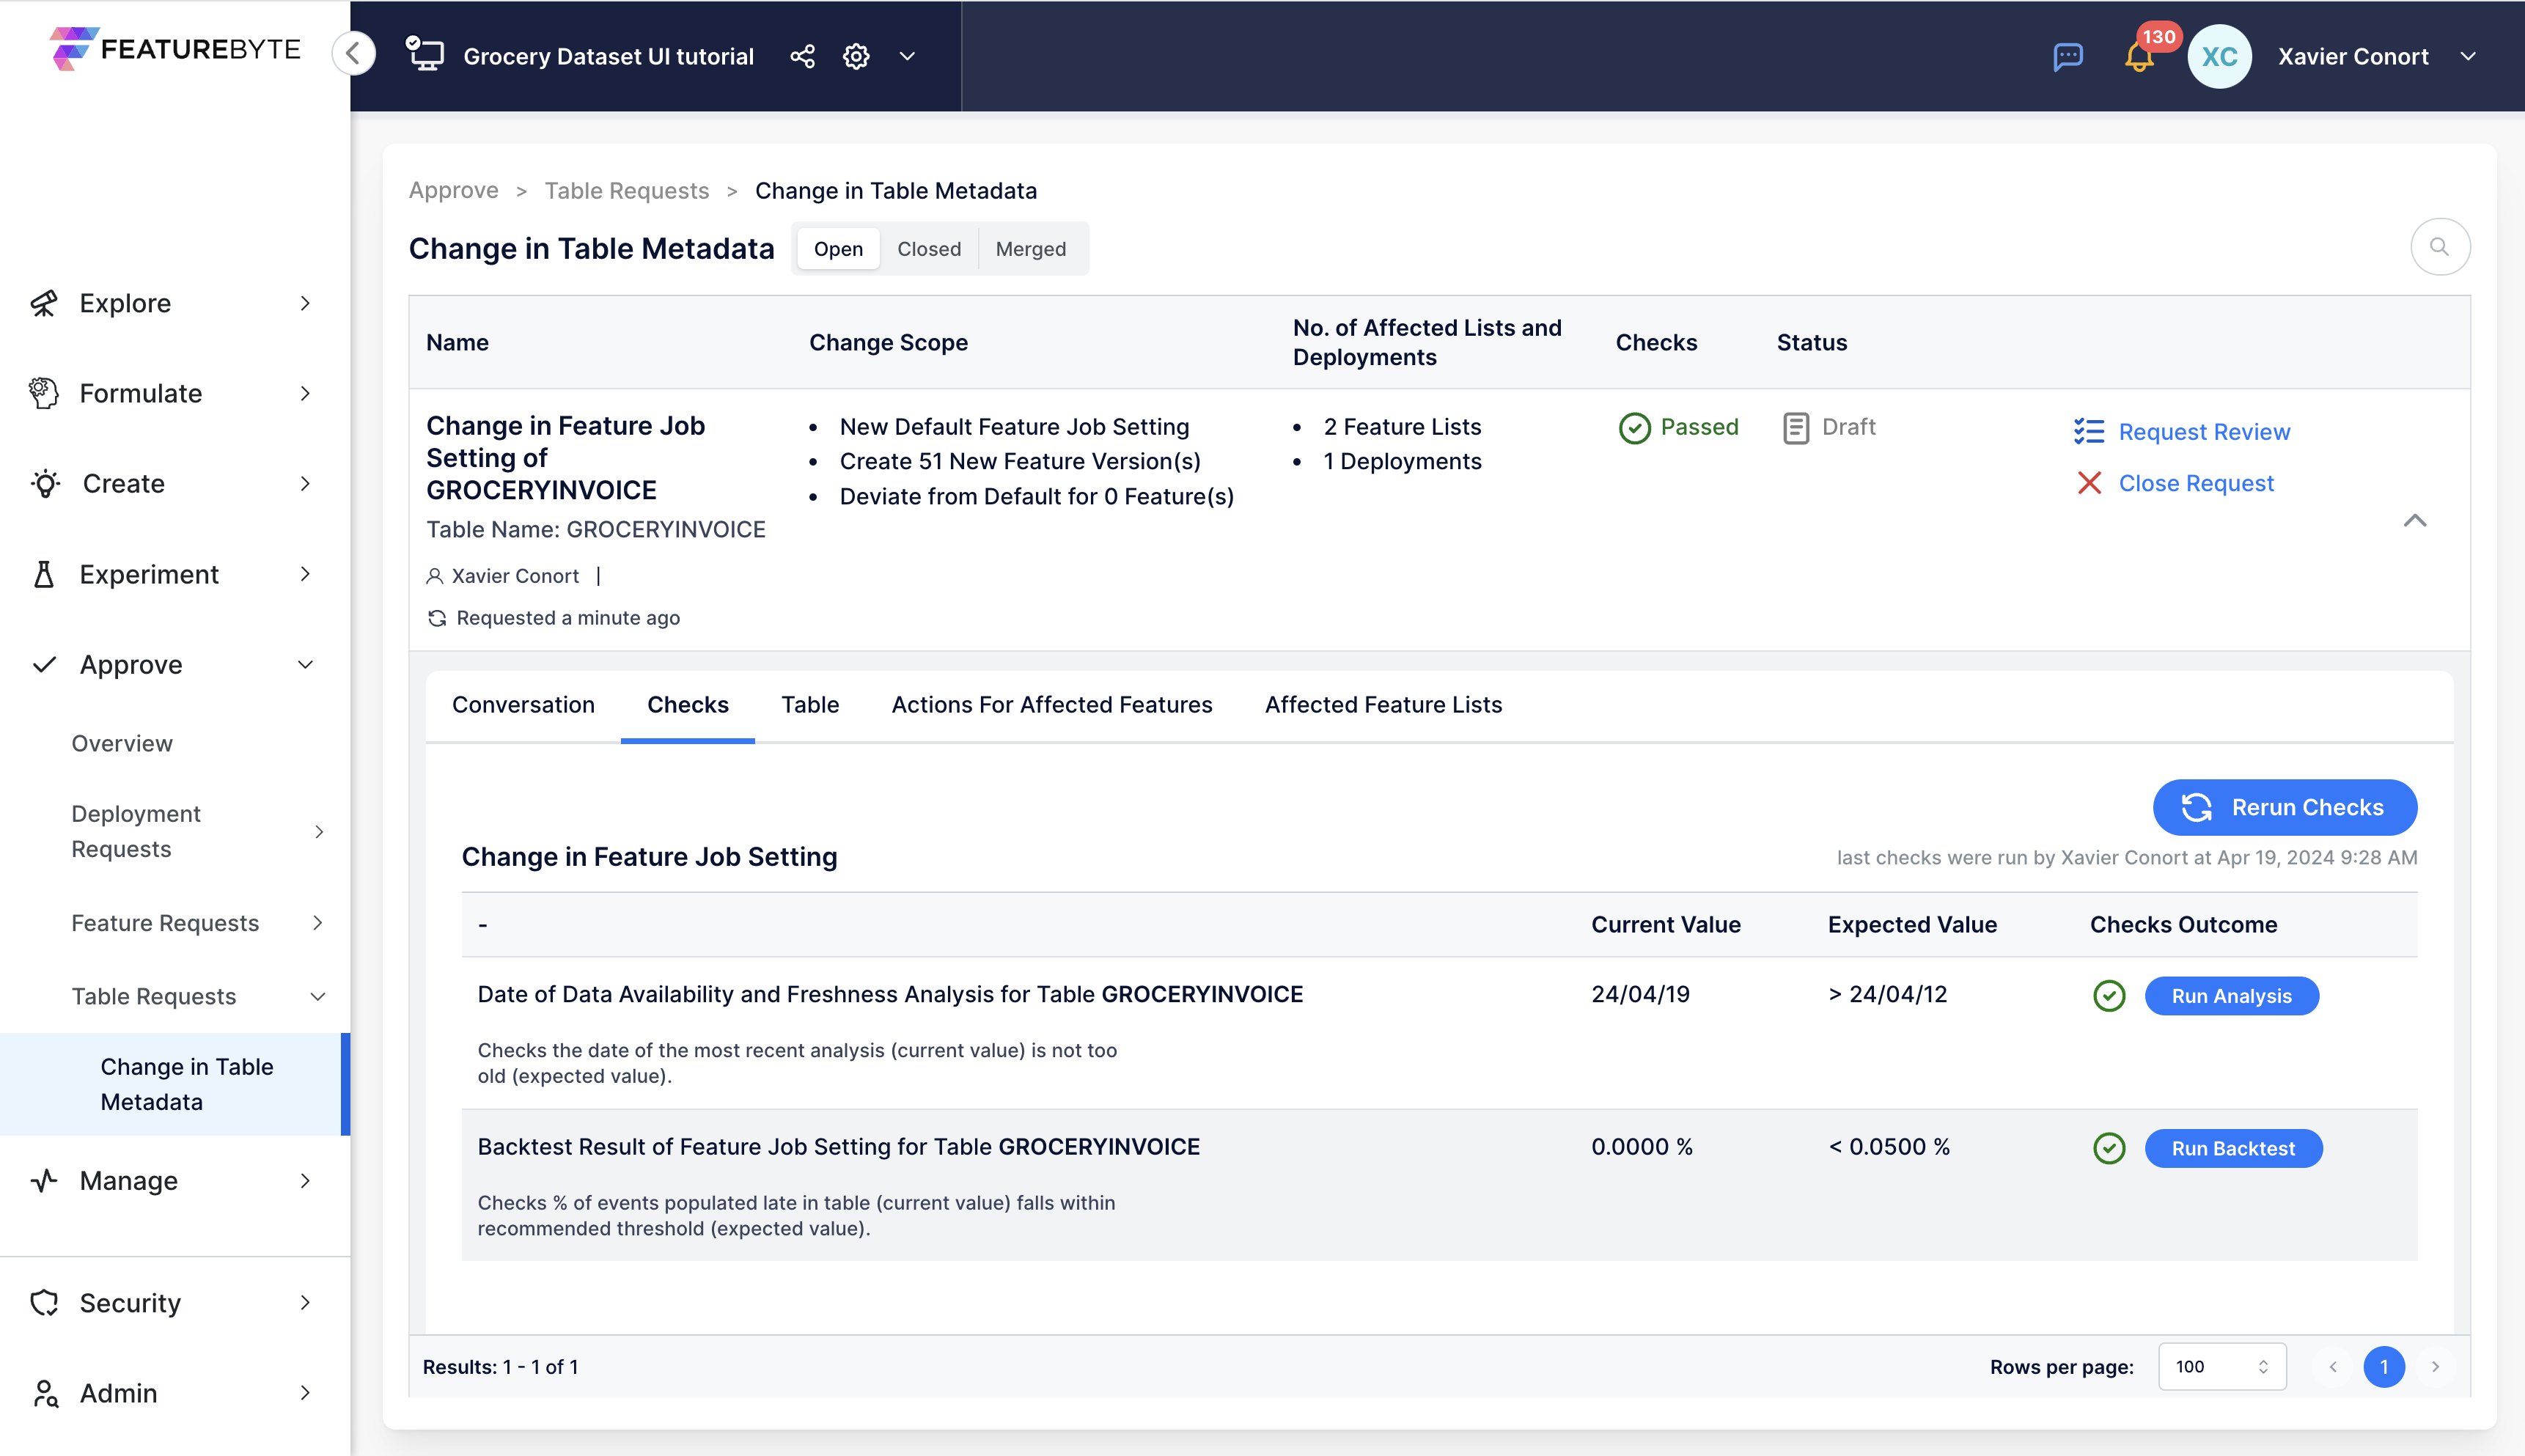
Initiate Approval Request: This update triggers an approval request. Click 'View' to examine the request.
Resolve Check Failures: In the 'Checks' tab, identify why checks are failing. To pass the failed check, run a backtest to evaluate potential training-serving inconsistencies with the new setting.
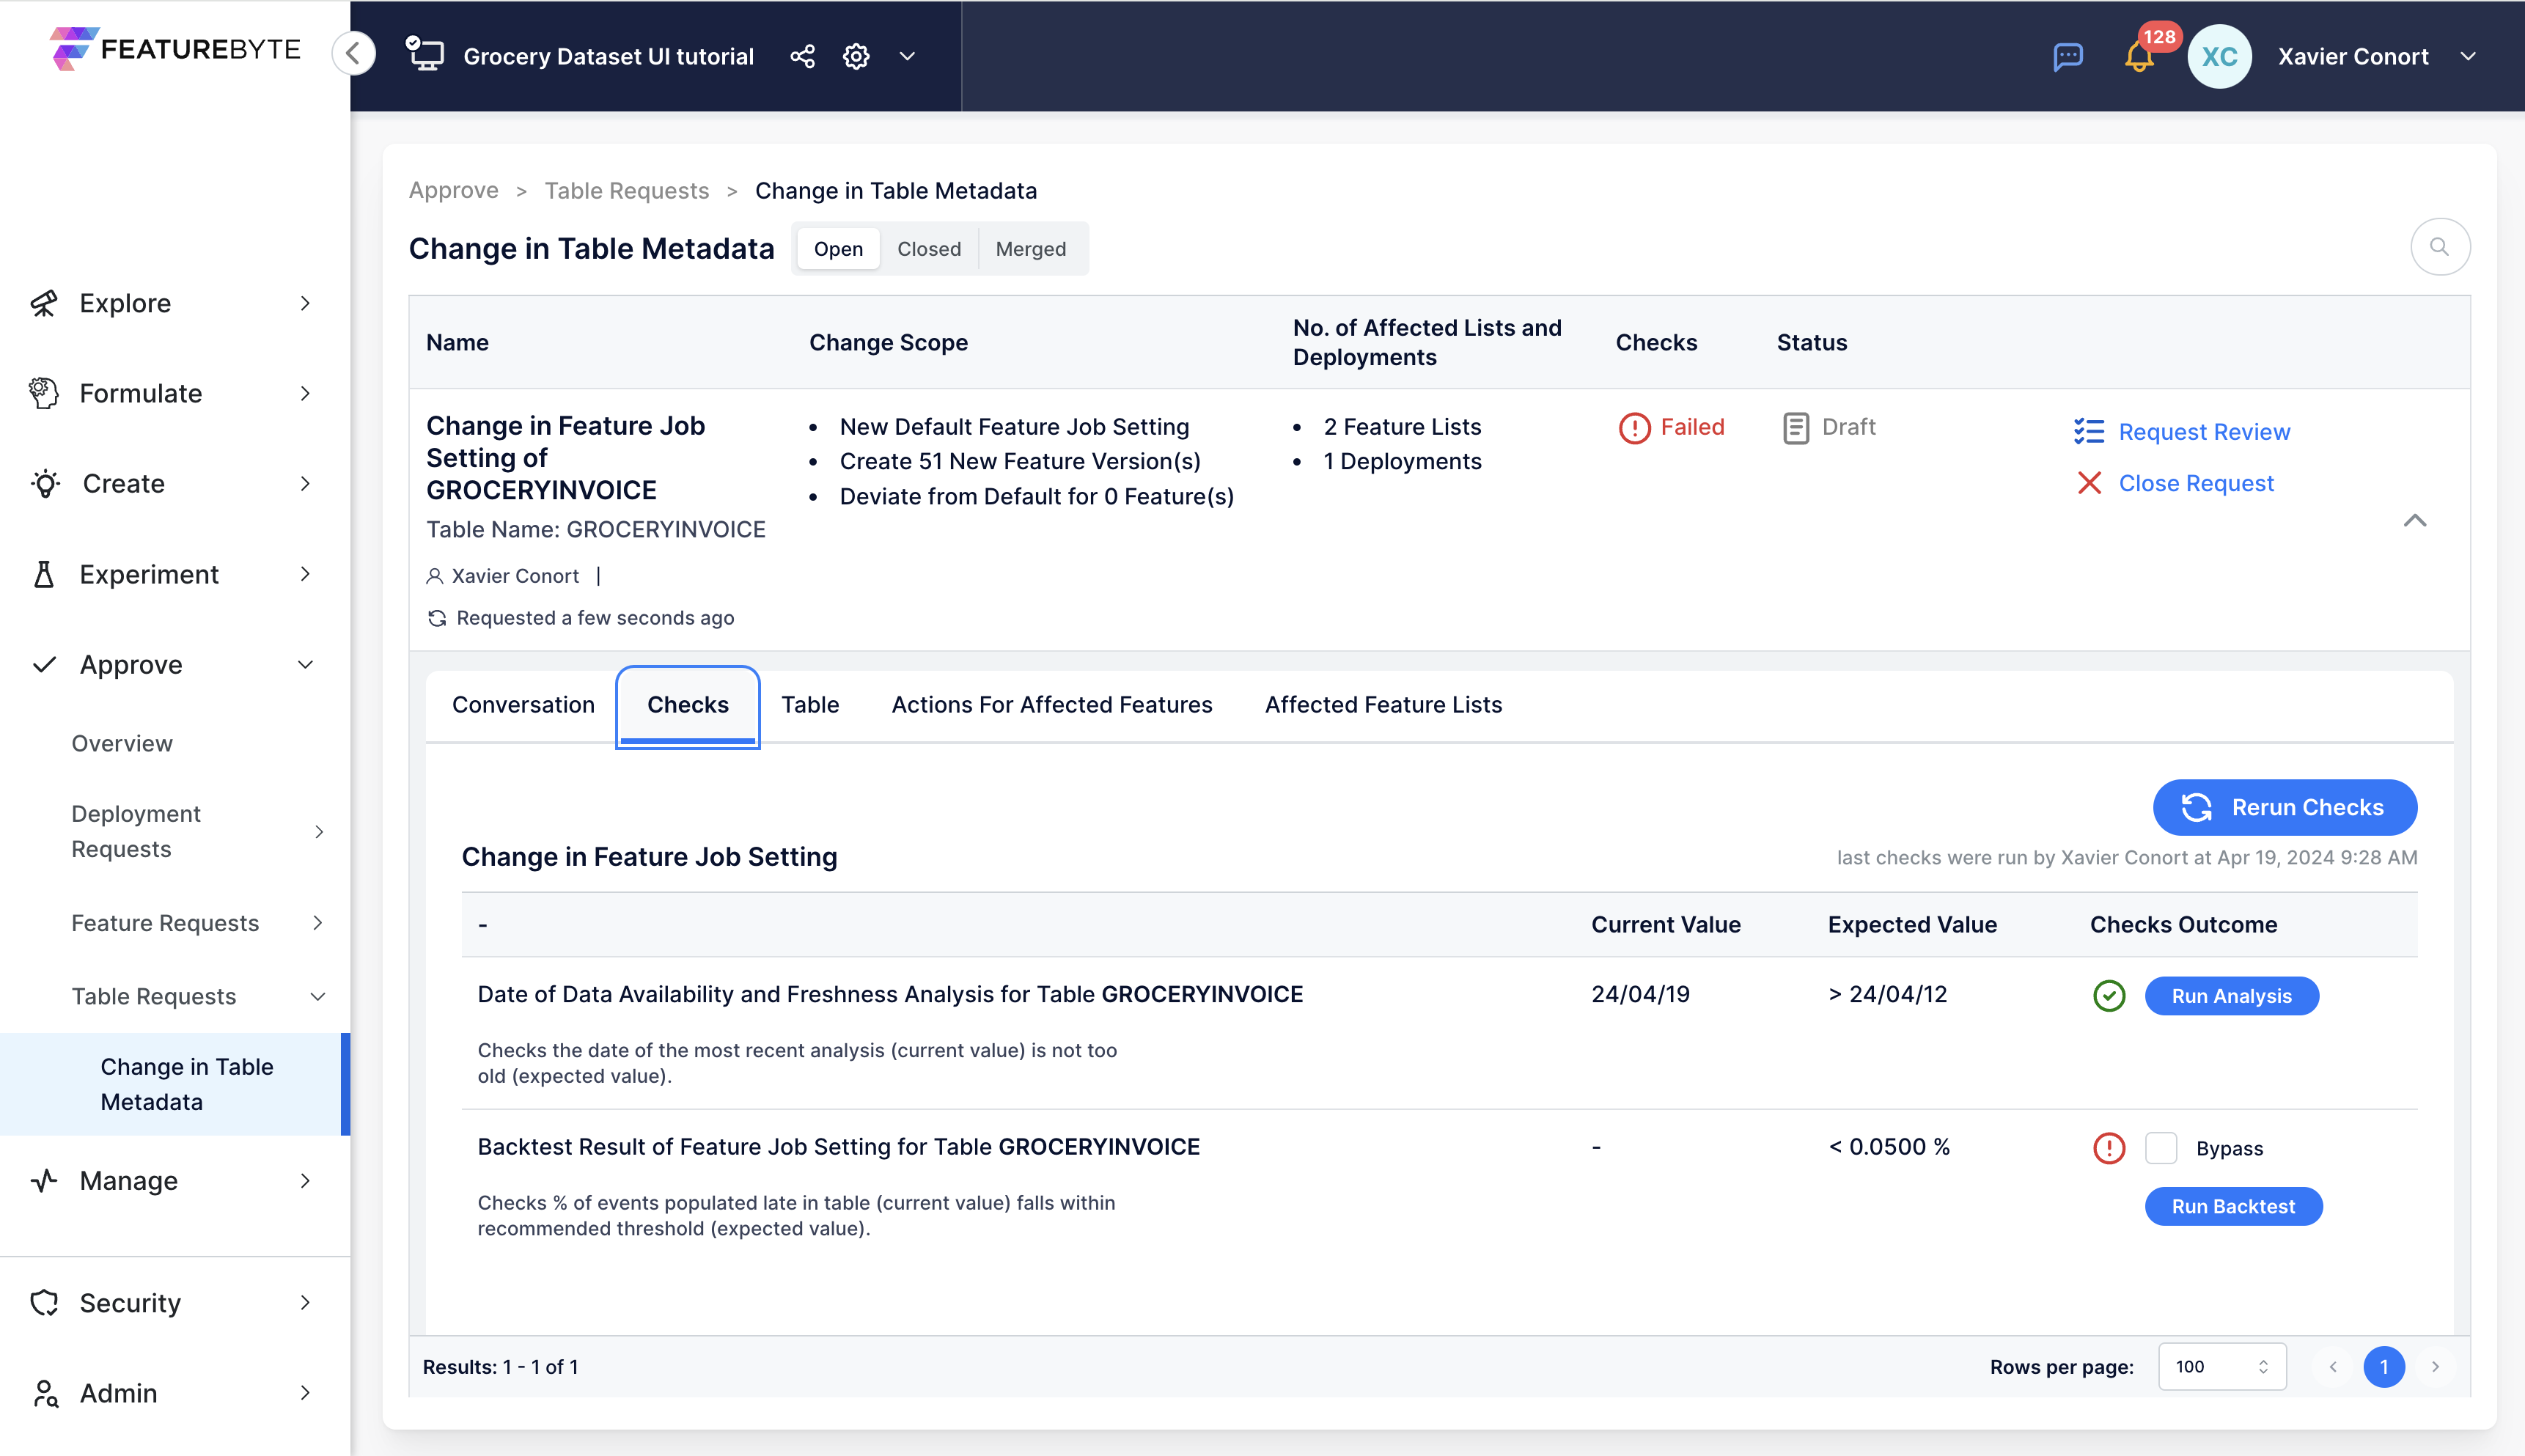
Backtest Success: After a successful backtest, the checks will turn green.
Assess Affected Features: Examine the number of features impacted by this change.
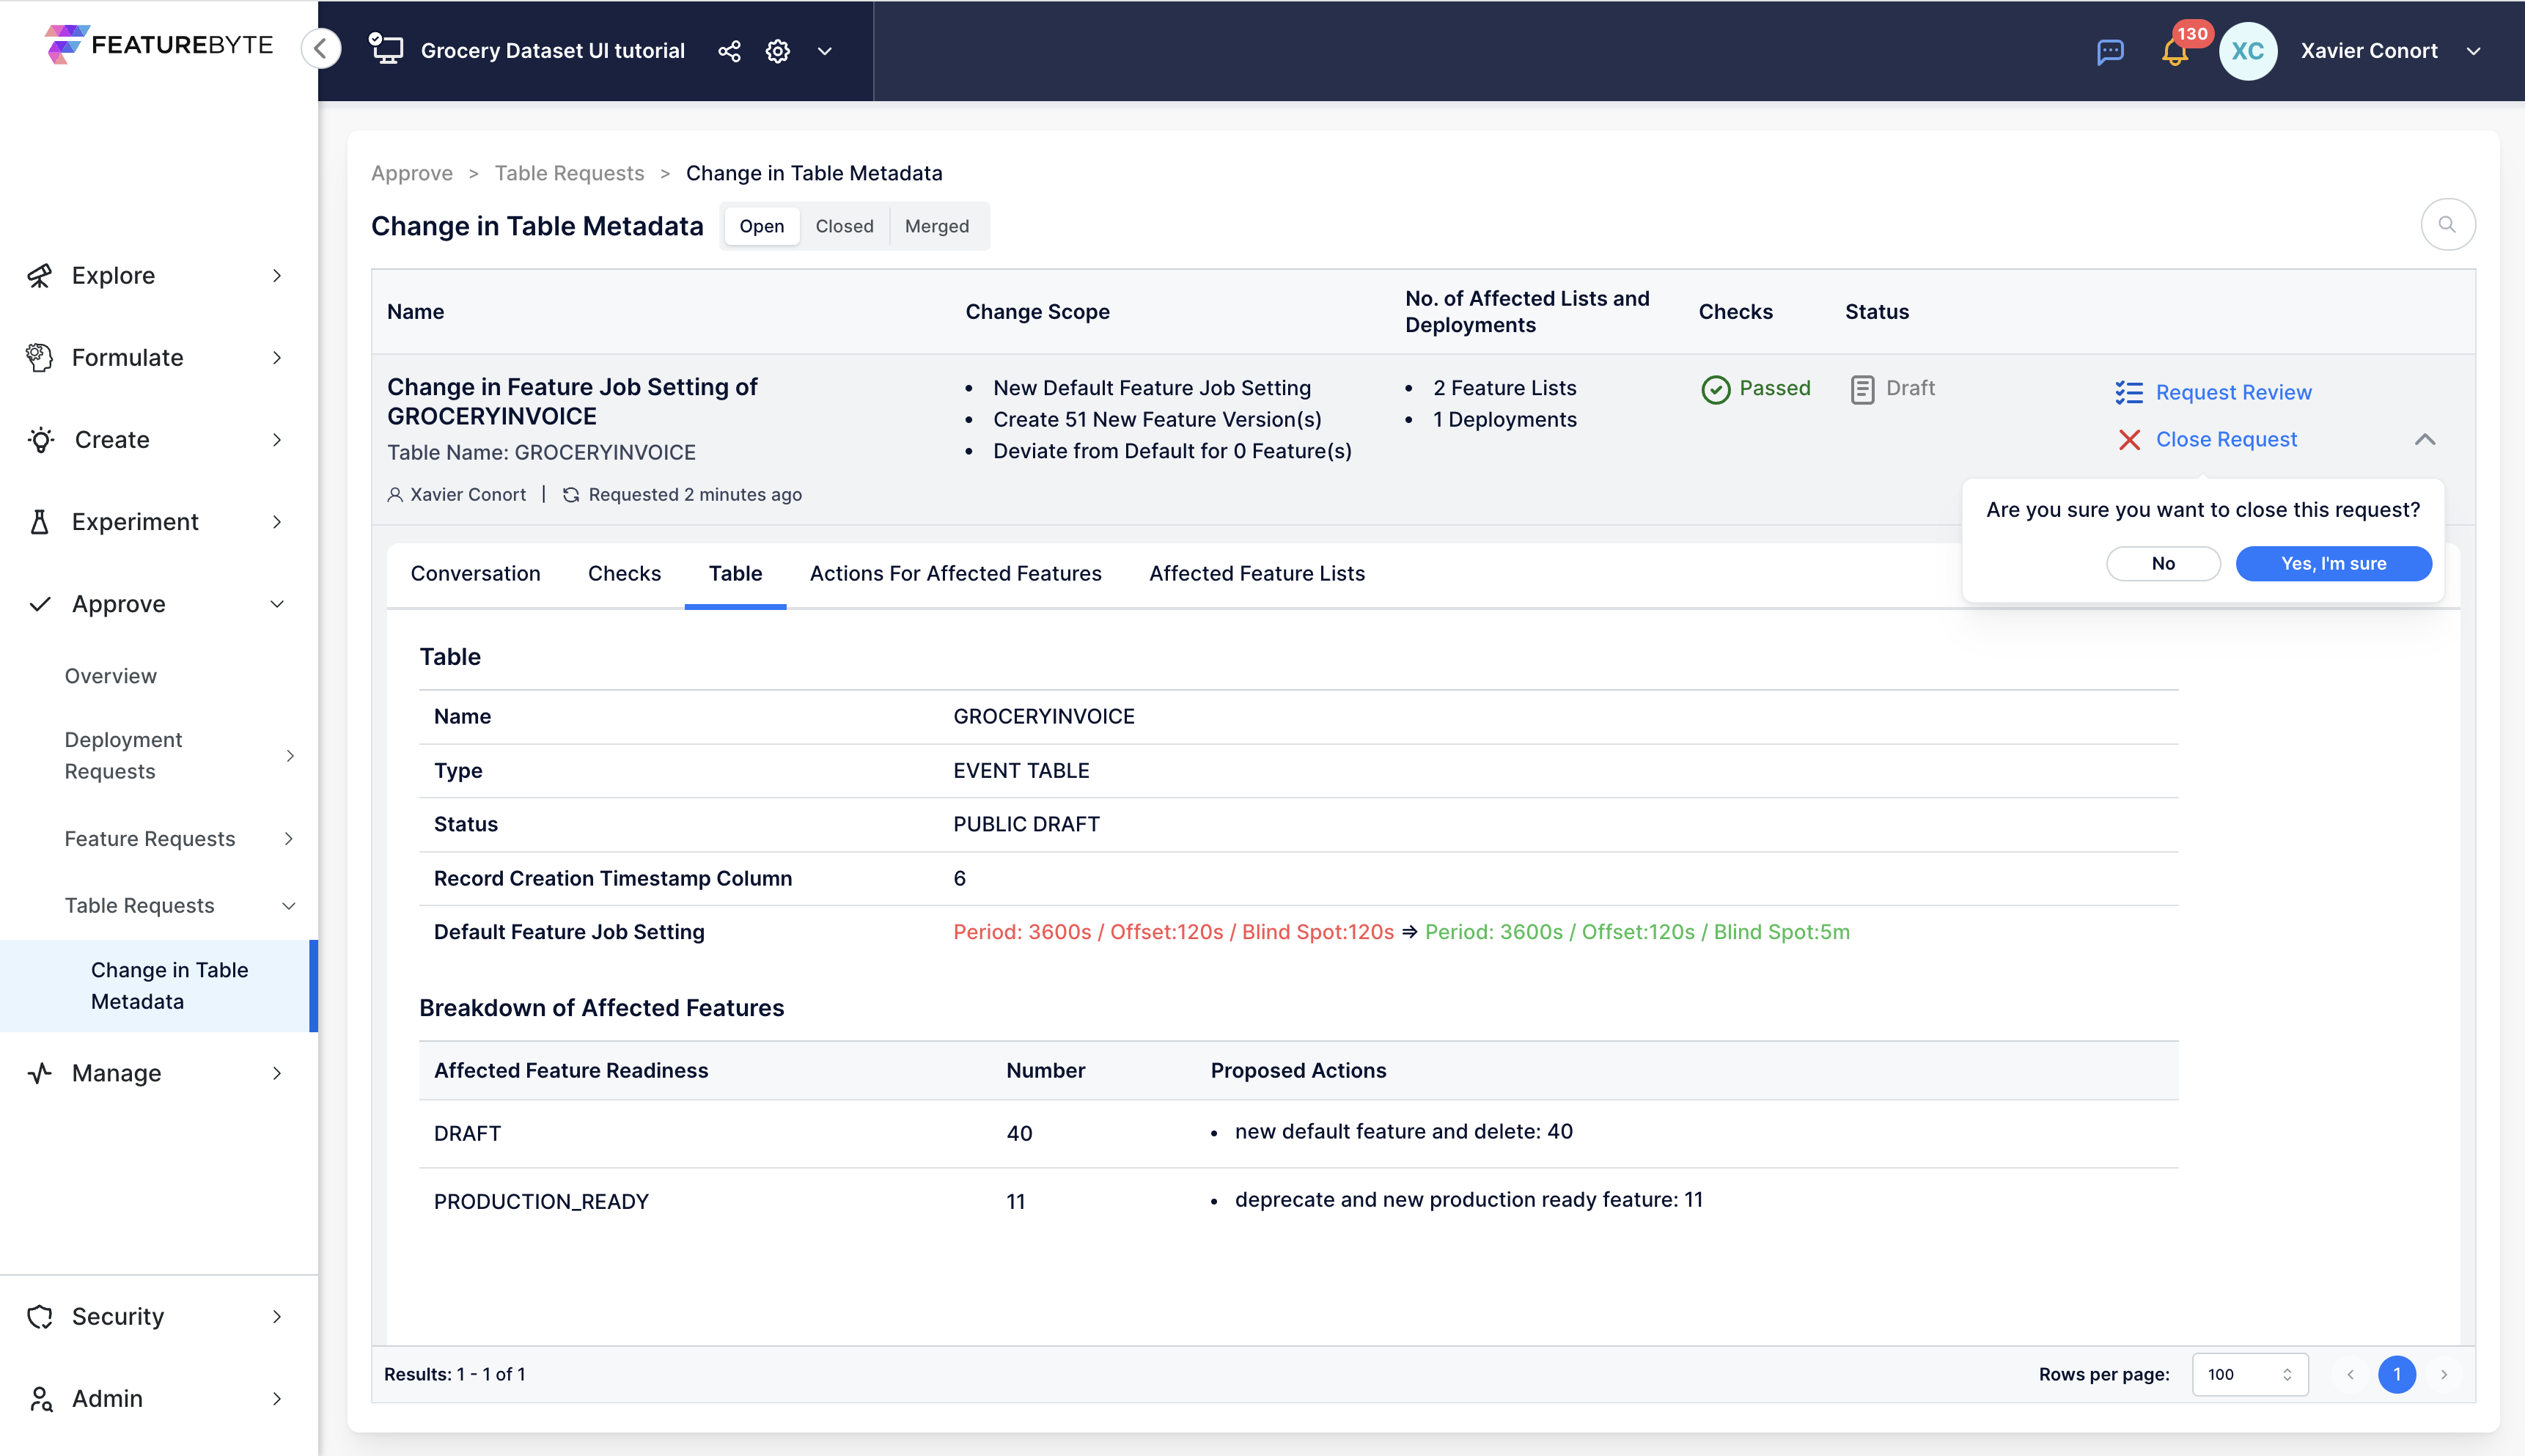
Option to Close Request: If the new conservative setting seems to impact too many features, you may choose to close the request.
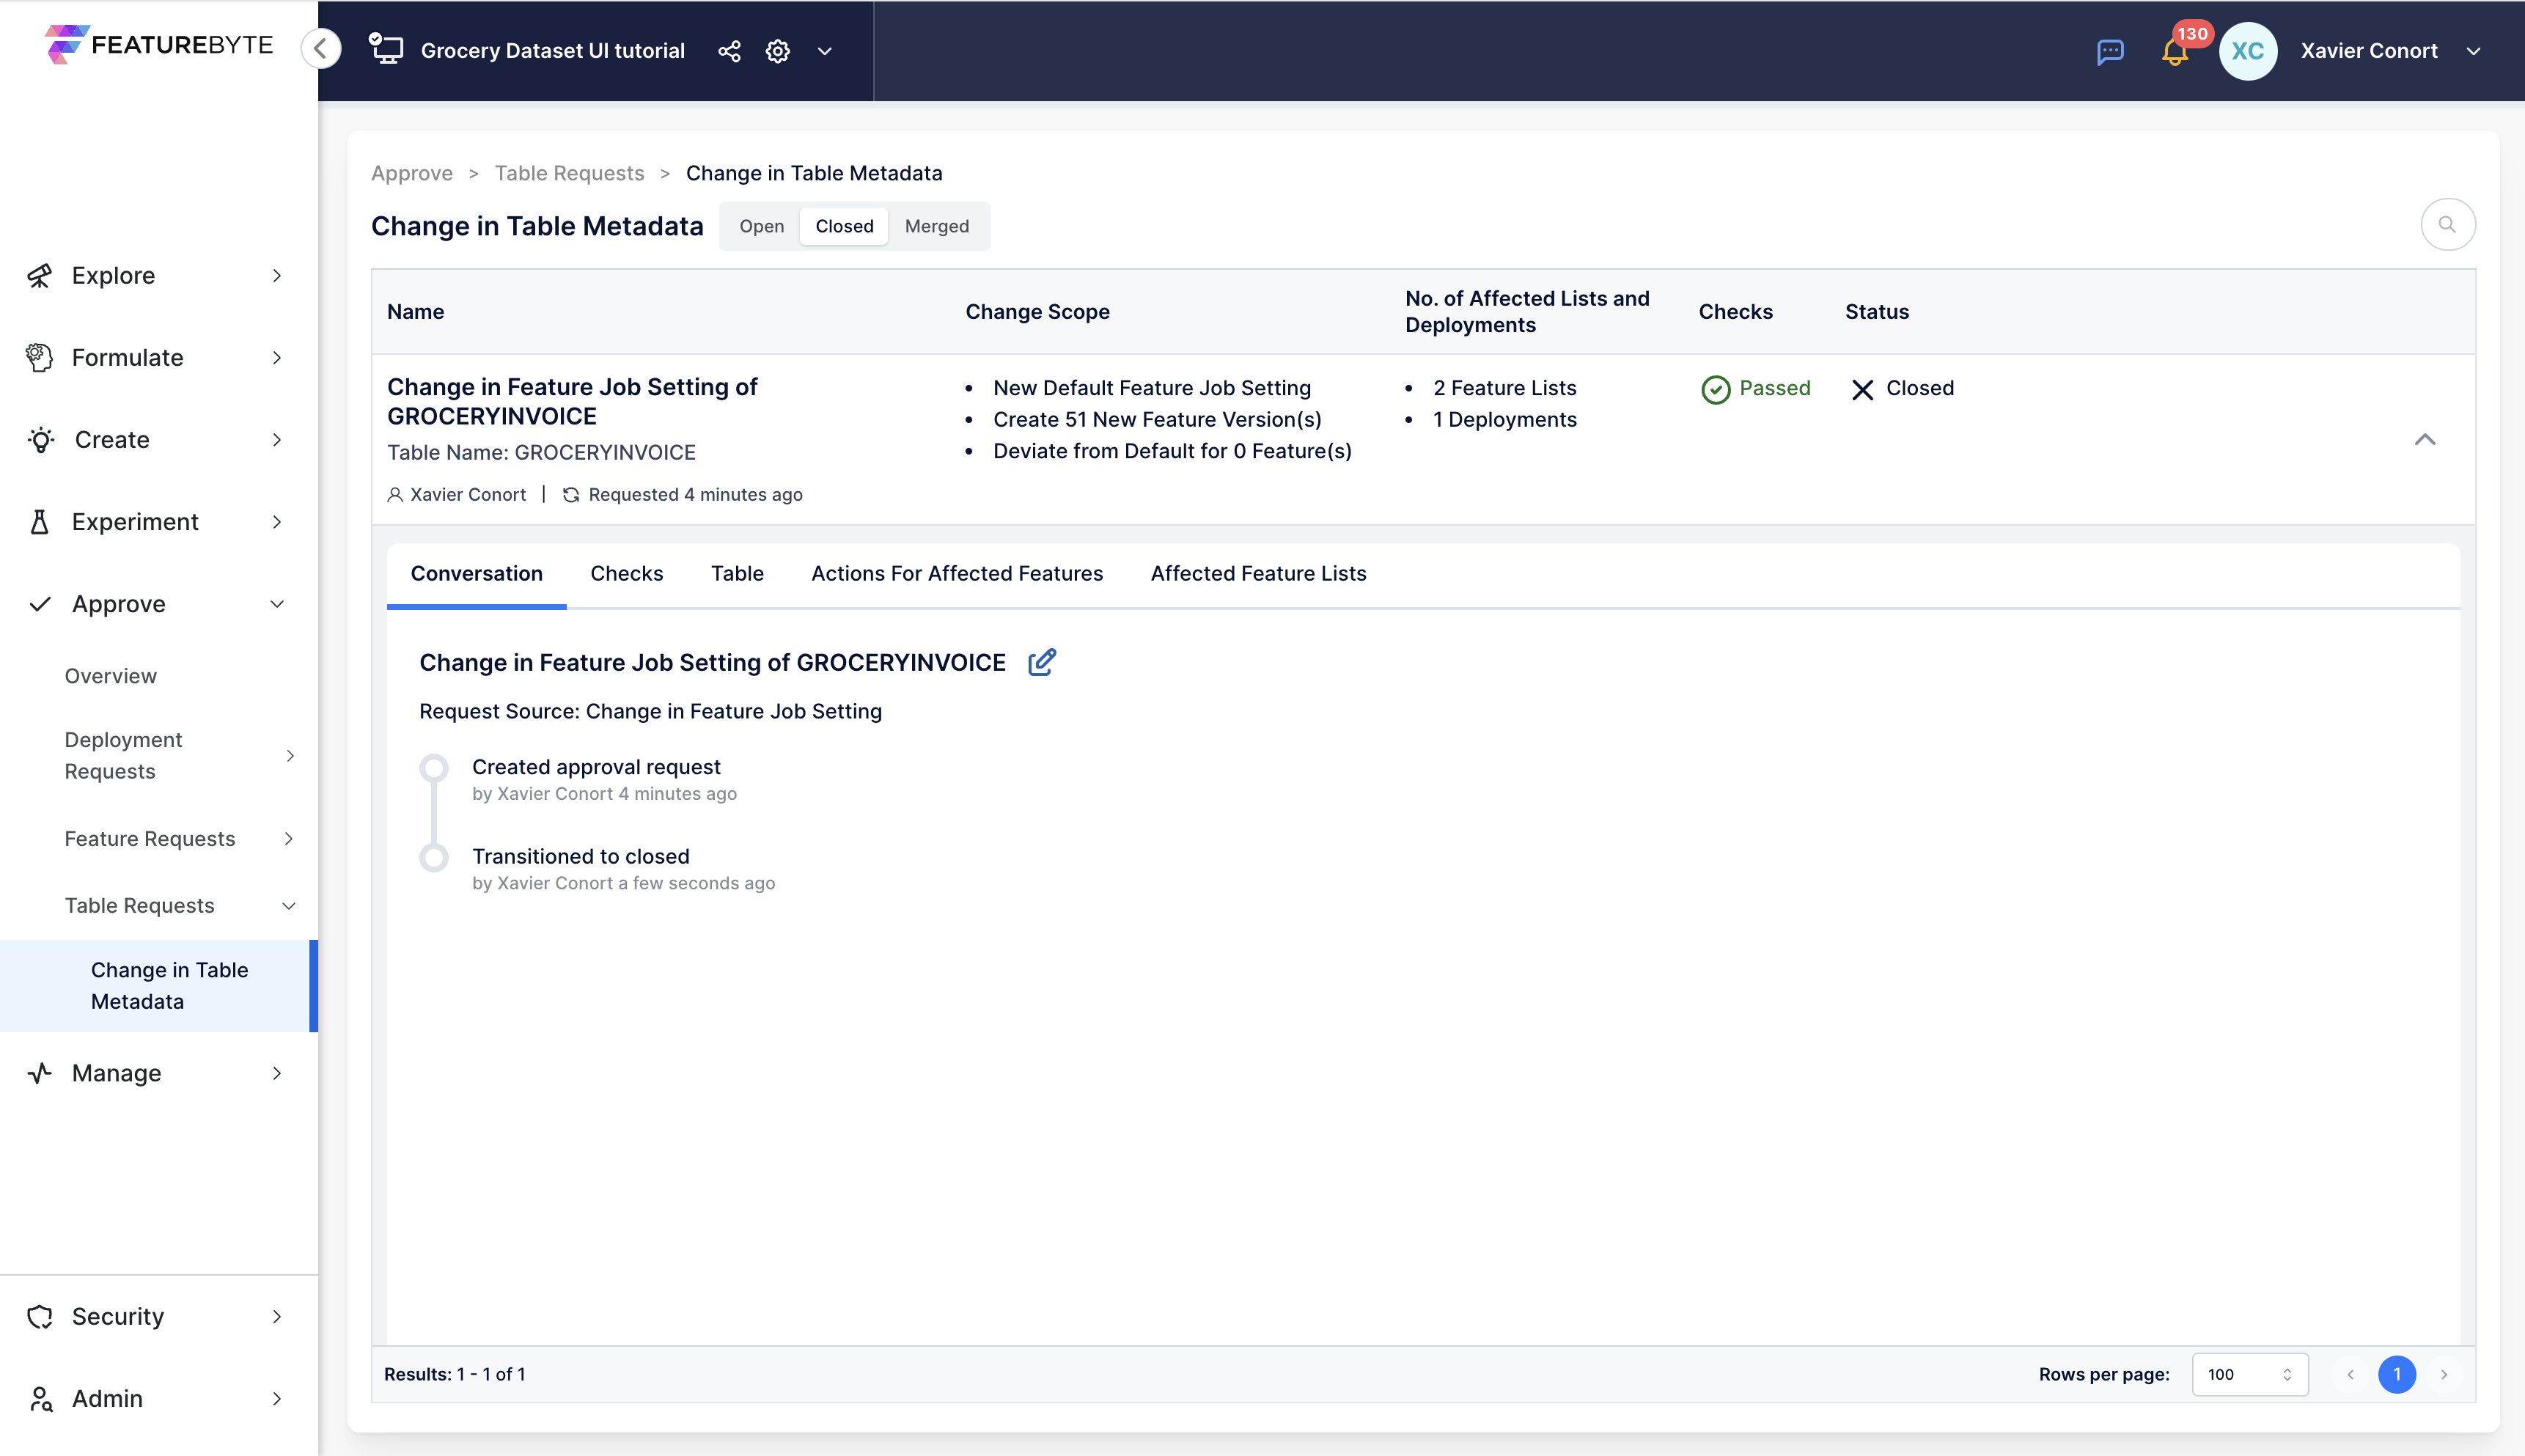
View Closed Requests: Closed requests can be viewed under the 'Closed' tab in the request catalog.
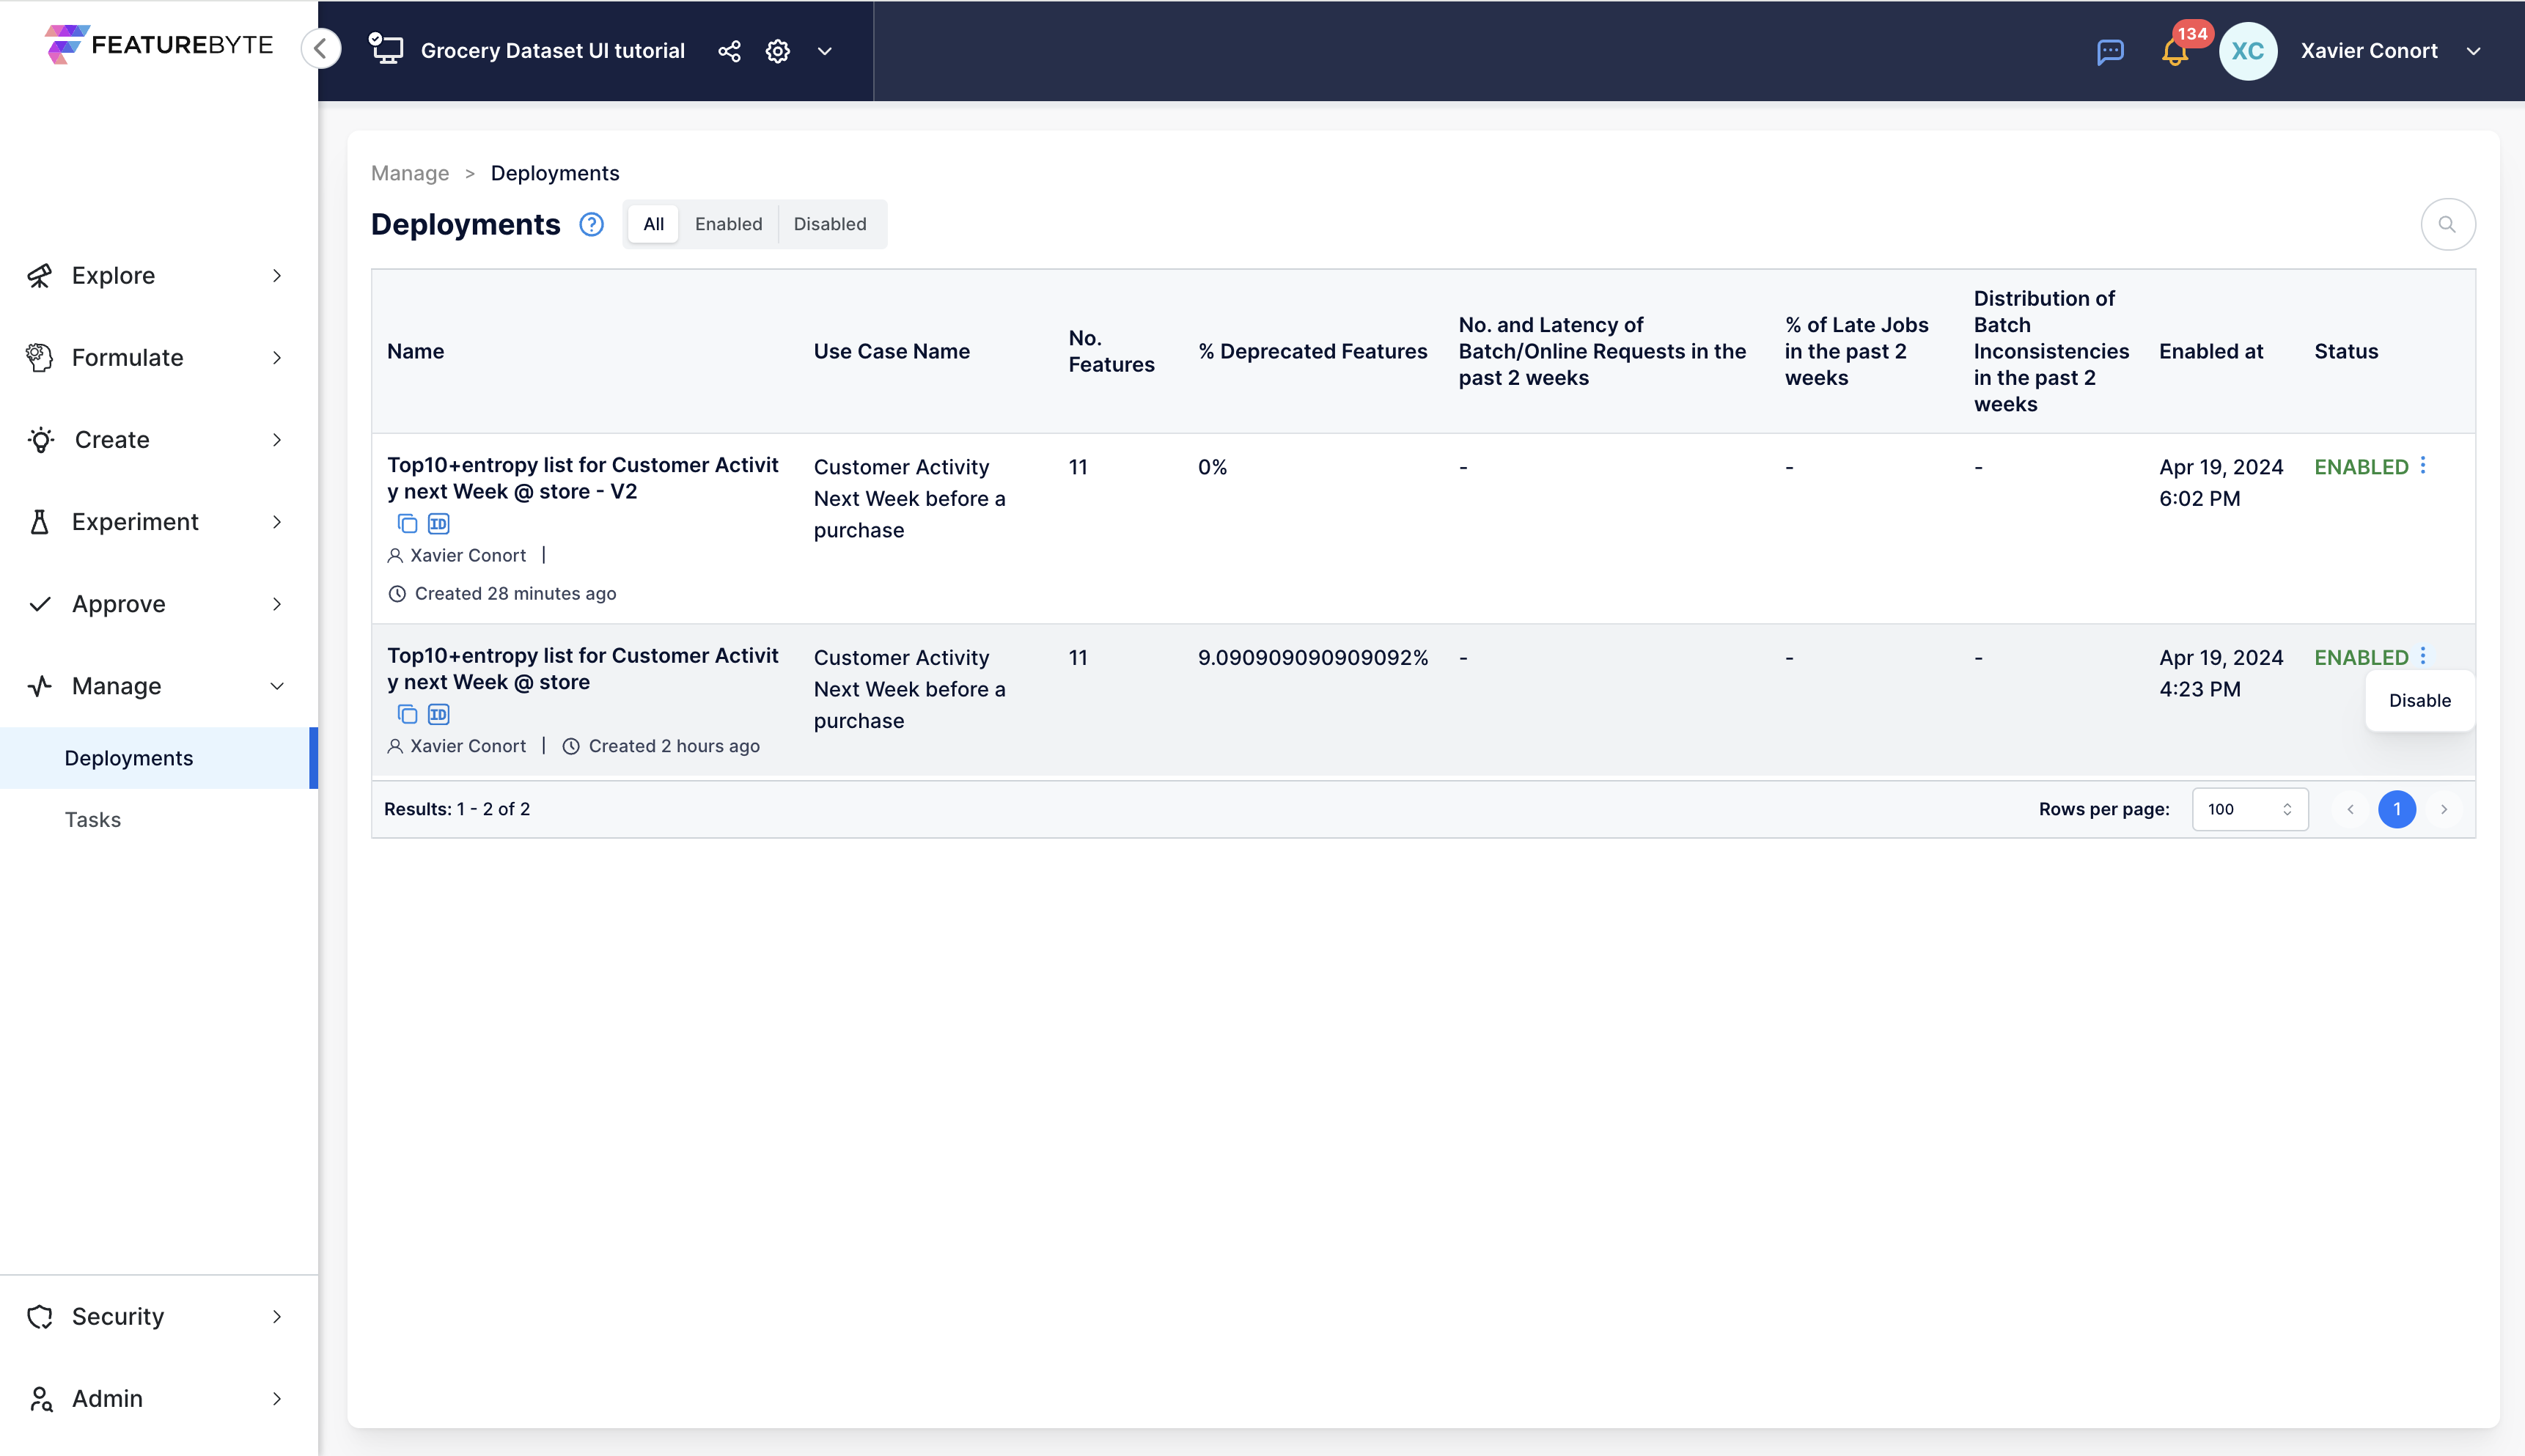
Step 4: Manage Deployments
Initiate New Deployment: Go to the Feature List Catalog and start a new deployment for the feature list "Top10 enhanced with customer basket diversity" using its latest version.
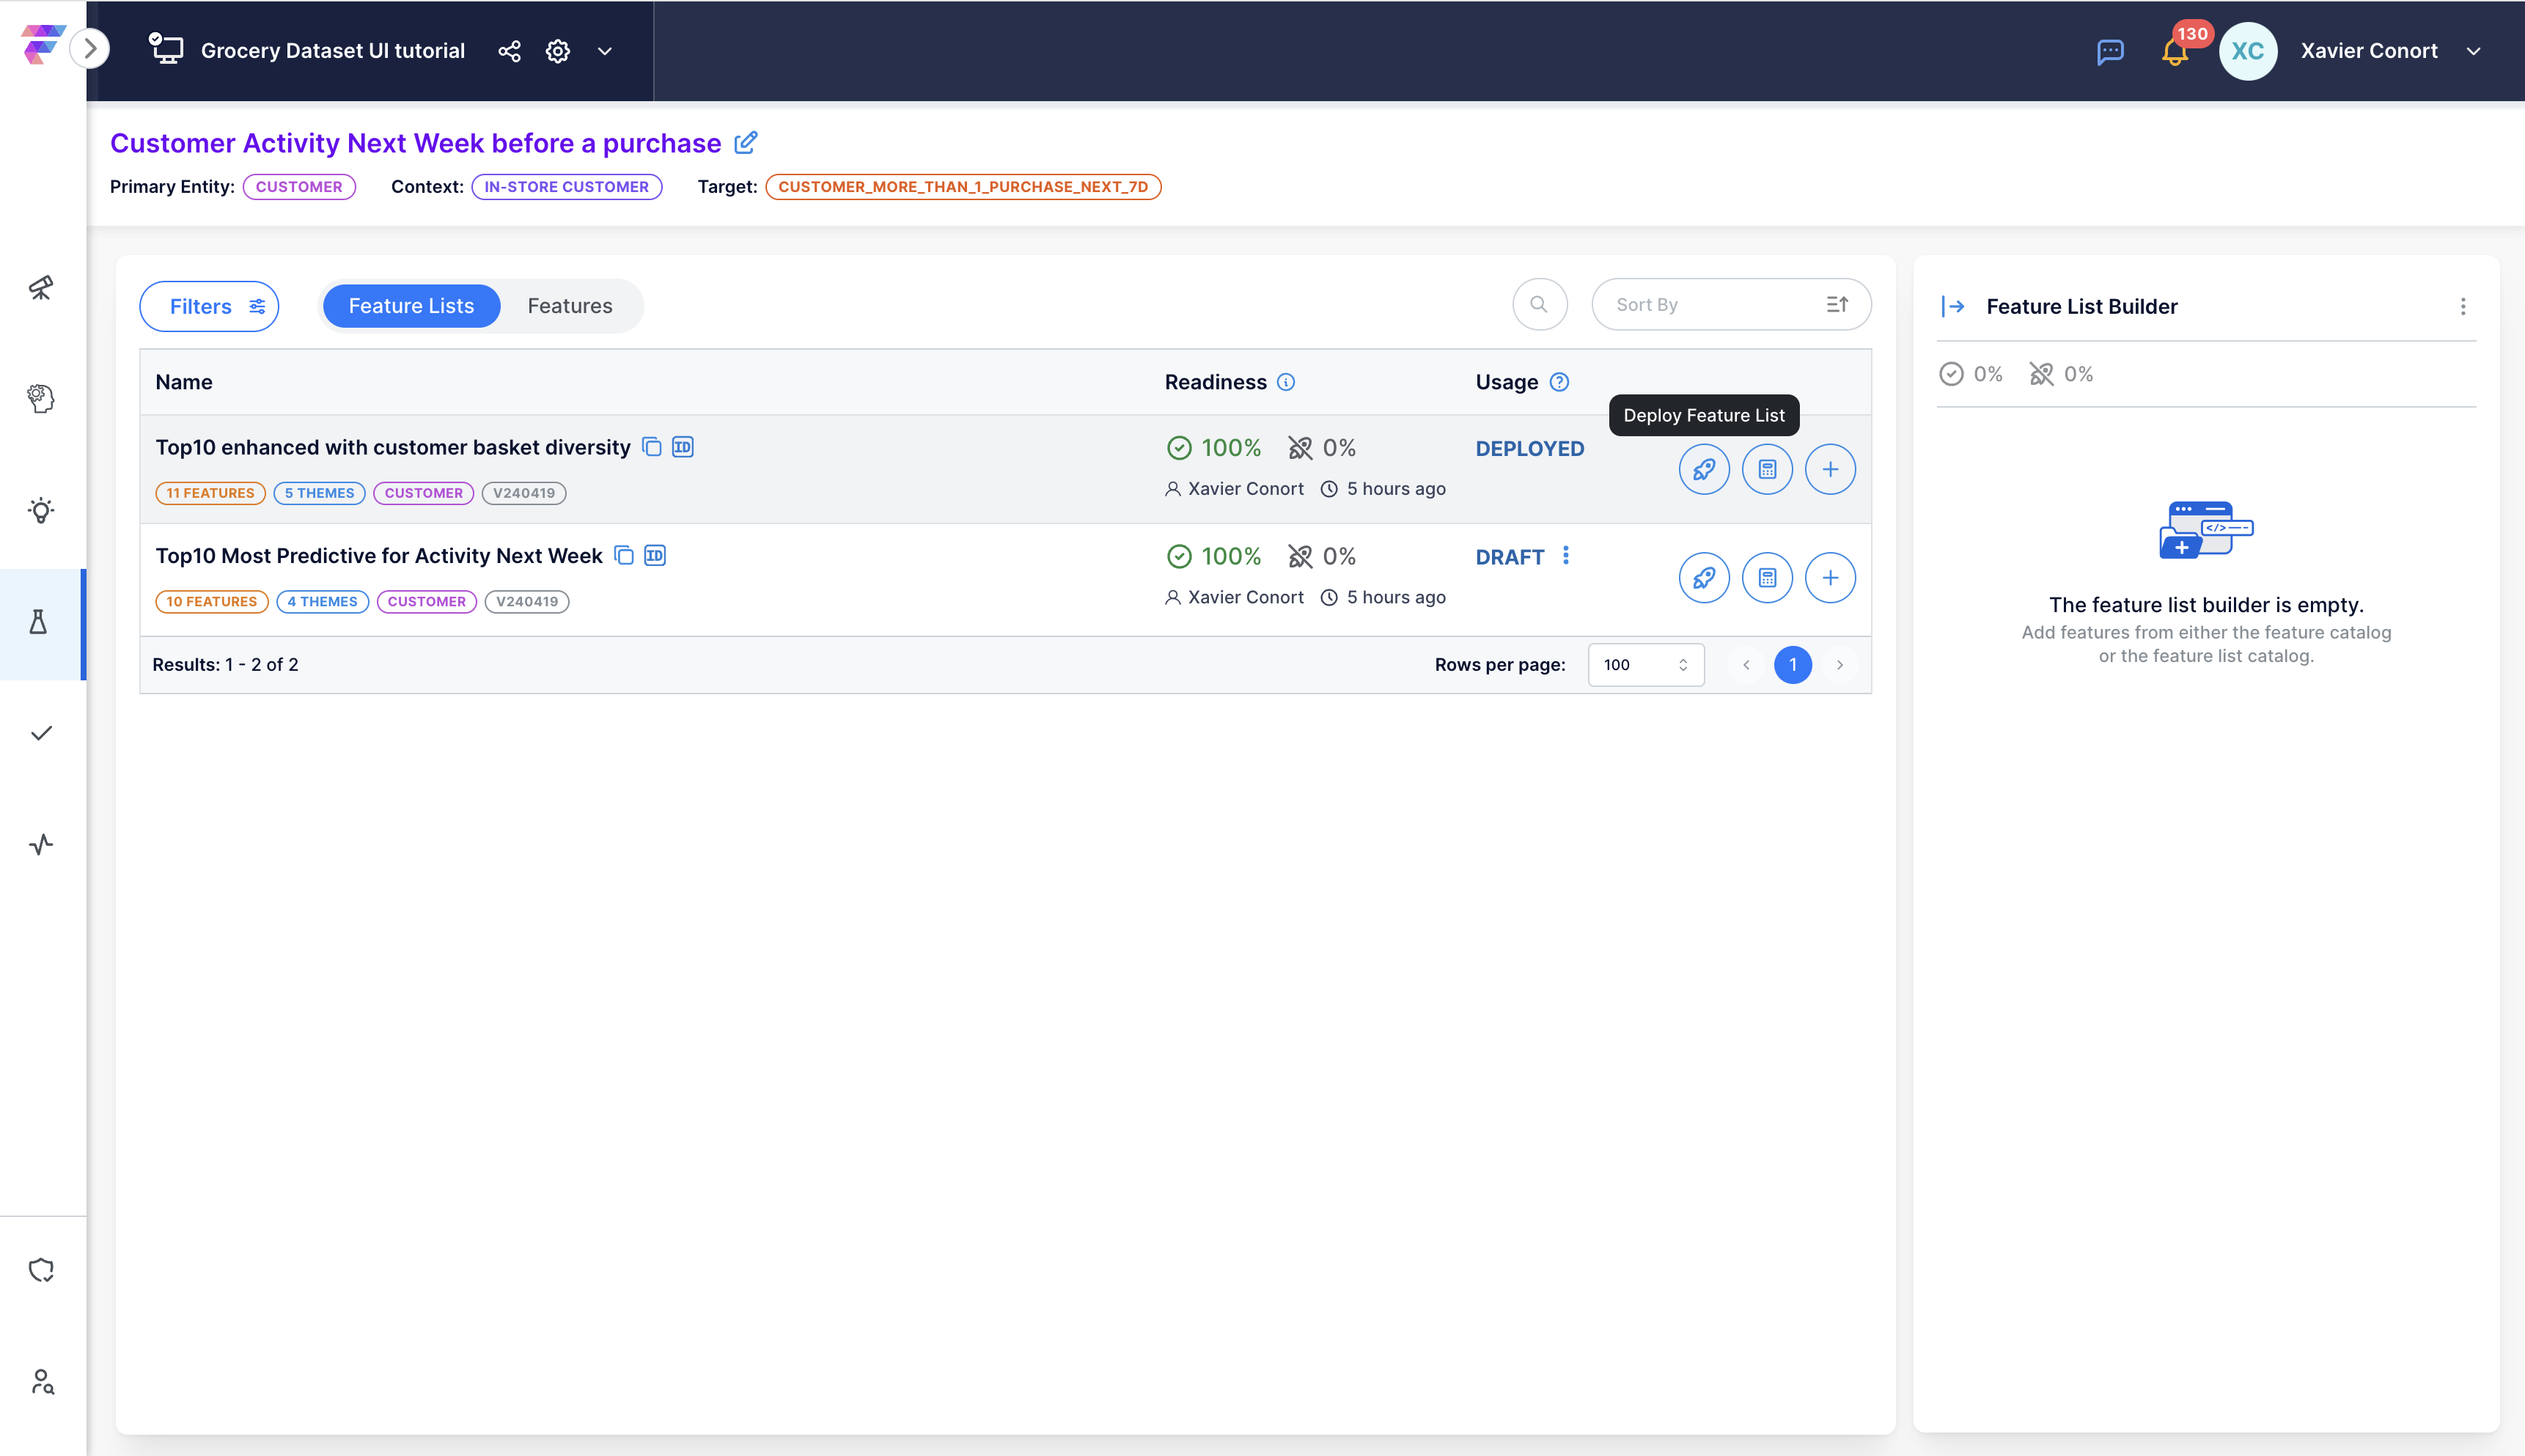
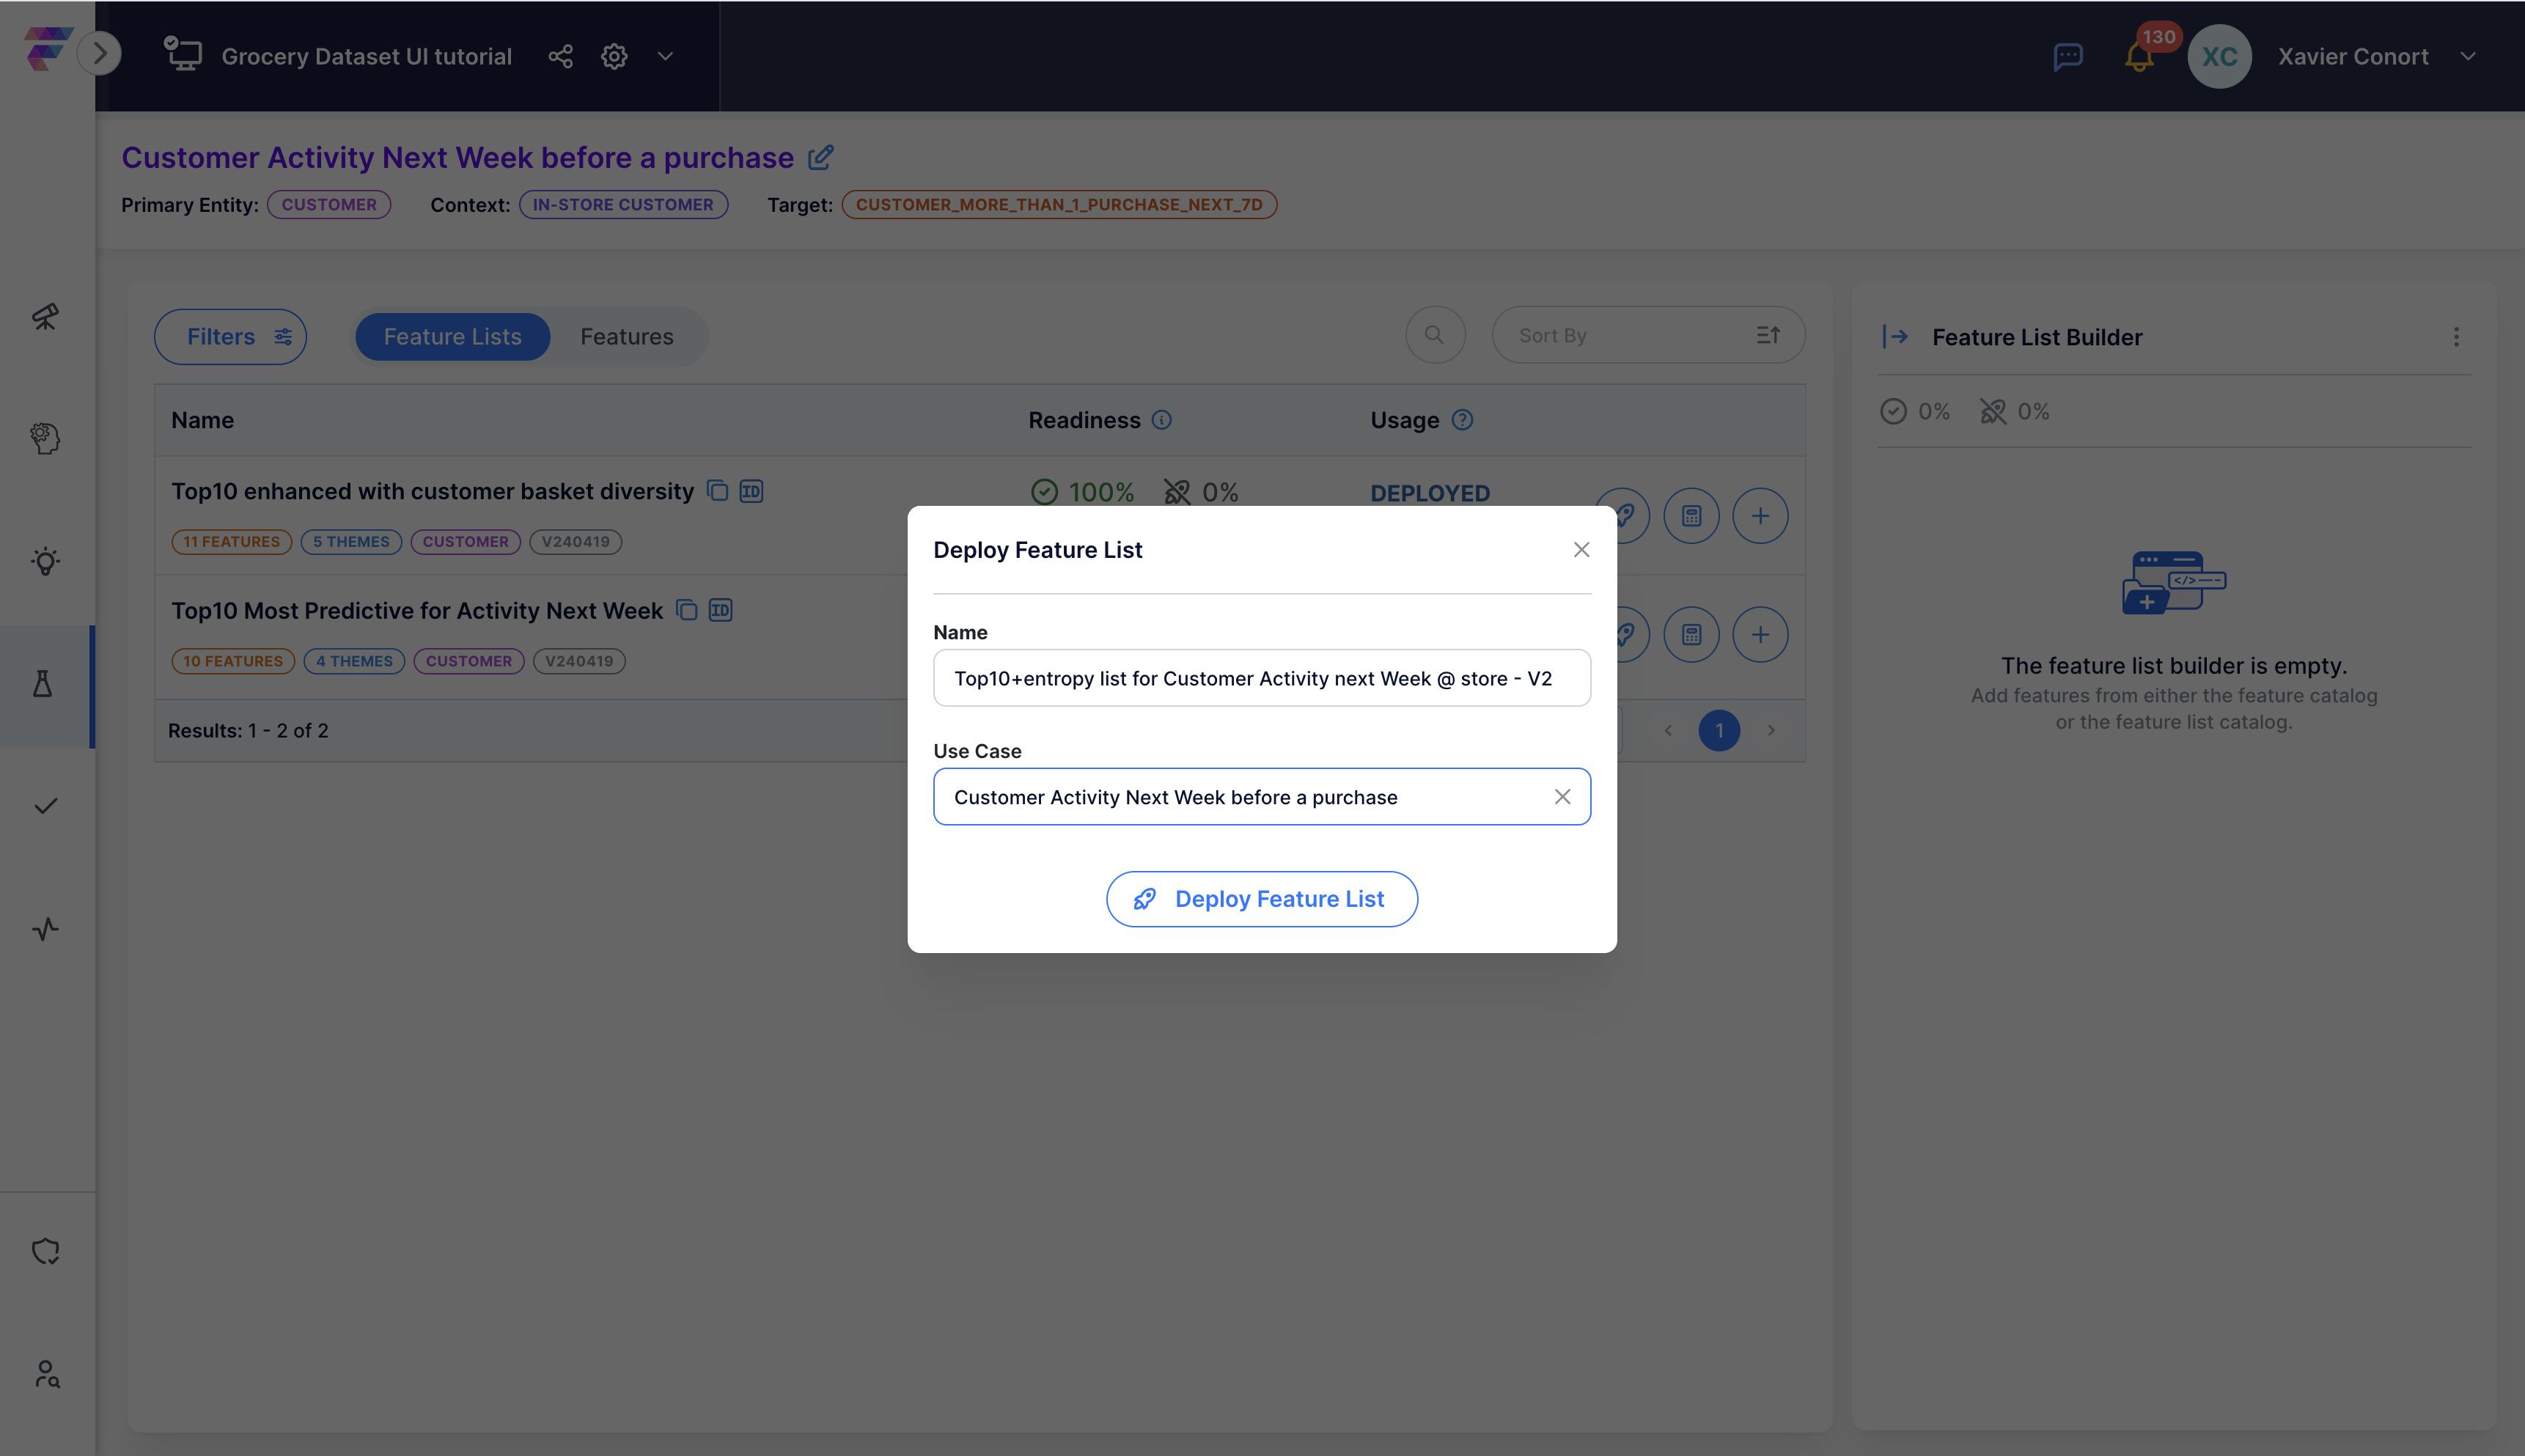
Name and Associate Deployment: Provide a descriptive name for the deployment and associate it with a relevant Use Case for easy tracking. For example: "Top10+entropy list for Customer Activity next Week @ store - V2".
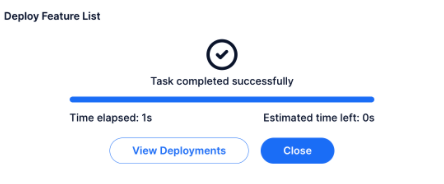
View Deployments: Click on 'View Deployments' to proceed to the Deployment Catalog.
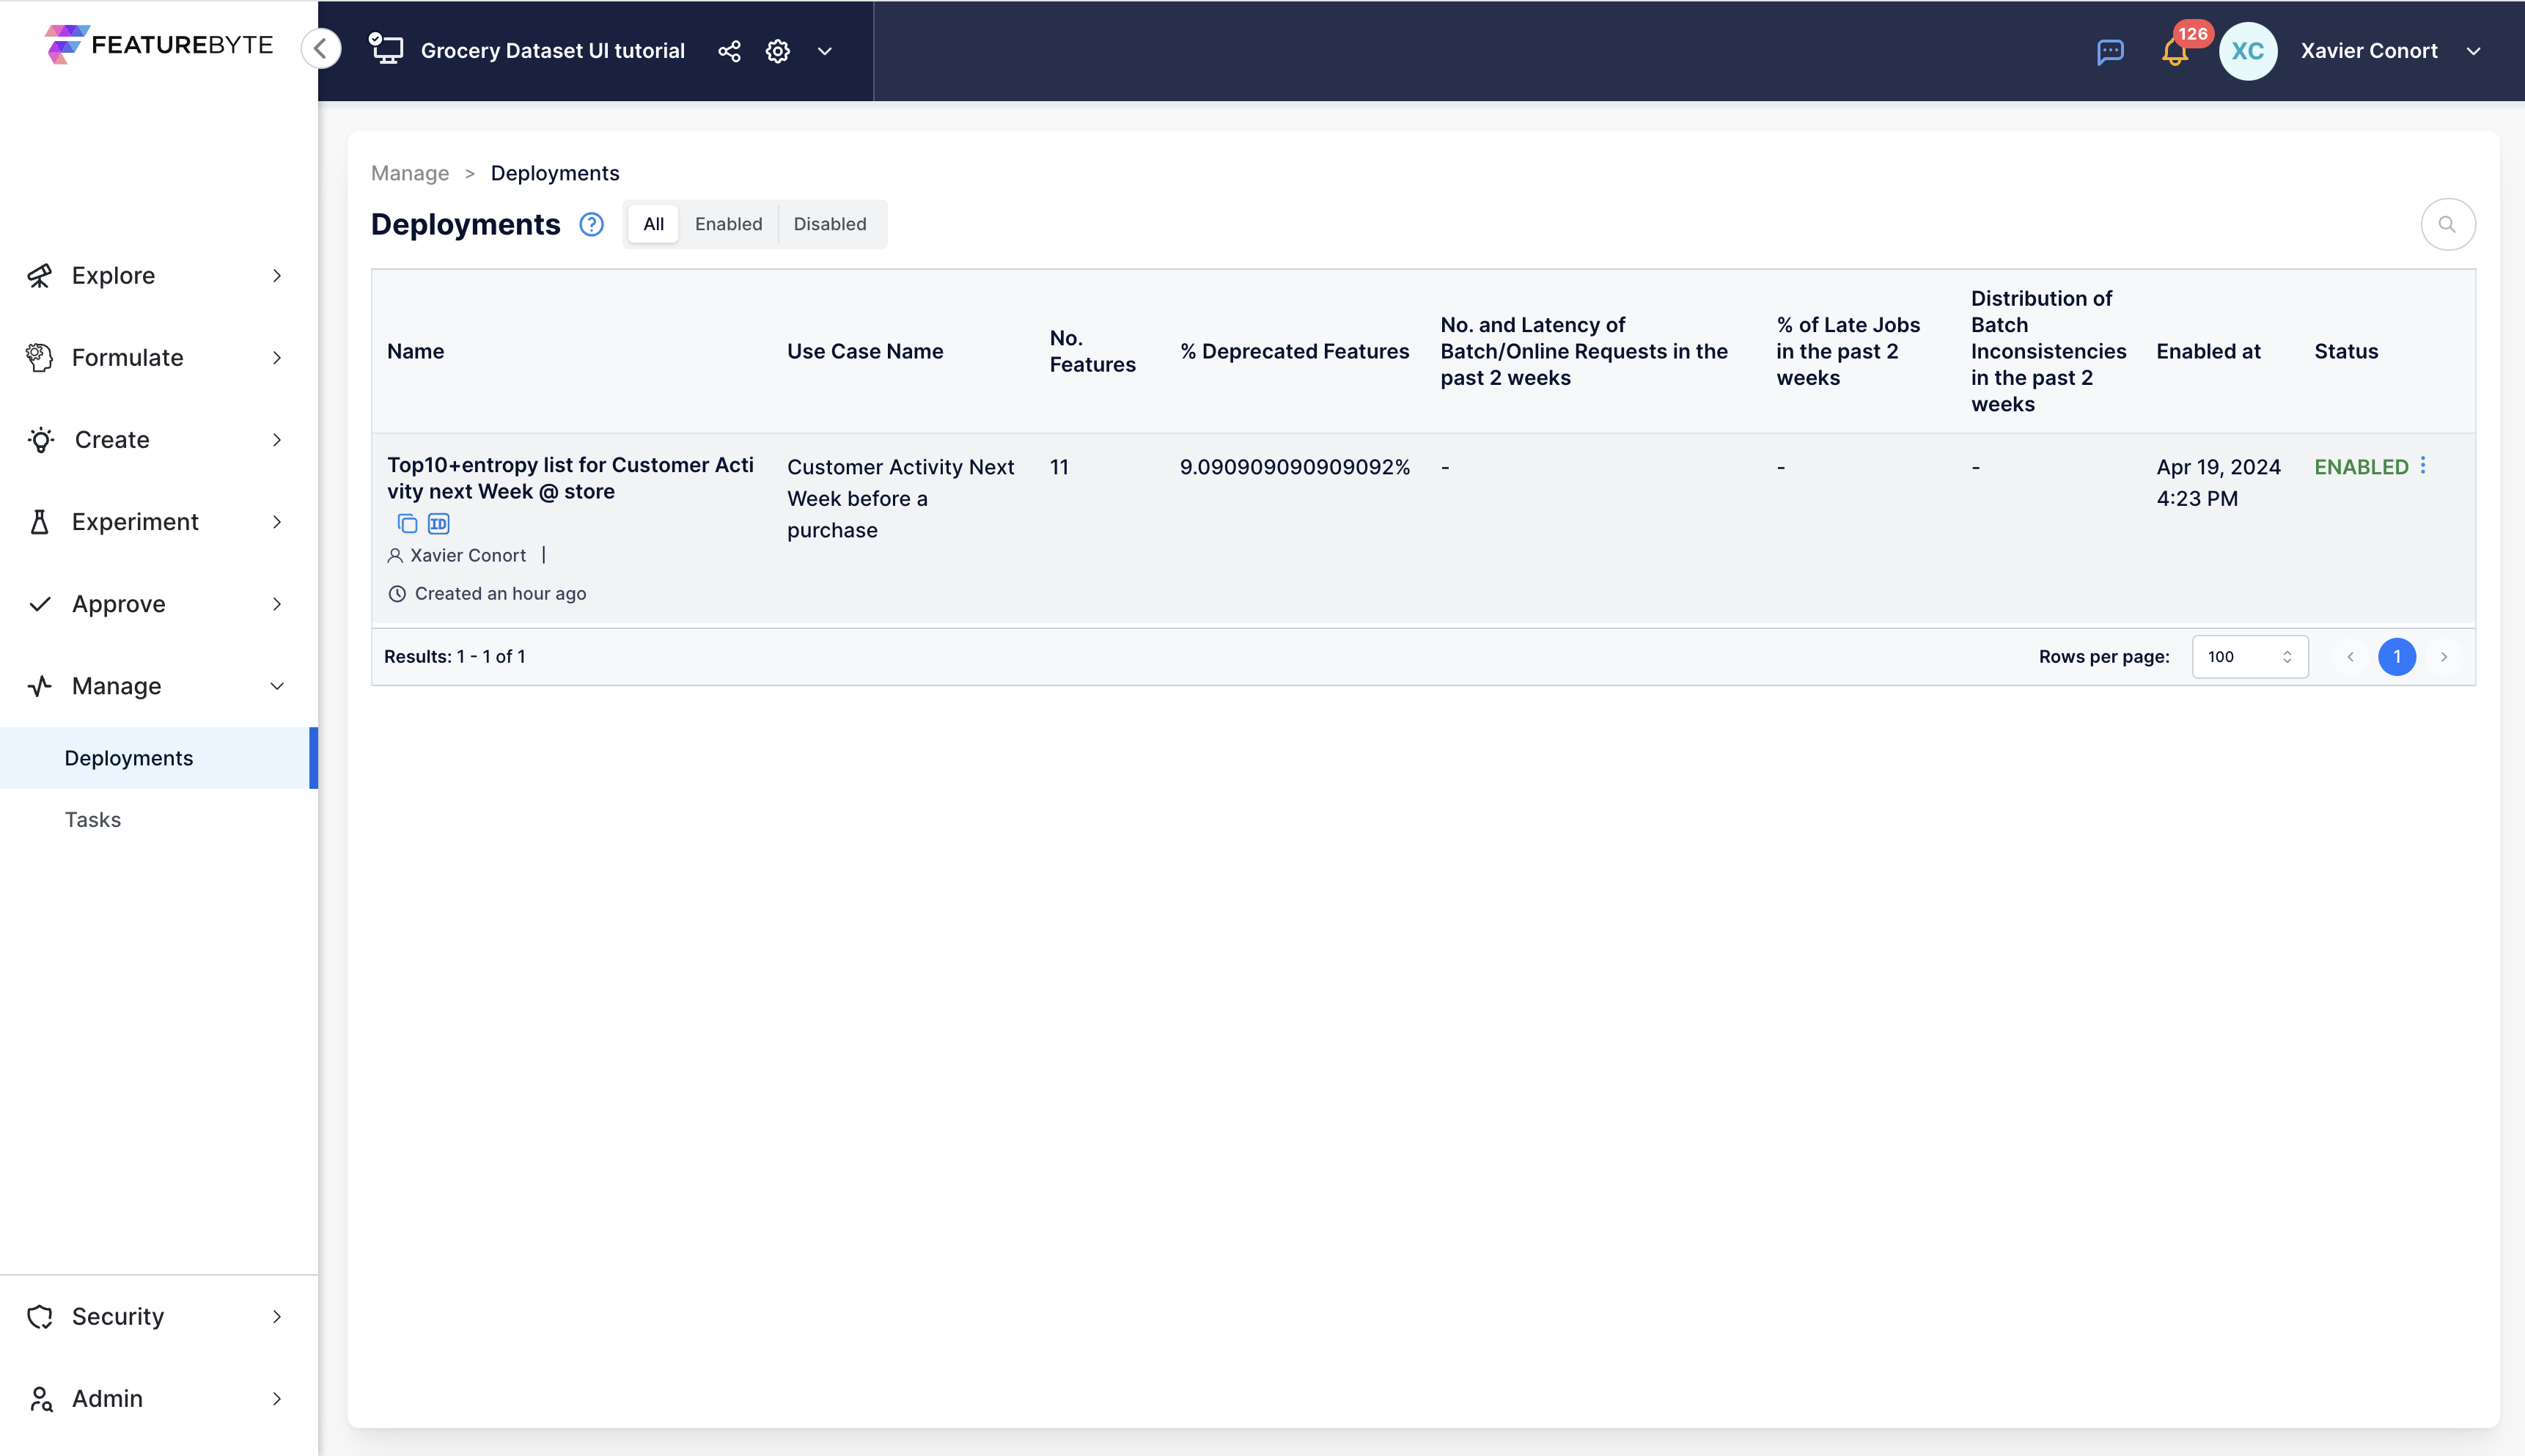
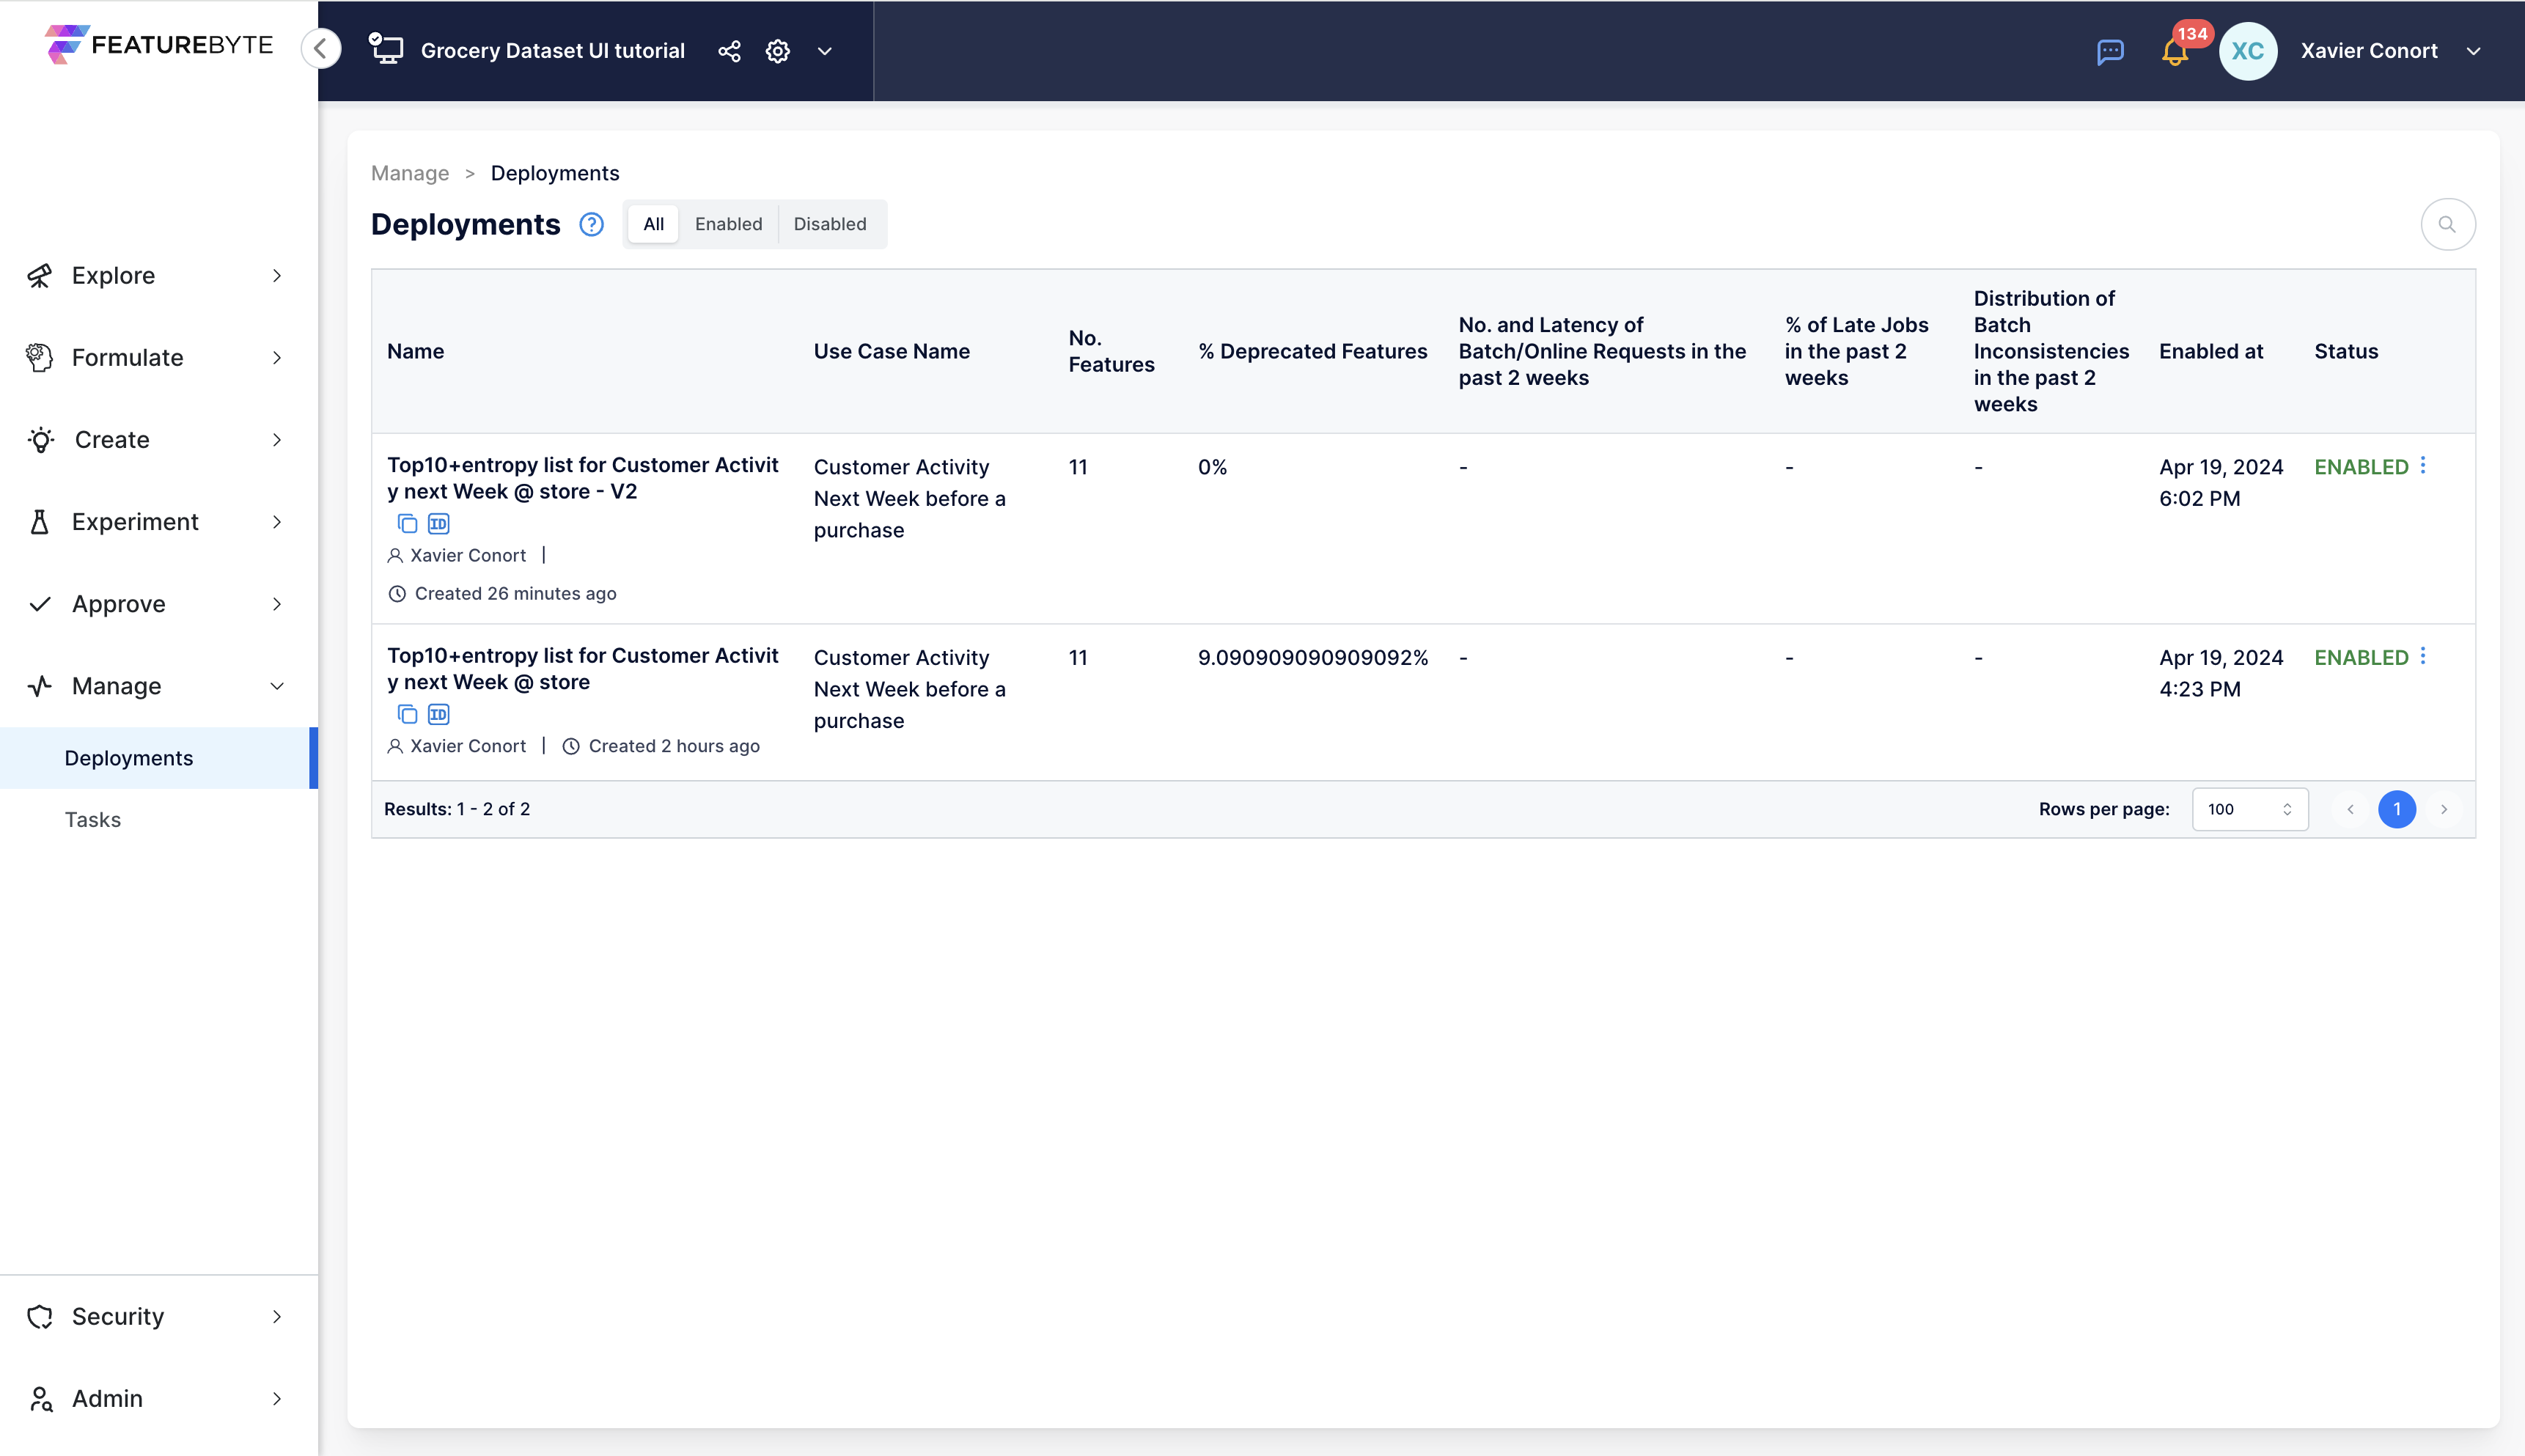
Enable New Deployment: In the Deployment Catalog (under the 'Manage' section), locate and enable the new deployment.
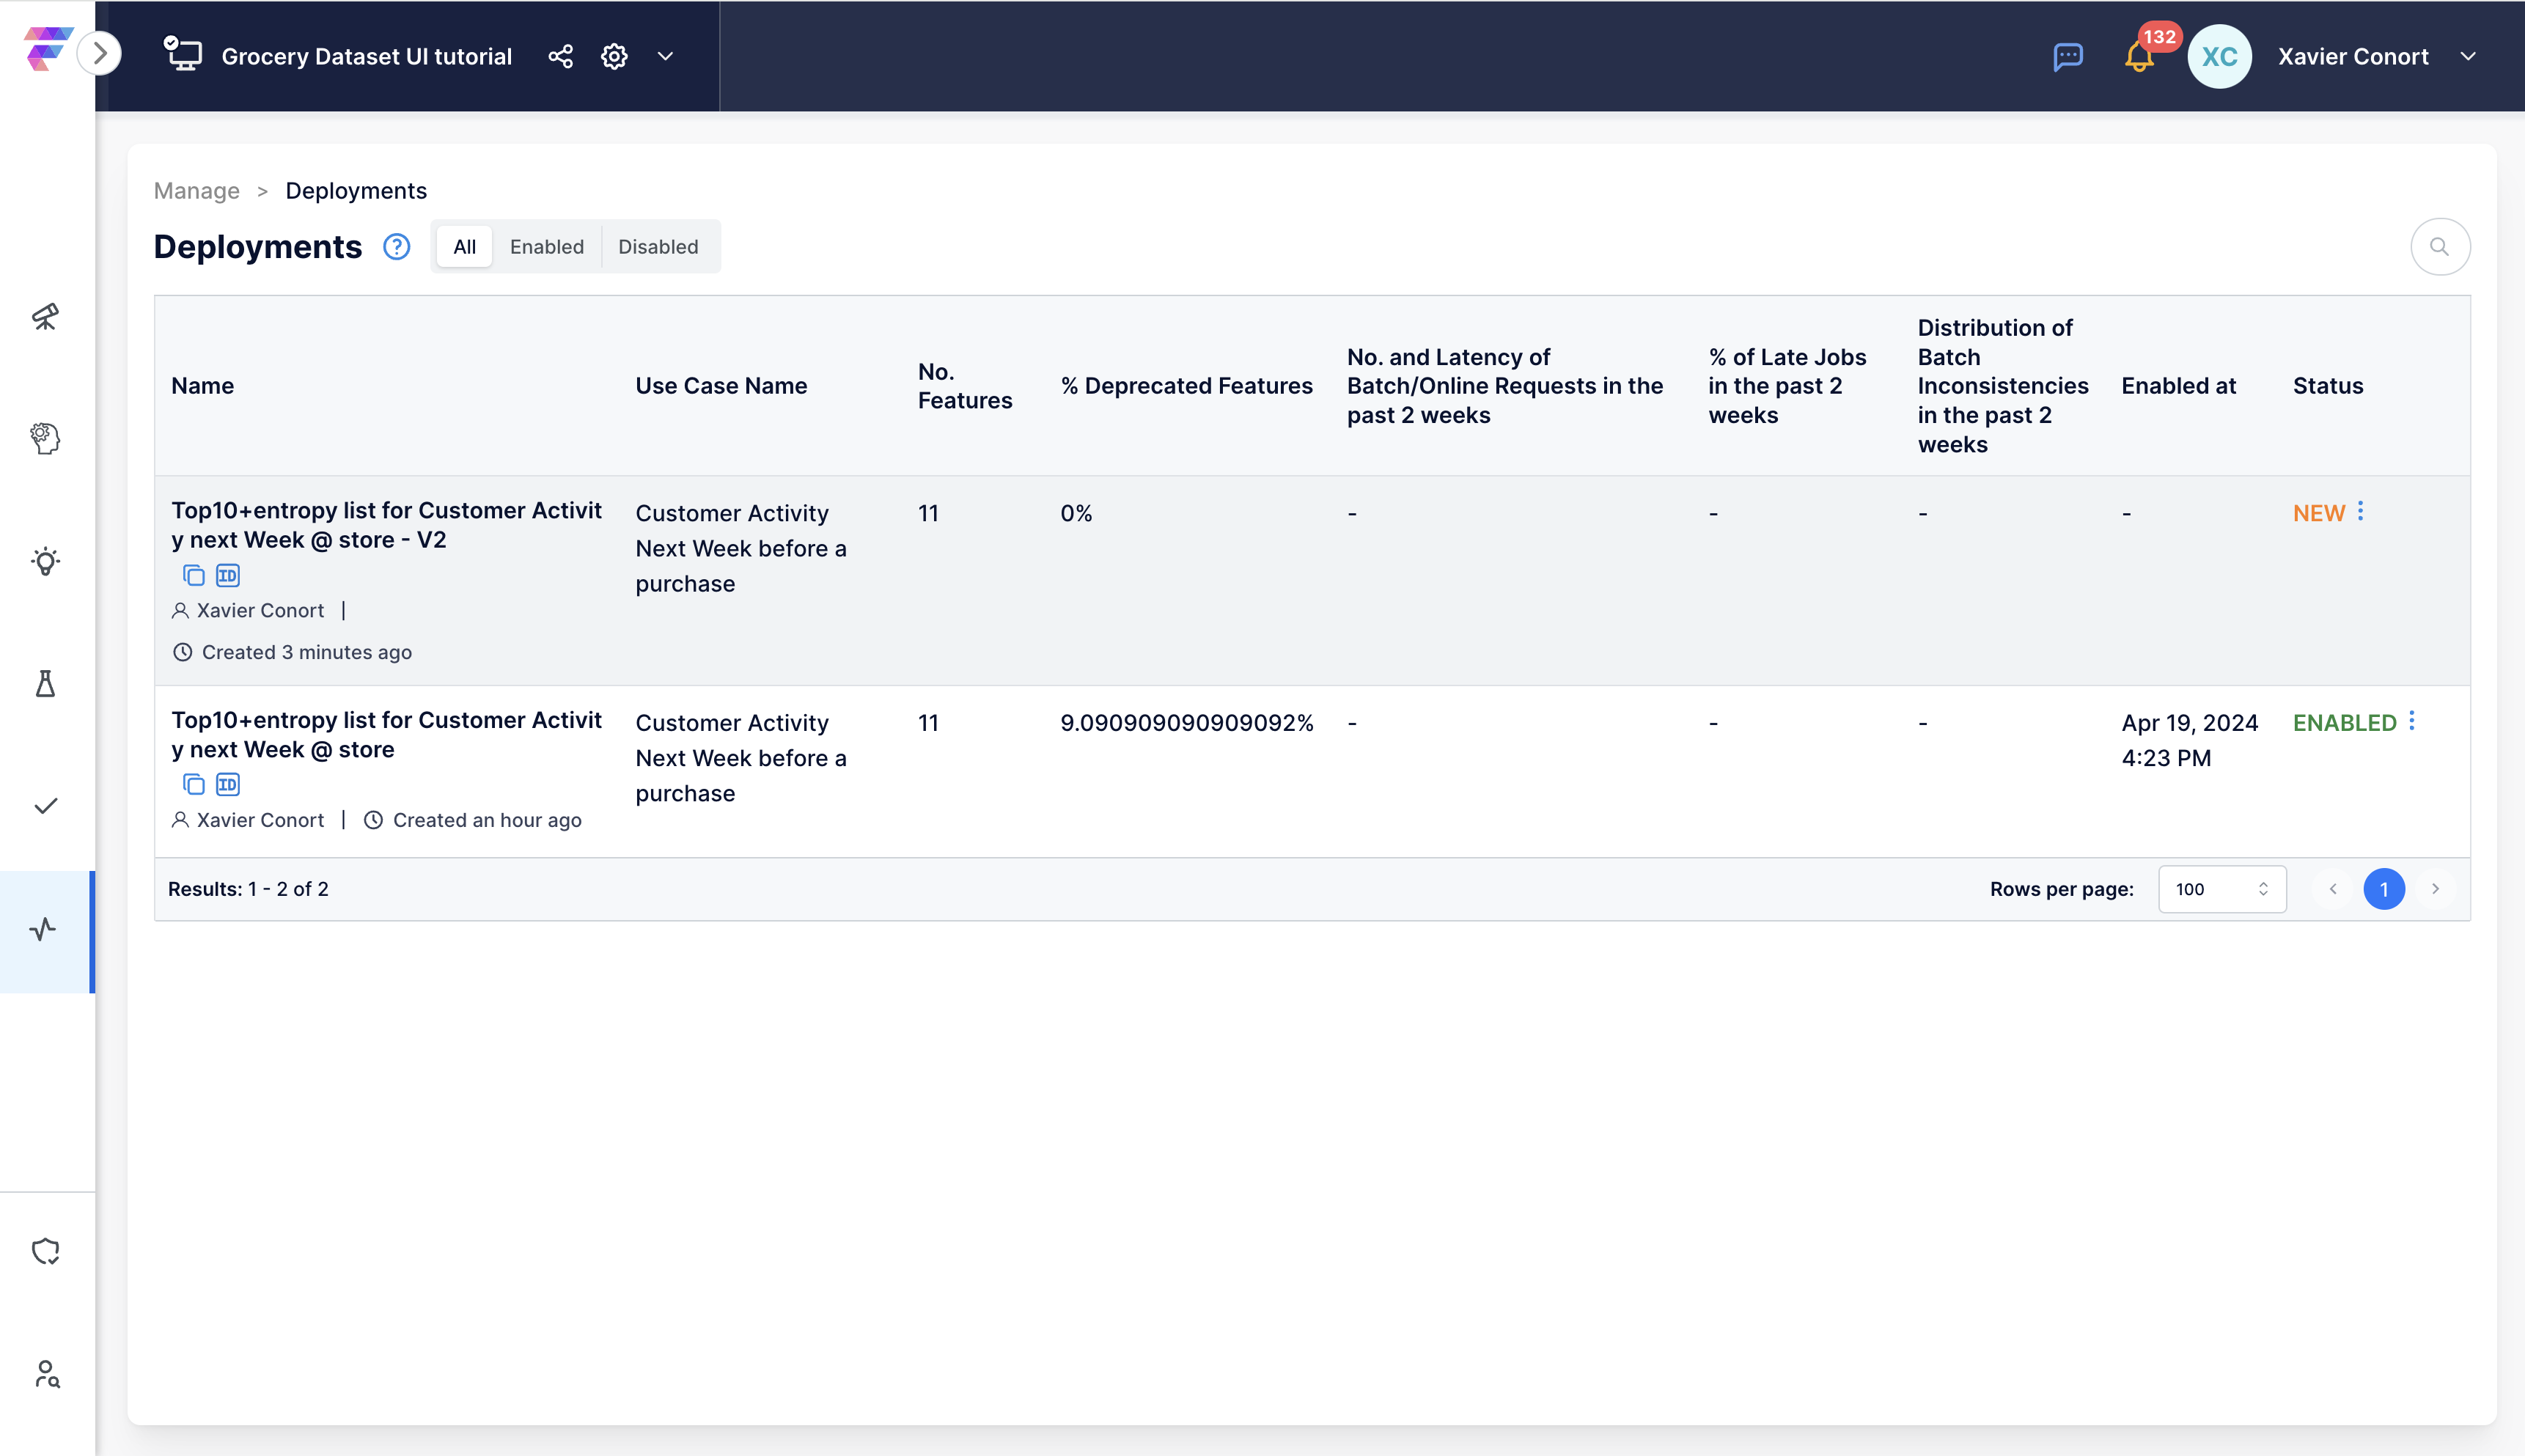
Check Feature List Version and Activate Deployment: Visit the 'About' tab to verify the feature list version used in the deployment. Click the three dots next to the 'NEW' label and select 'Enable'.

Confirm Multiple Deployments: Ensure that there are now two active deployments.
Step 5: Monitor Deployments
Access Scheduled Tasks: From the menu, under 'Manage', go to 'Tasks' and select the 'Scheduled' tab to view the completion status of tiles jobs.
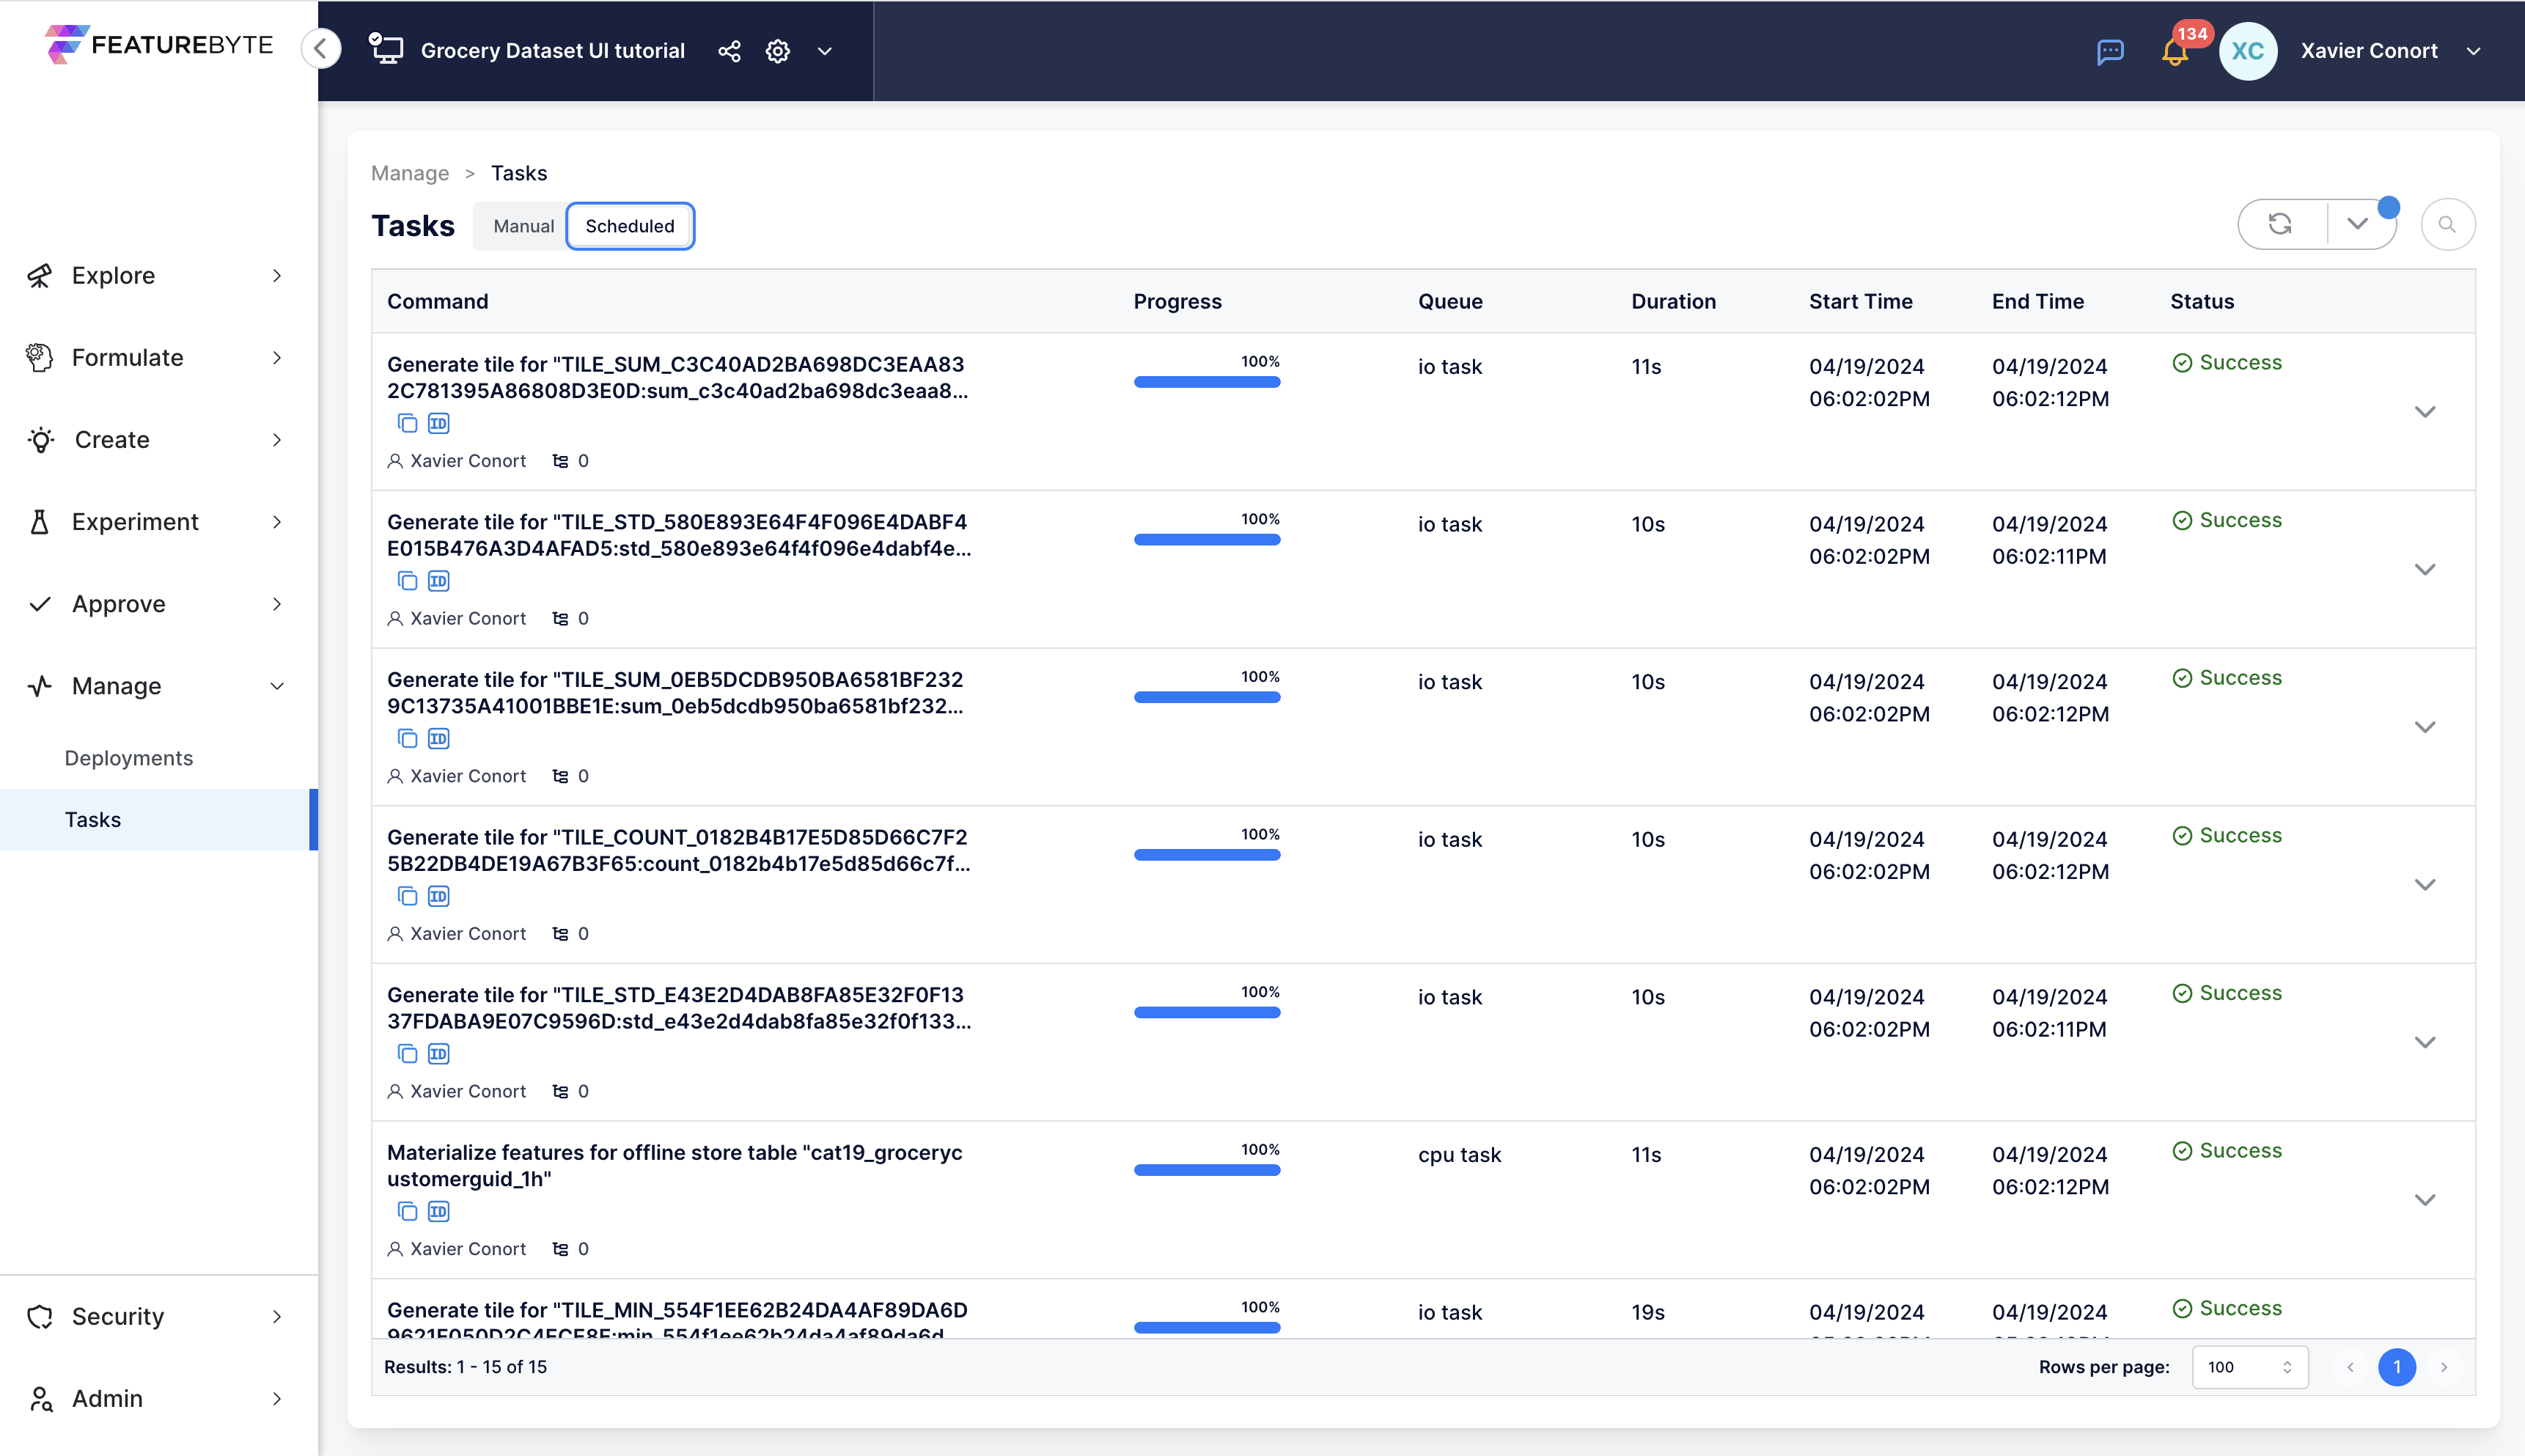
Review Feature Job Status: Regularly check feature job status reports to monitor the performance of your deployed features.
Use the provided Python code snippet in a notebook to generate a detailed report on recent activities of scheduled feature jobs for a deployment.
import featurebyte as fb
# Set your profile to the tutorial environment
fb.use_profile("tutorial")
# Activate catalog
catalog = fb.Catalog.activate("Grocery Dataset UI Tutorial")
# Get deployment object
deployment = catalog.get_deployment("Top10+entropy list for Customer Activity next Week @ store - V2")
# Get feature job status
deployment.get_feature_jobs_status()
Step 6: Disable Deployments
Navigate to Deployment Catalog: Access the Deployment Catalog from the 'Manage' section in the menu.
Disable Deployment: If a deployment is no longer needed, click the three dots next to its 'ENABLED' status and select 'Disable'.