11. Deploy and serve a feature list
You'll designate features as Production-Ready, navigate FeatureByte's Approval Flow, and once all features in your list receive approval, deploy it for both online and batch serving.
Step 1: Mark a Feature as Production-Ready
Navigate to the Feature catalog from the Experiment section of the menu.
Locate the most predictive feature by sorting based on the predictive score, here "CUSTOMER_Count_of_invoices_4w."
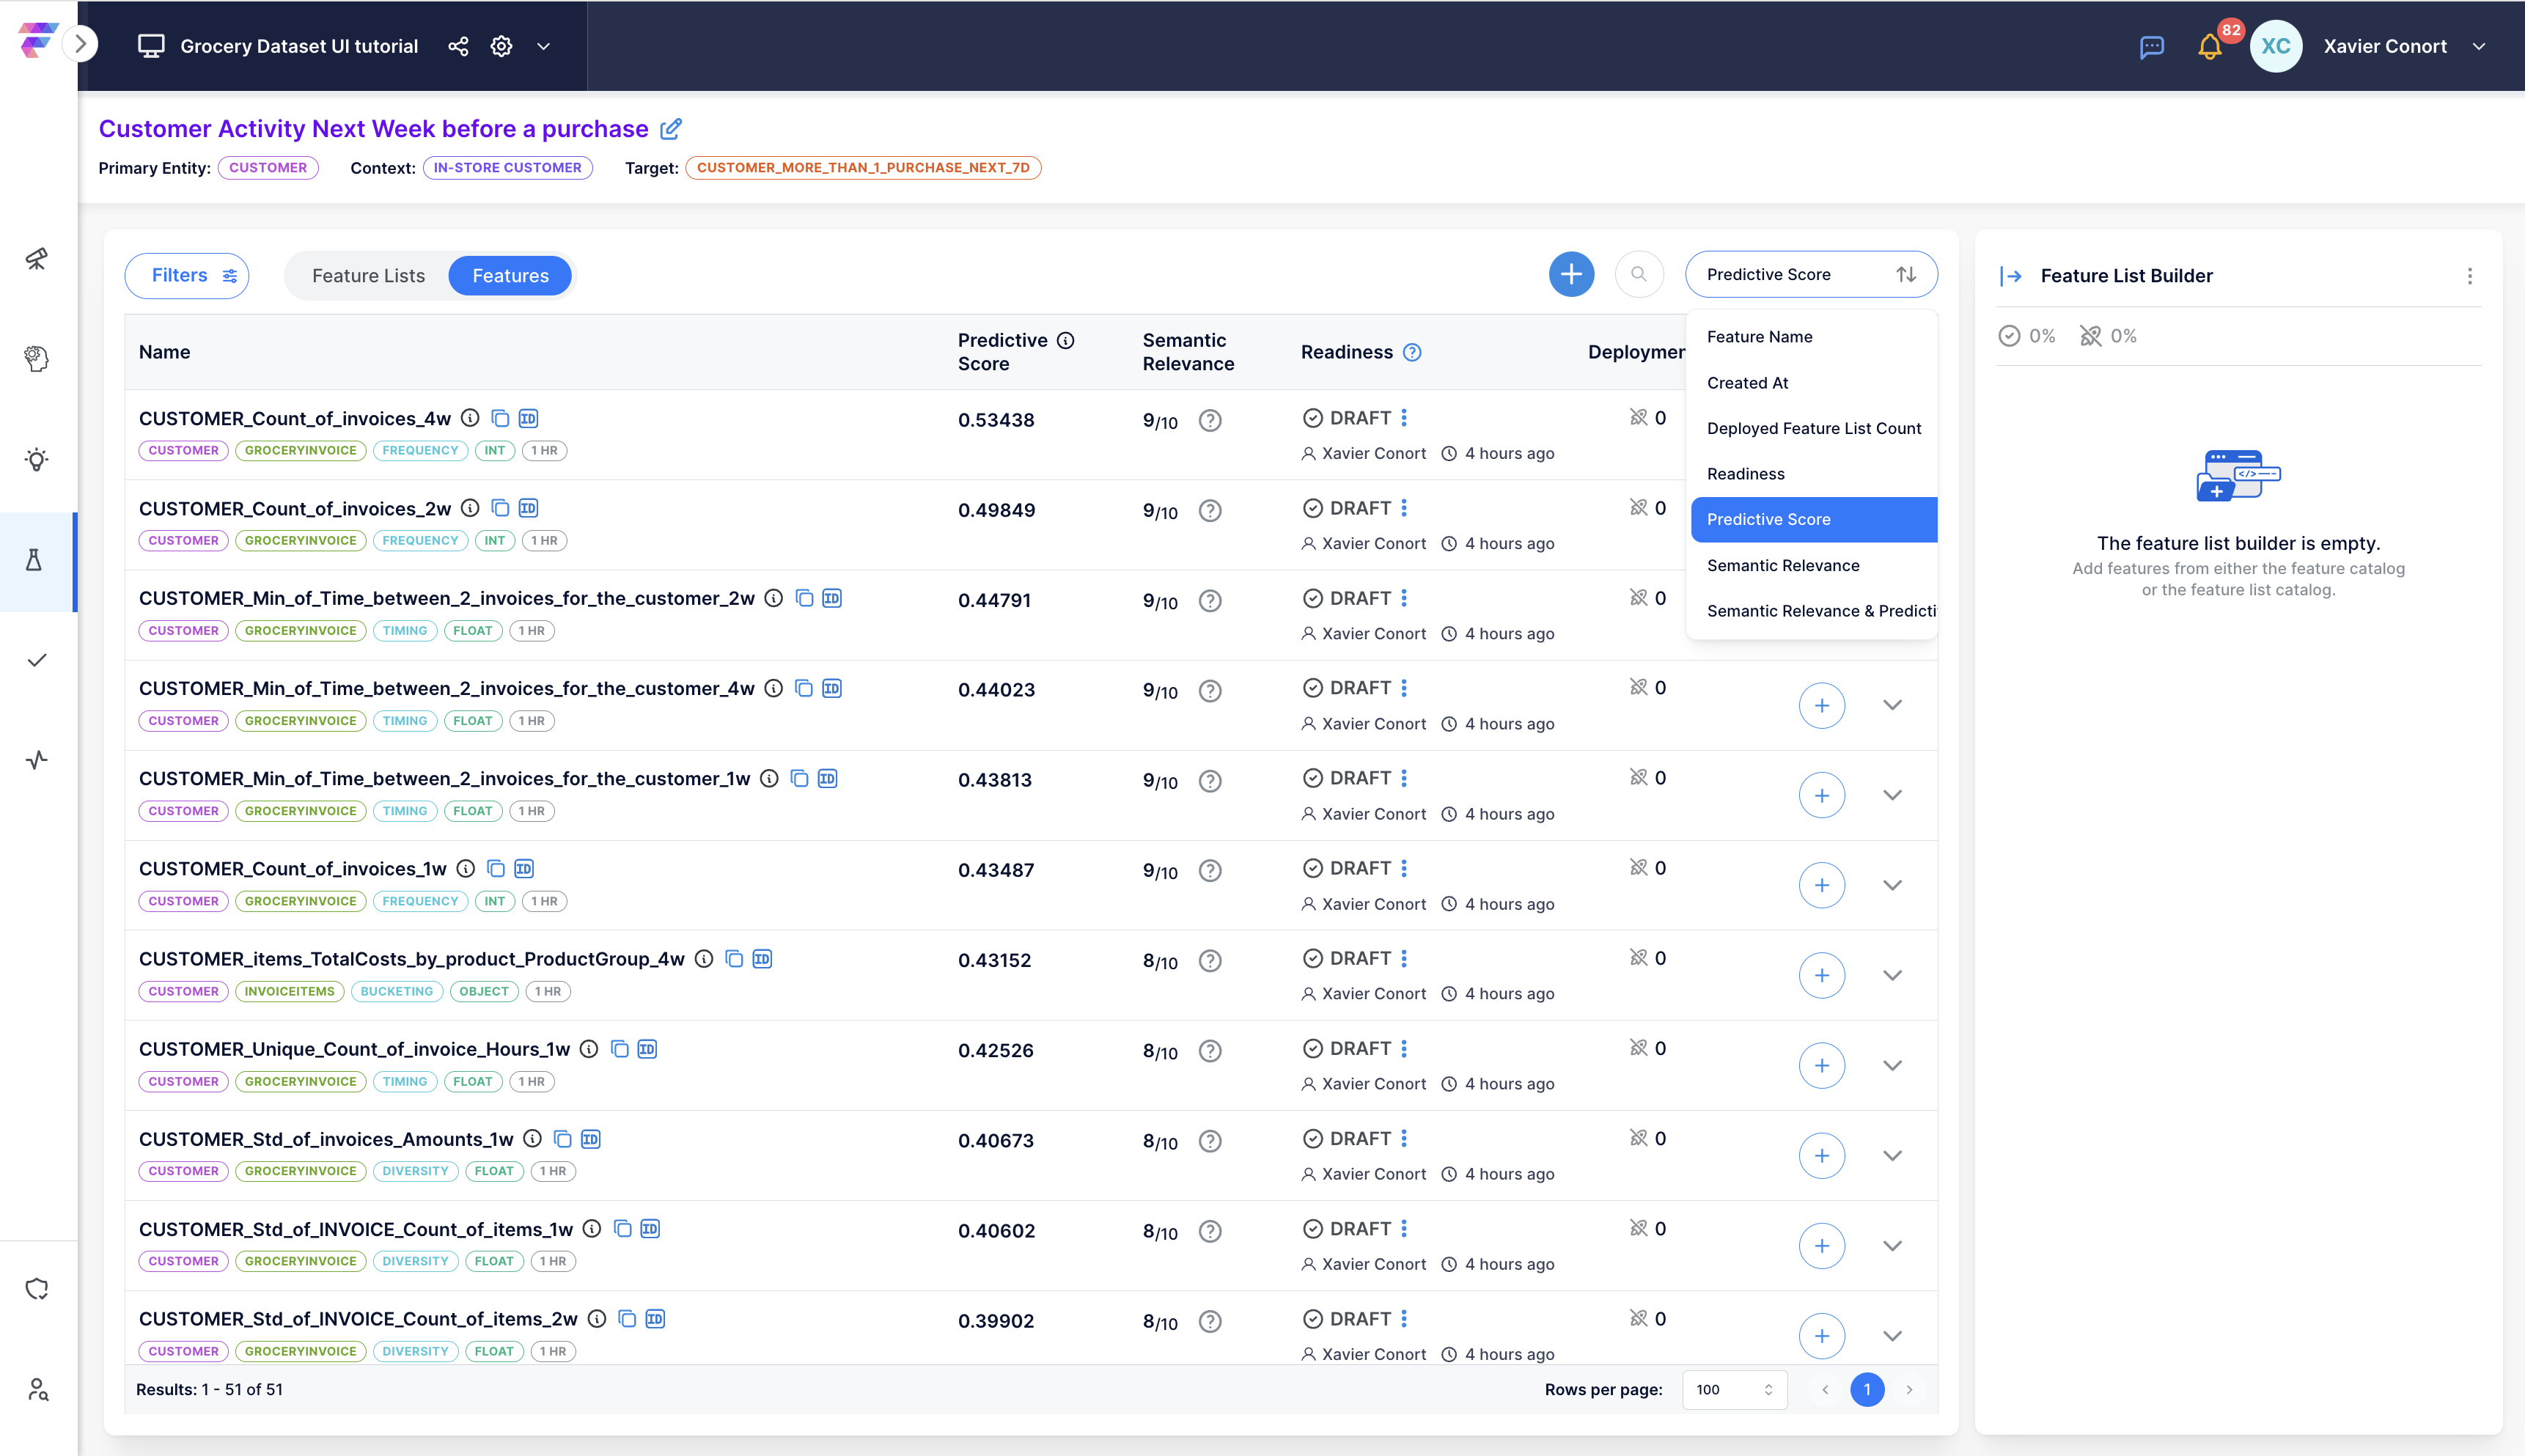
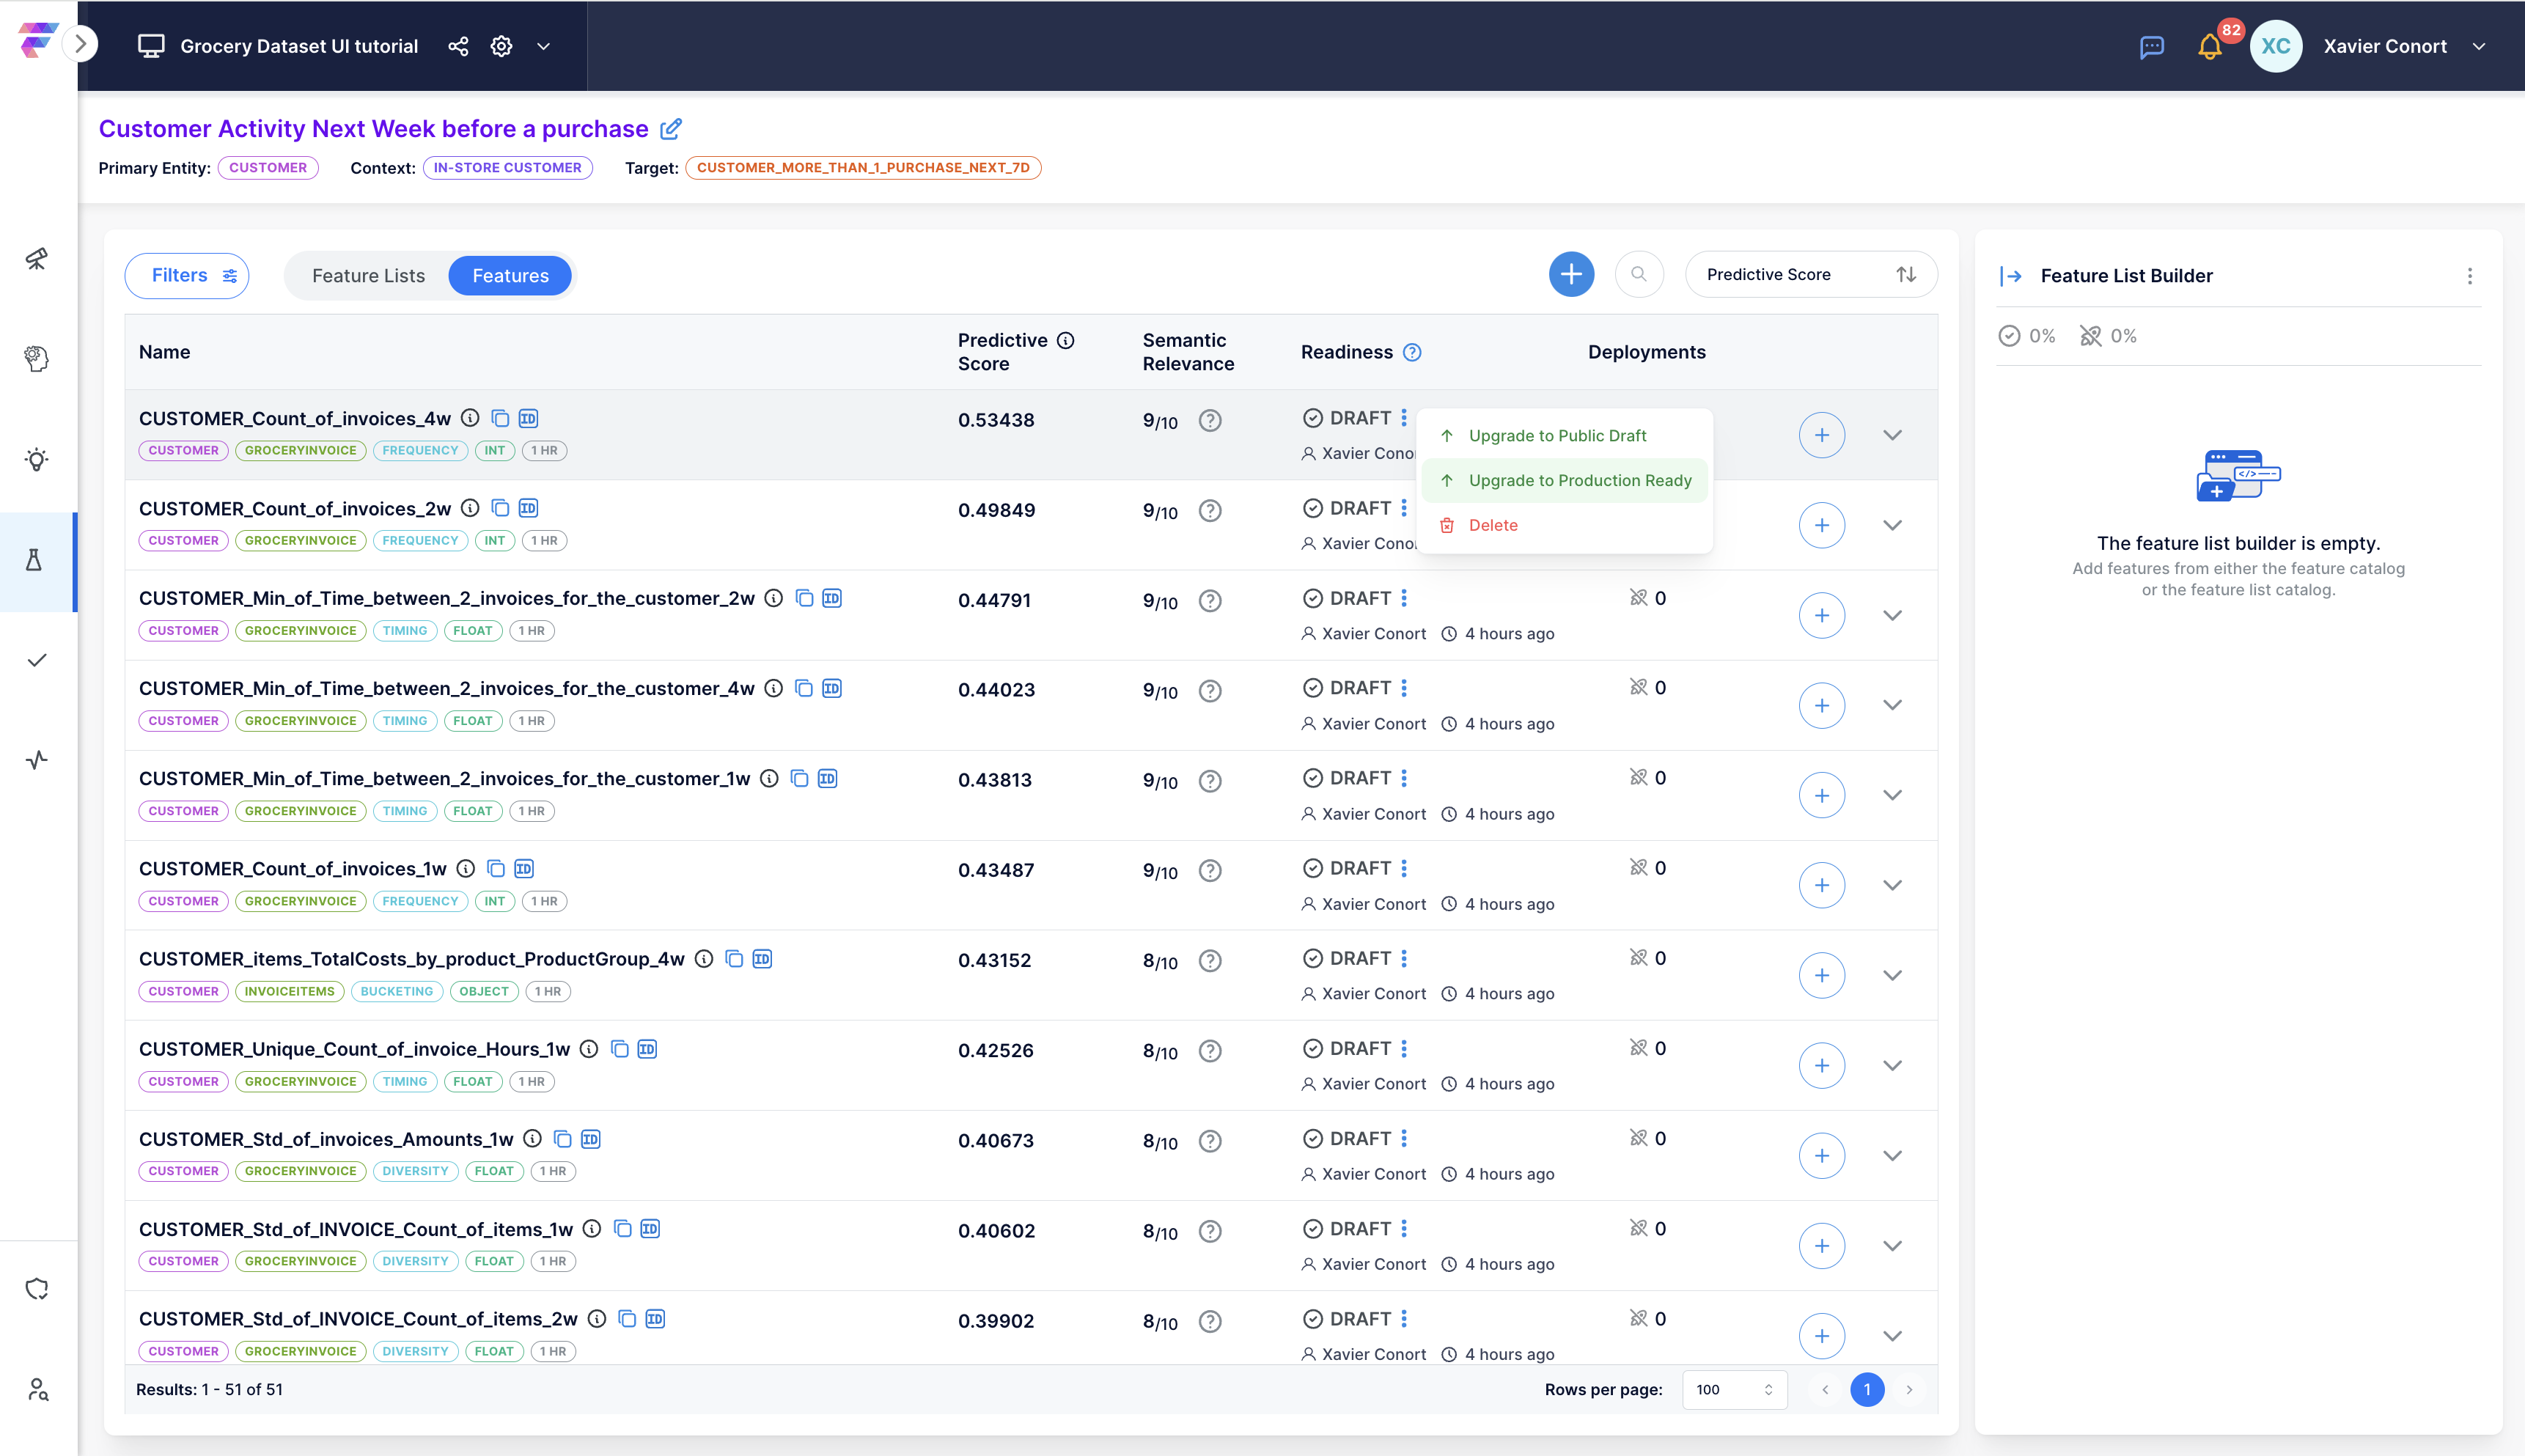
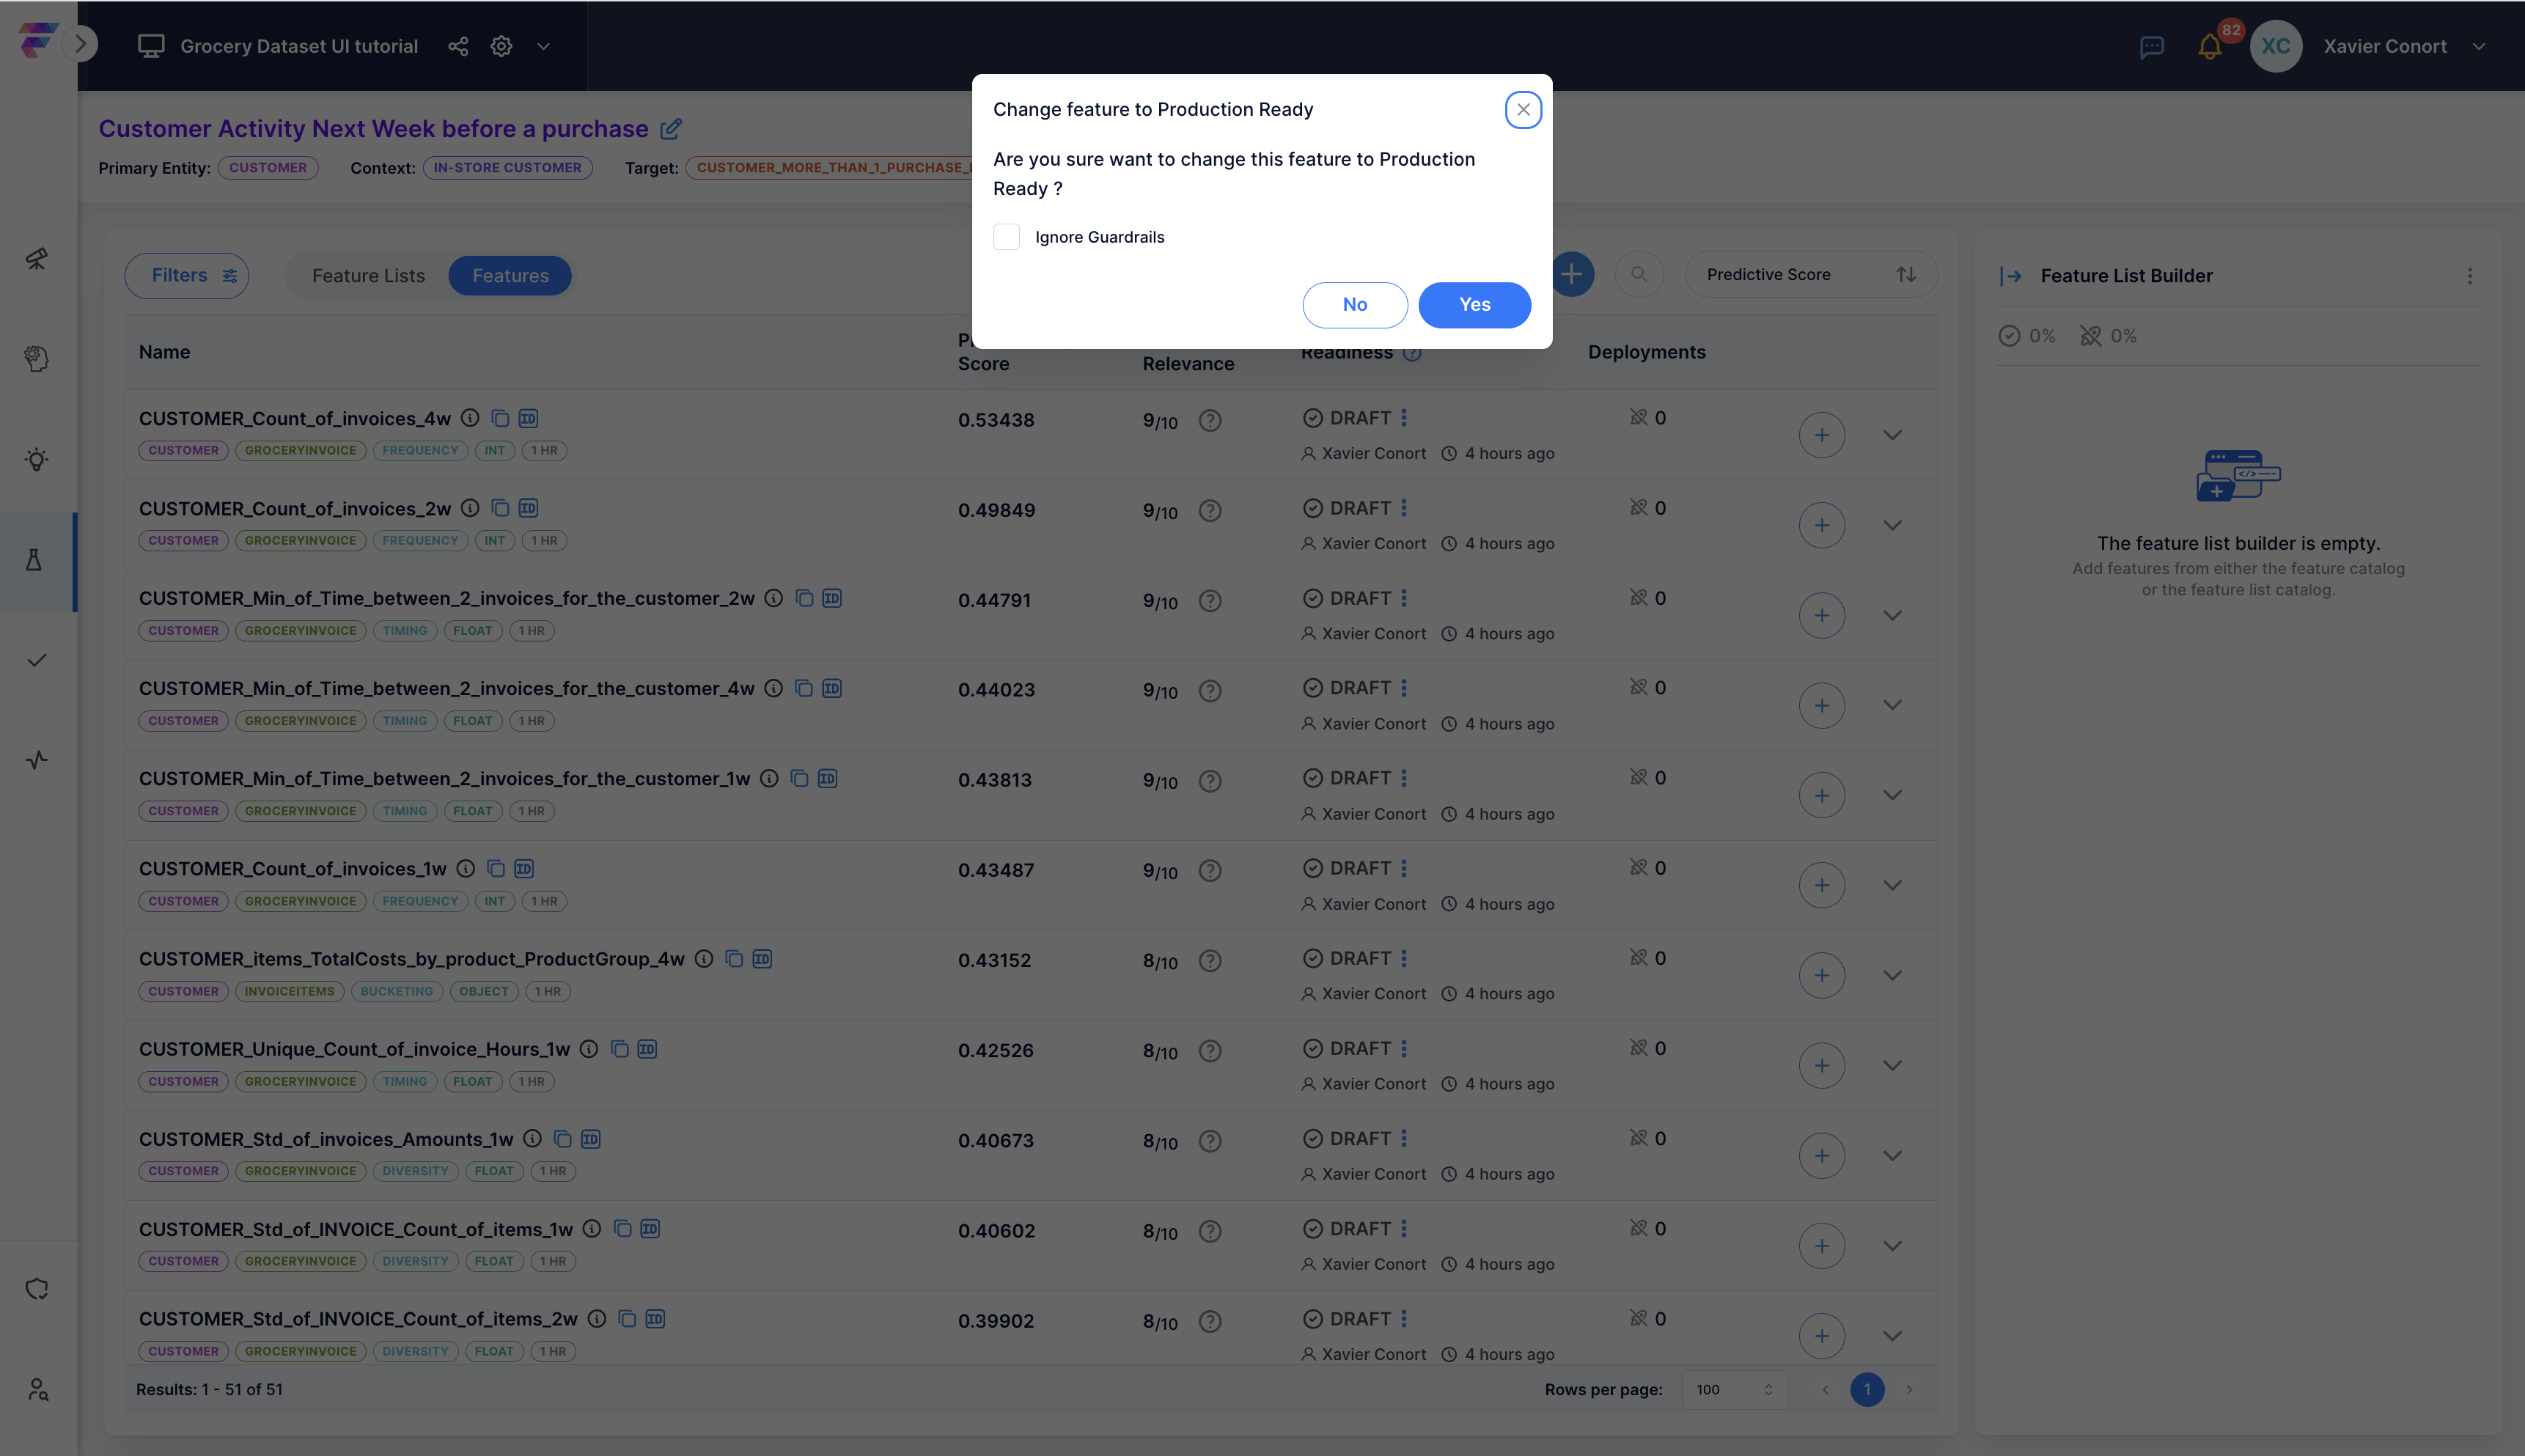
Click the three dots next to the feature's current status (e.g., DRAFT) and change its readiness to "Production-Ready".
Confirm.
Note
If your catalog has an Approval Flow enabled, upgrading features to "Production-Ready" requires approval.
Step 2: Enable Approval Flow
Click on the settings icon located next to the Catalog name at the top of the screen.

Inside the catalog settings, locate and enable the 'Approval Flow' option.

Look for a validation mark next to the Catalog name. This indicates the Approval Flow is enabled.
![]()
Step 3: Request Production-Ready Upgrade
Search "CUSTOMER_Entropy_of_items_TotalCosts_by_product_ProductGroup_4w" feature, click 'Upgrade to Production Ready' and confirm you want to change its readiness.
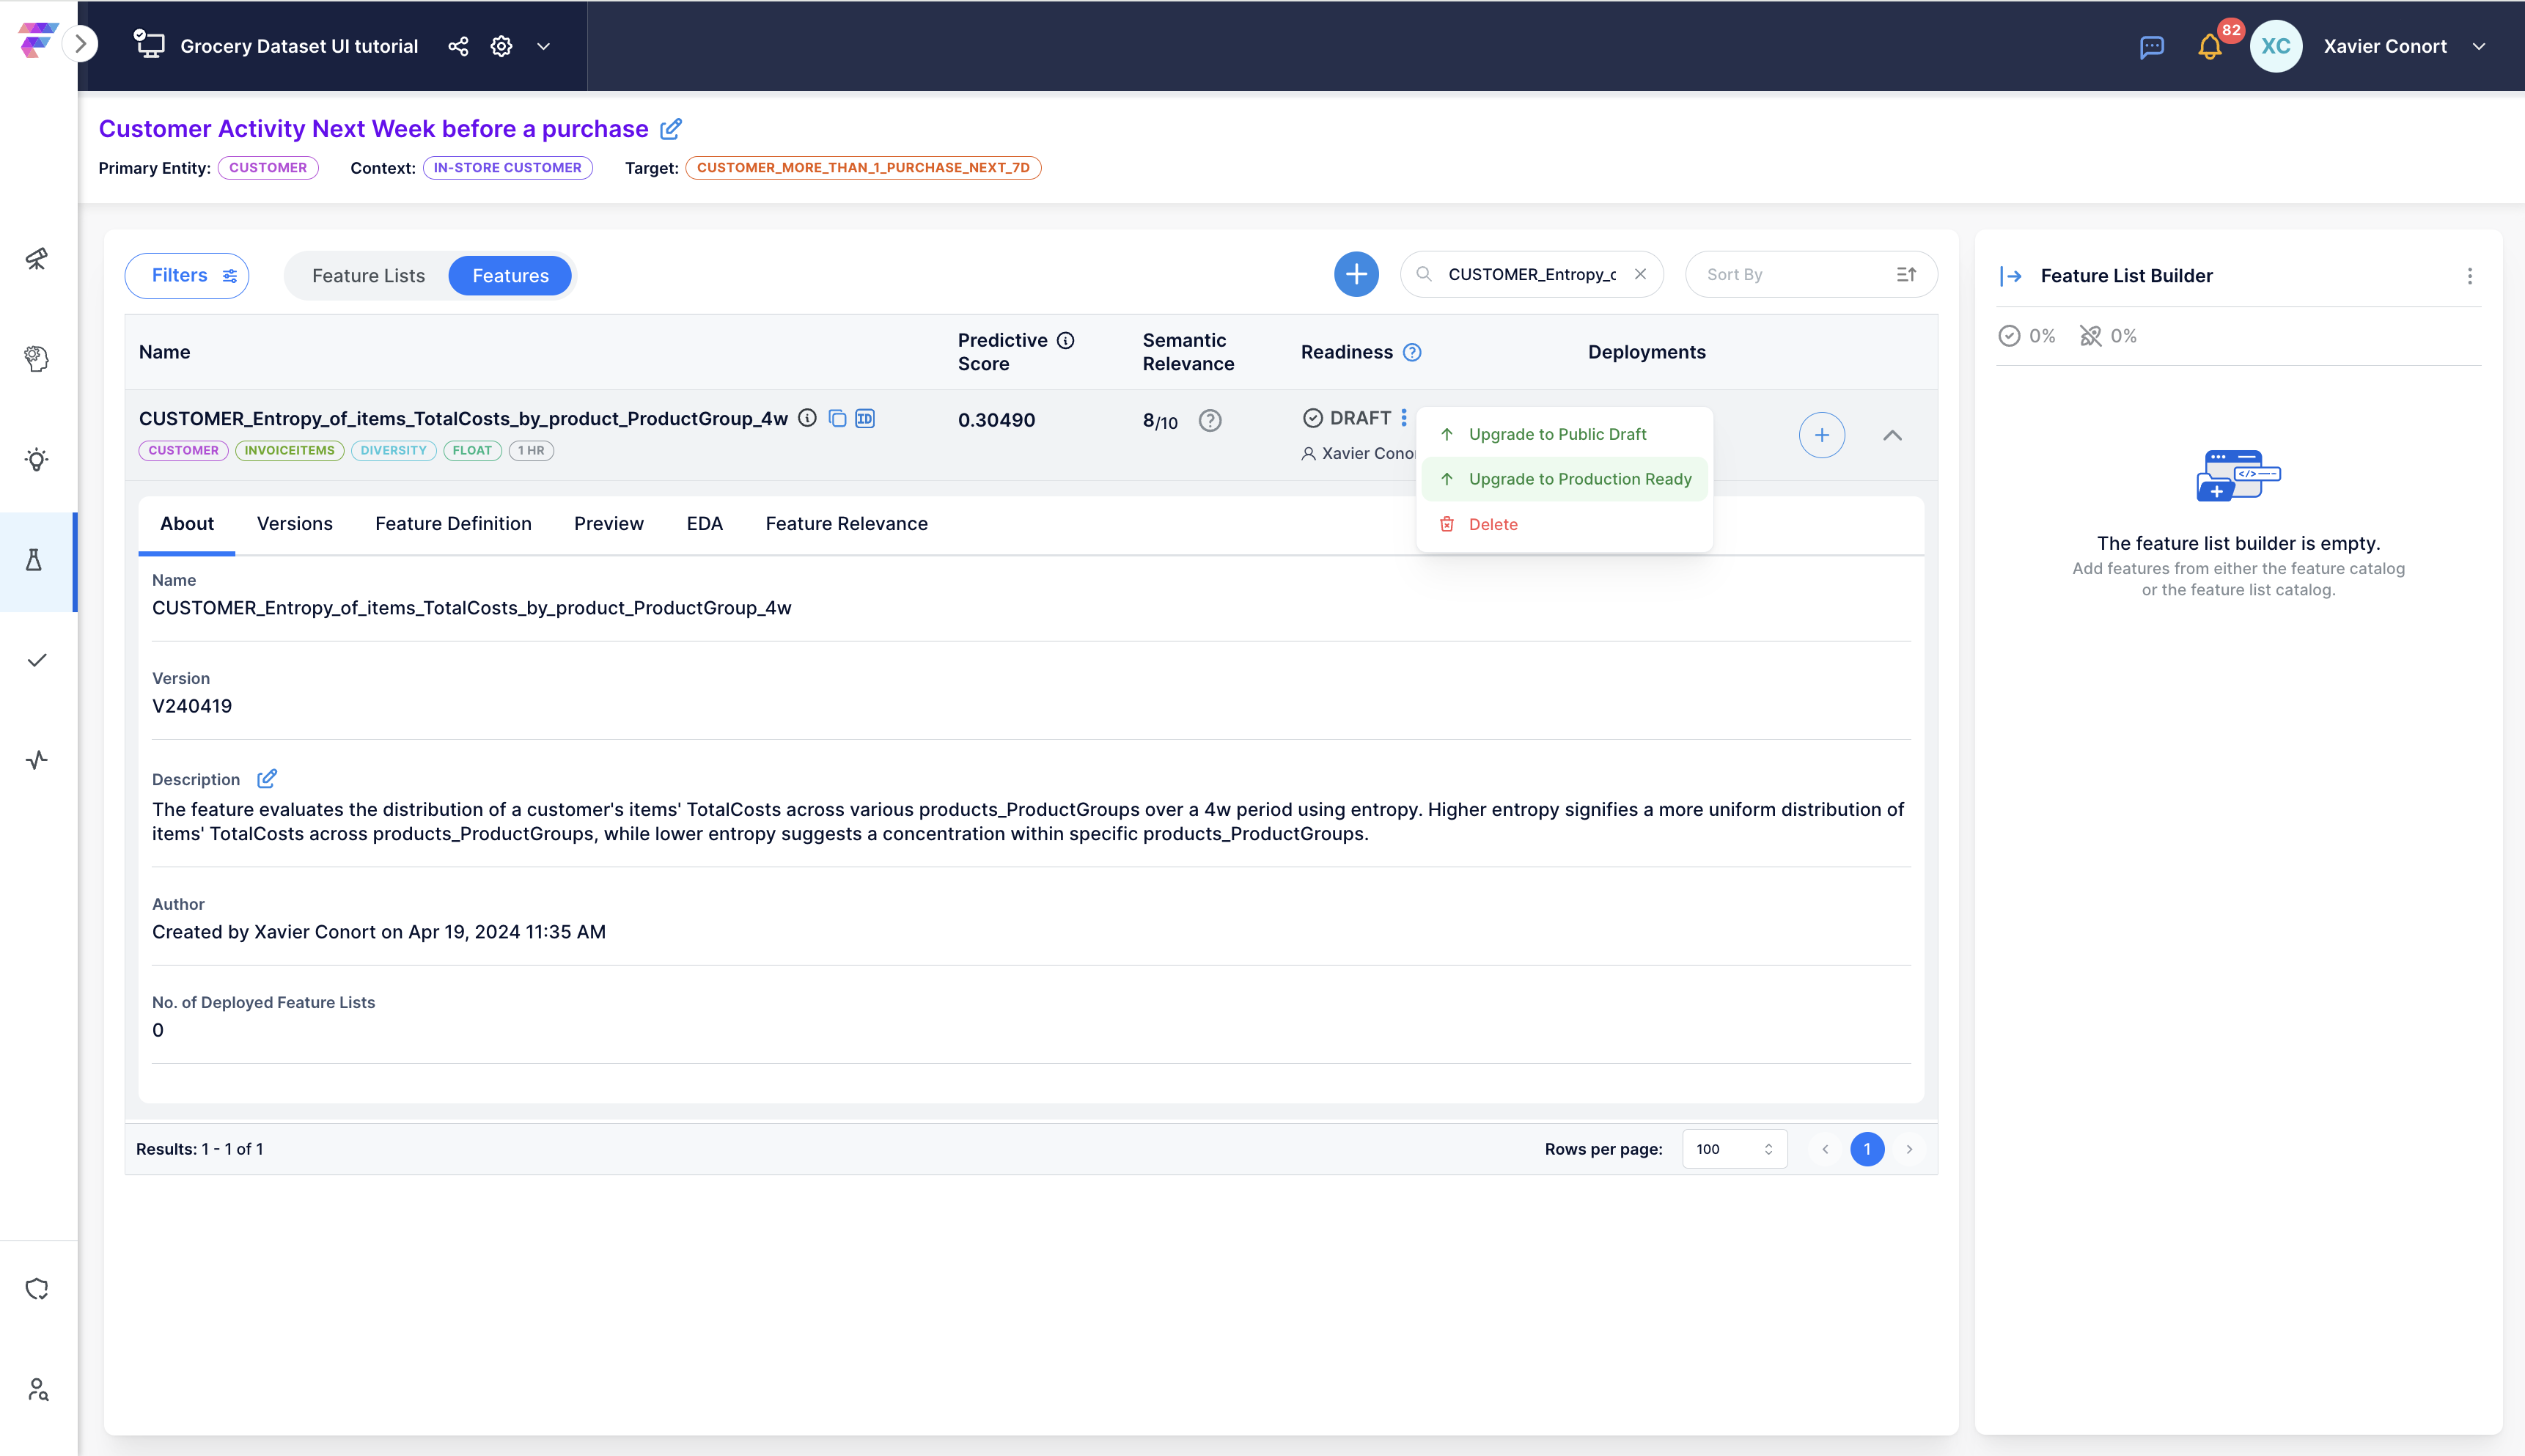
This initiates an approval request. Click 'View' to see the request.

The request is listed for Production-Ready upgrade.
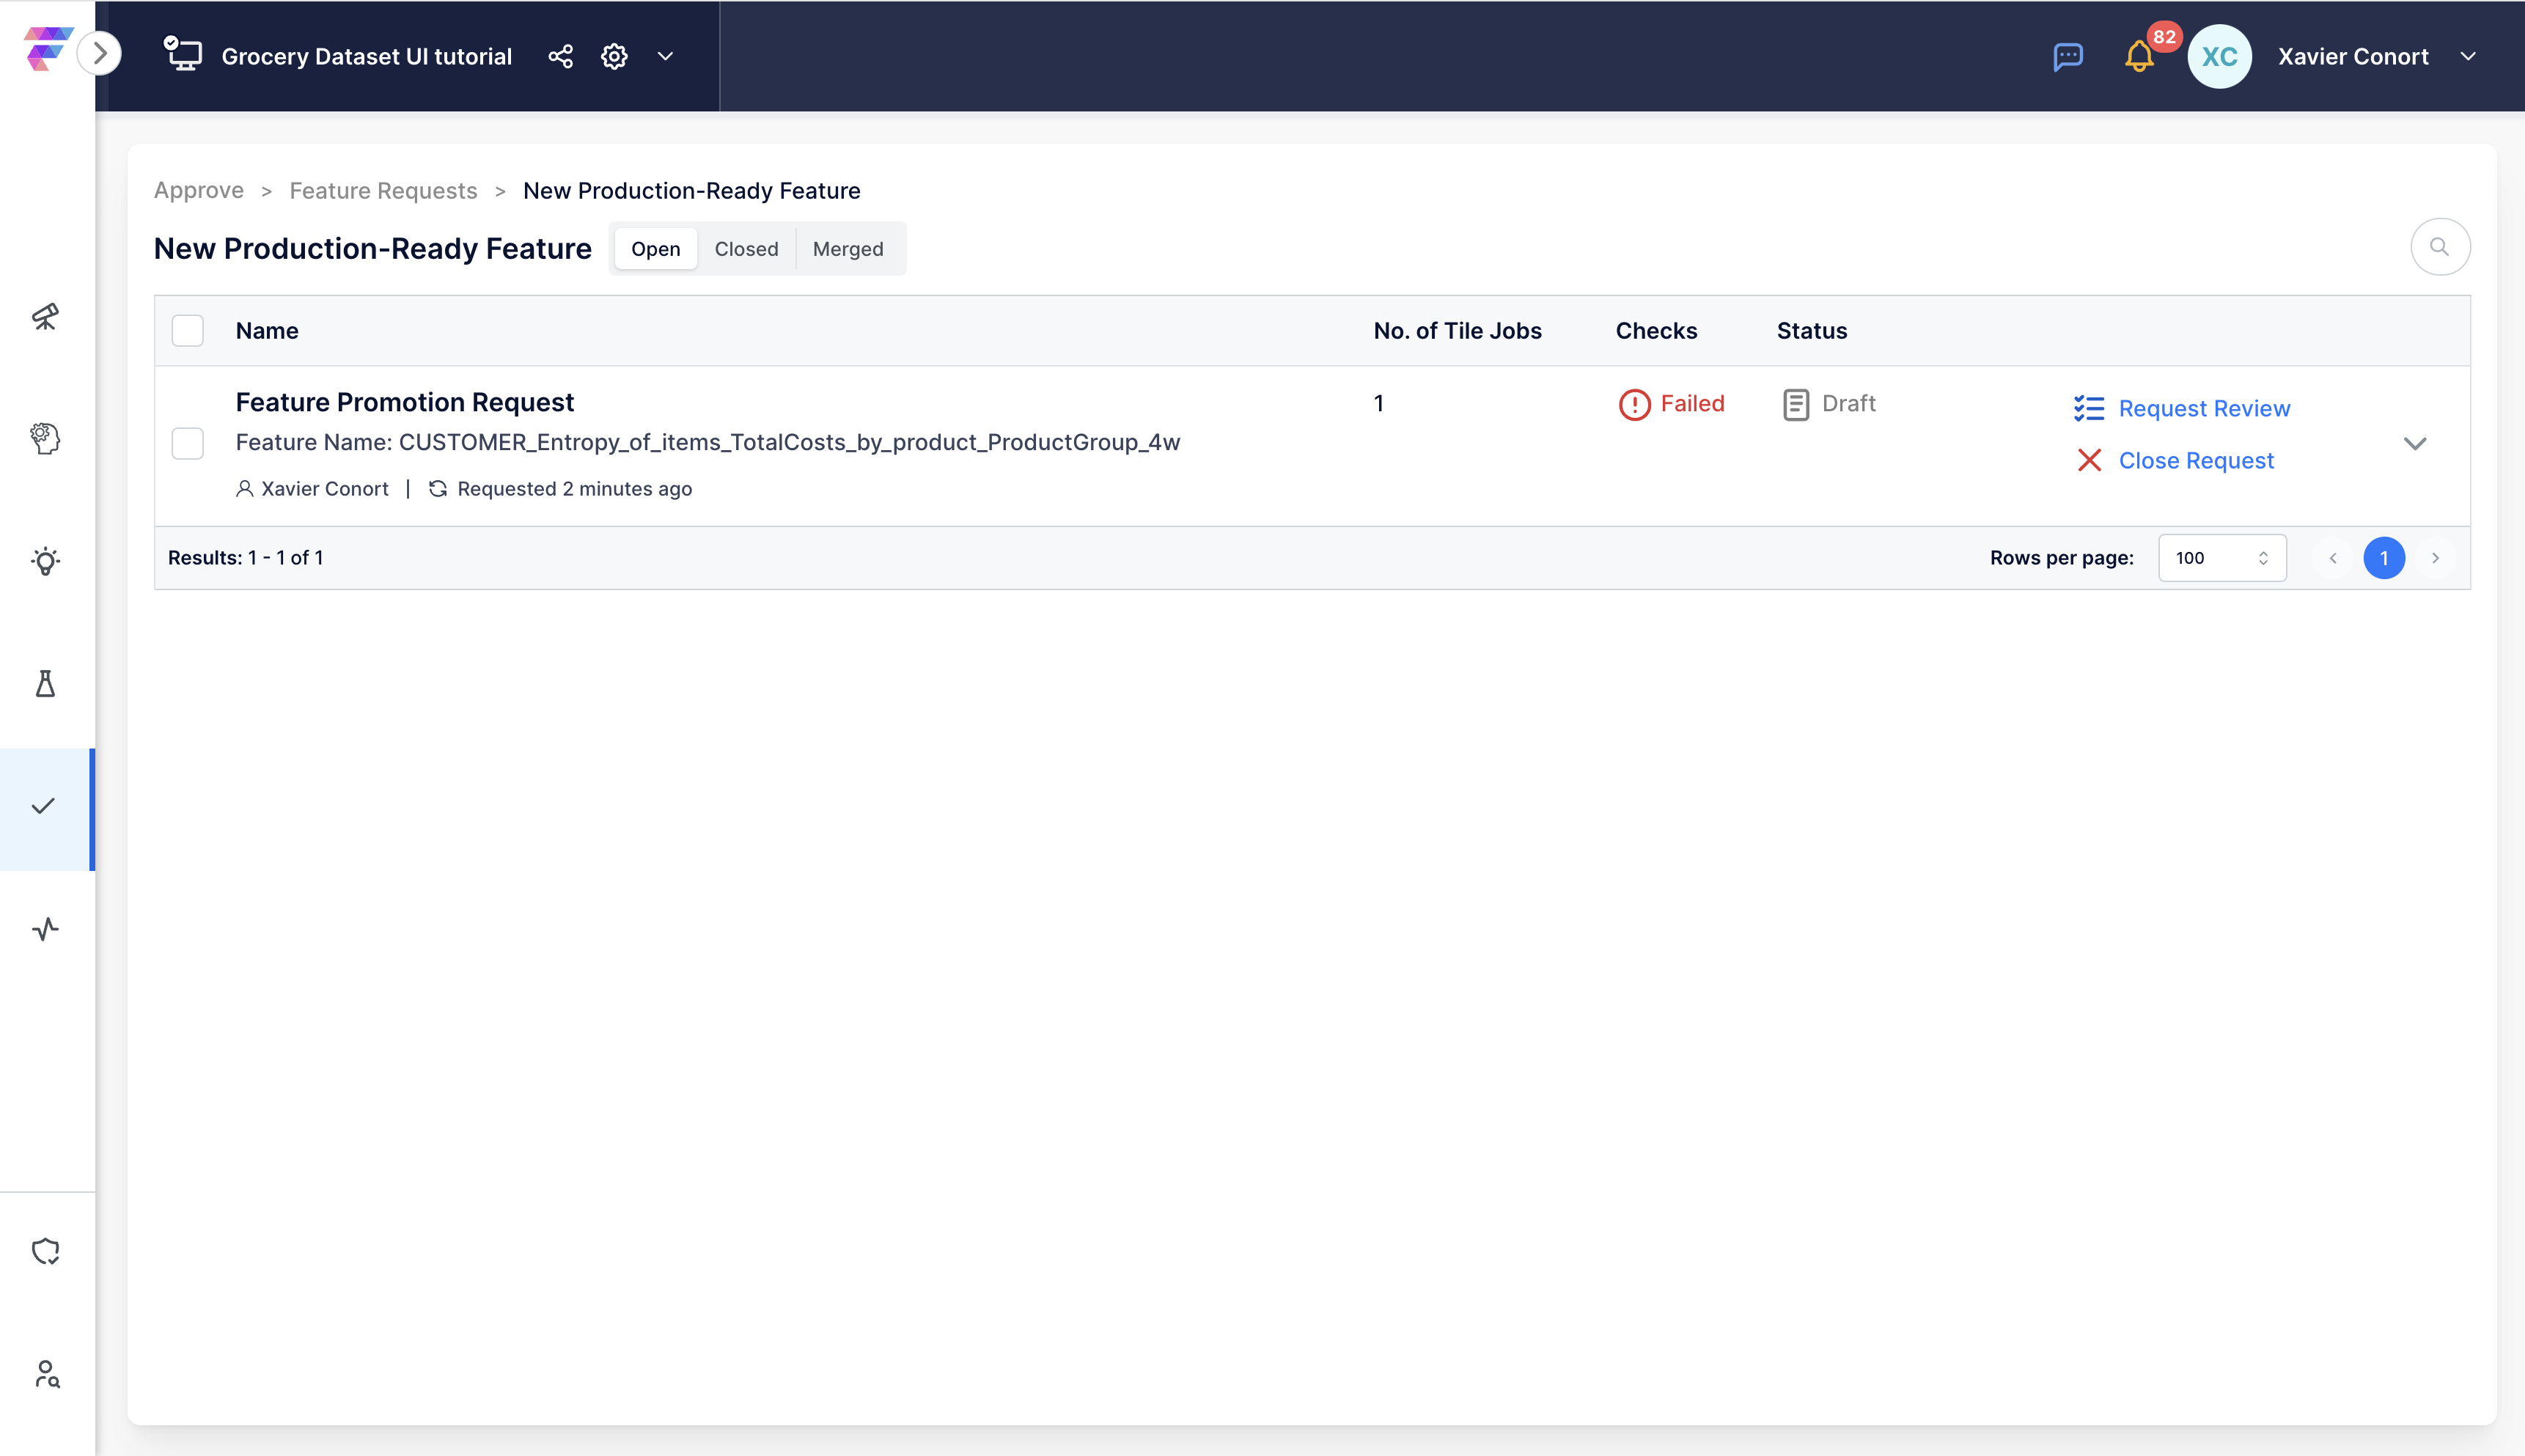
Step 4: Review Checks
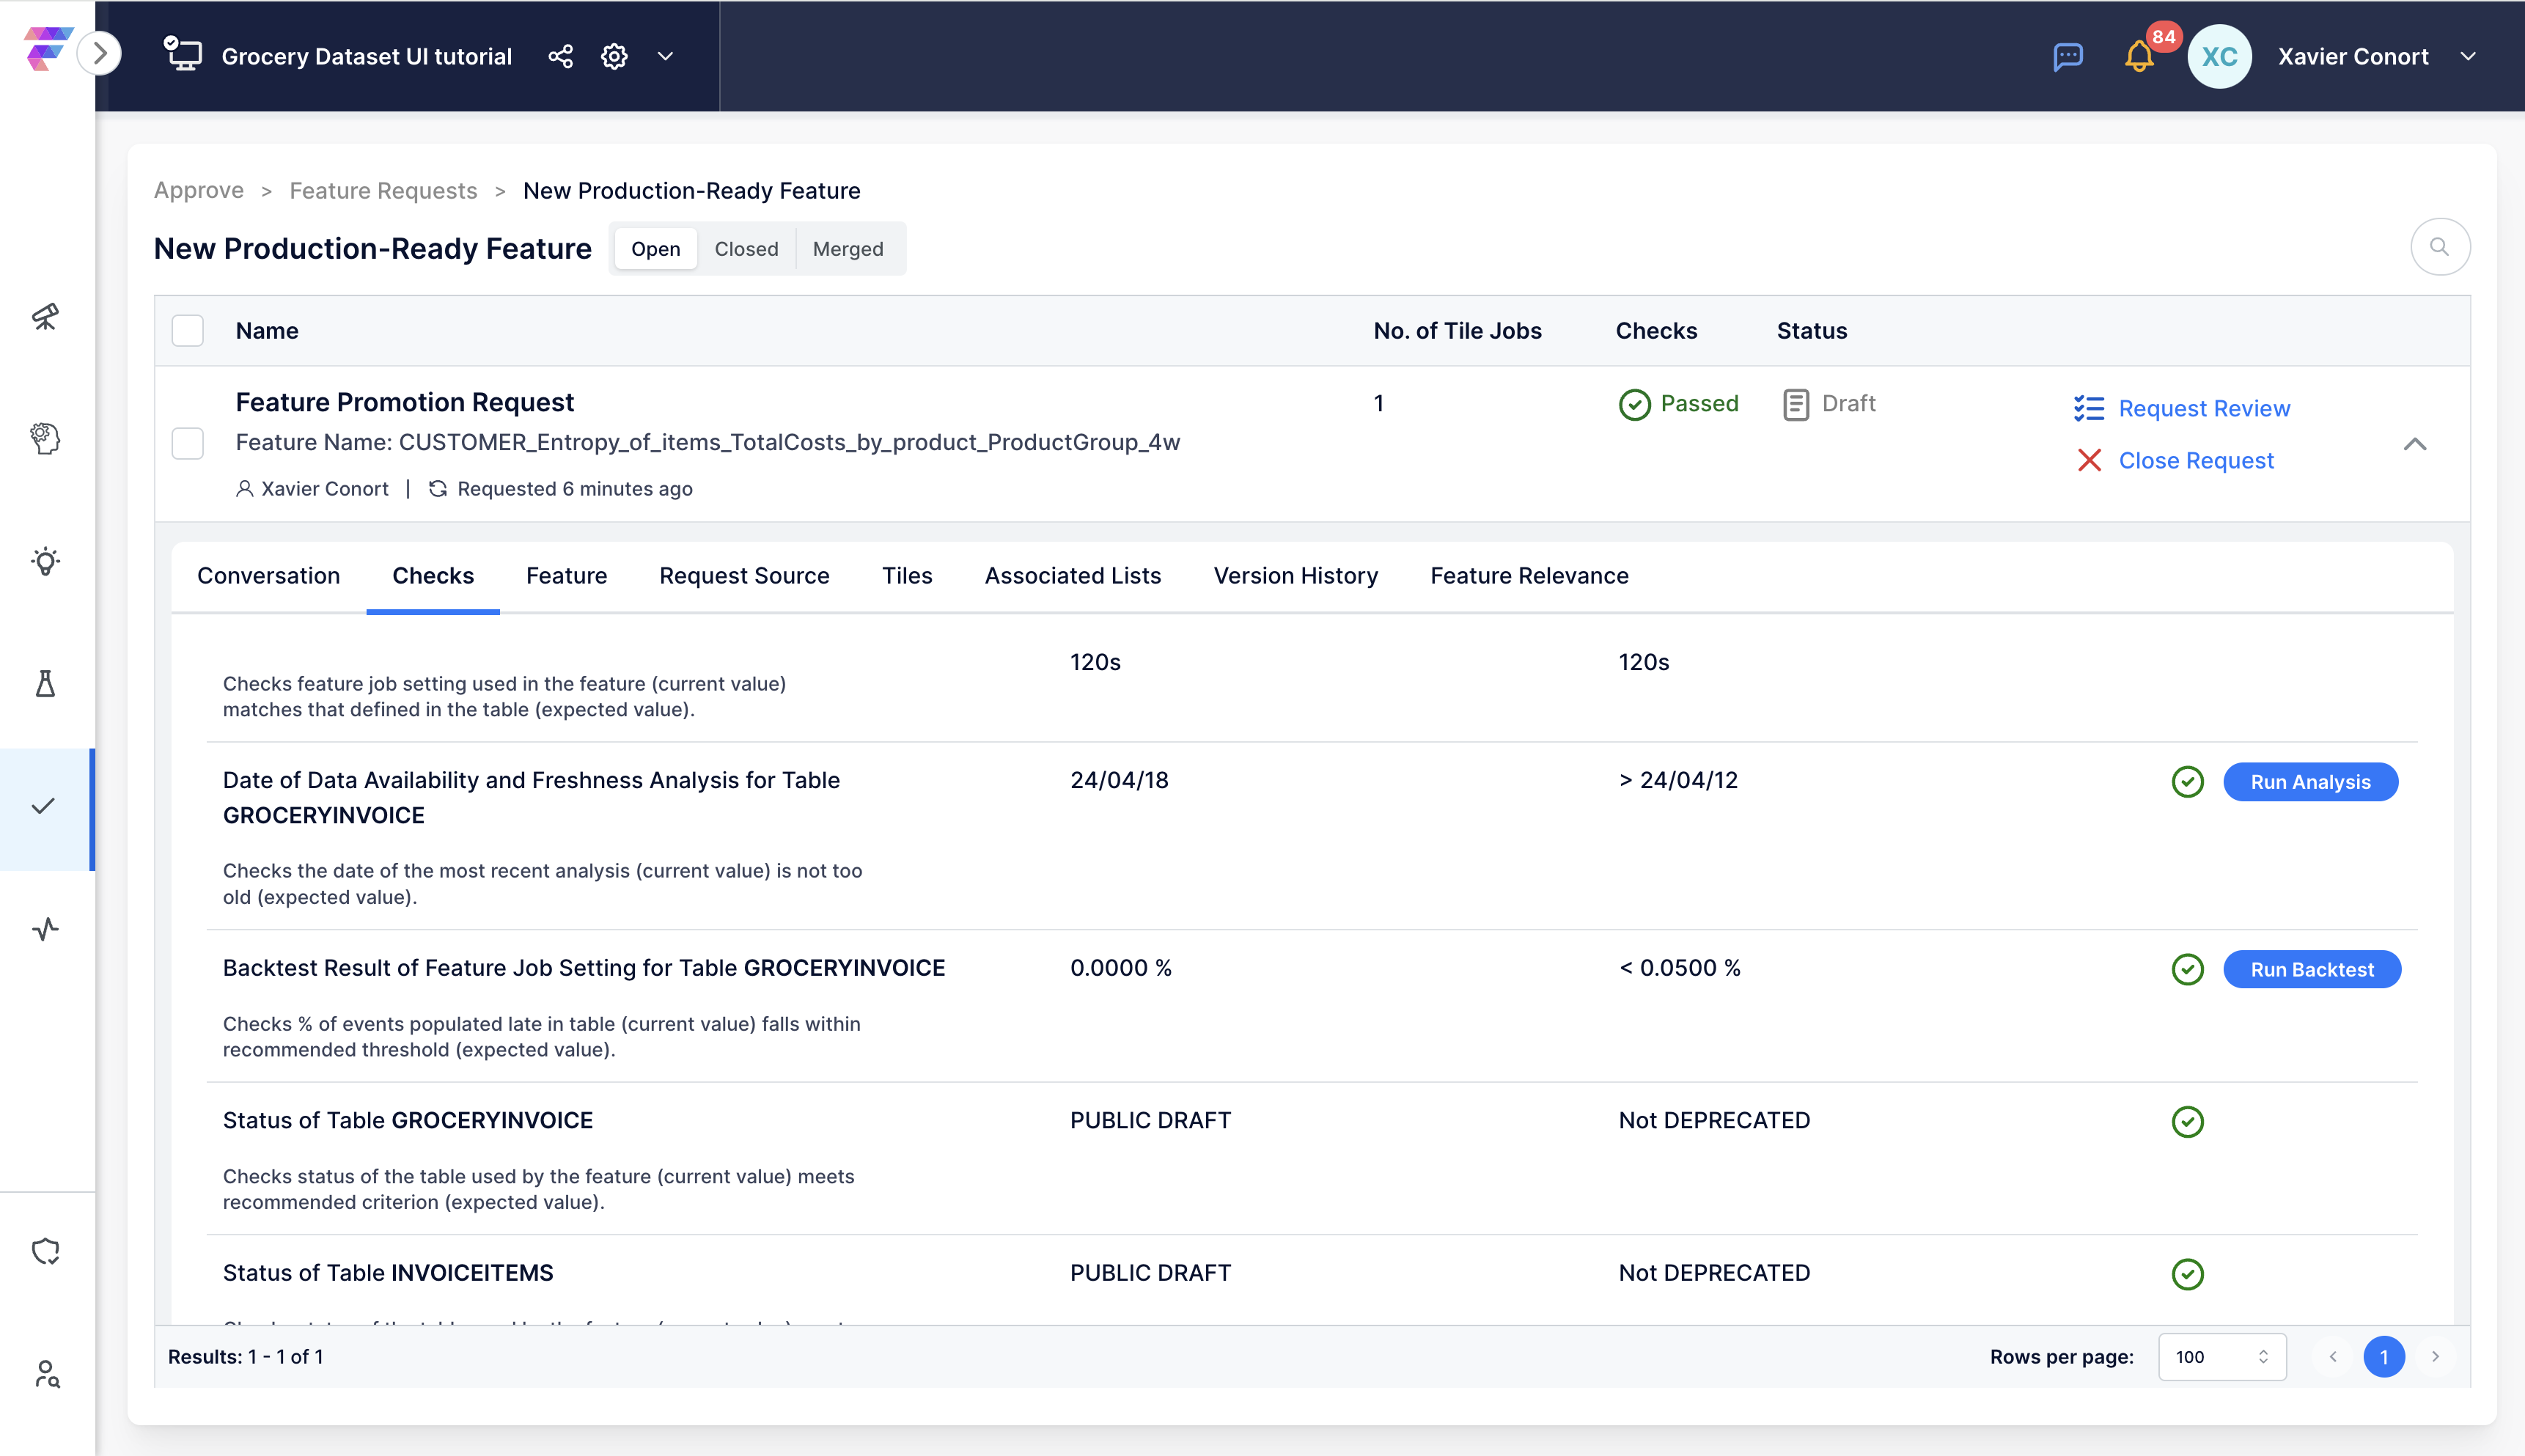
Click on the request to view details and checks.
Note
Checks include several evaluations, such as checking the feature's compliance with default cleaning operations and the feature job setting of its source tables. It also involves confirming the status of these tables and backtesting the feature job setting to prevent future training-serving inconsistencies.
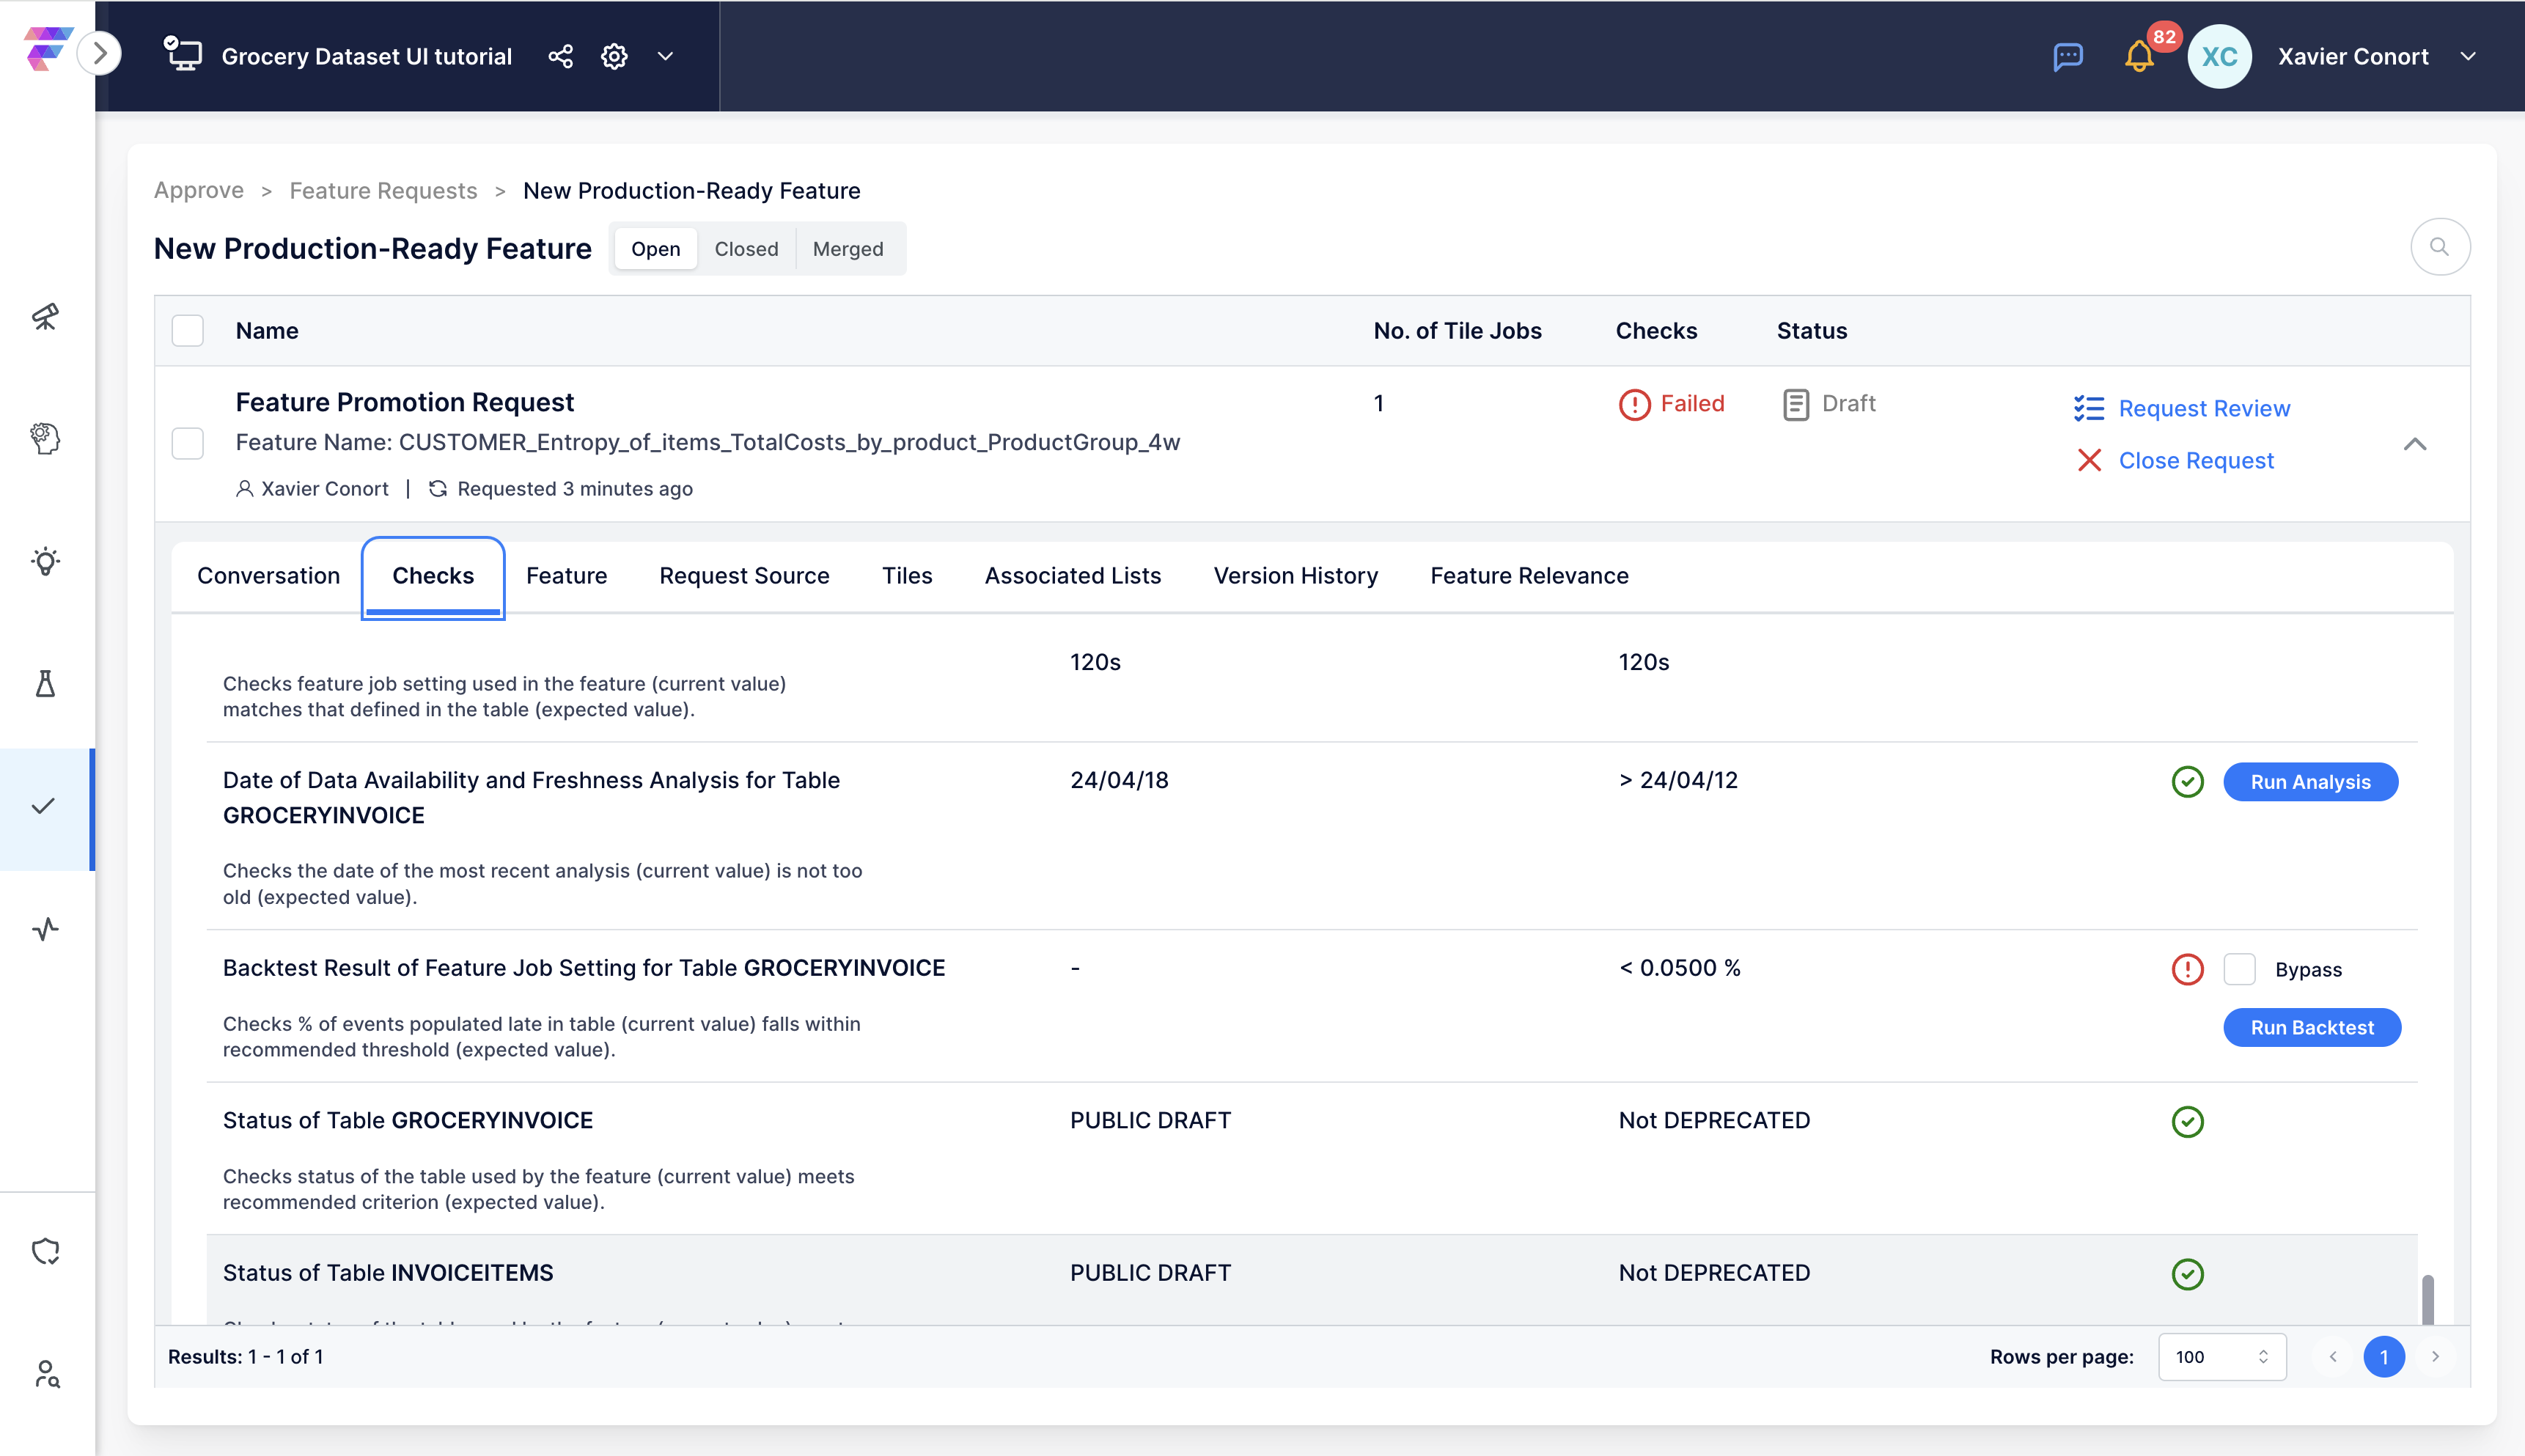
If any checks fail, resolve them. In our case, a check is failing because no backtest has been run to assess the feature job setting.
Click 'Run Backtest'. This should turn the check green.
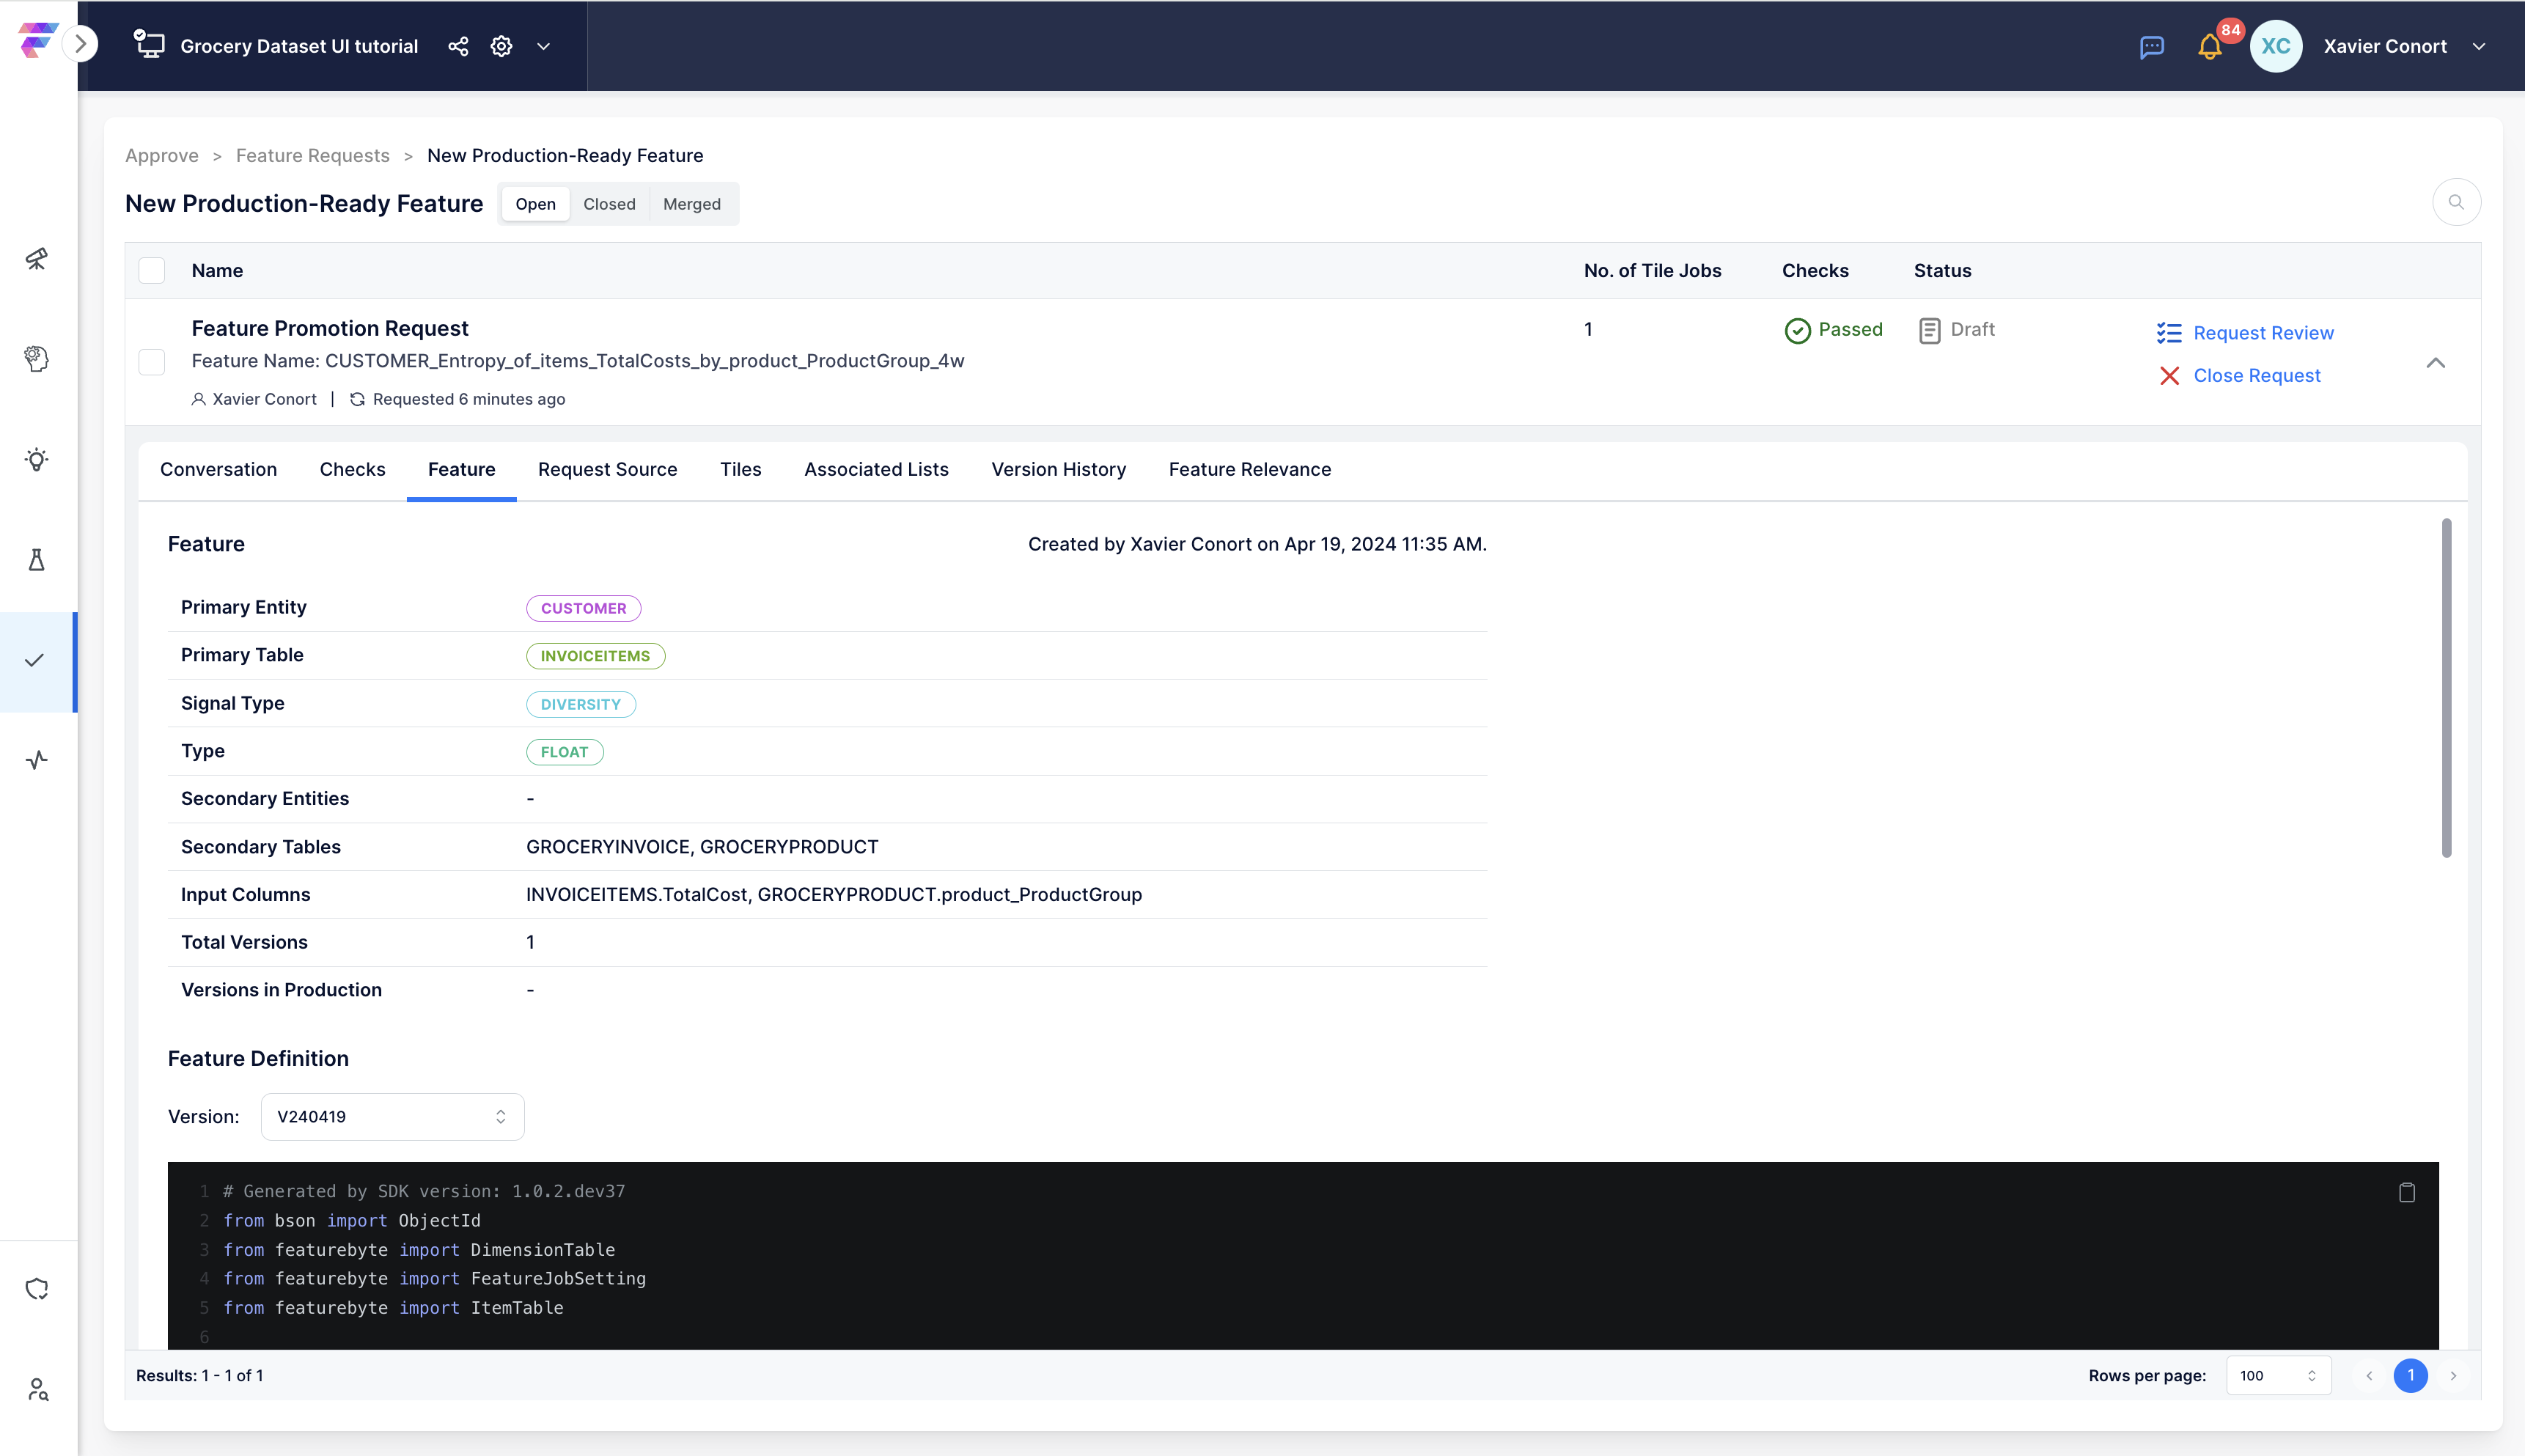
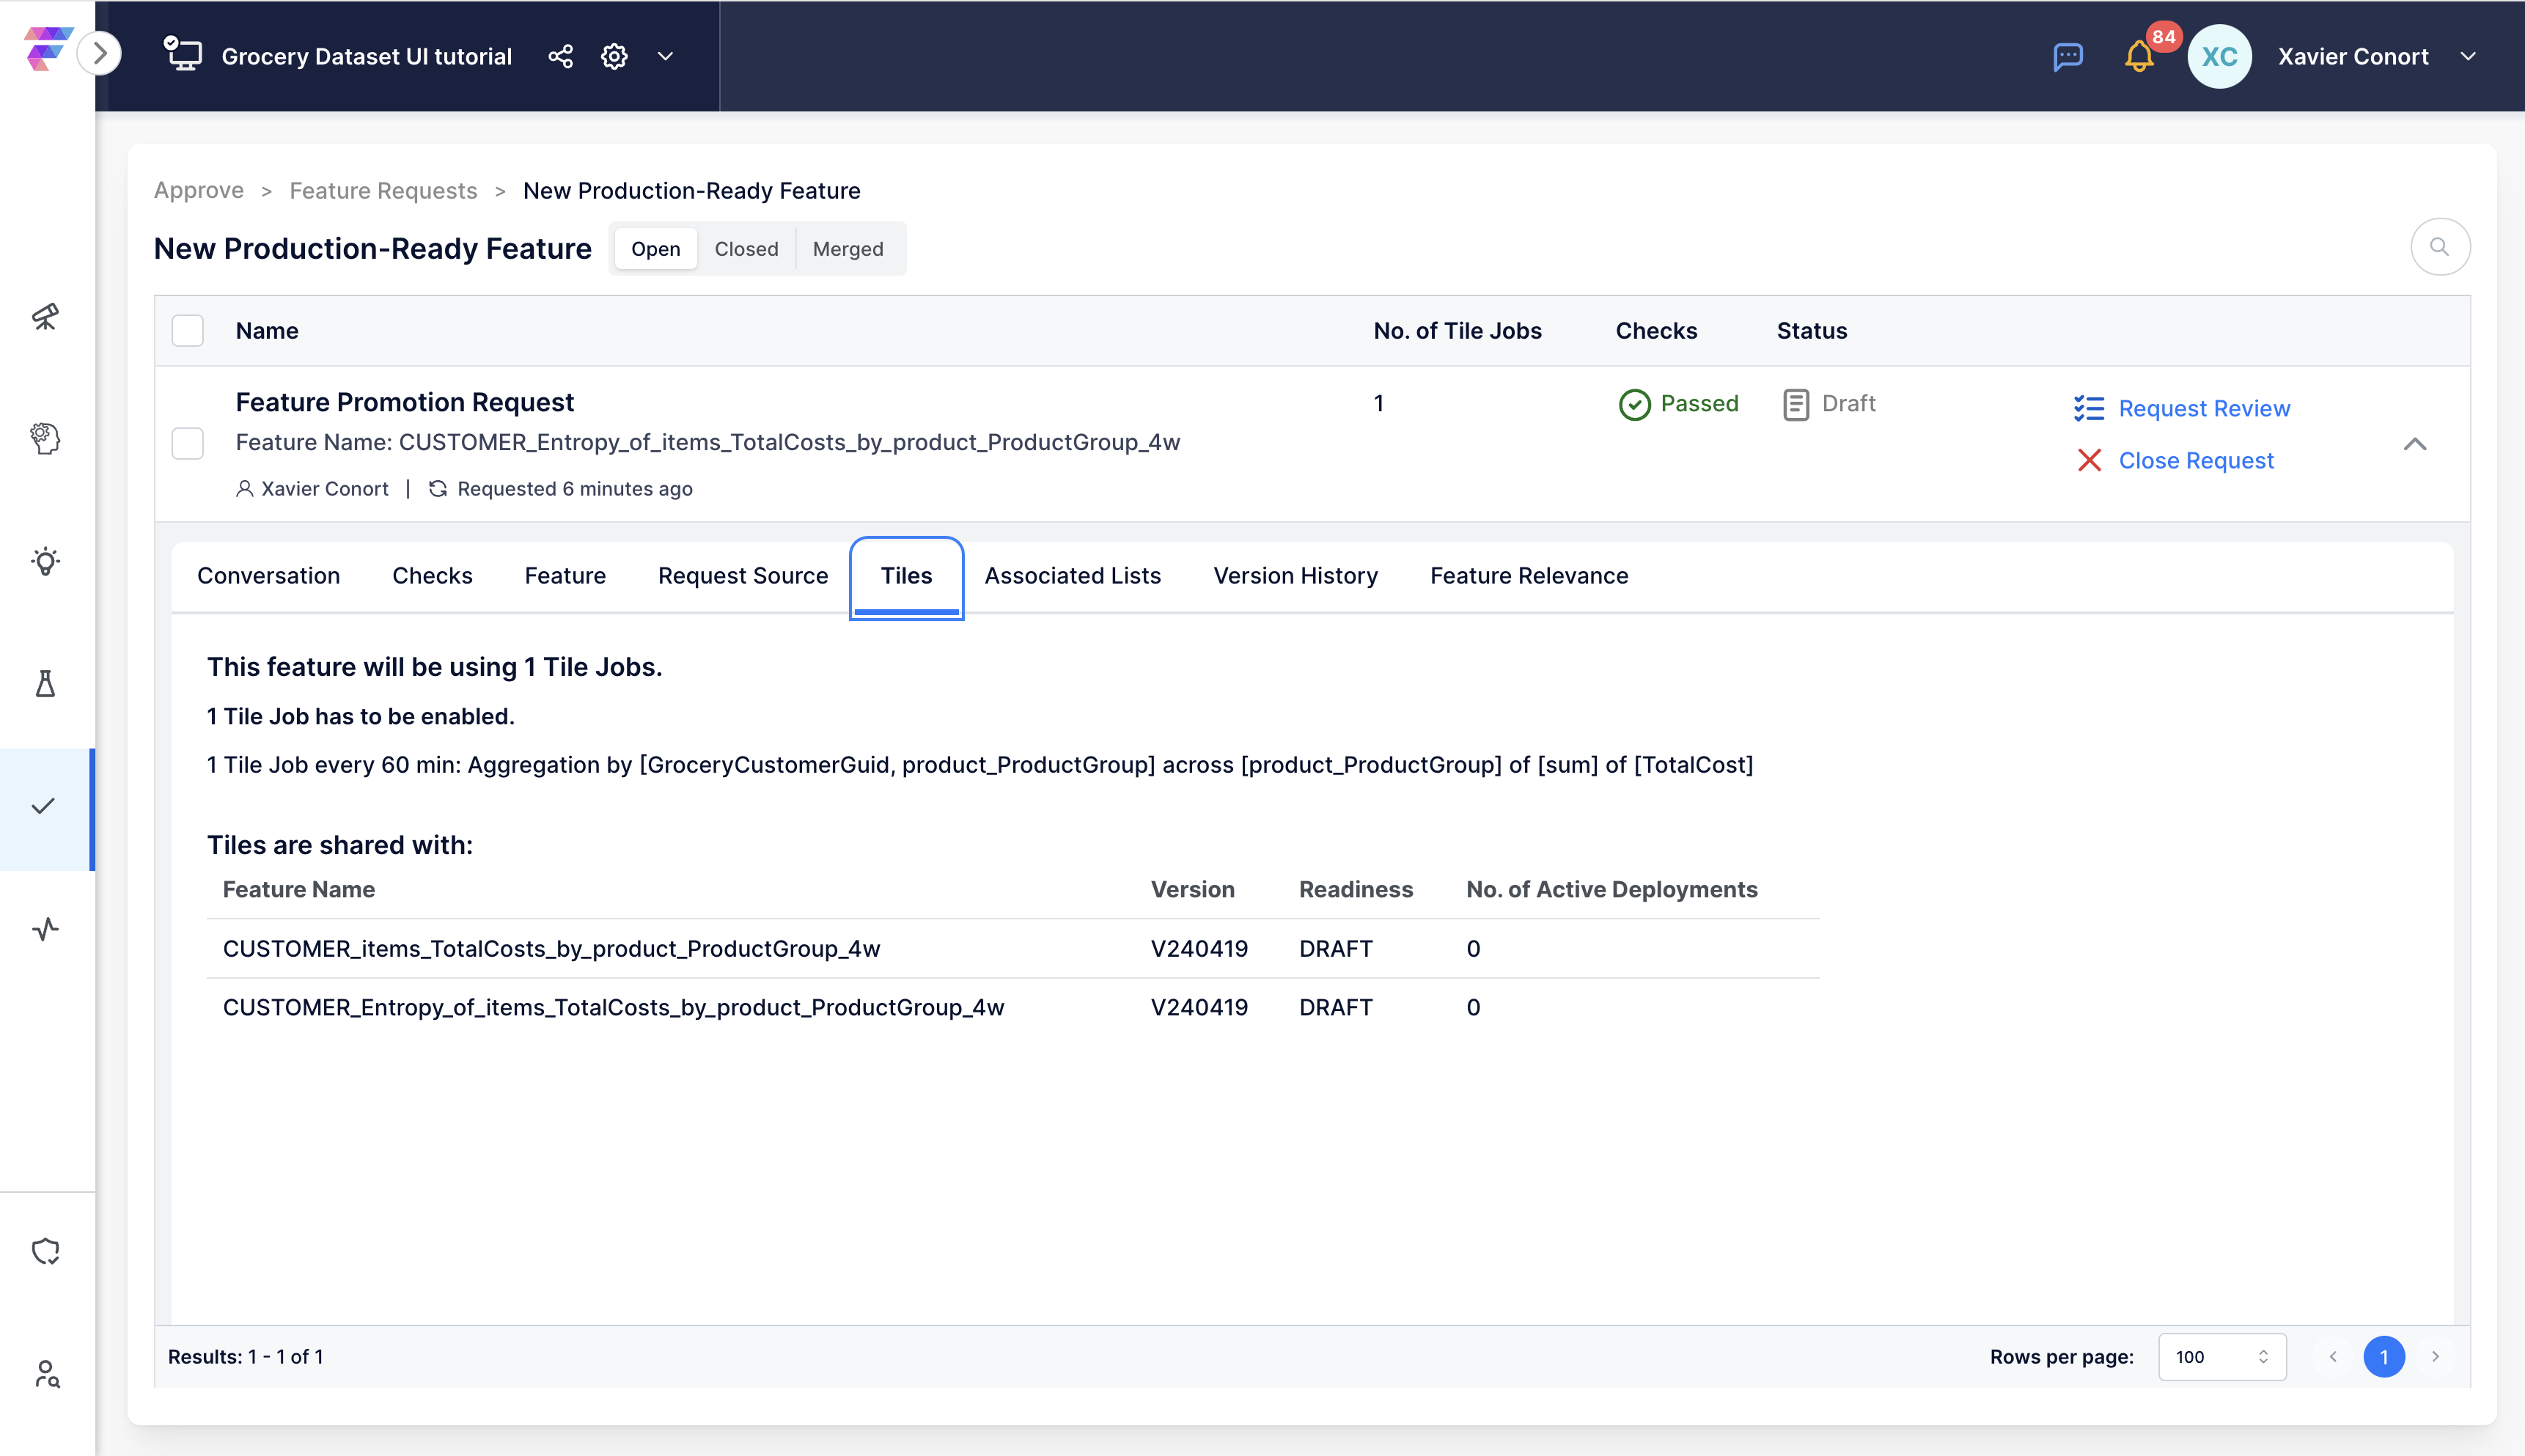
Step 5: Review Feature
Review the feature details, including its definition and use of tiles (partial aggregations).
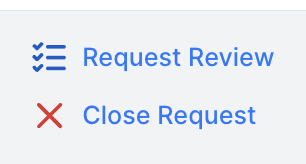
Step 6: Request Review
Once the request is ready for review, request it.
The request is now awaiting approval.
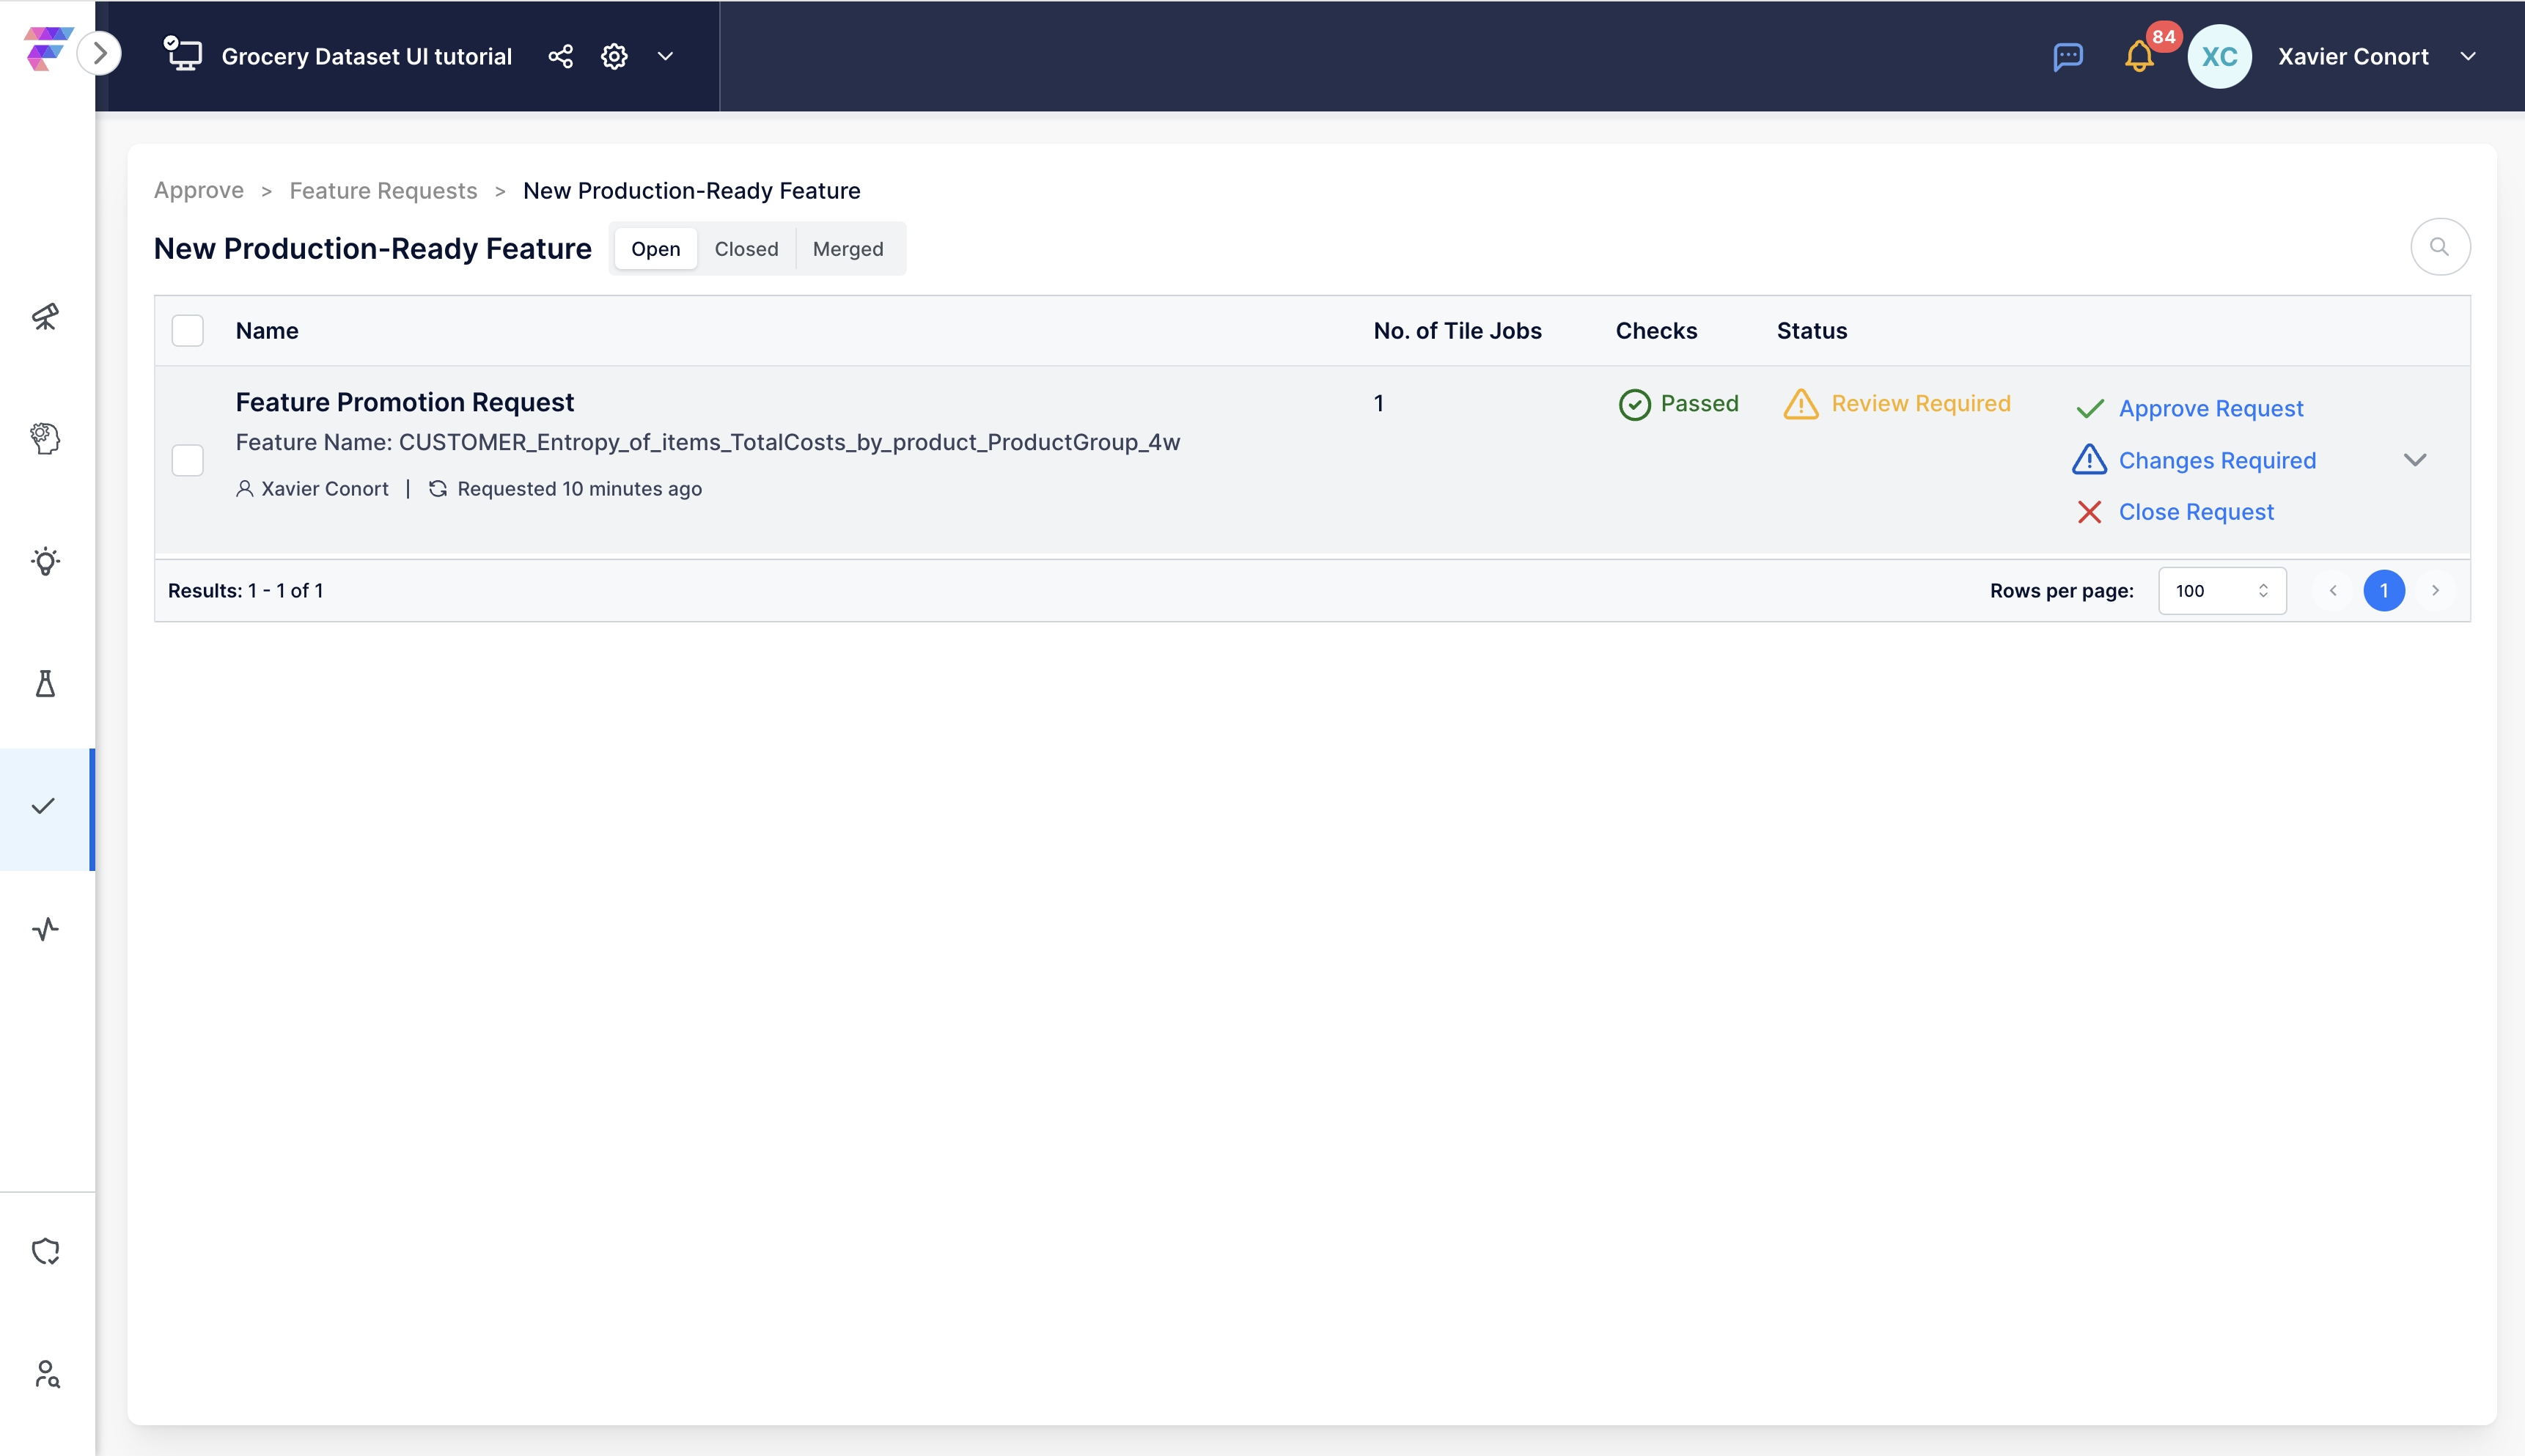
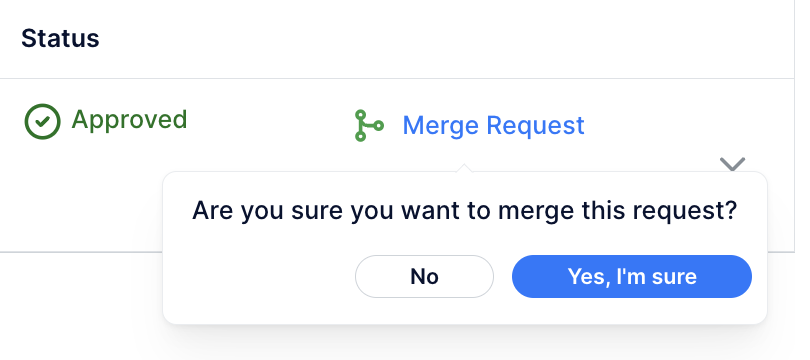
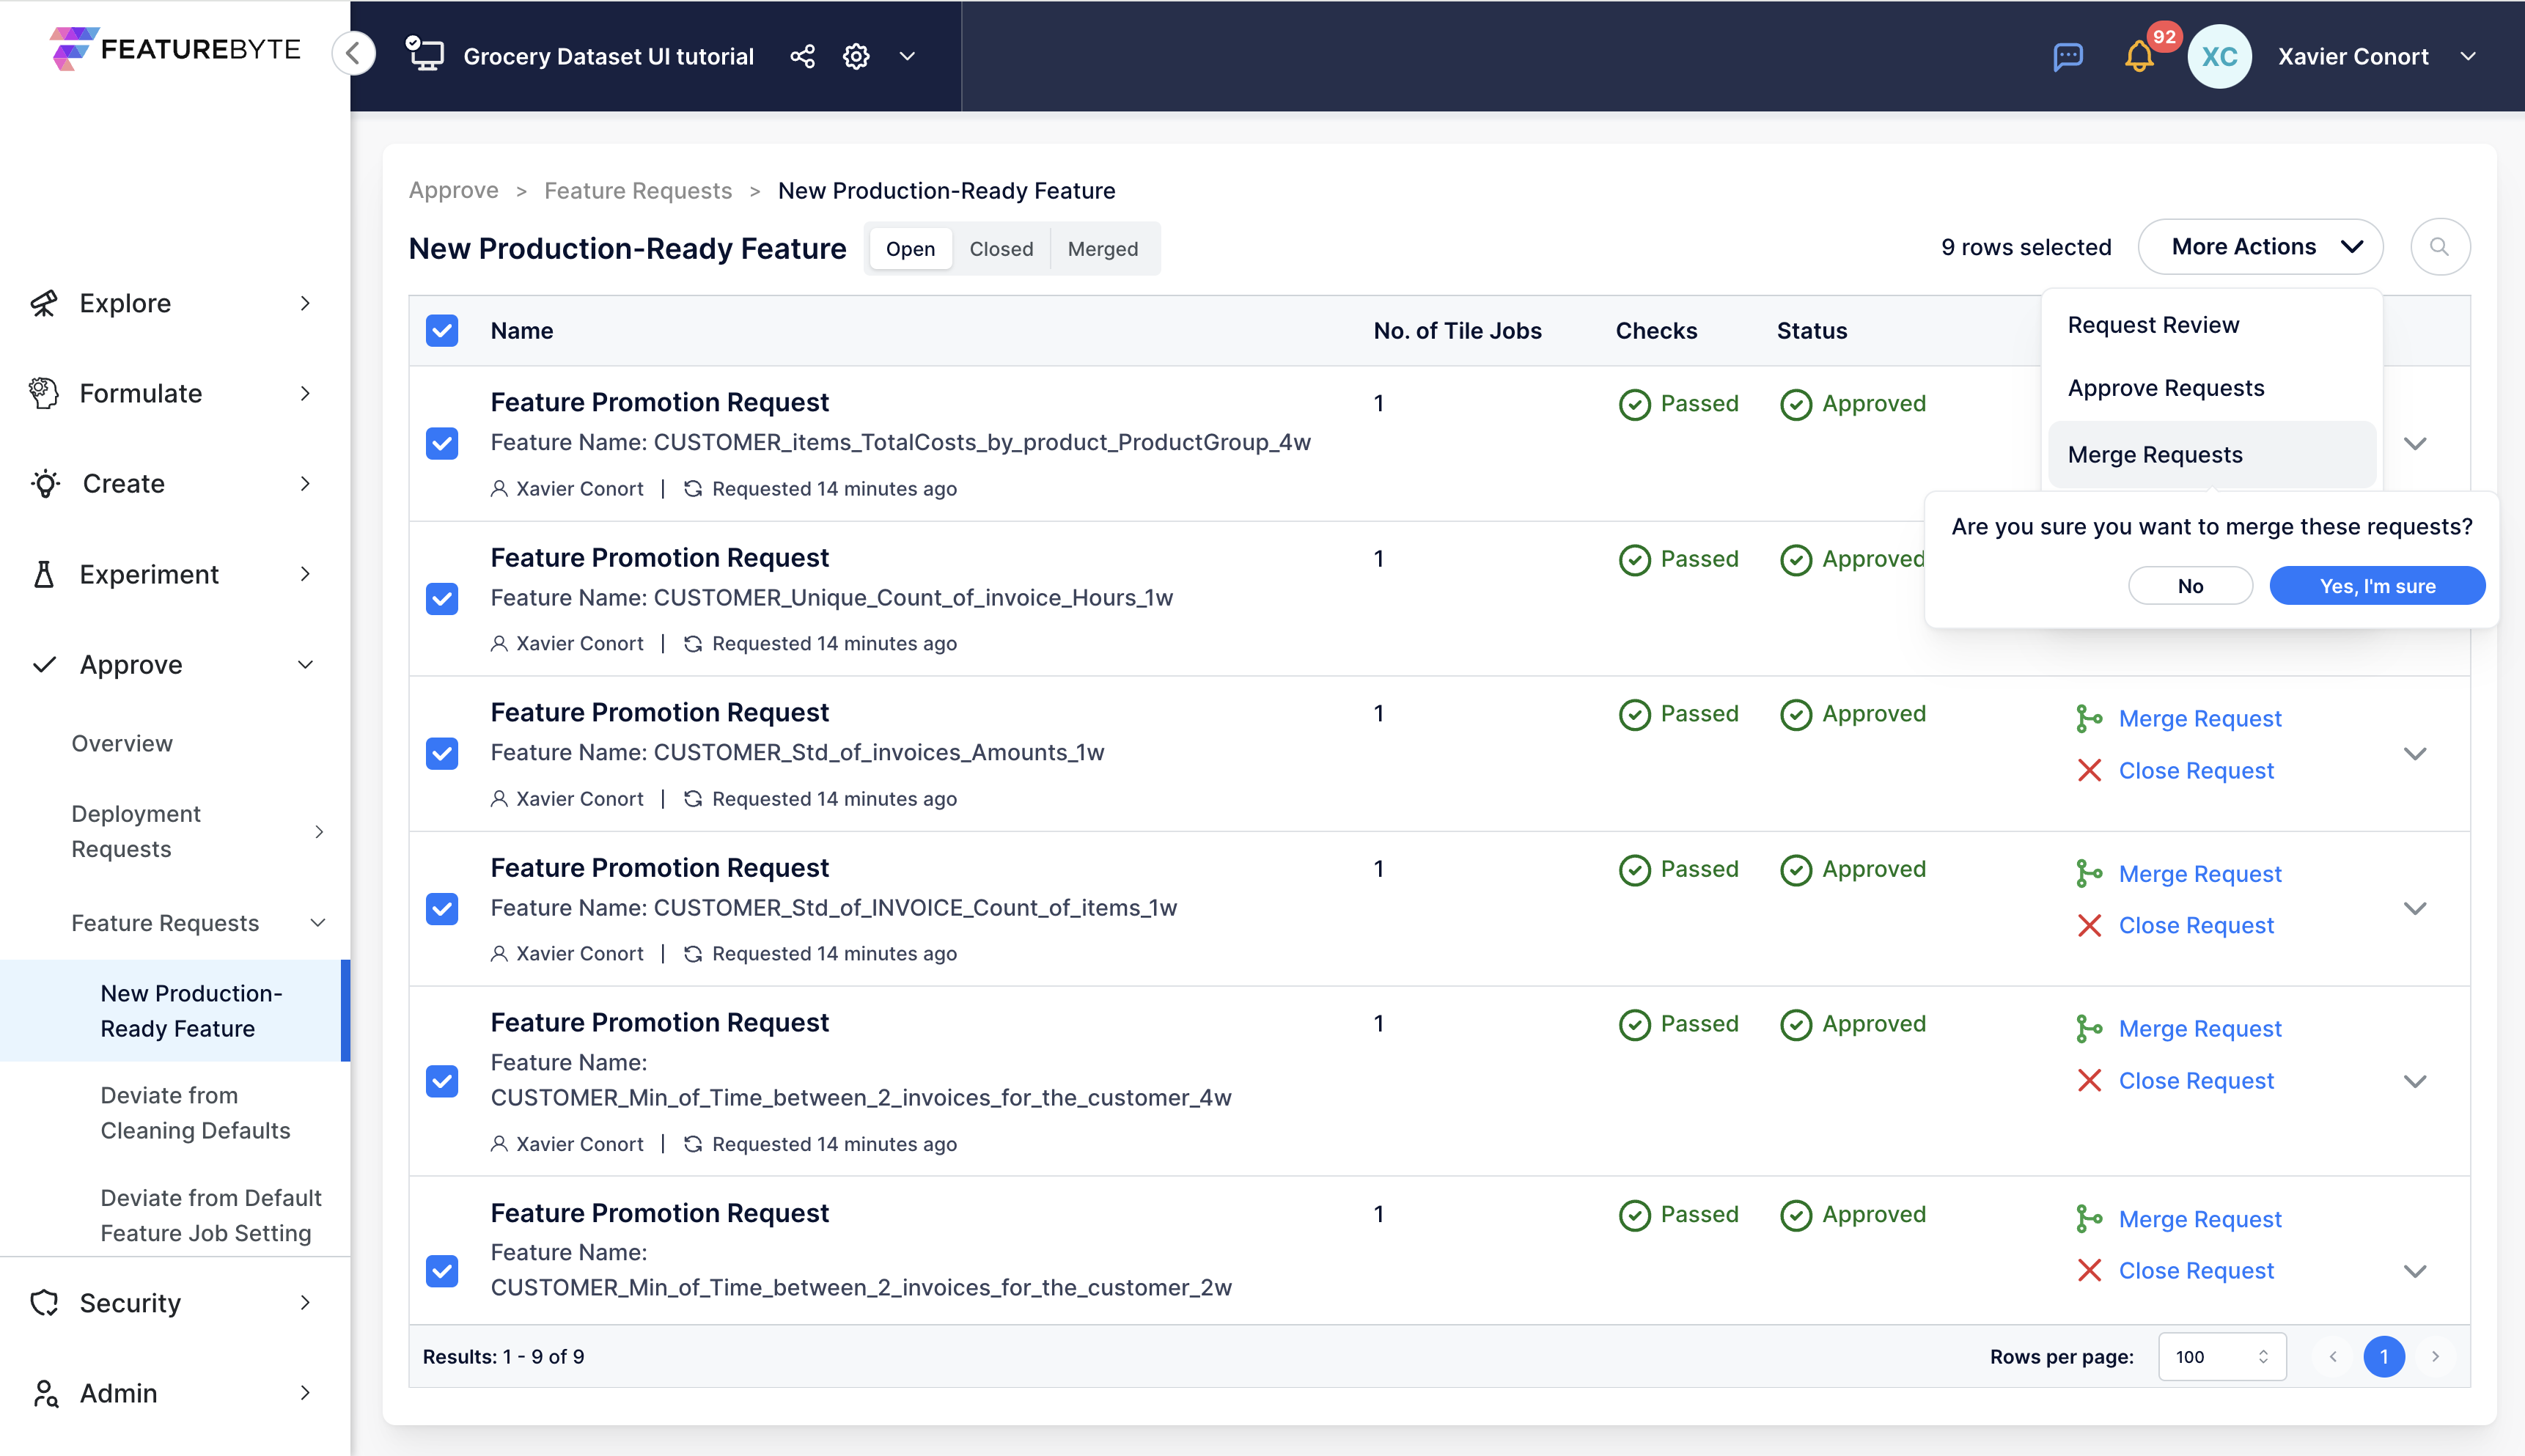
Step 7: Approve and Merge Request
After review, approve.
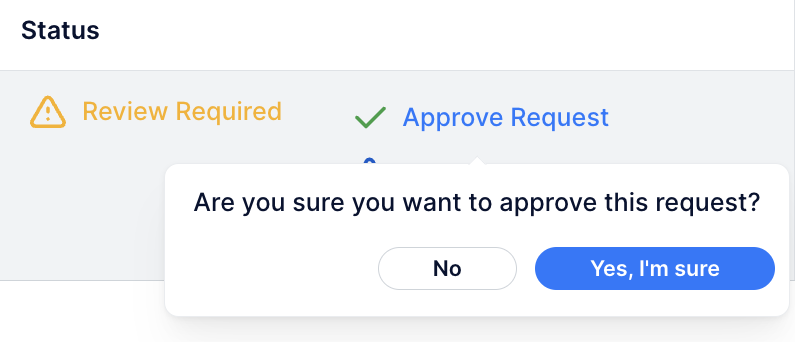
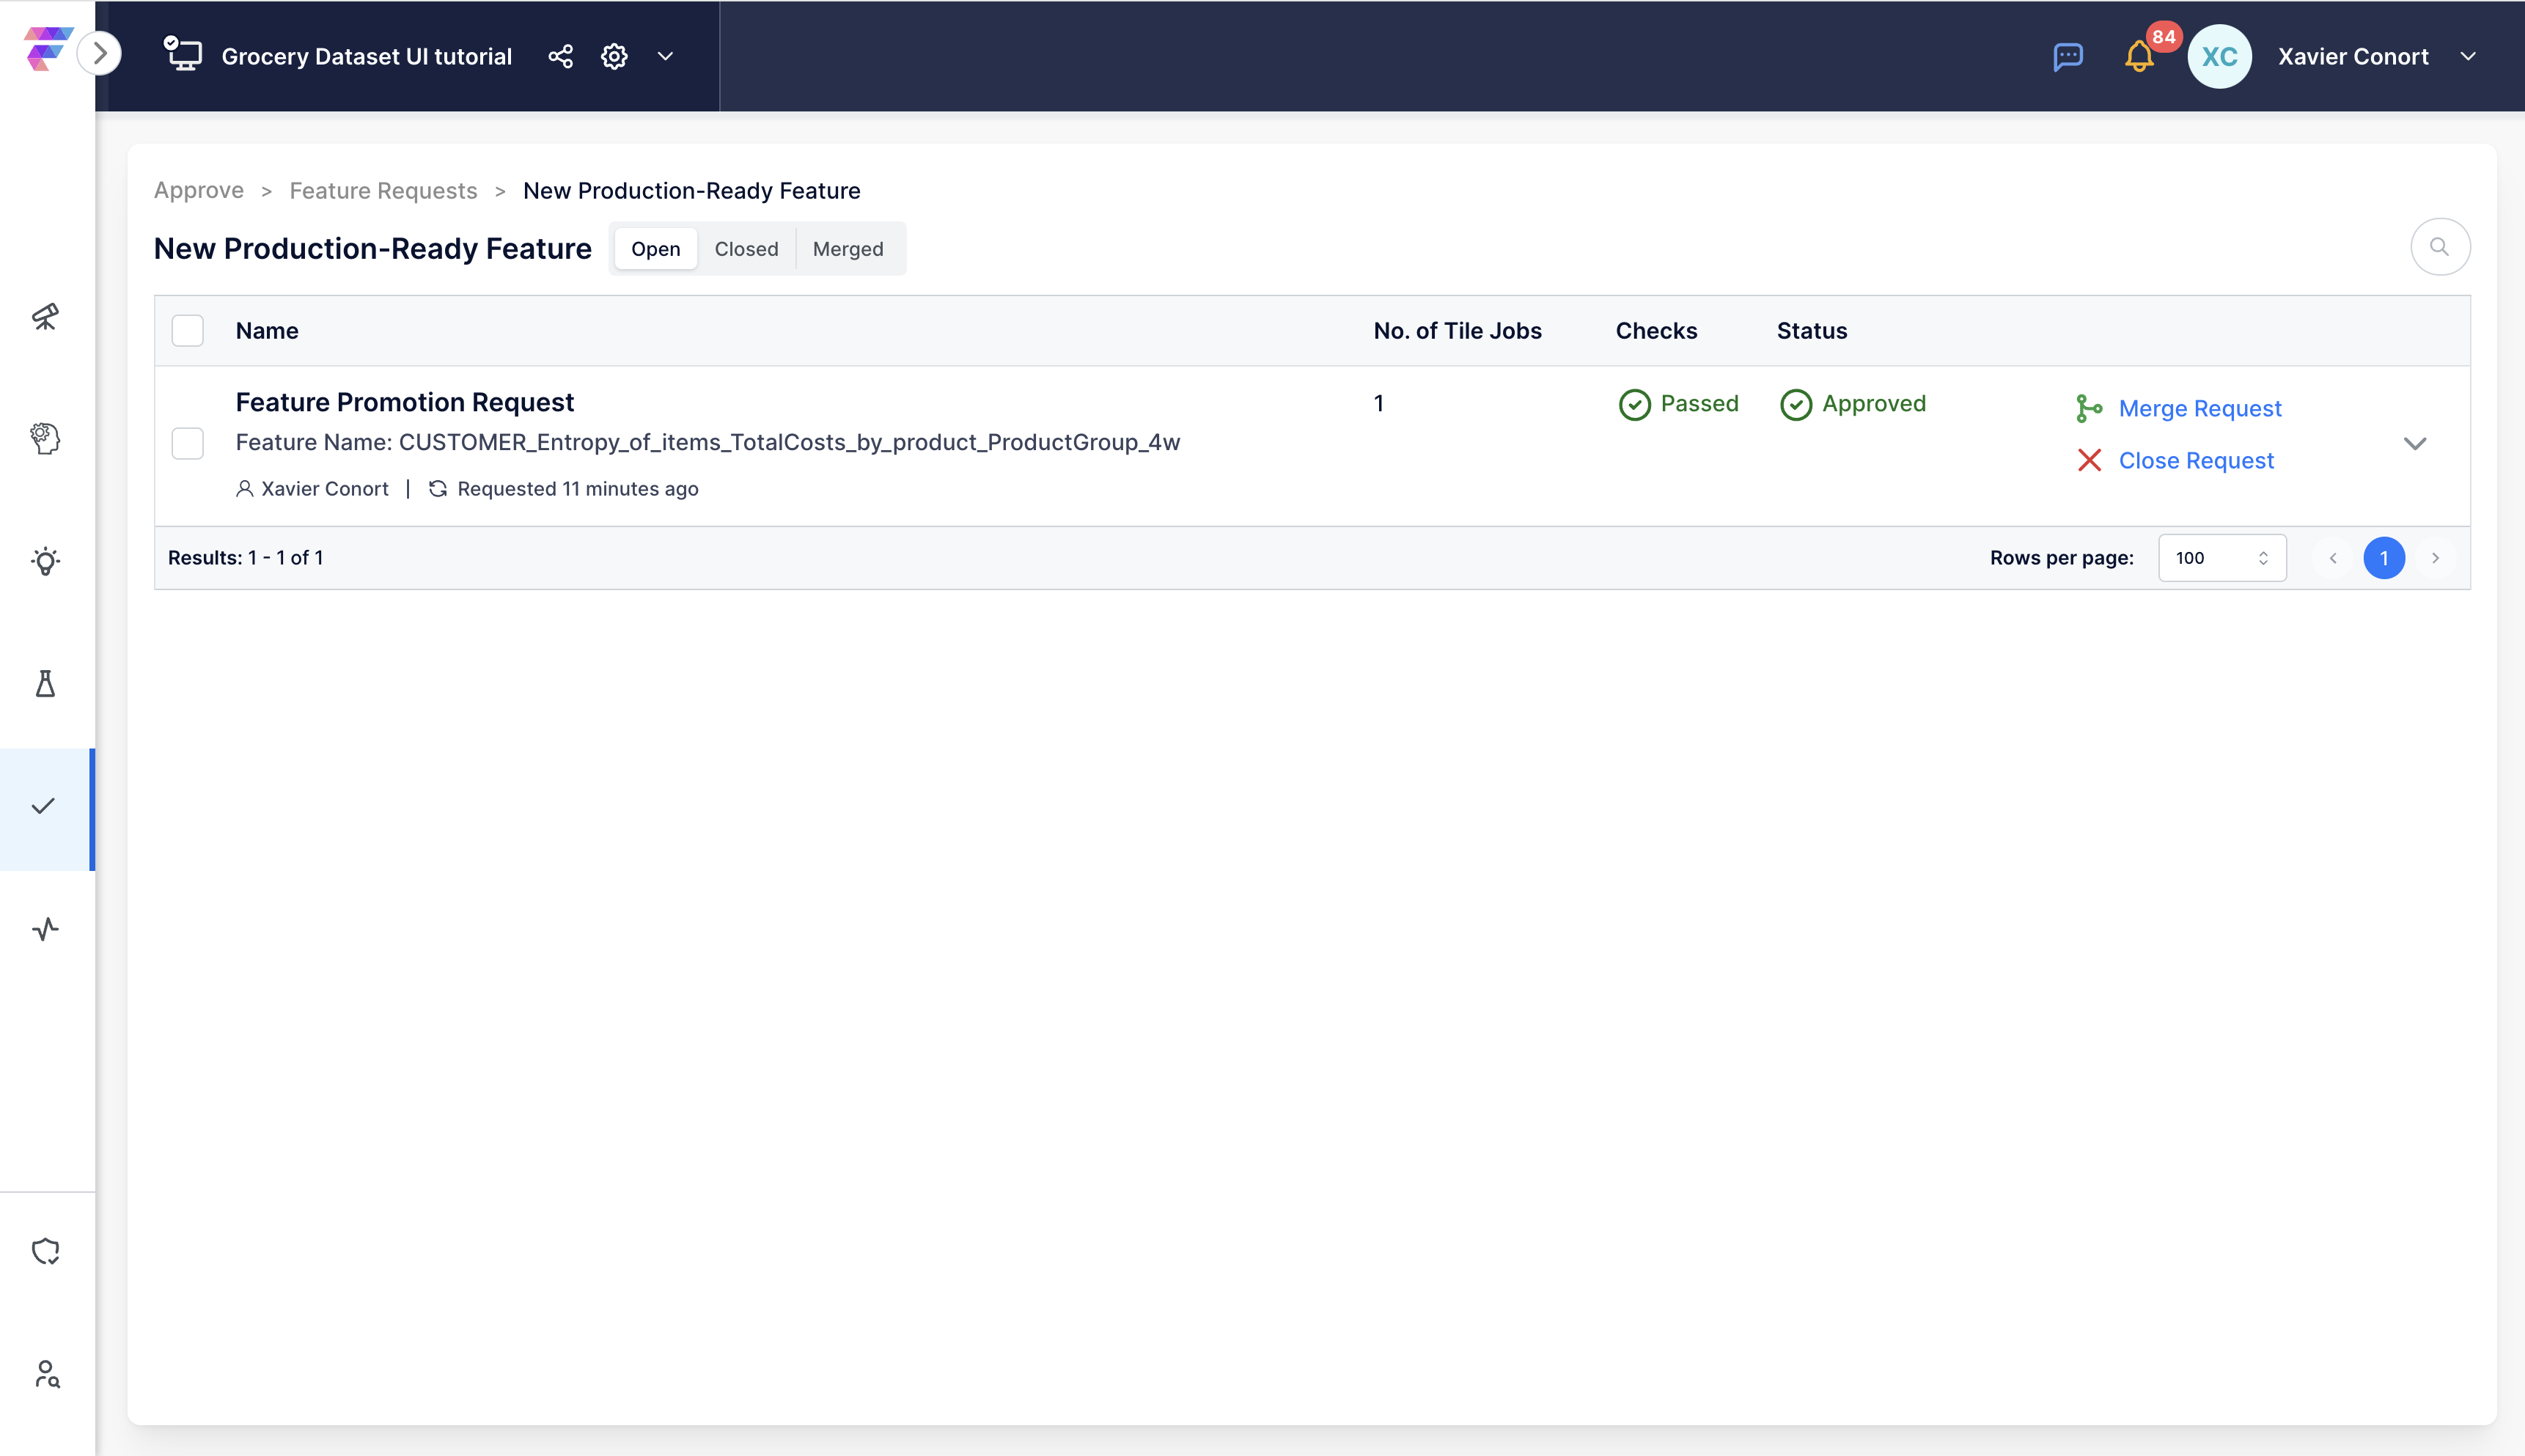
Confirm the merge.
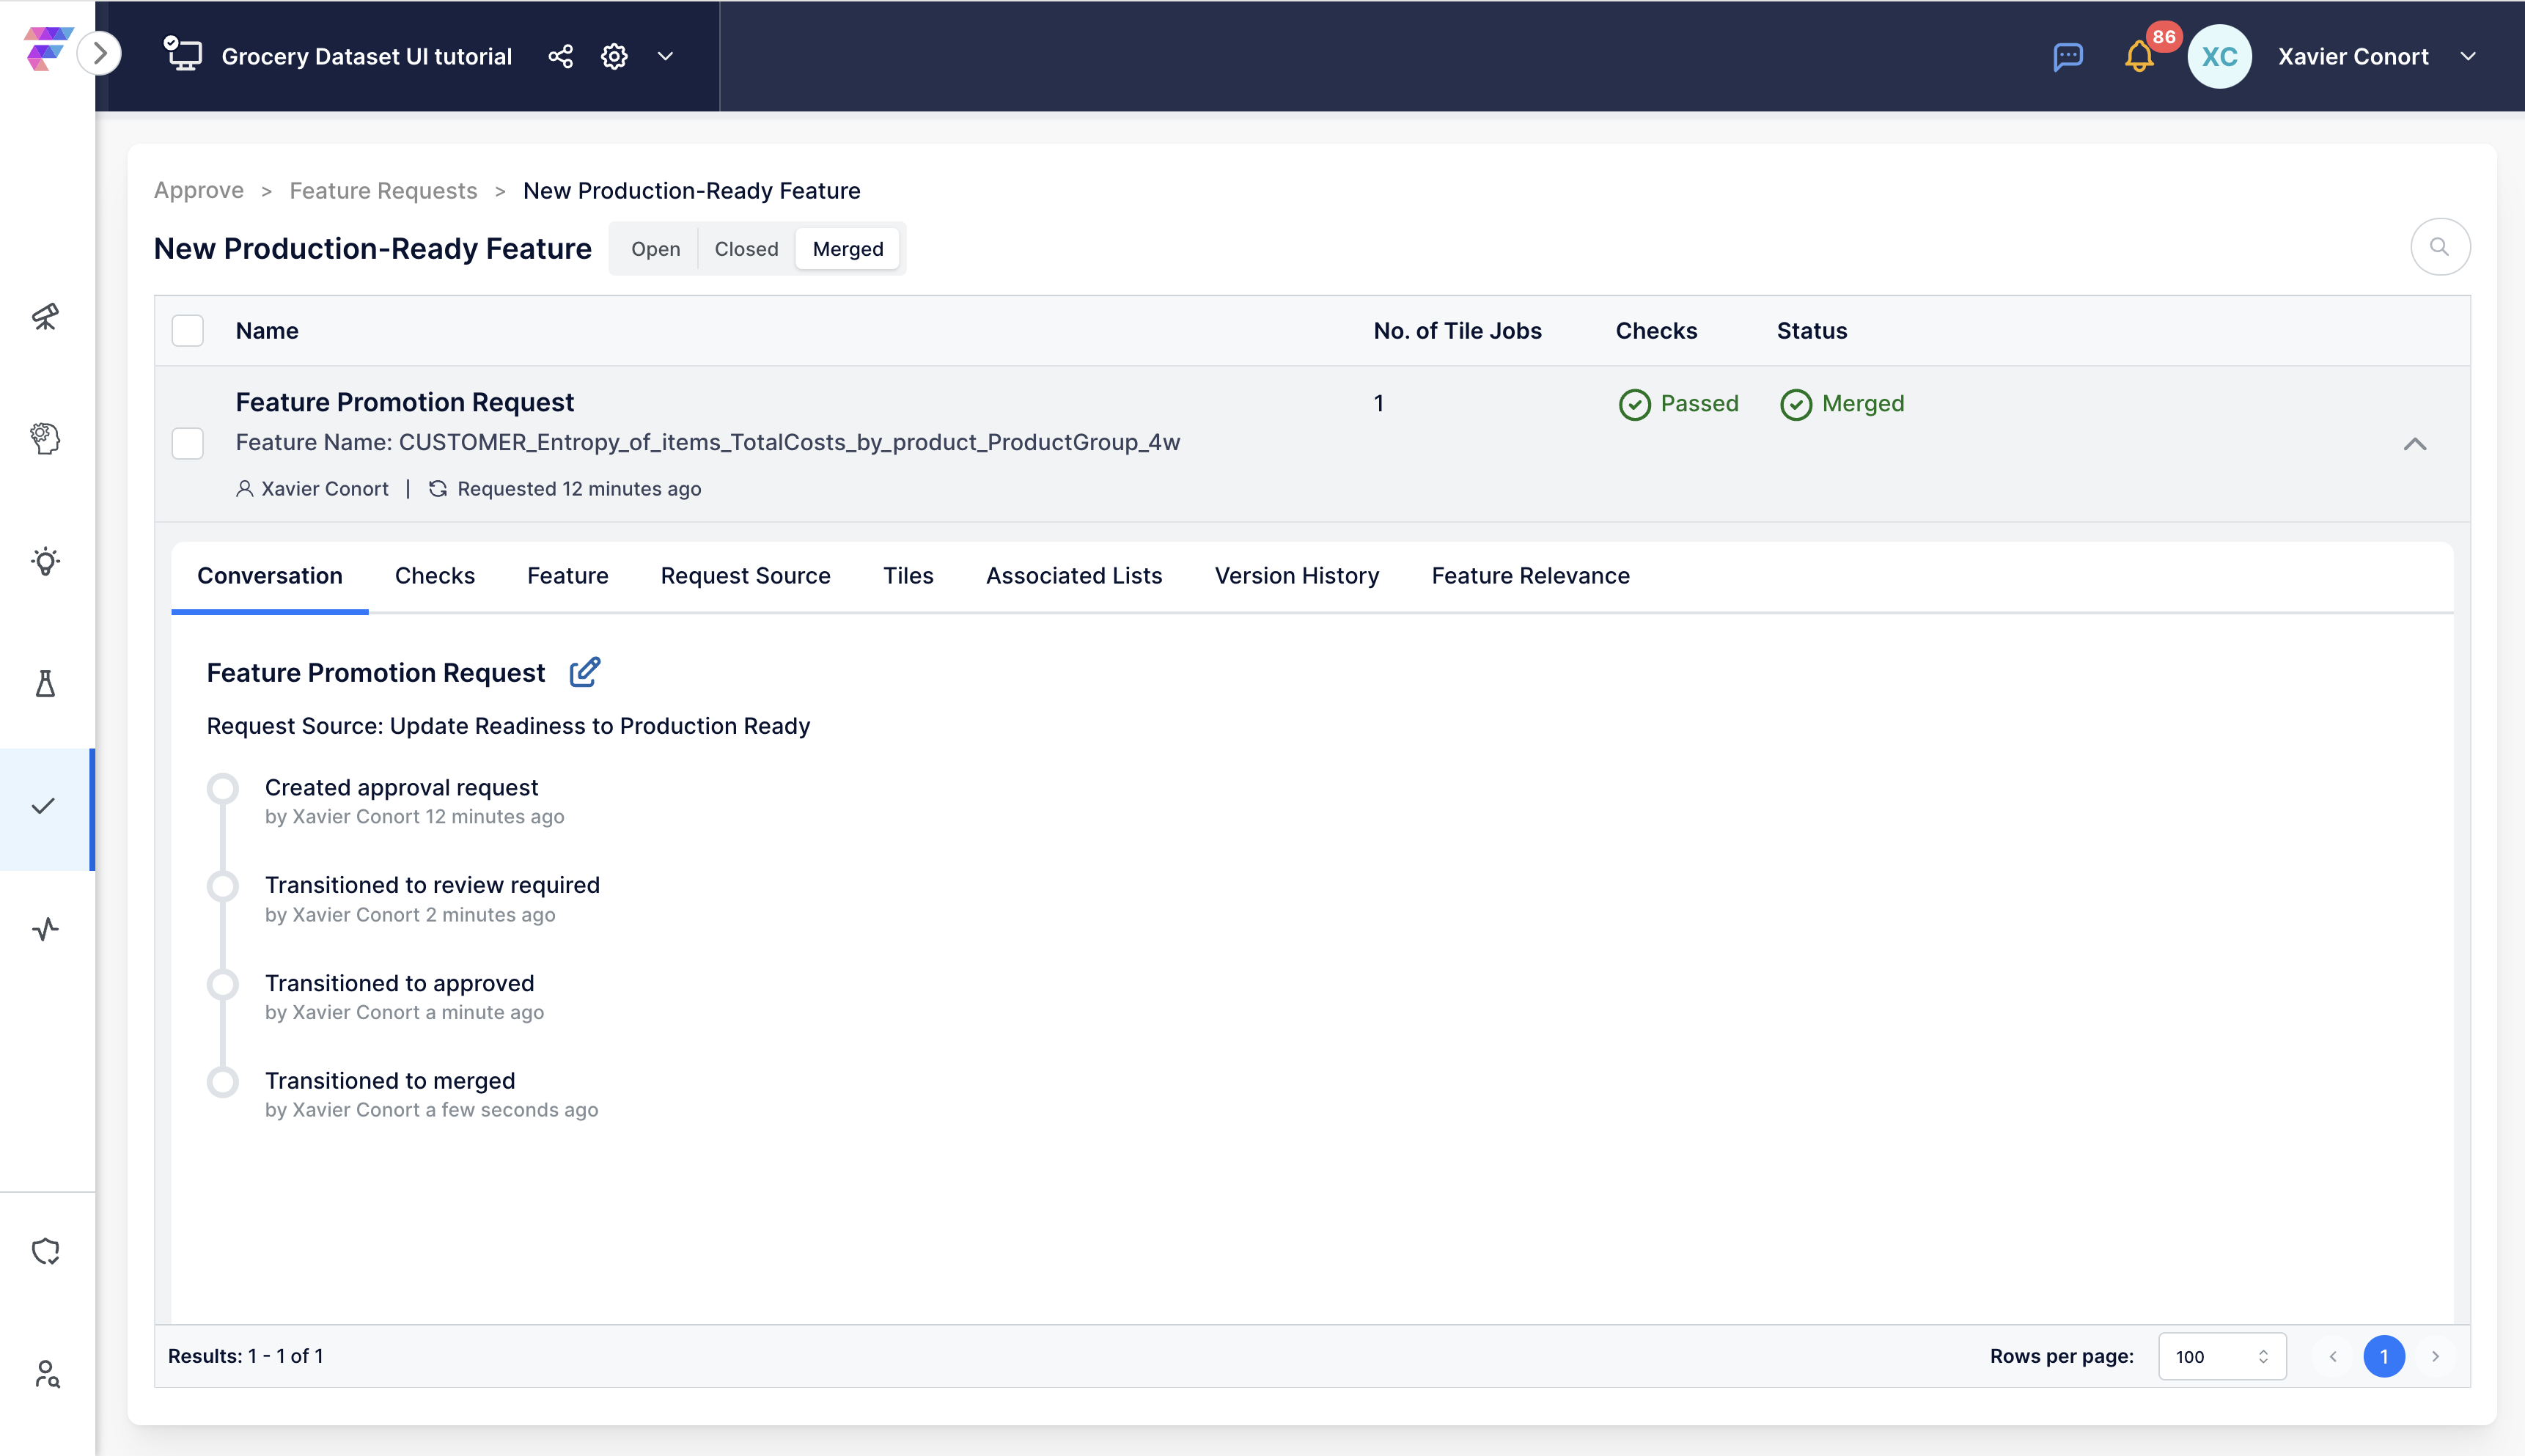
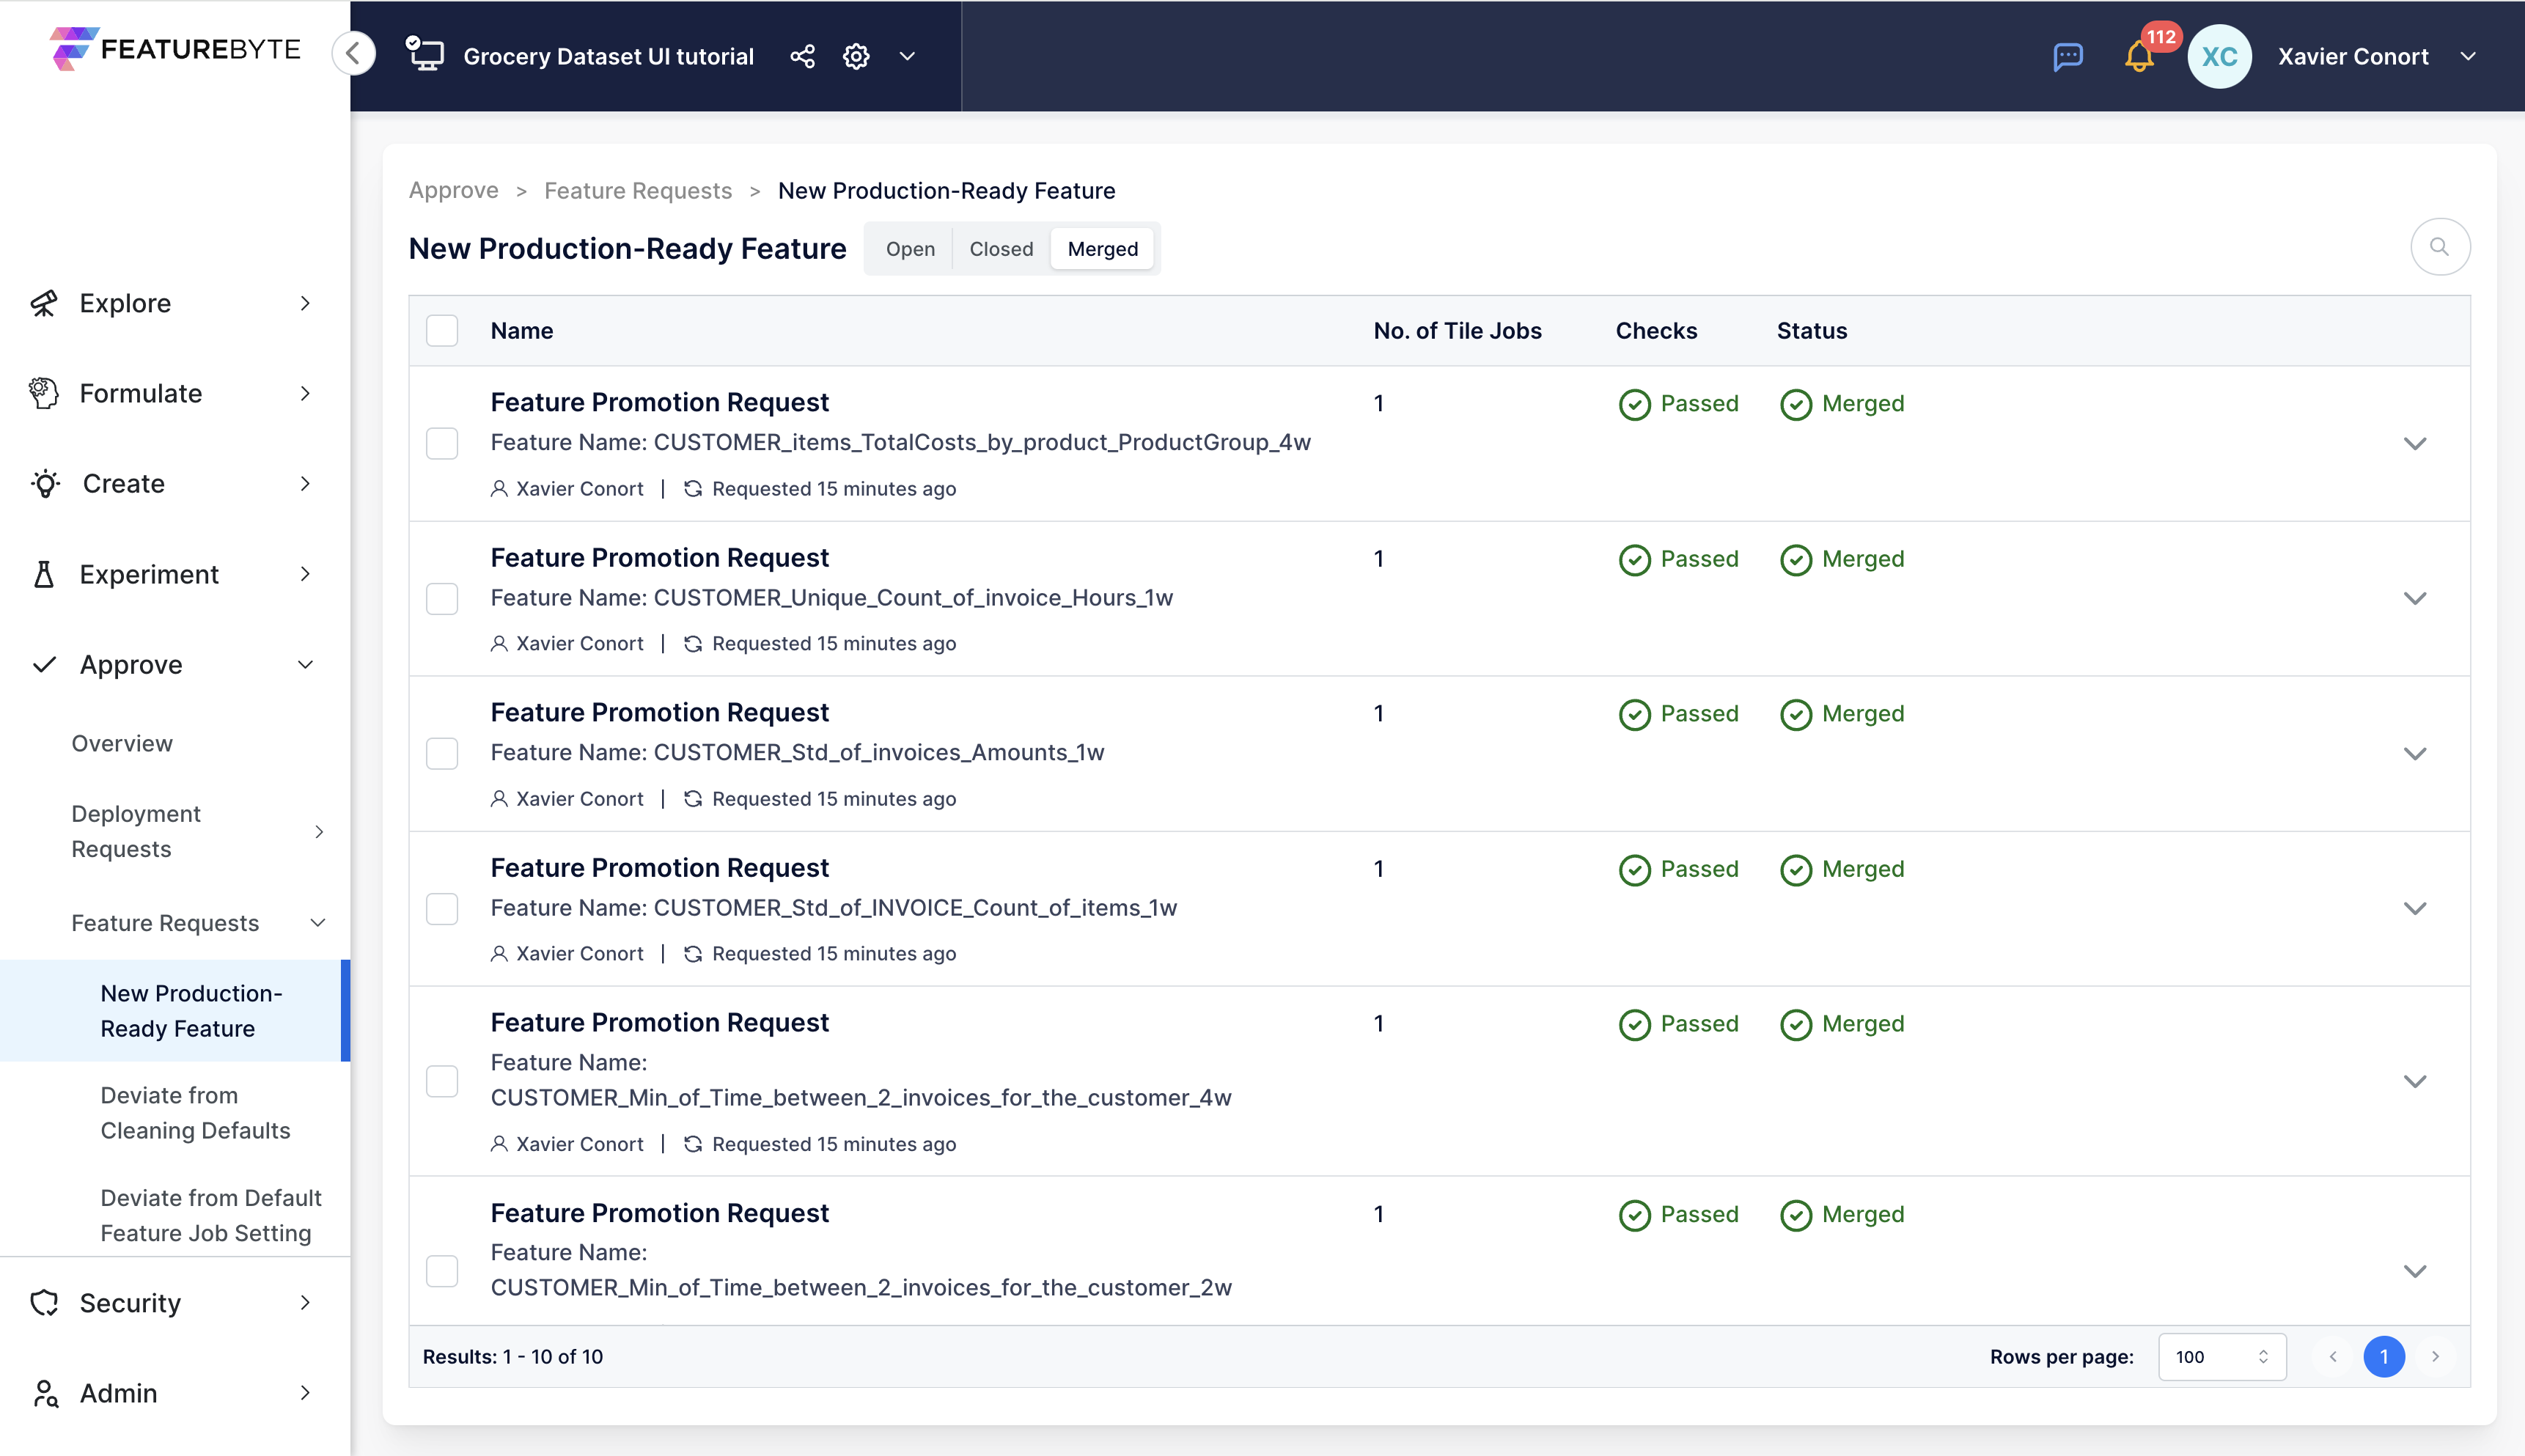
Step 8: Audit Merged Request
Click 'Merged' to see details of merged requests.
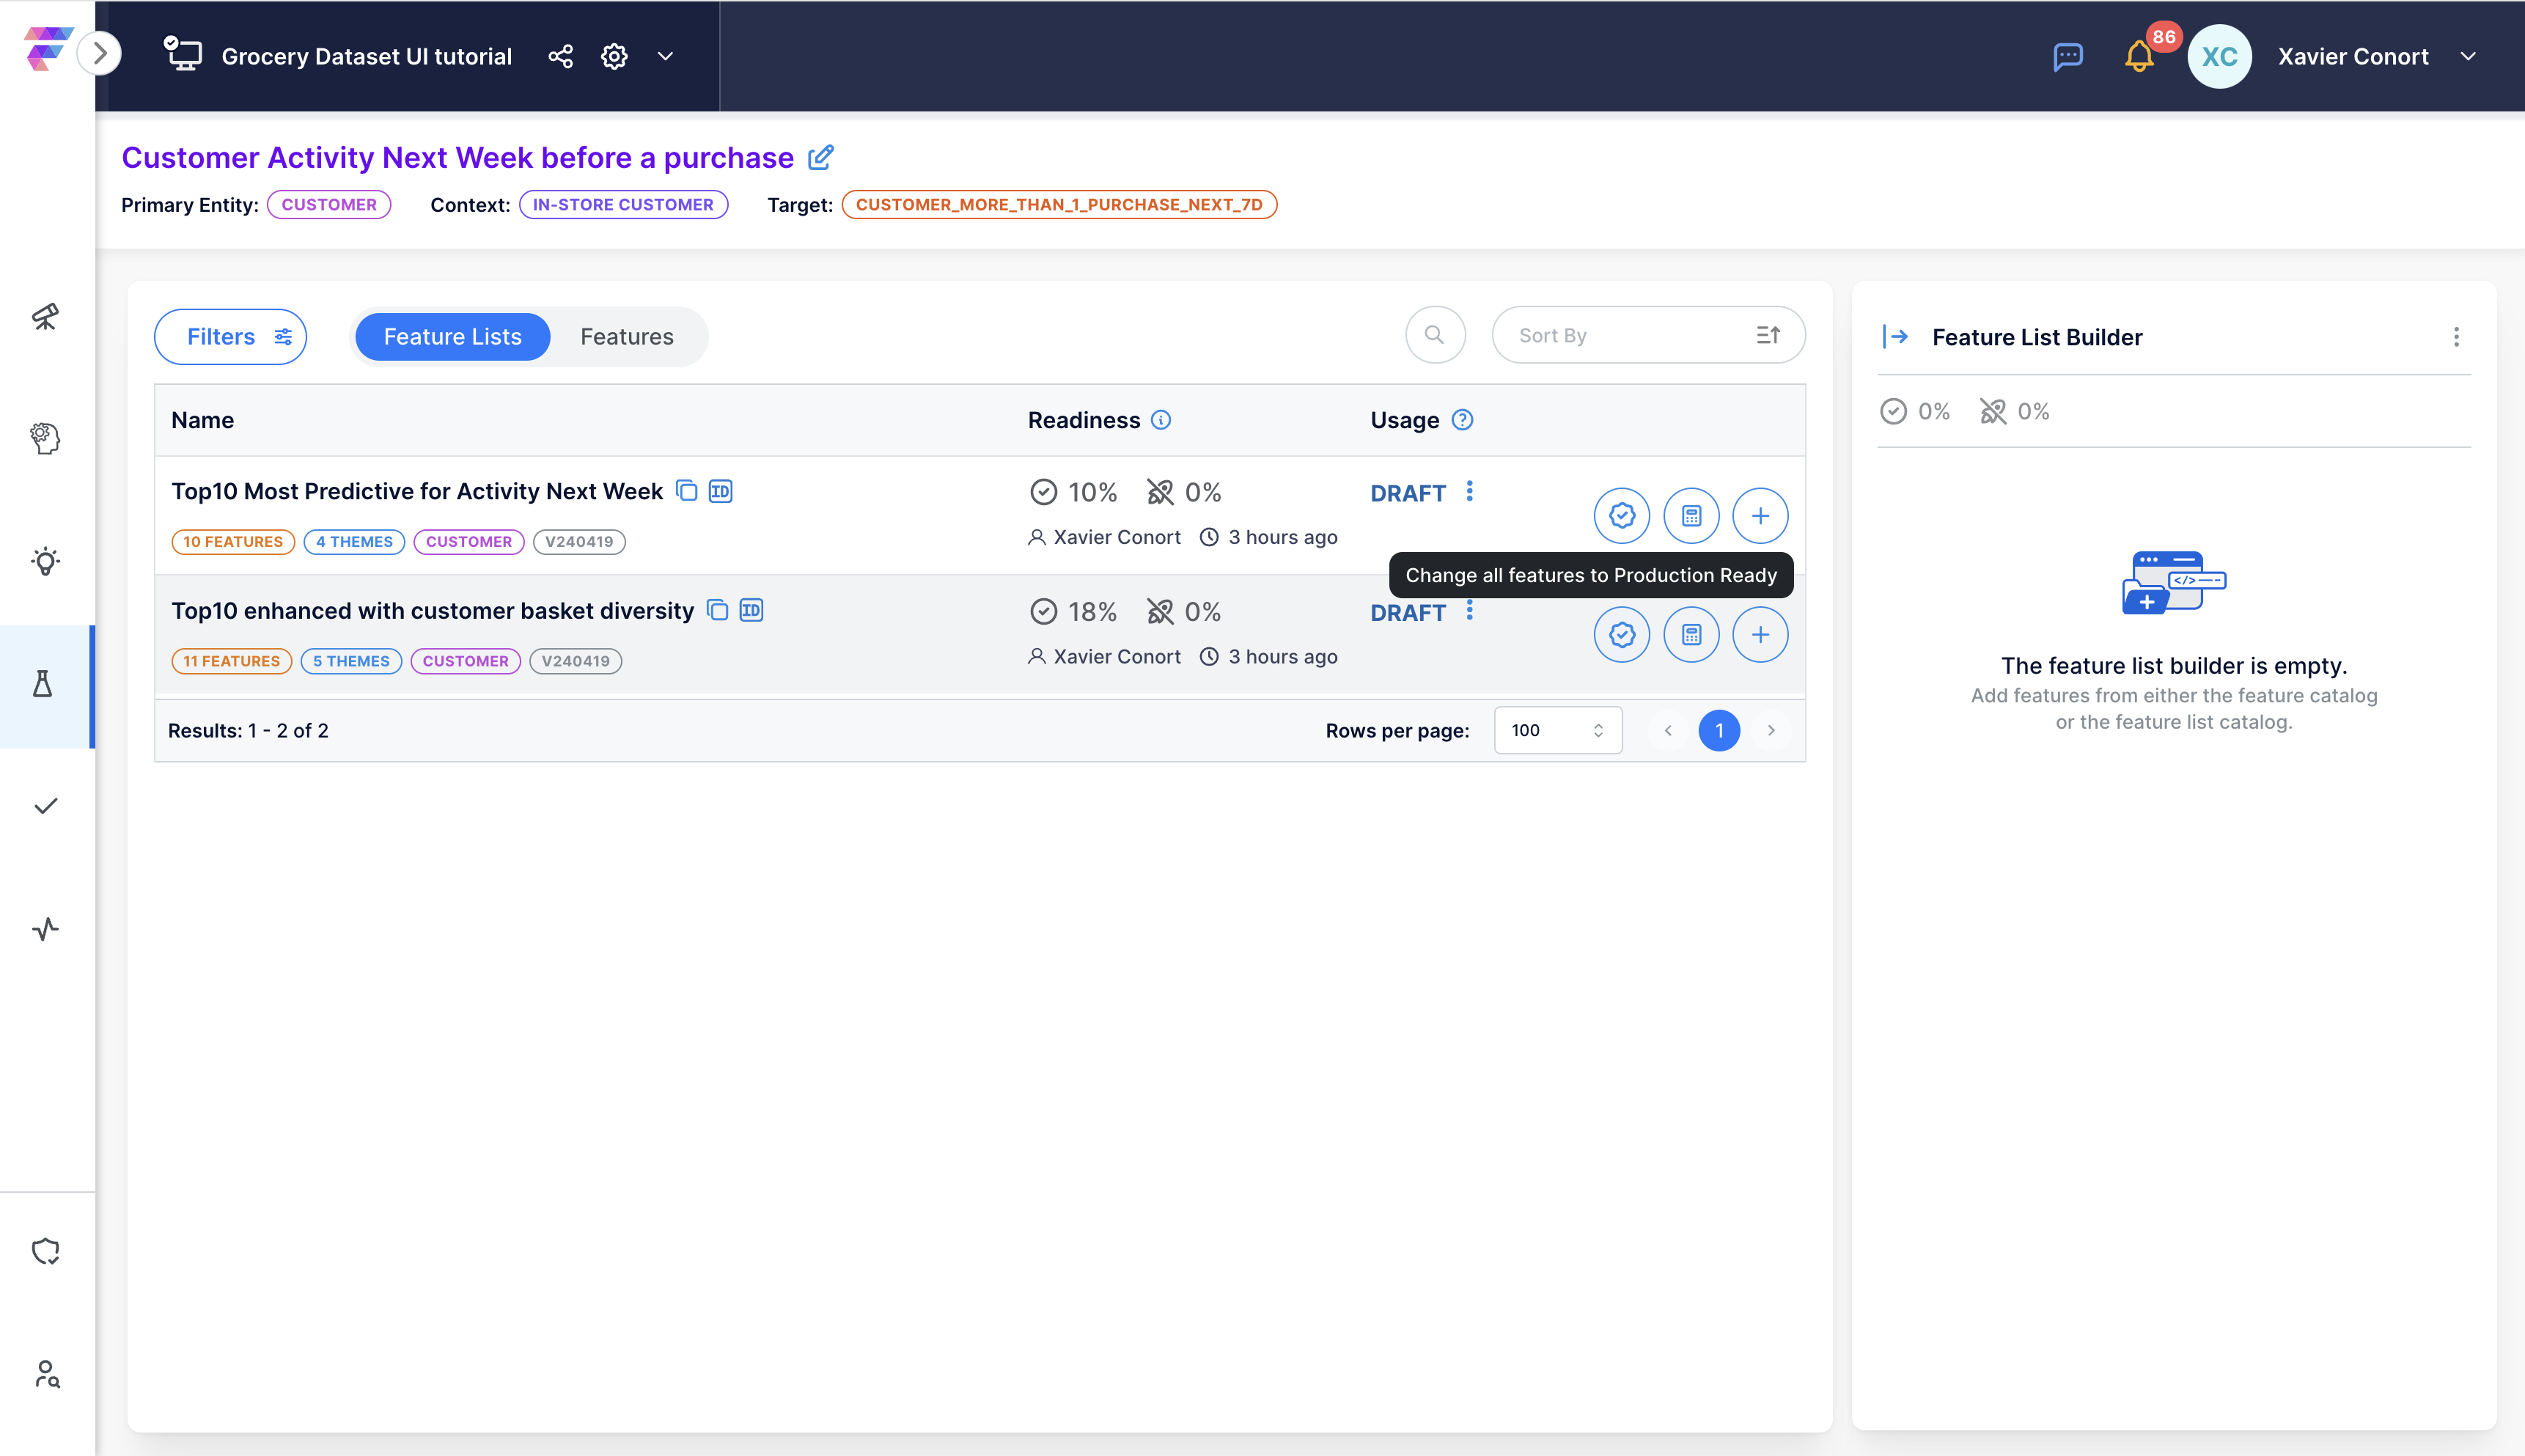
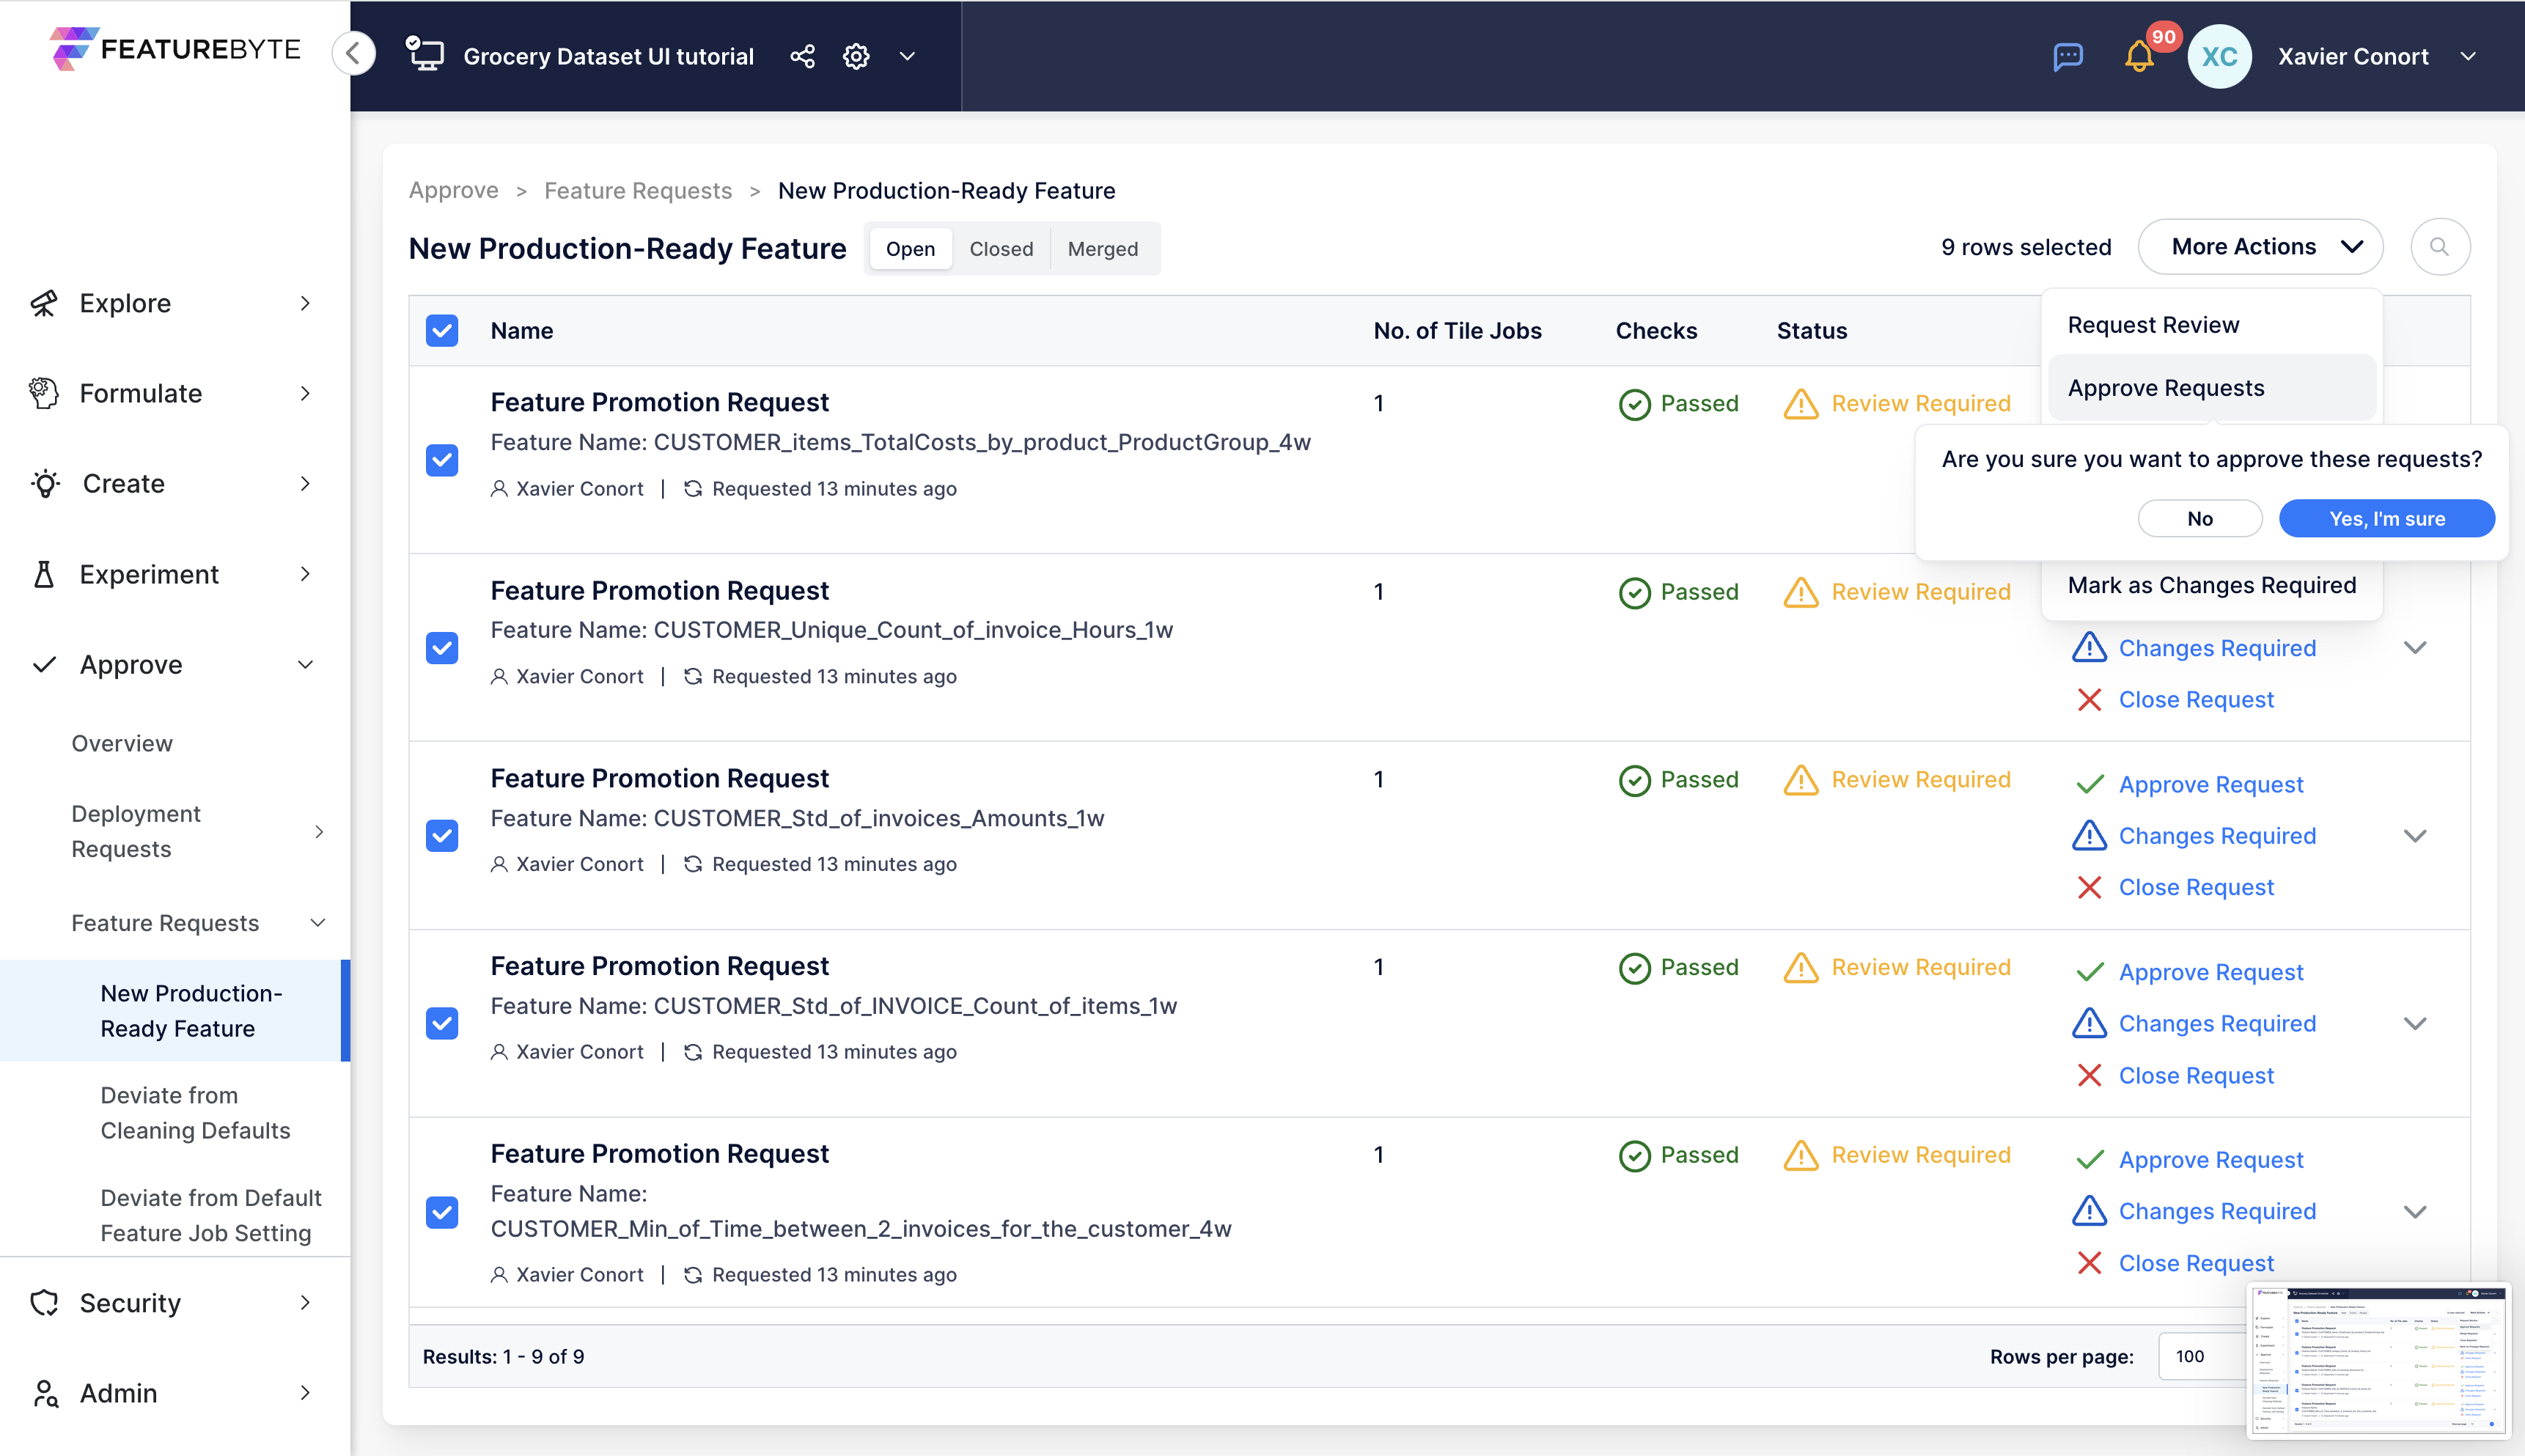
Step 9: Requests by batch
To mark all features in a feature list as "Production-Ready",
- Go to the Feature List Catalog.
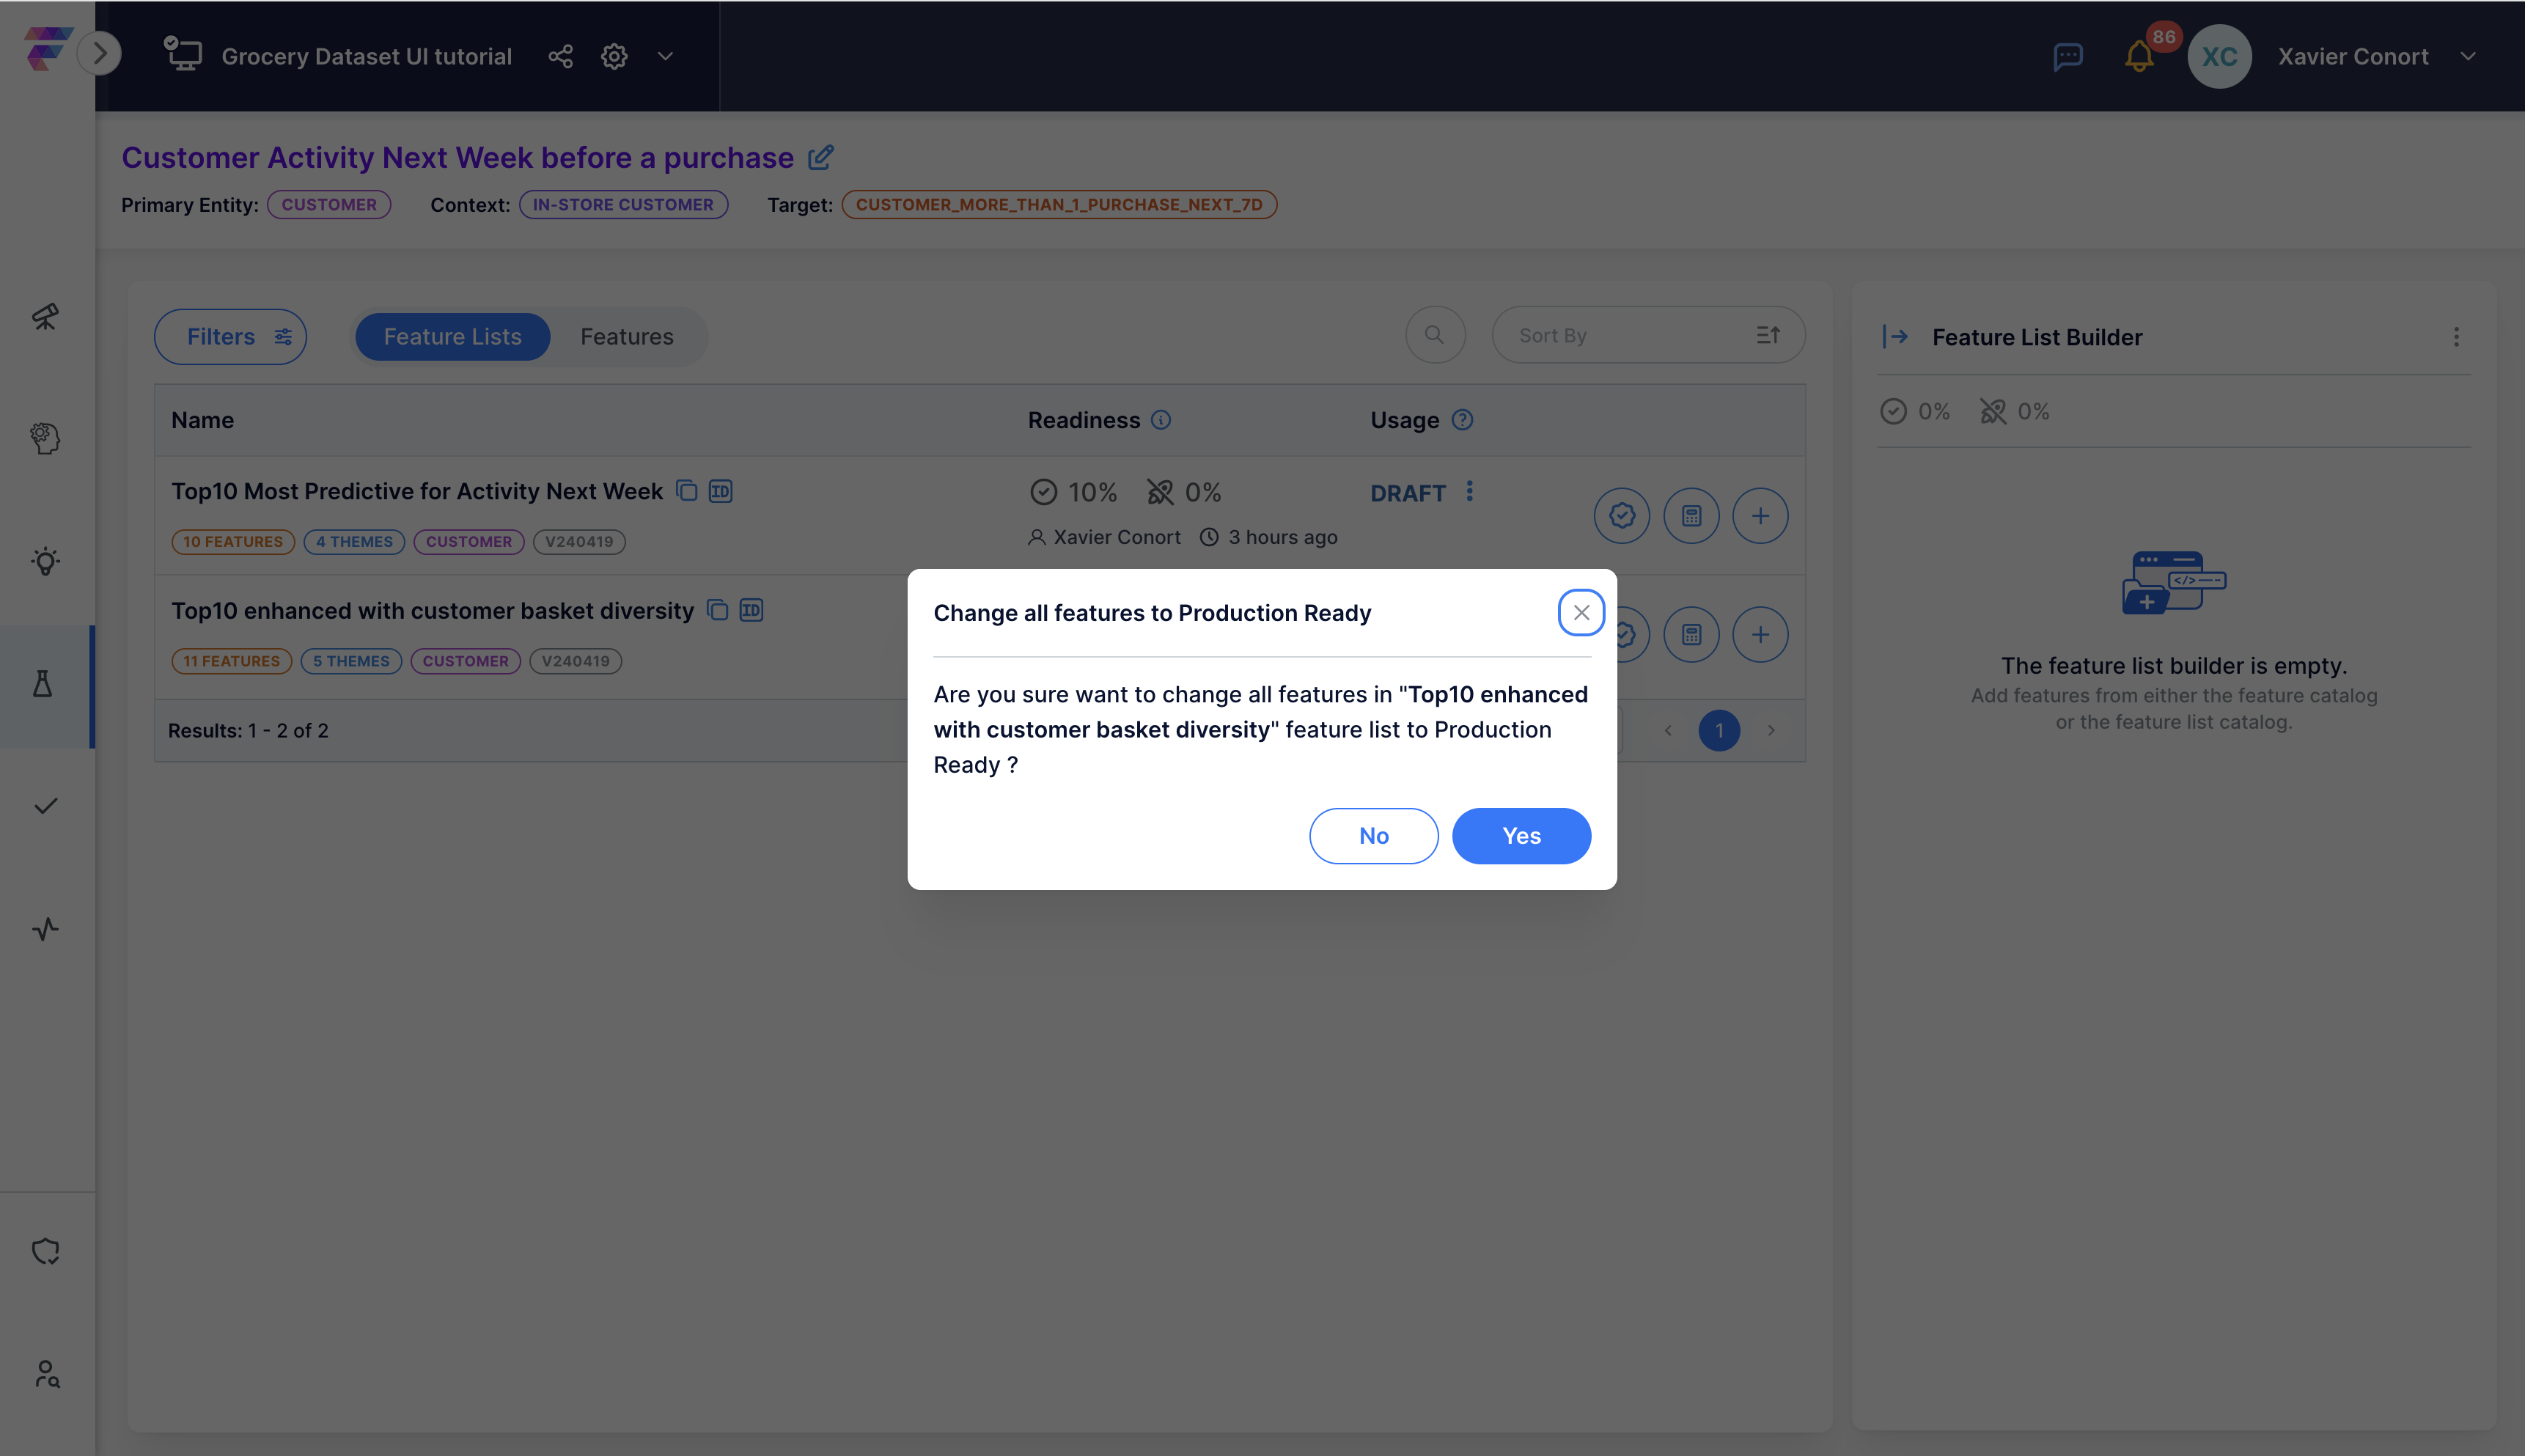
- Click on the check icon next to the calculator button of the feature list you want to update.
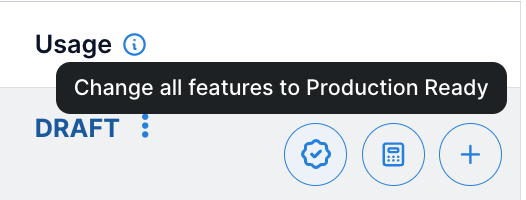
Confirm.
Navigate to 'New Production-Ready Feature' under 'Feature Requests' of the 'Approve' section of the menu.
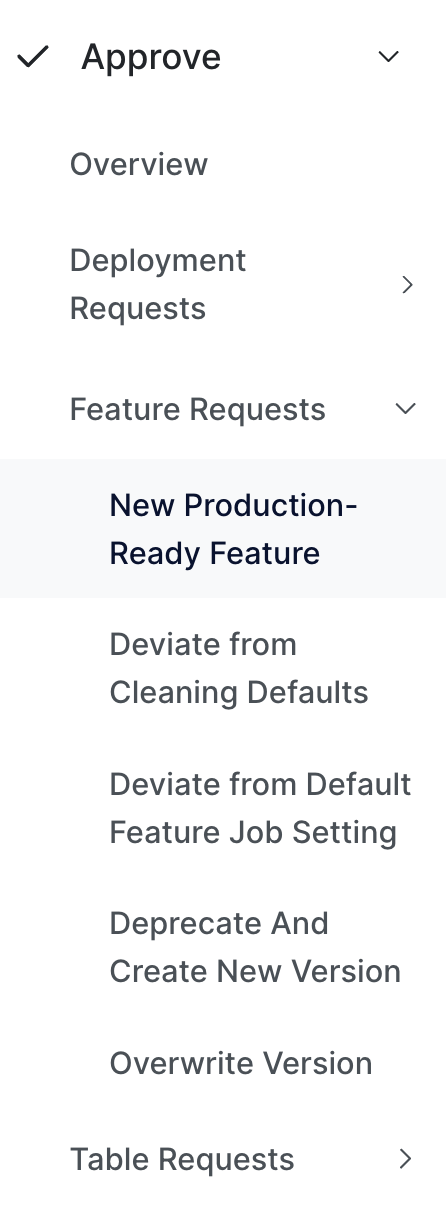
Since all checks passed, select all requests by checking the box next to 'Name', and then request reviews in batches.

Approve.
Merge requests.
The merged requests can be found in the Merged tab.
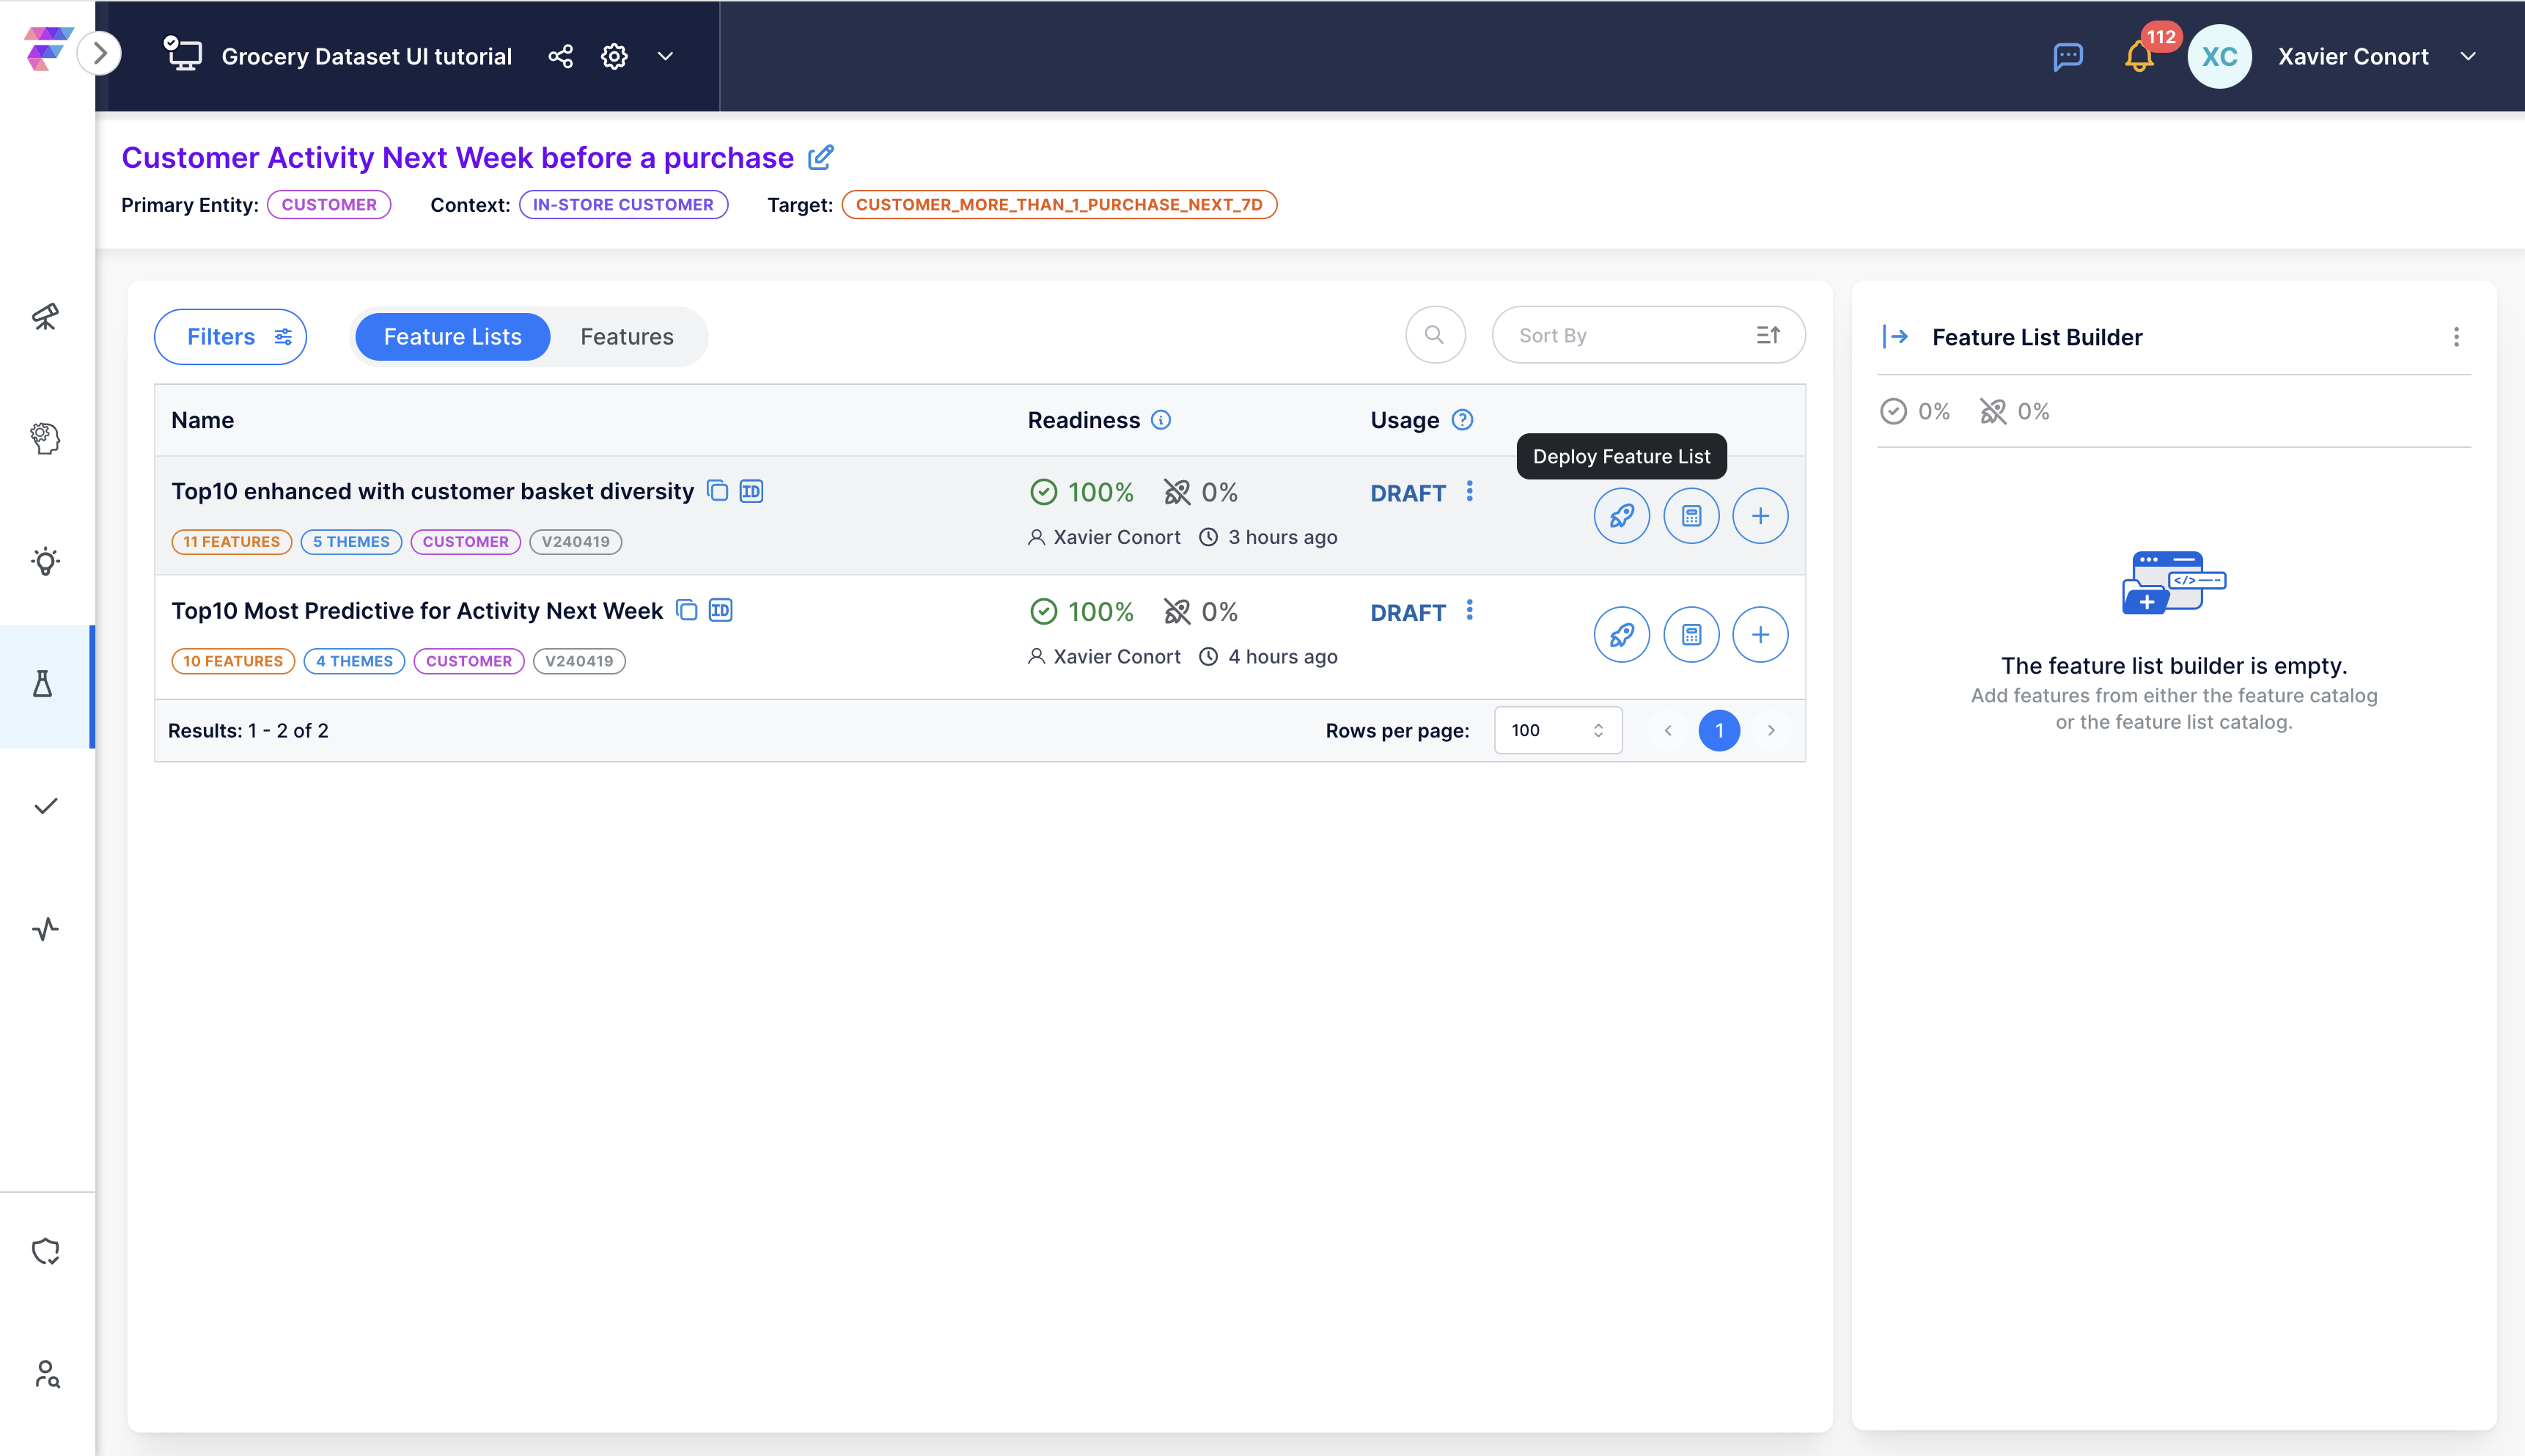
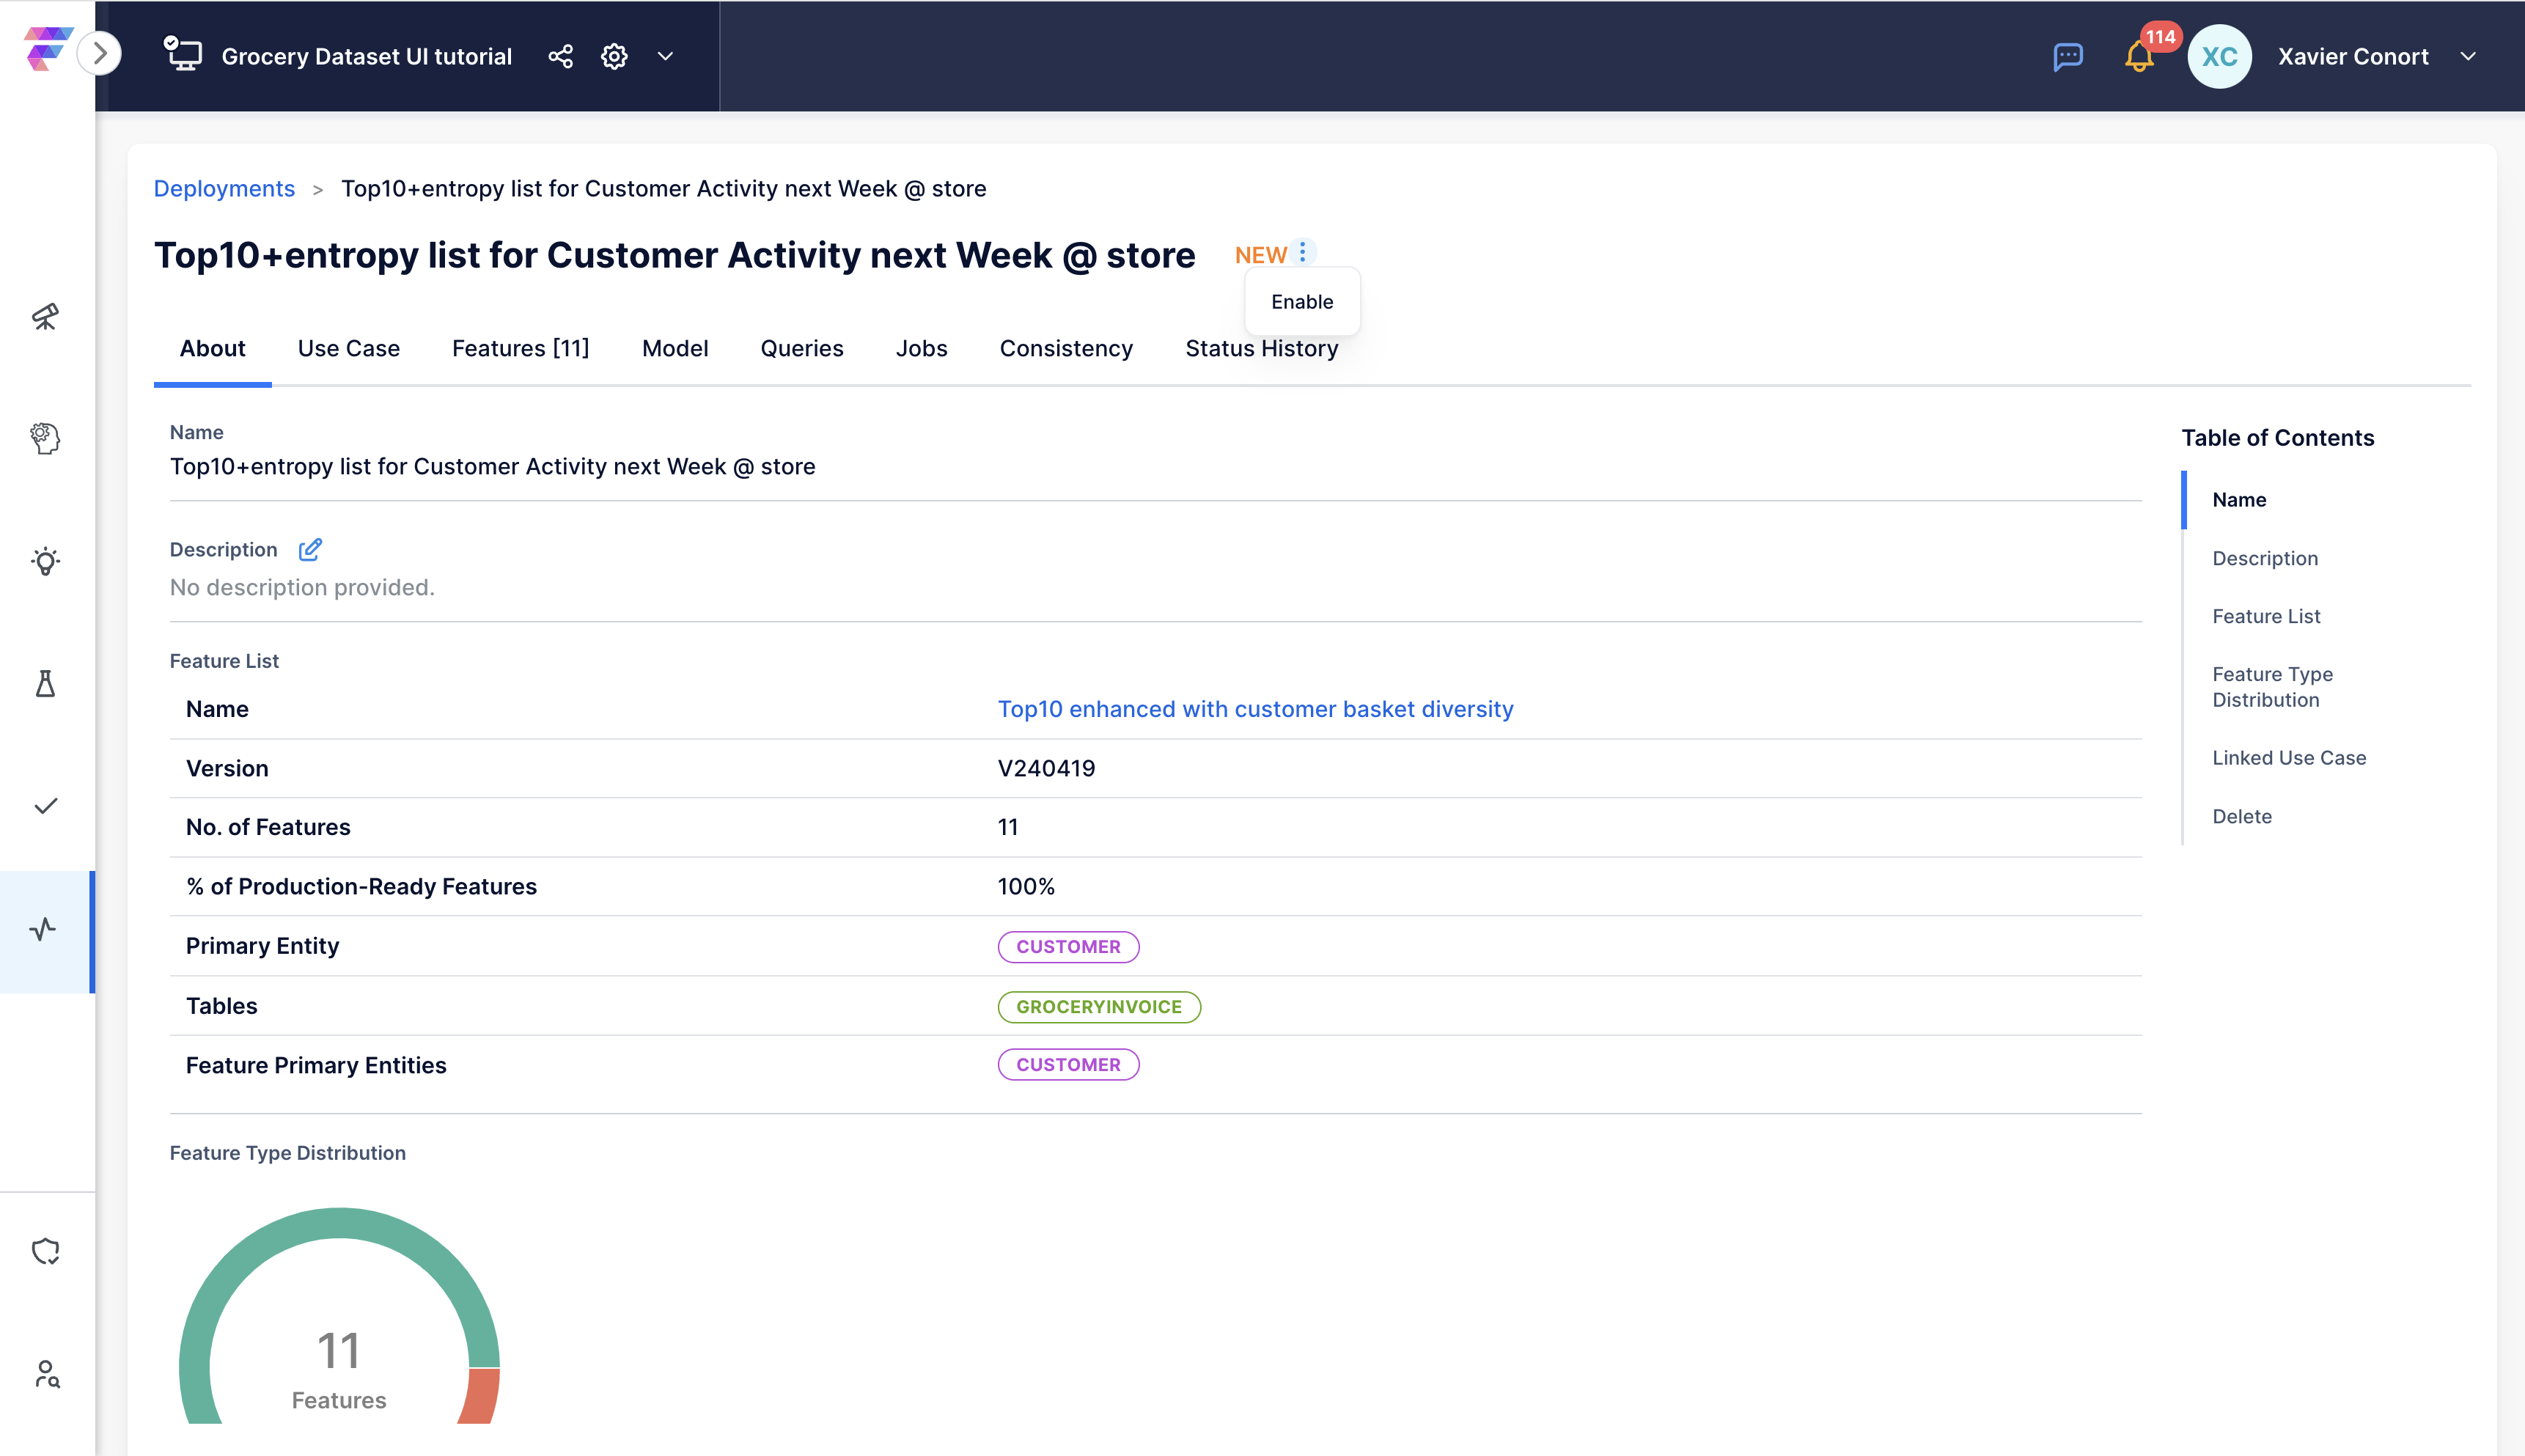
Step 10: Deploy
Now that all features in our feature list are "Production-Ready," we can deploy it.
Click the rocket icon to initiate deployment.
Provide a name (e.g. "Top10+entropy list for Customer Activity next Week @ store") and associate the deployment with your Use Case for tracking.
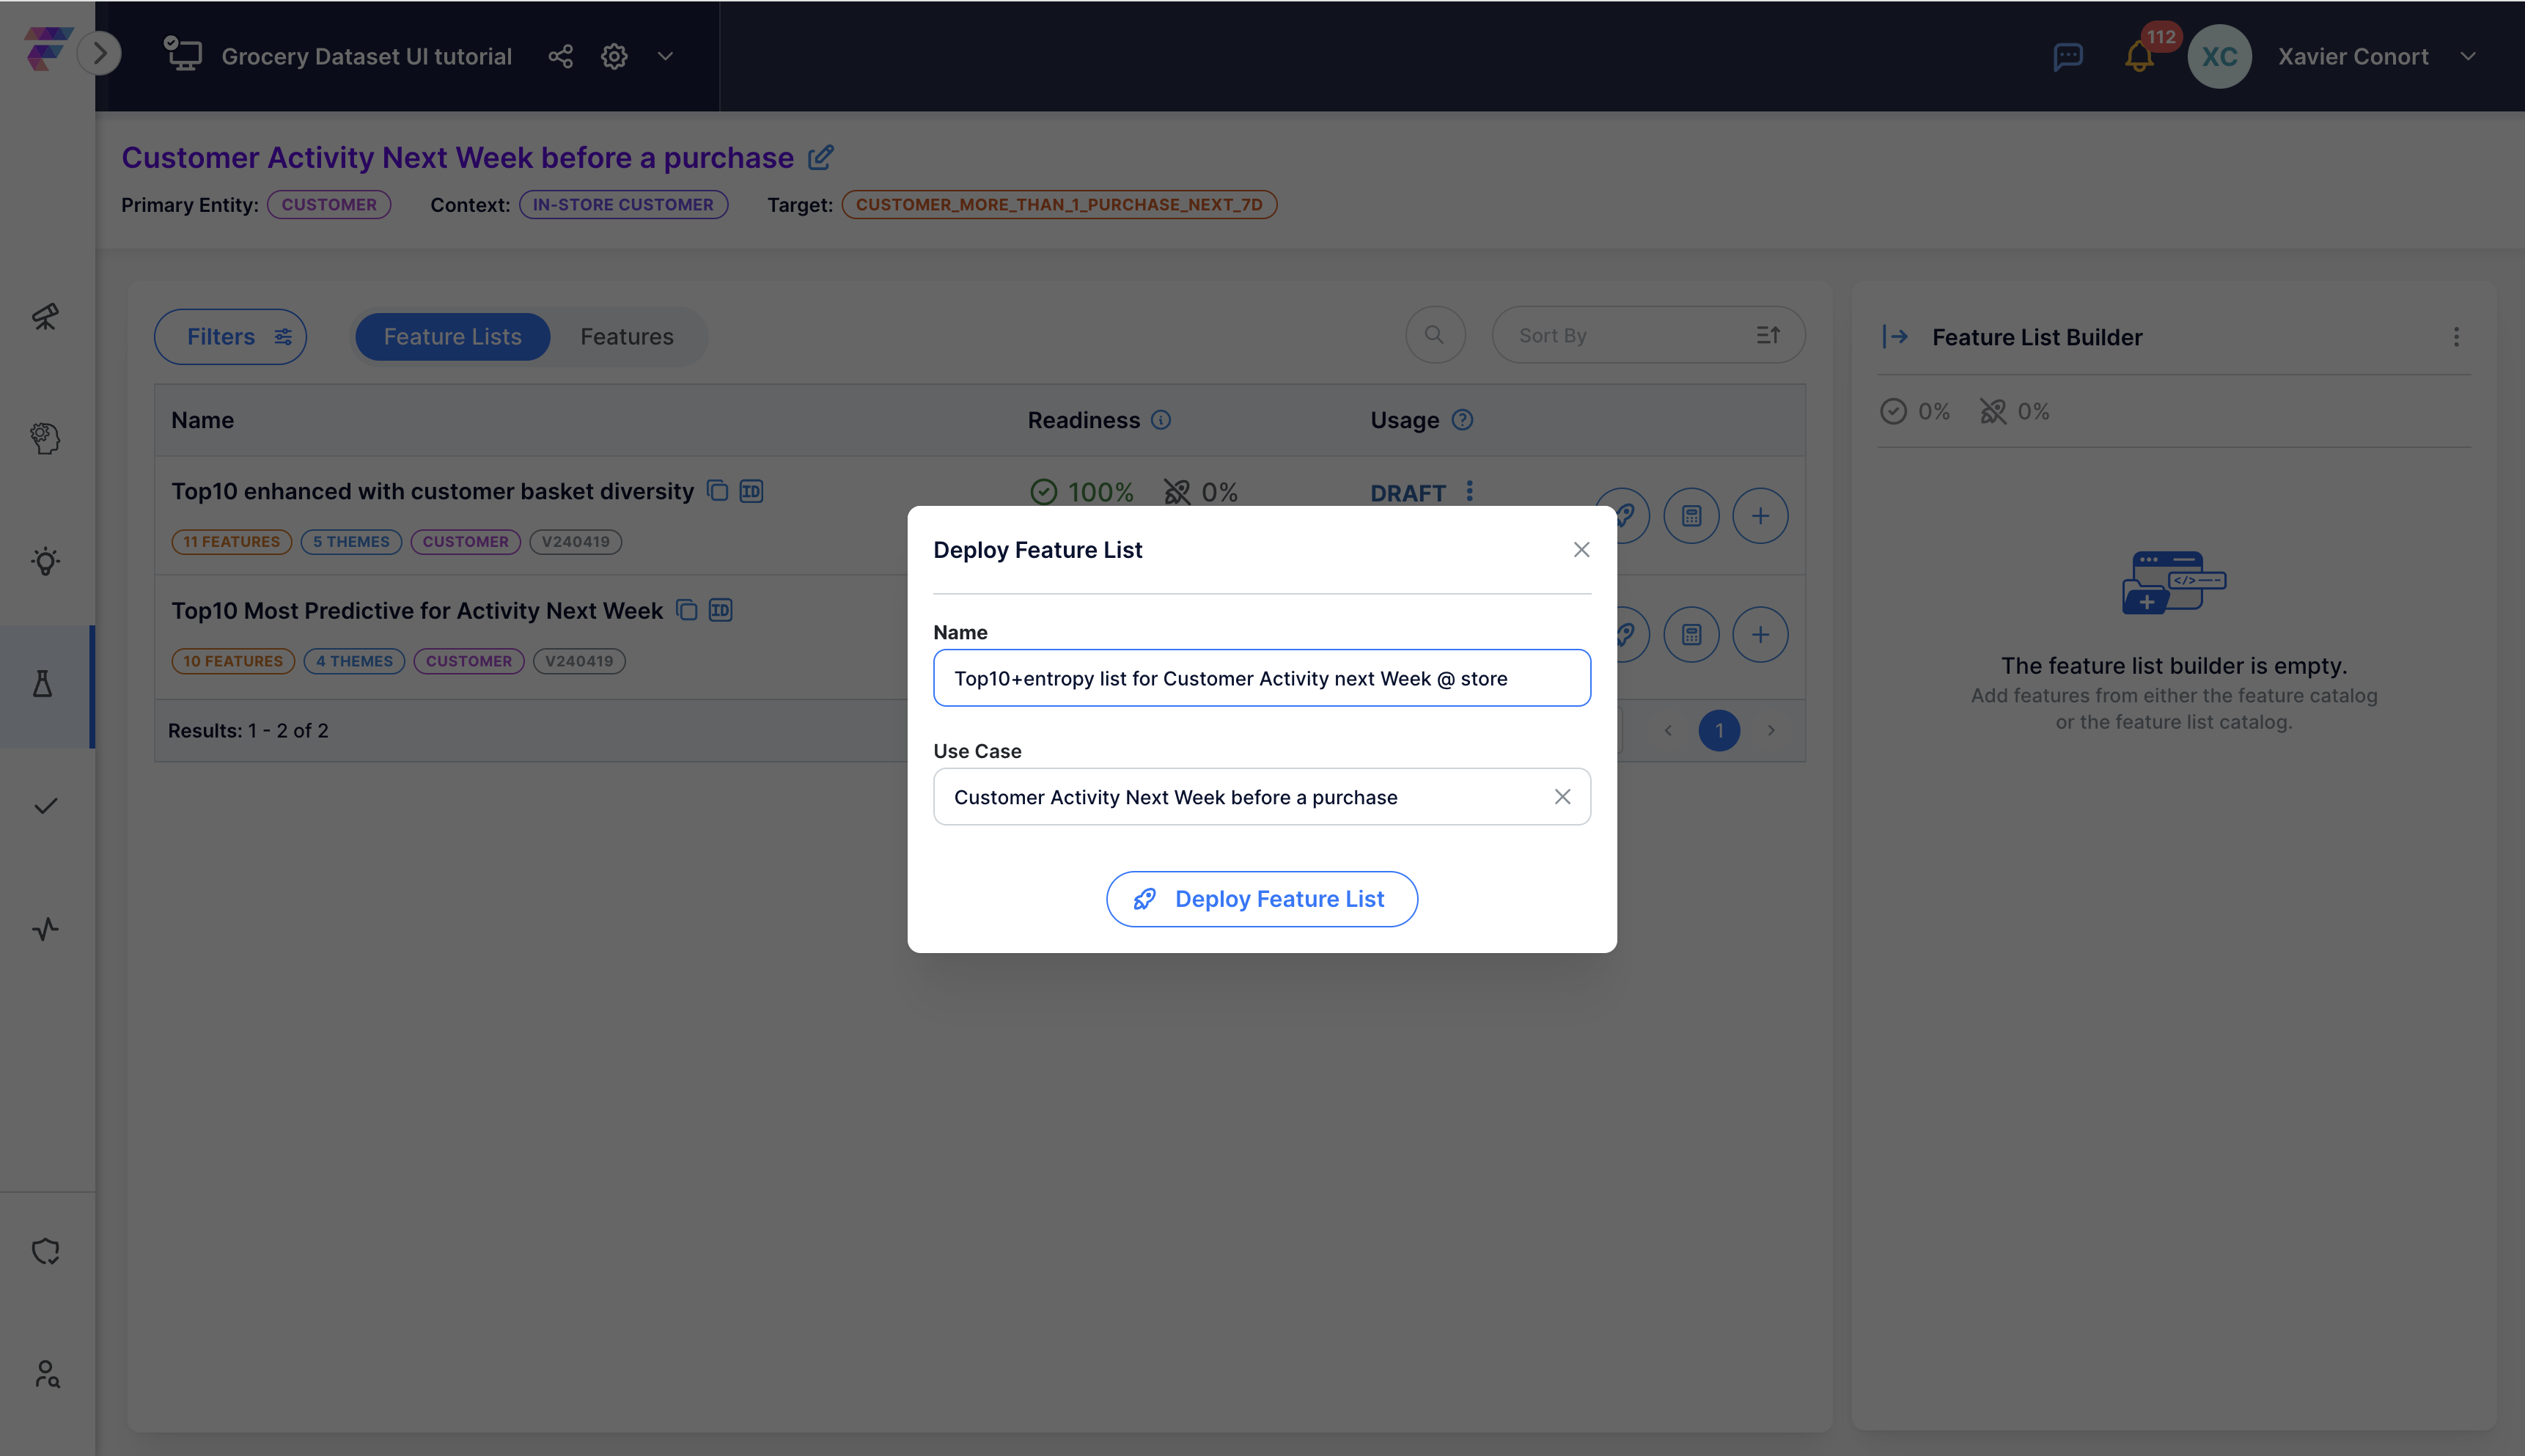
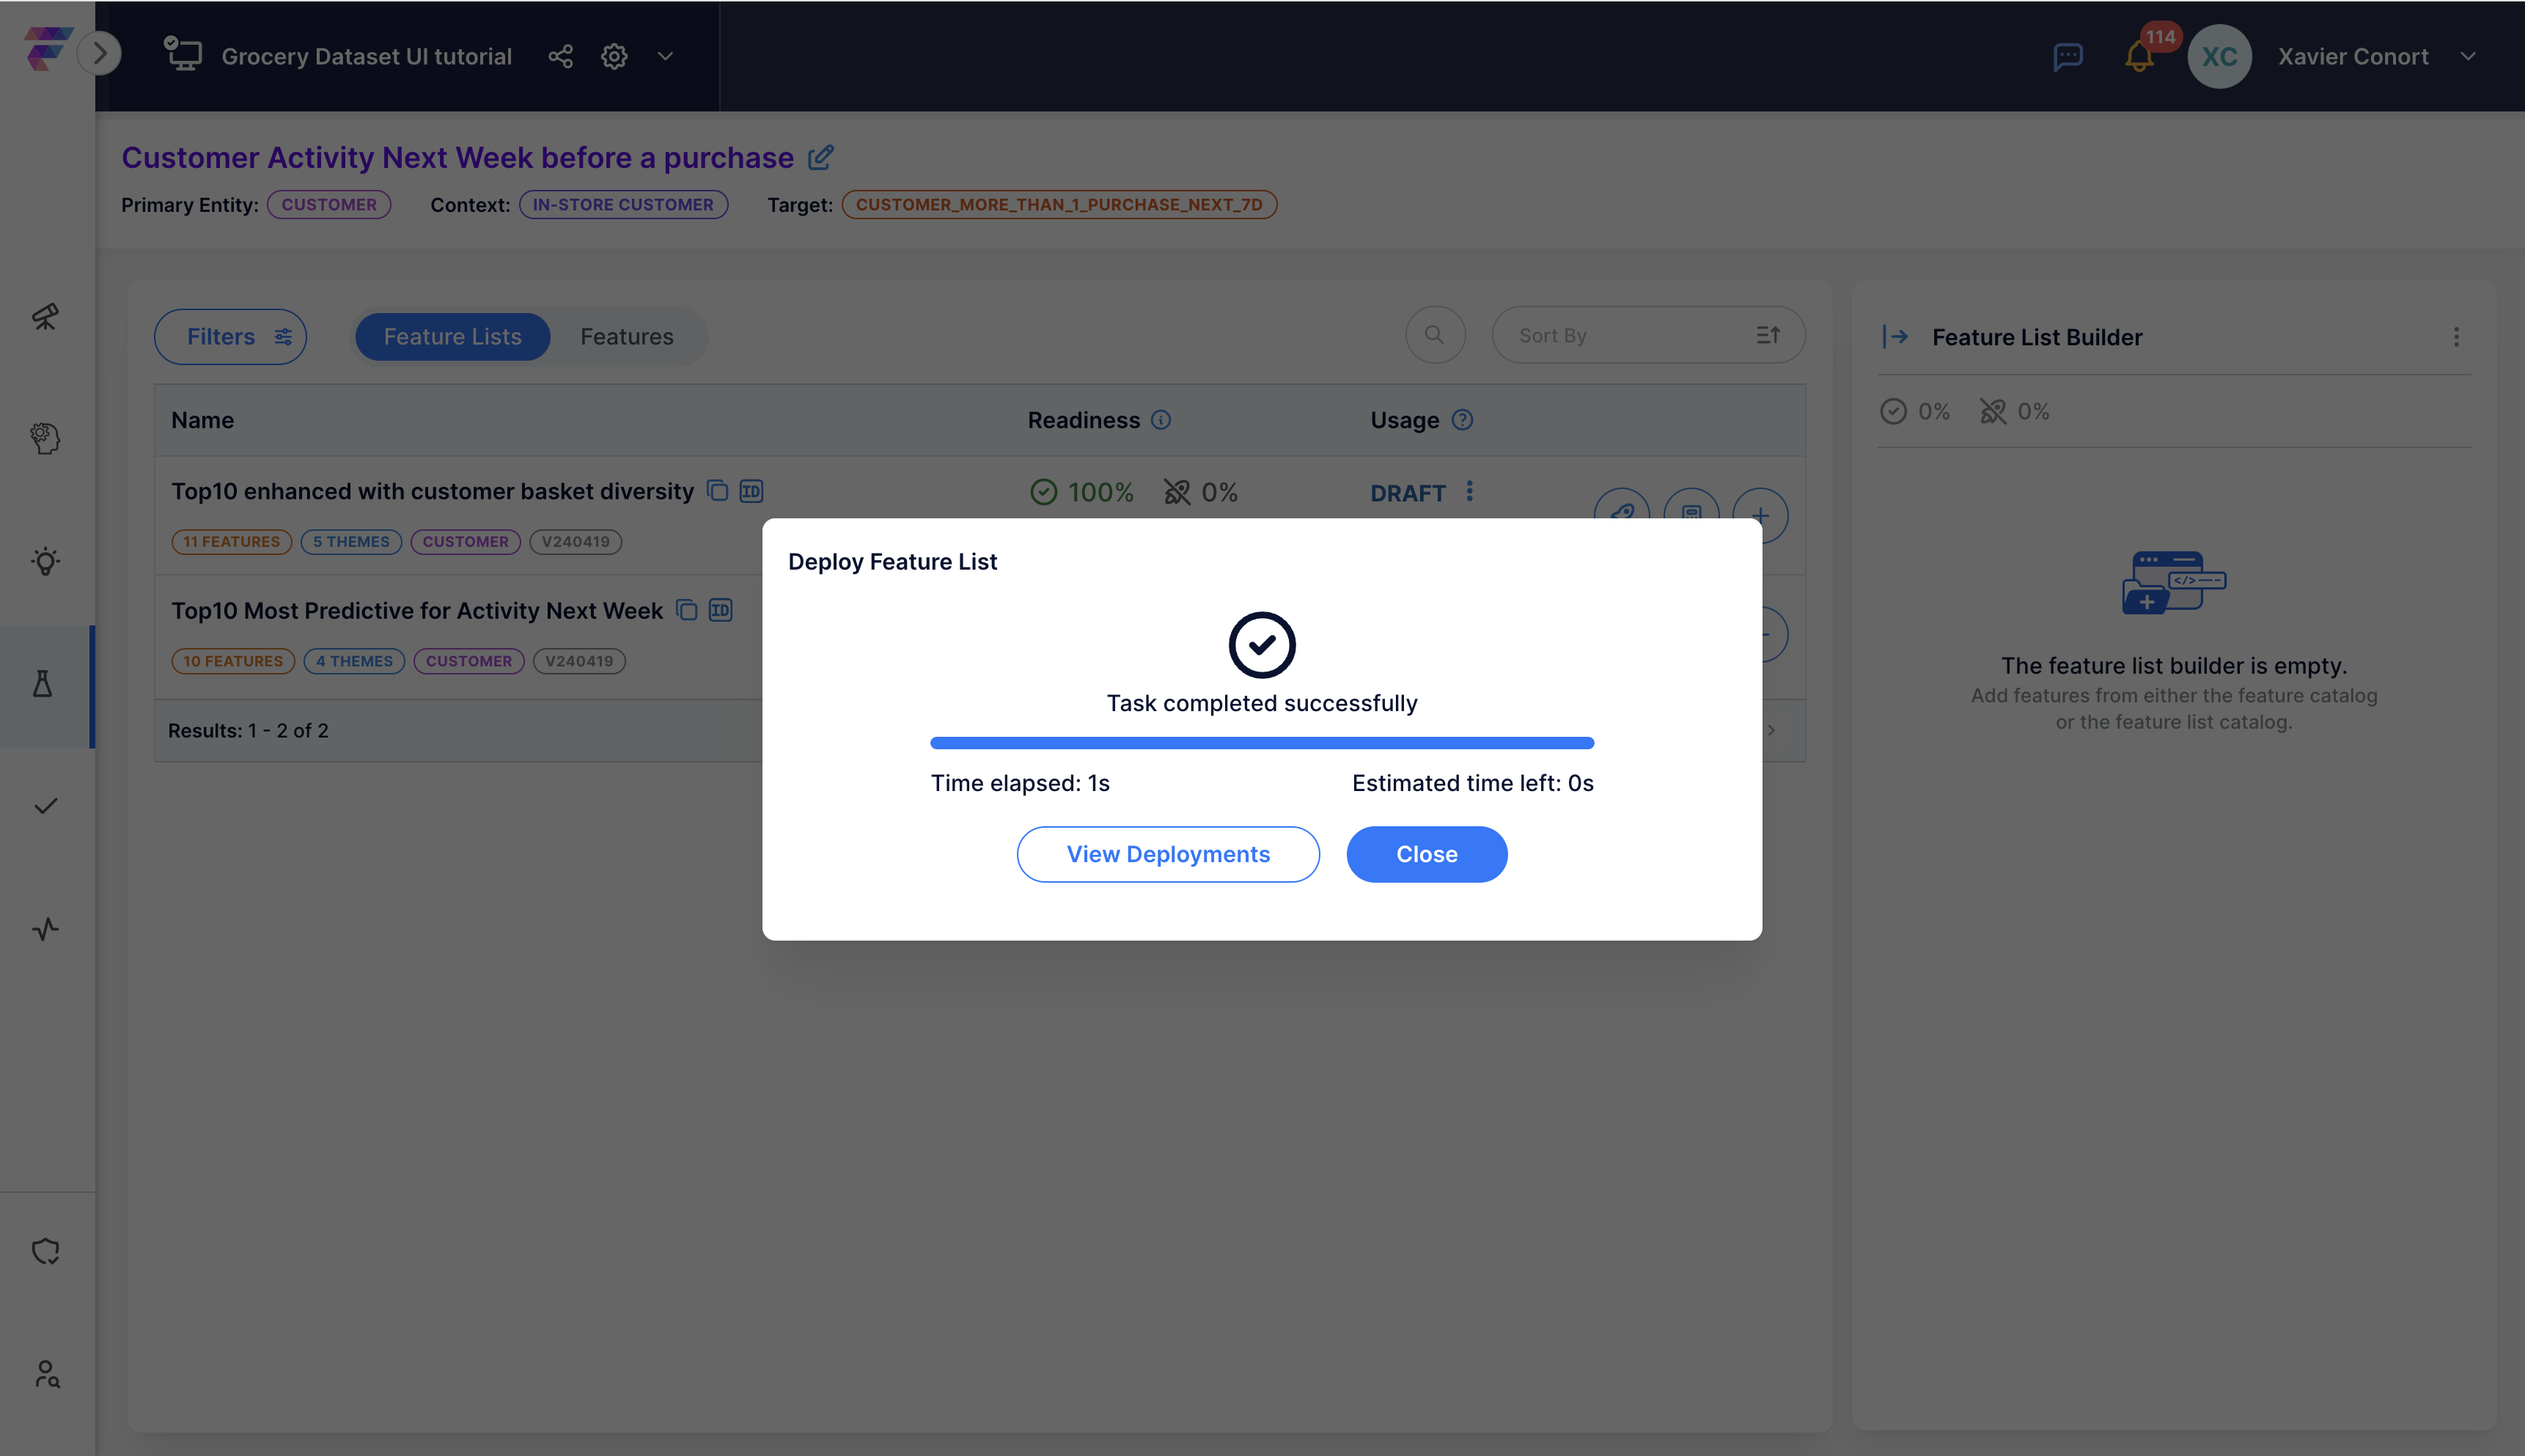
Click 'View Deployment' to access the deployment in the Deployment Catalog.
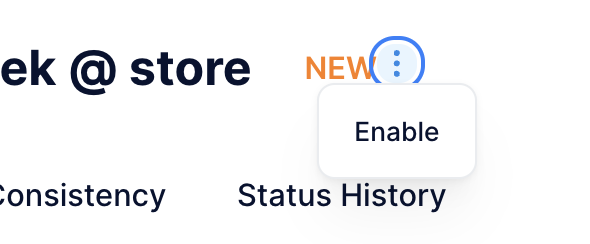
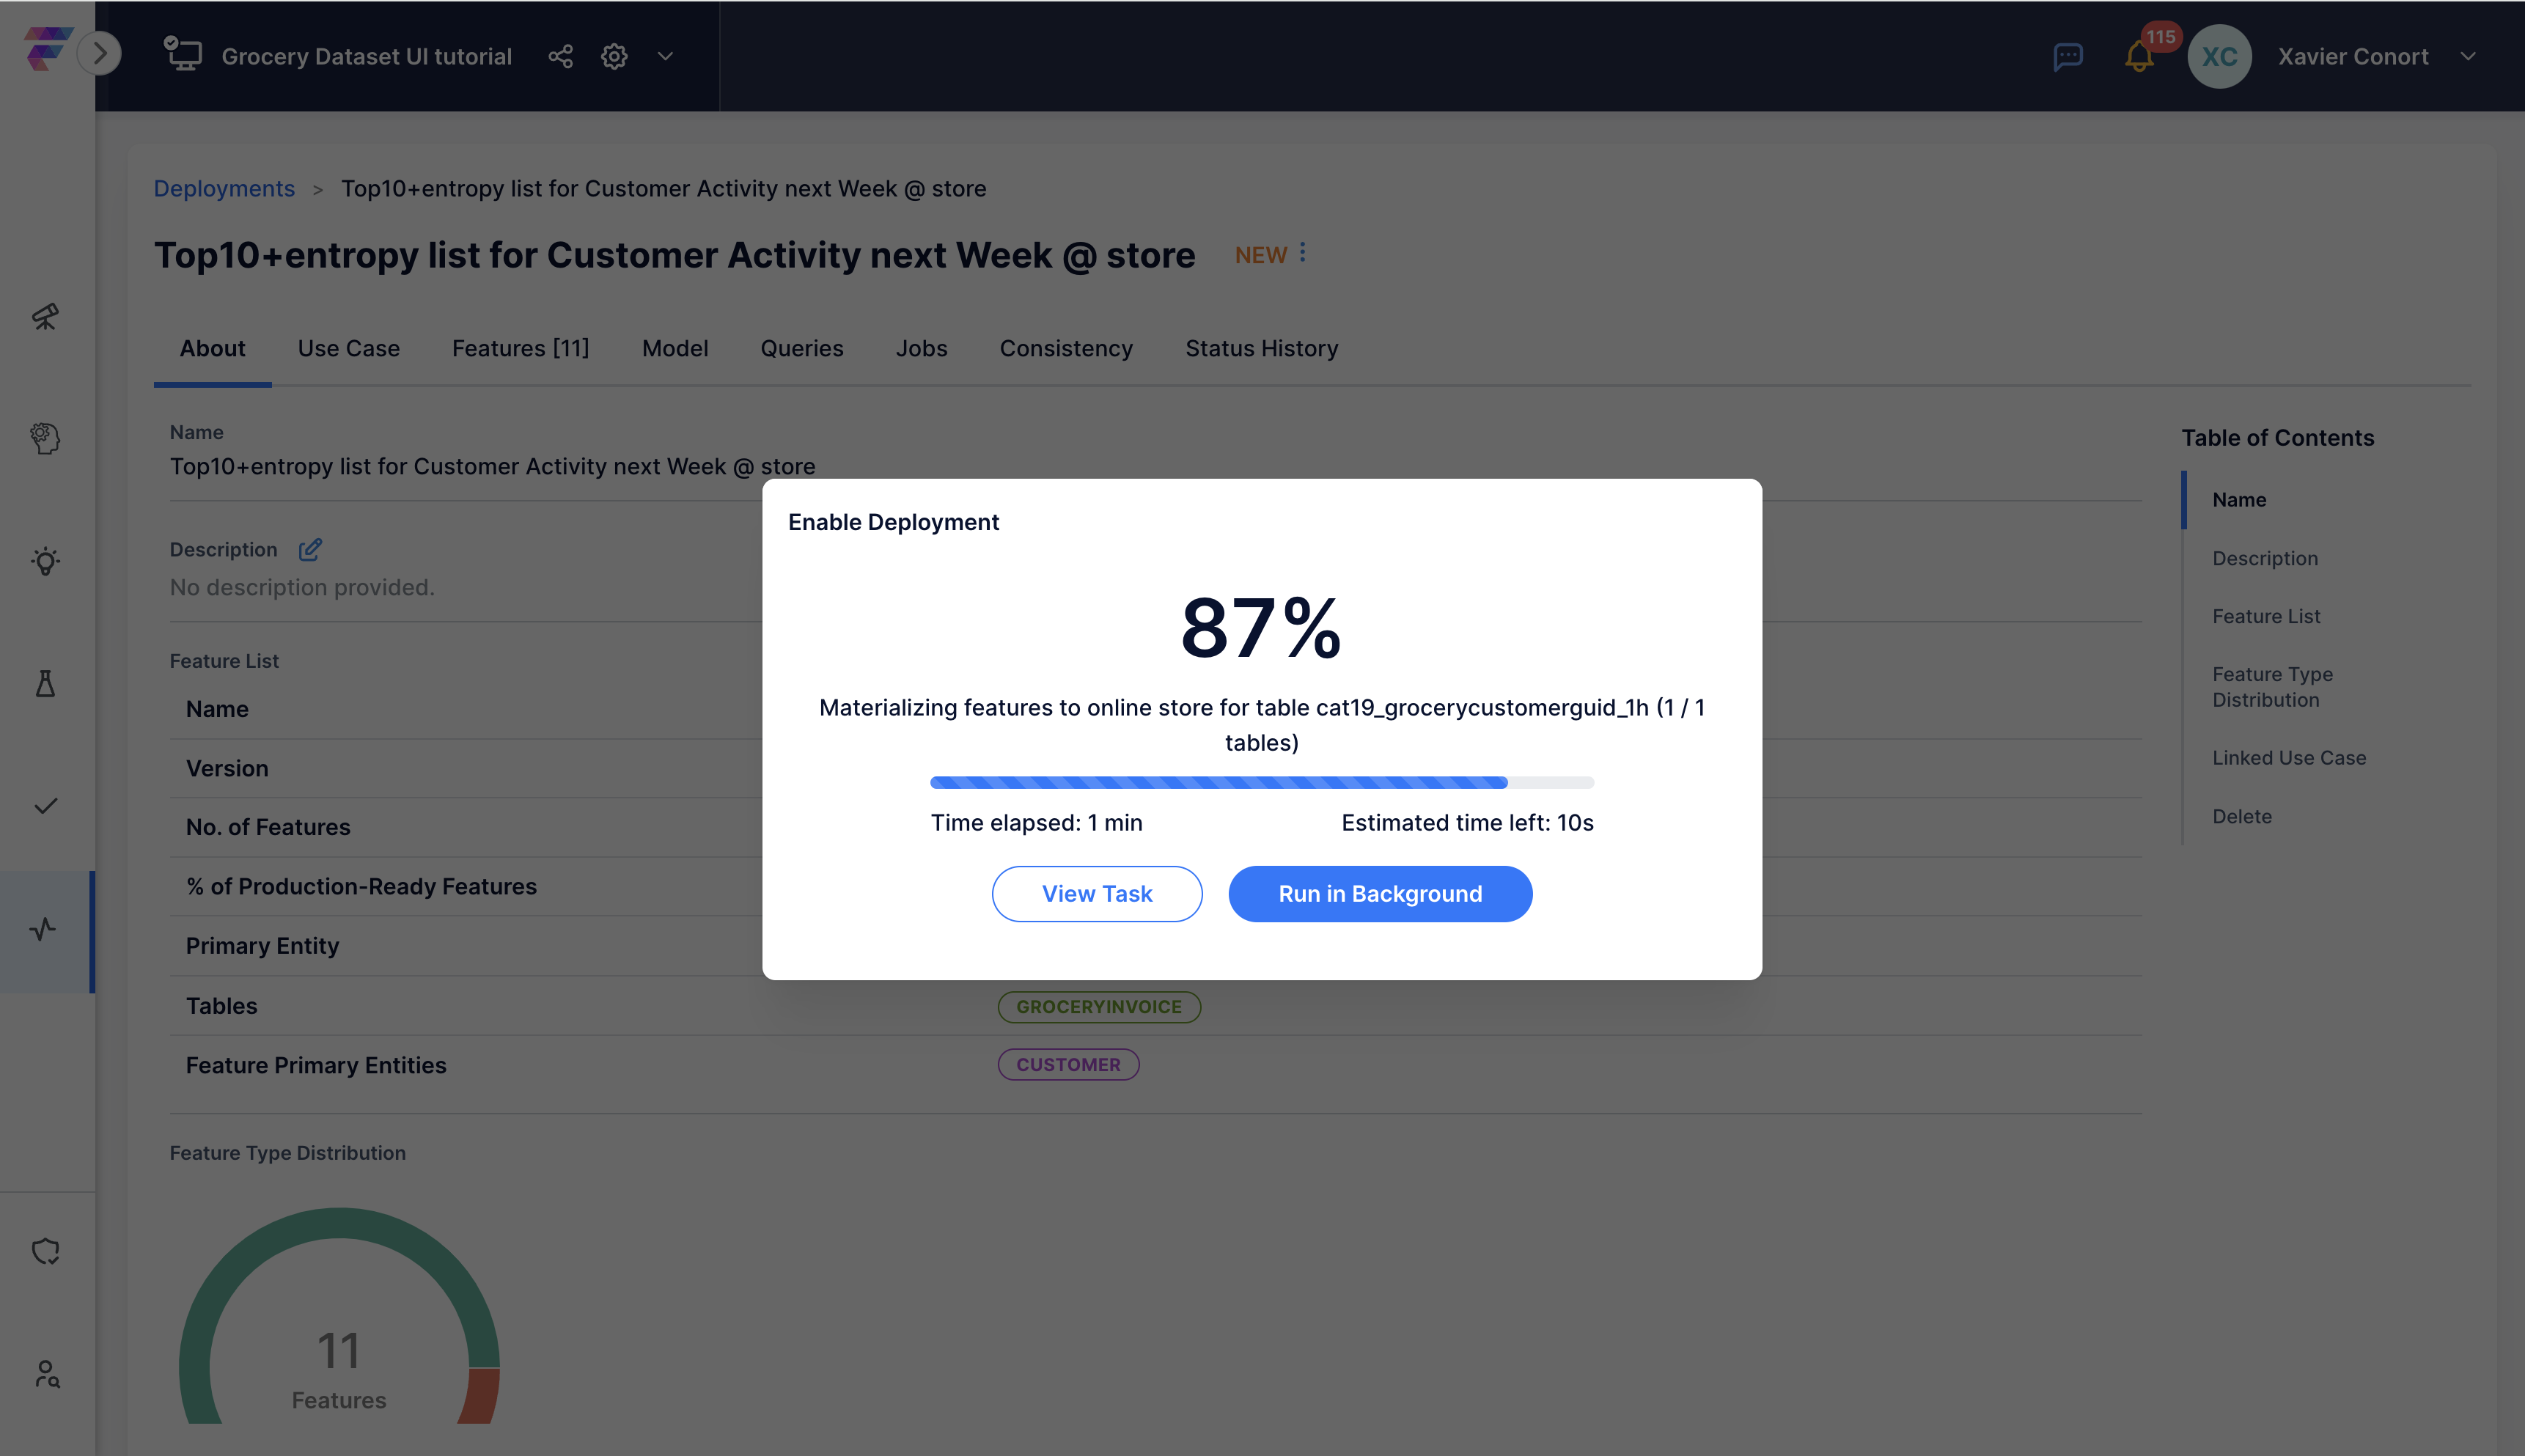
Step 11: Enable Deployment
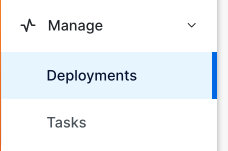
In the Deployment Catalog (under the 'Manage' Section), locate the new deployment and select it.
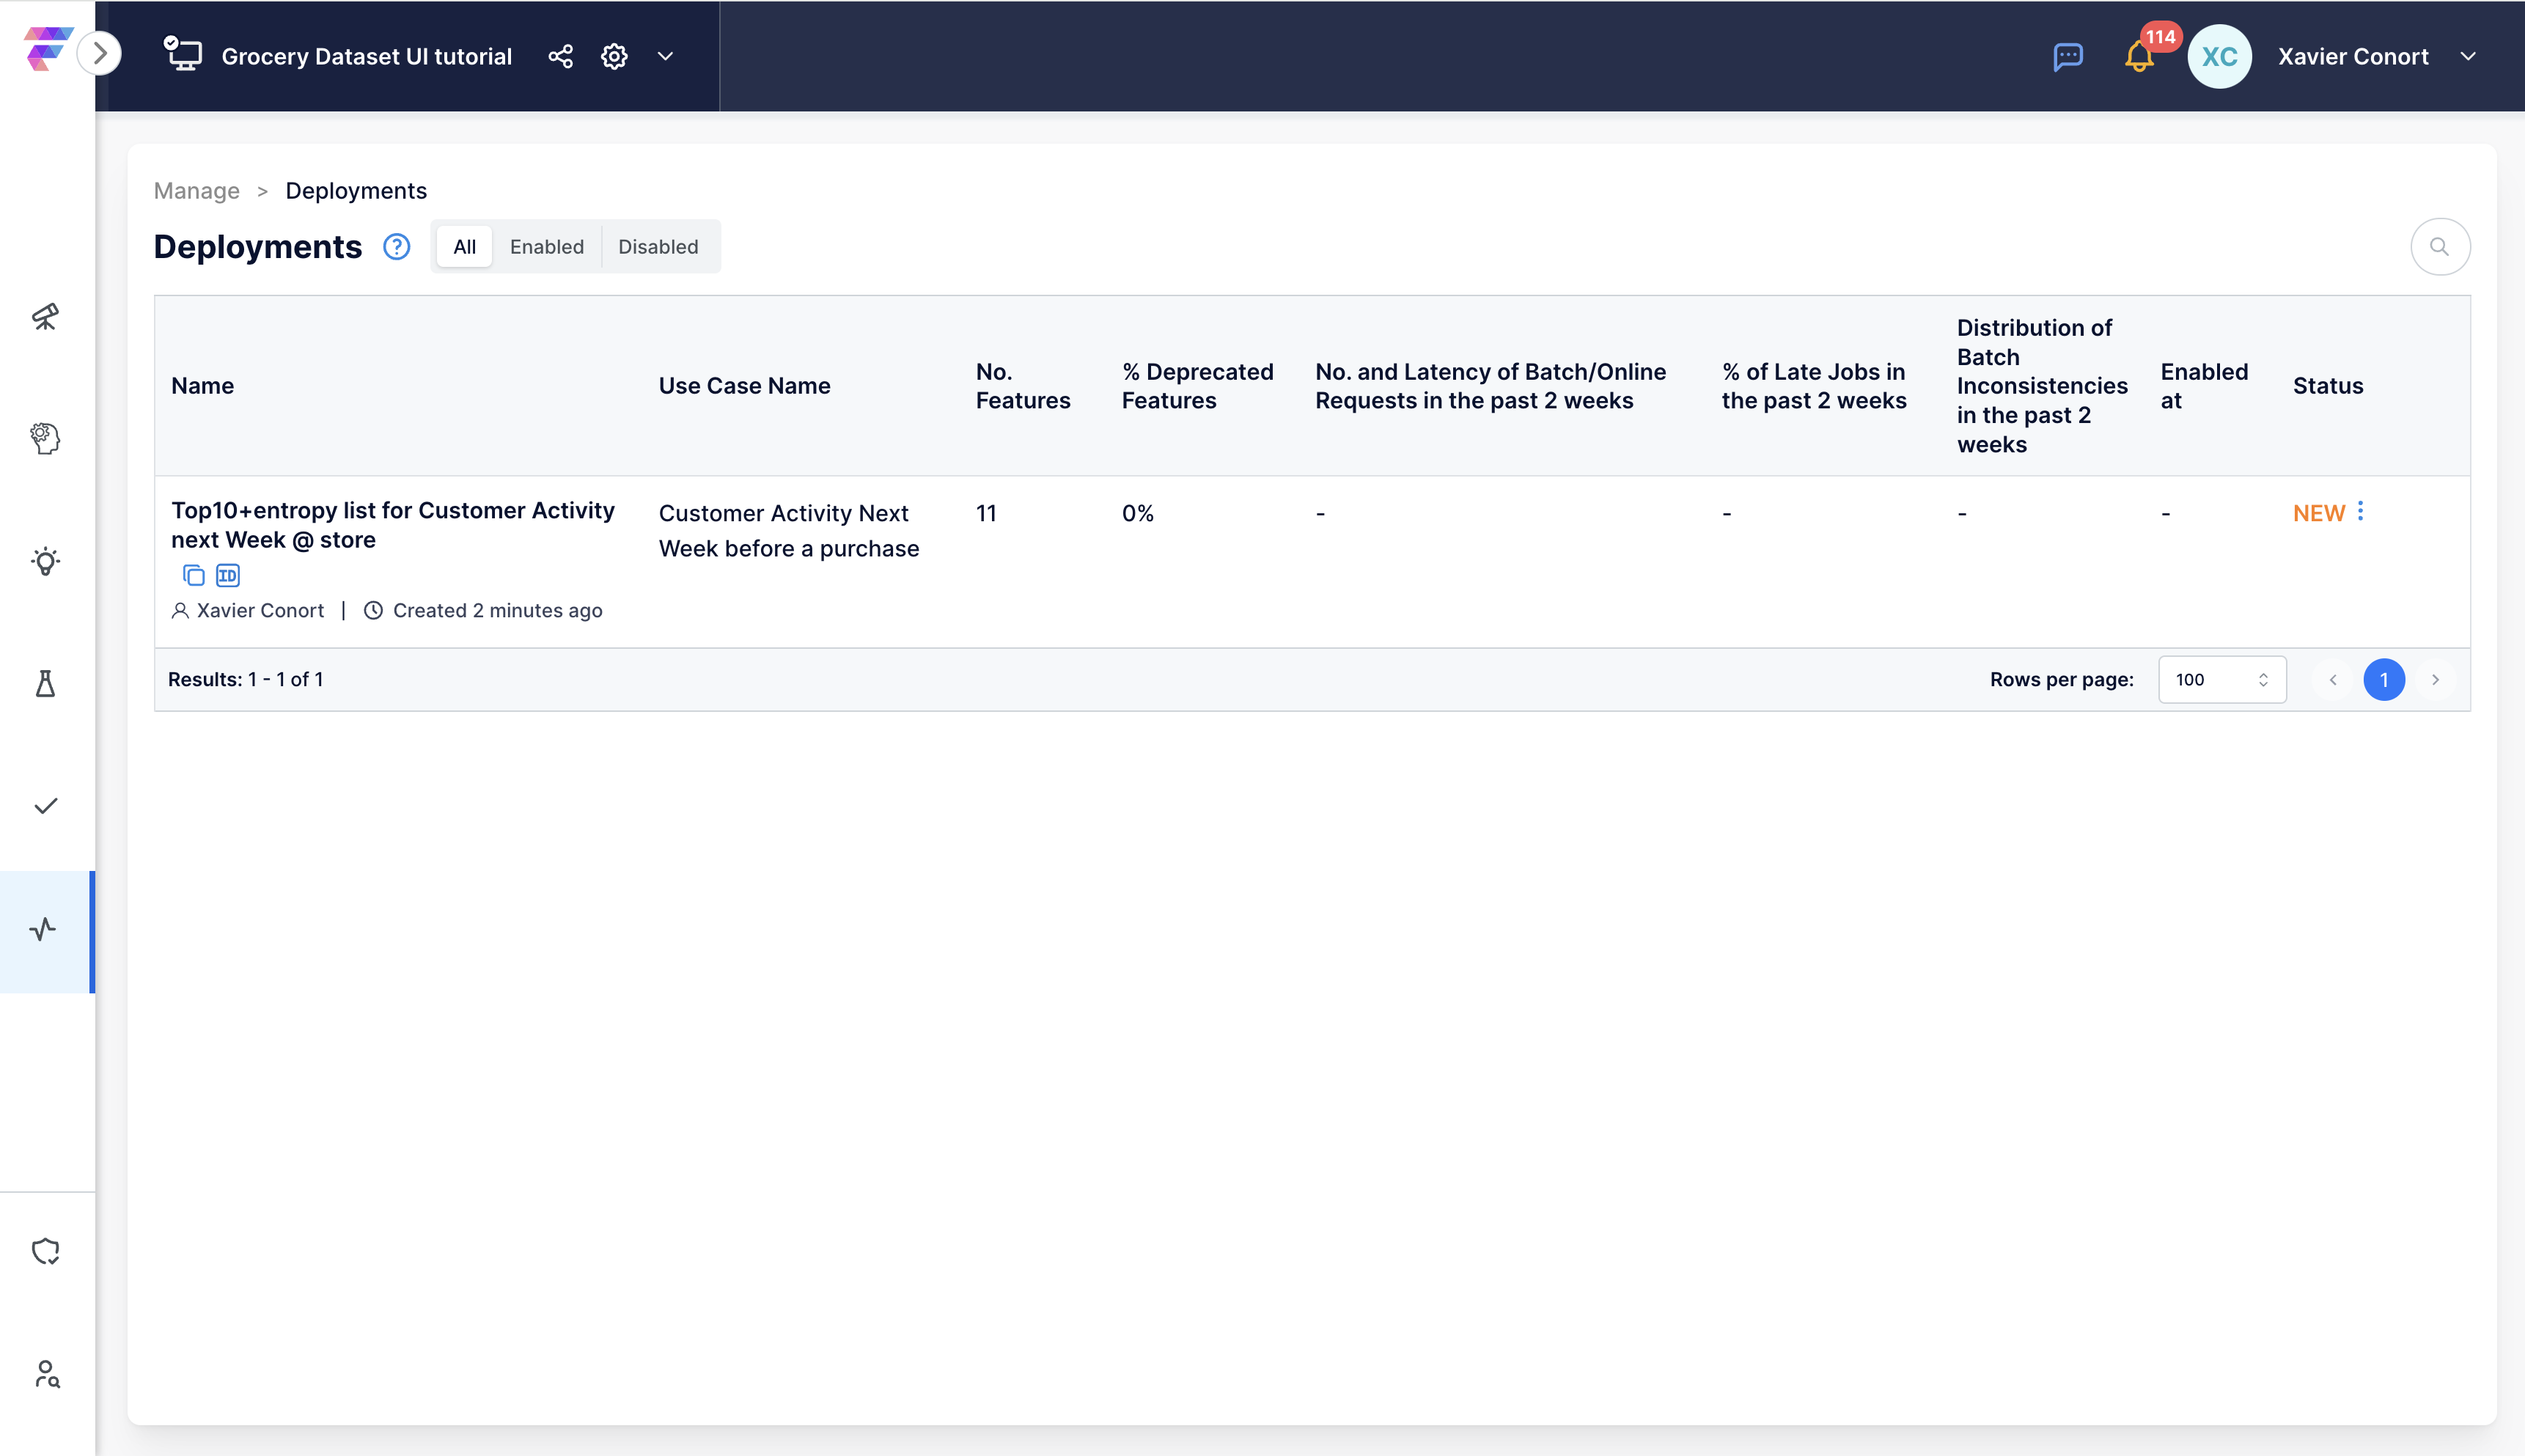
Click the three dots next to the 'NEW' label and choose 'Enable.'
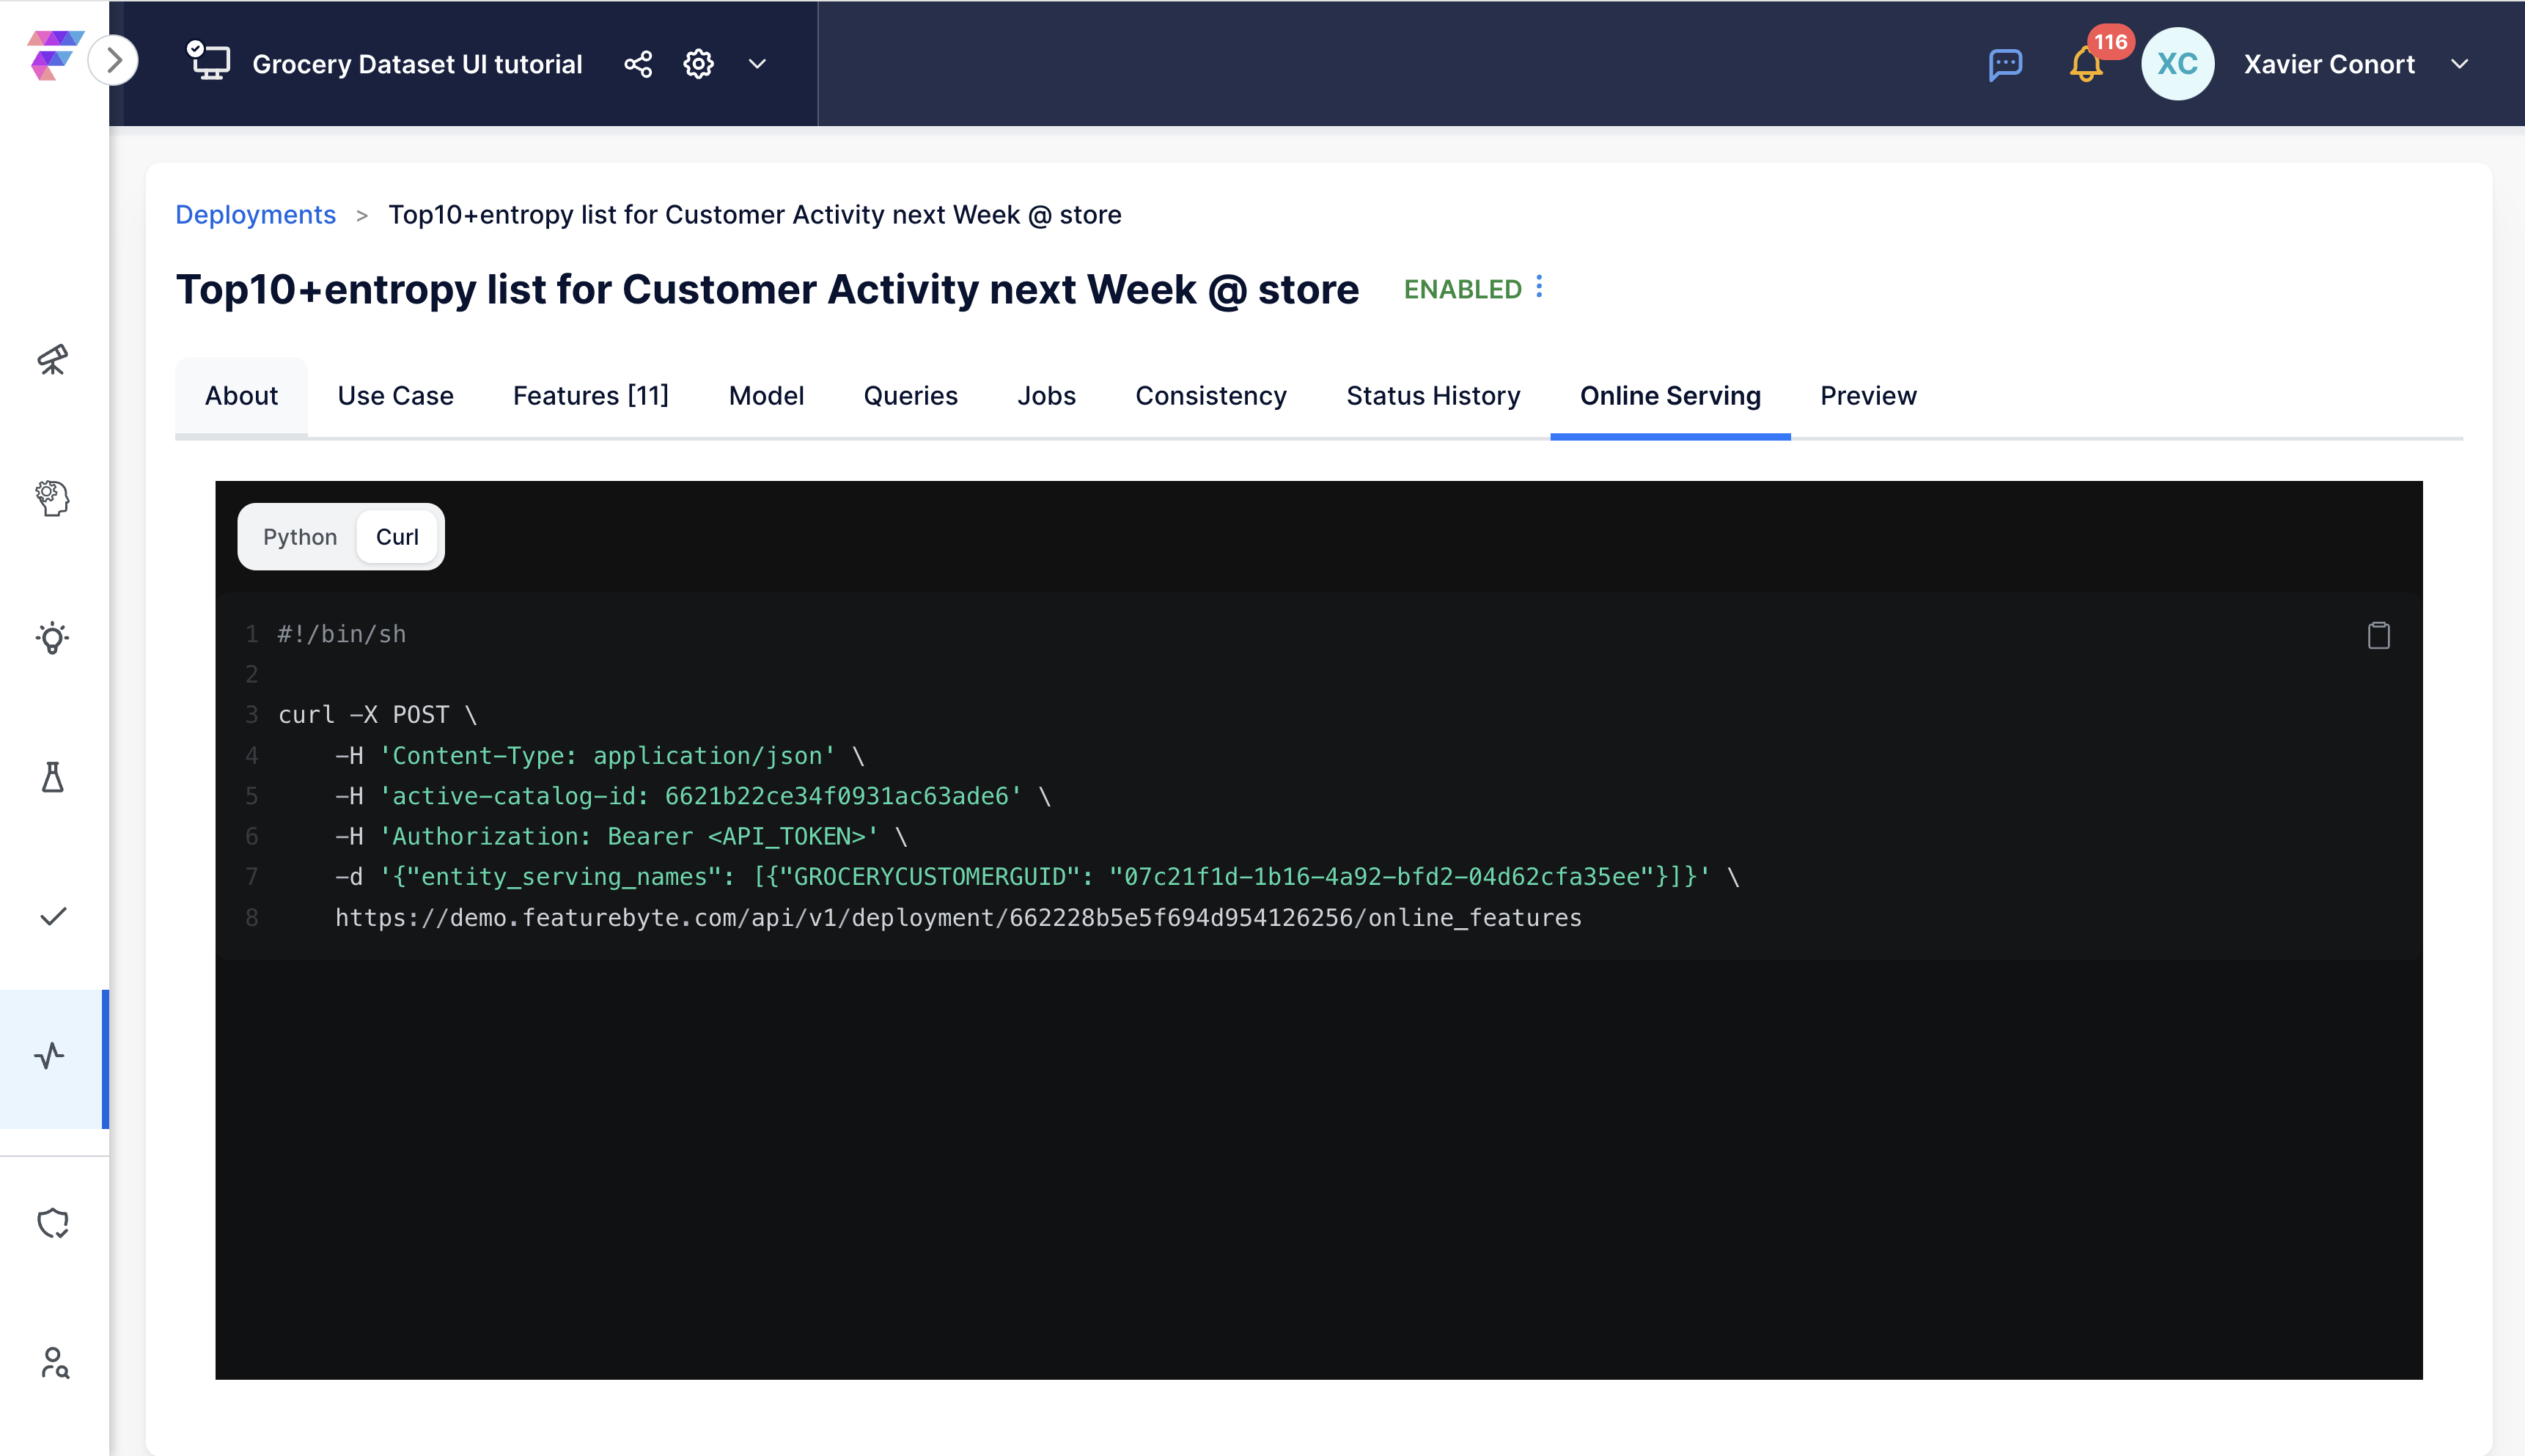
Step 12: Online Serving
In the 'Online Serving' tab, find Python or shell script templates for REST API services.
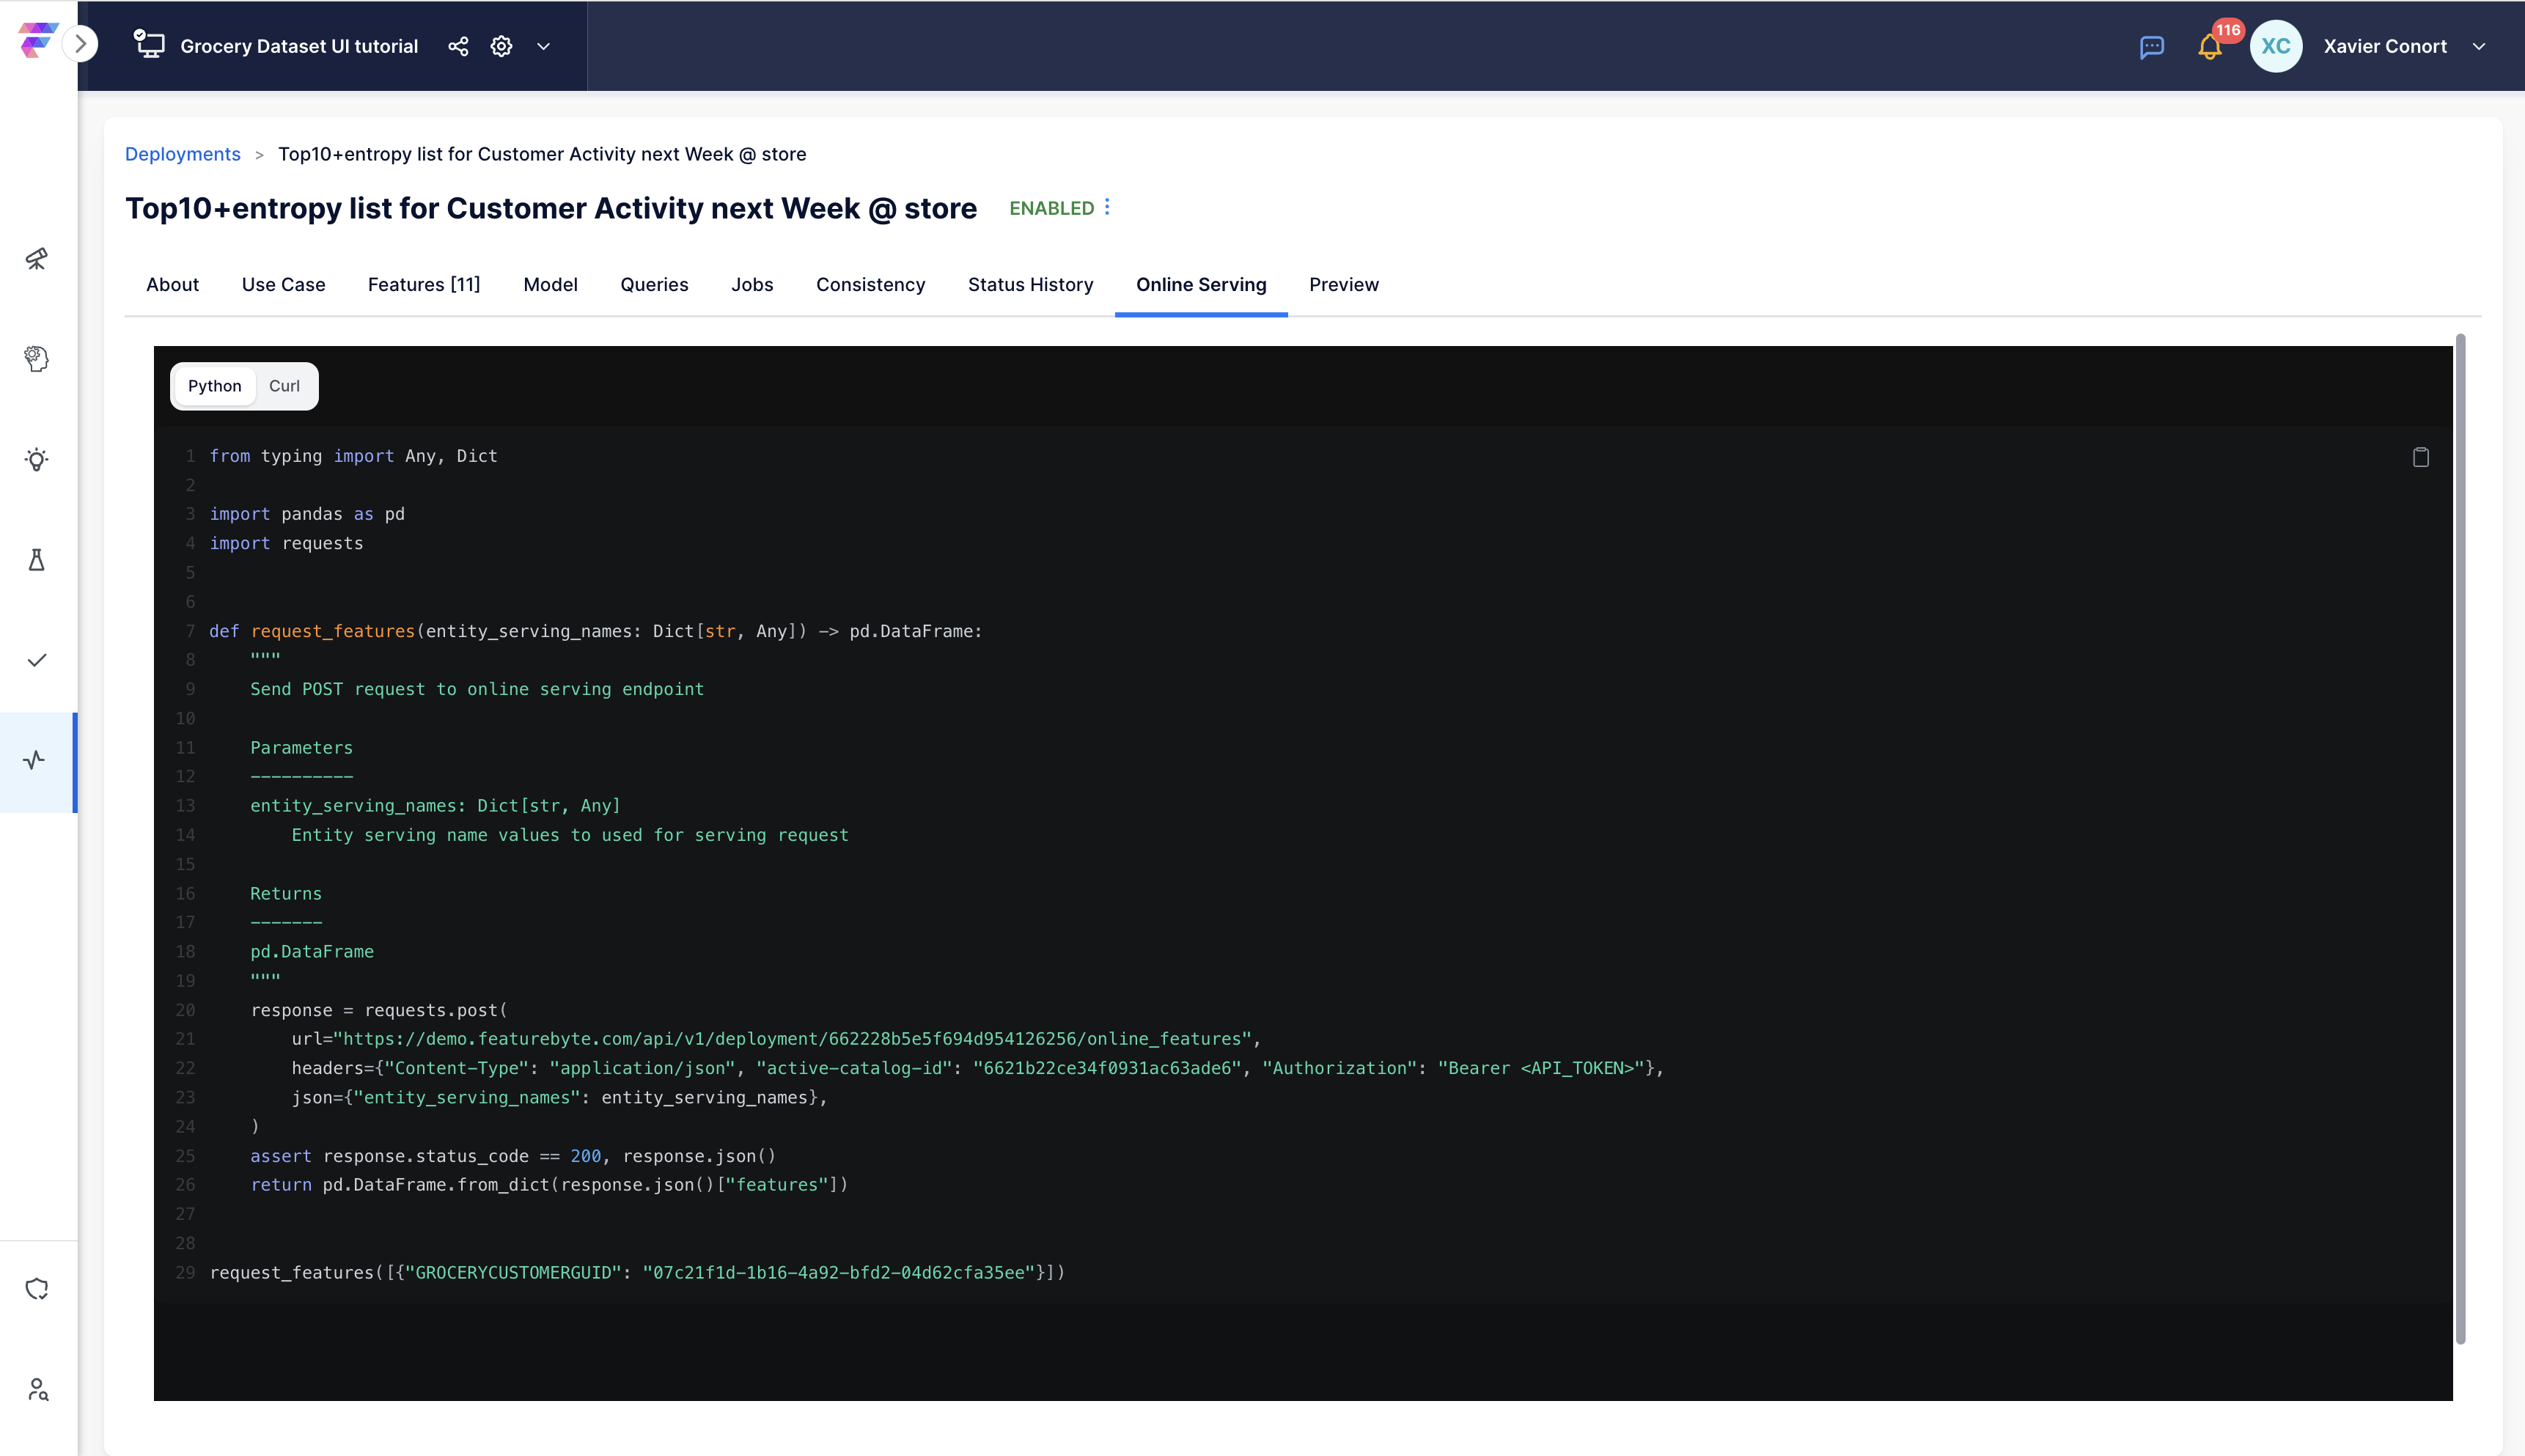
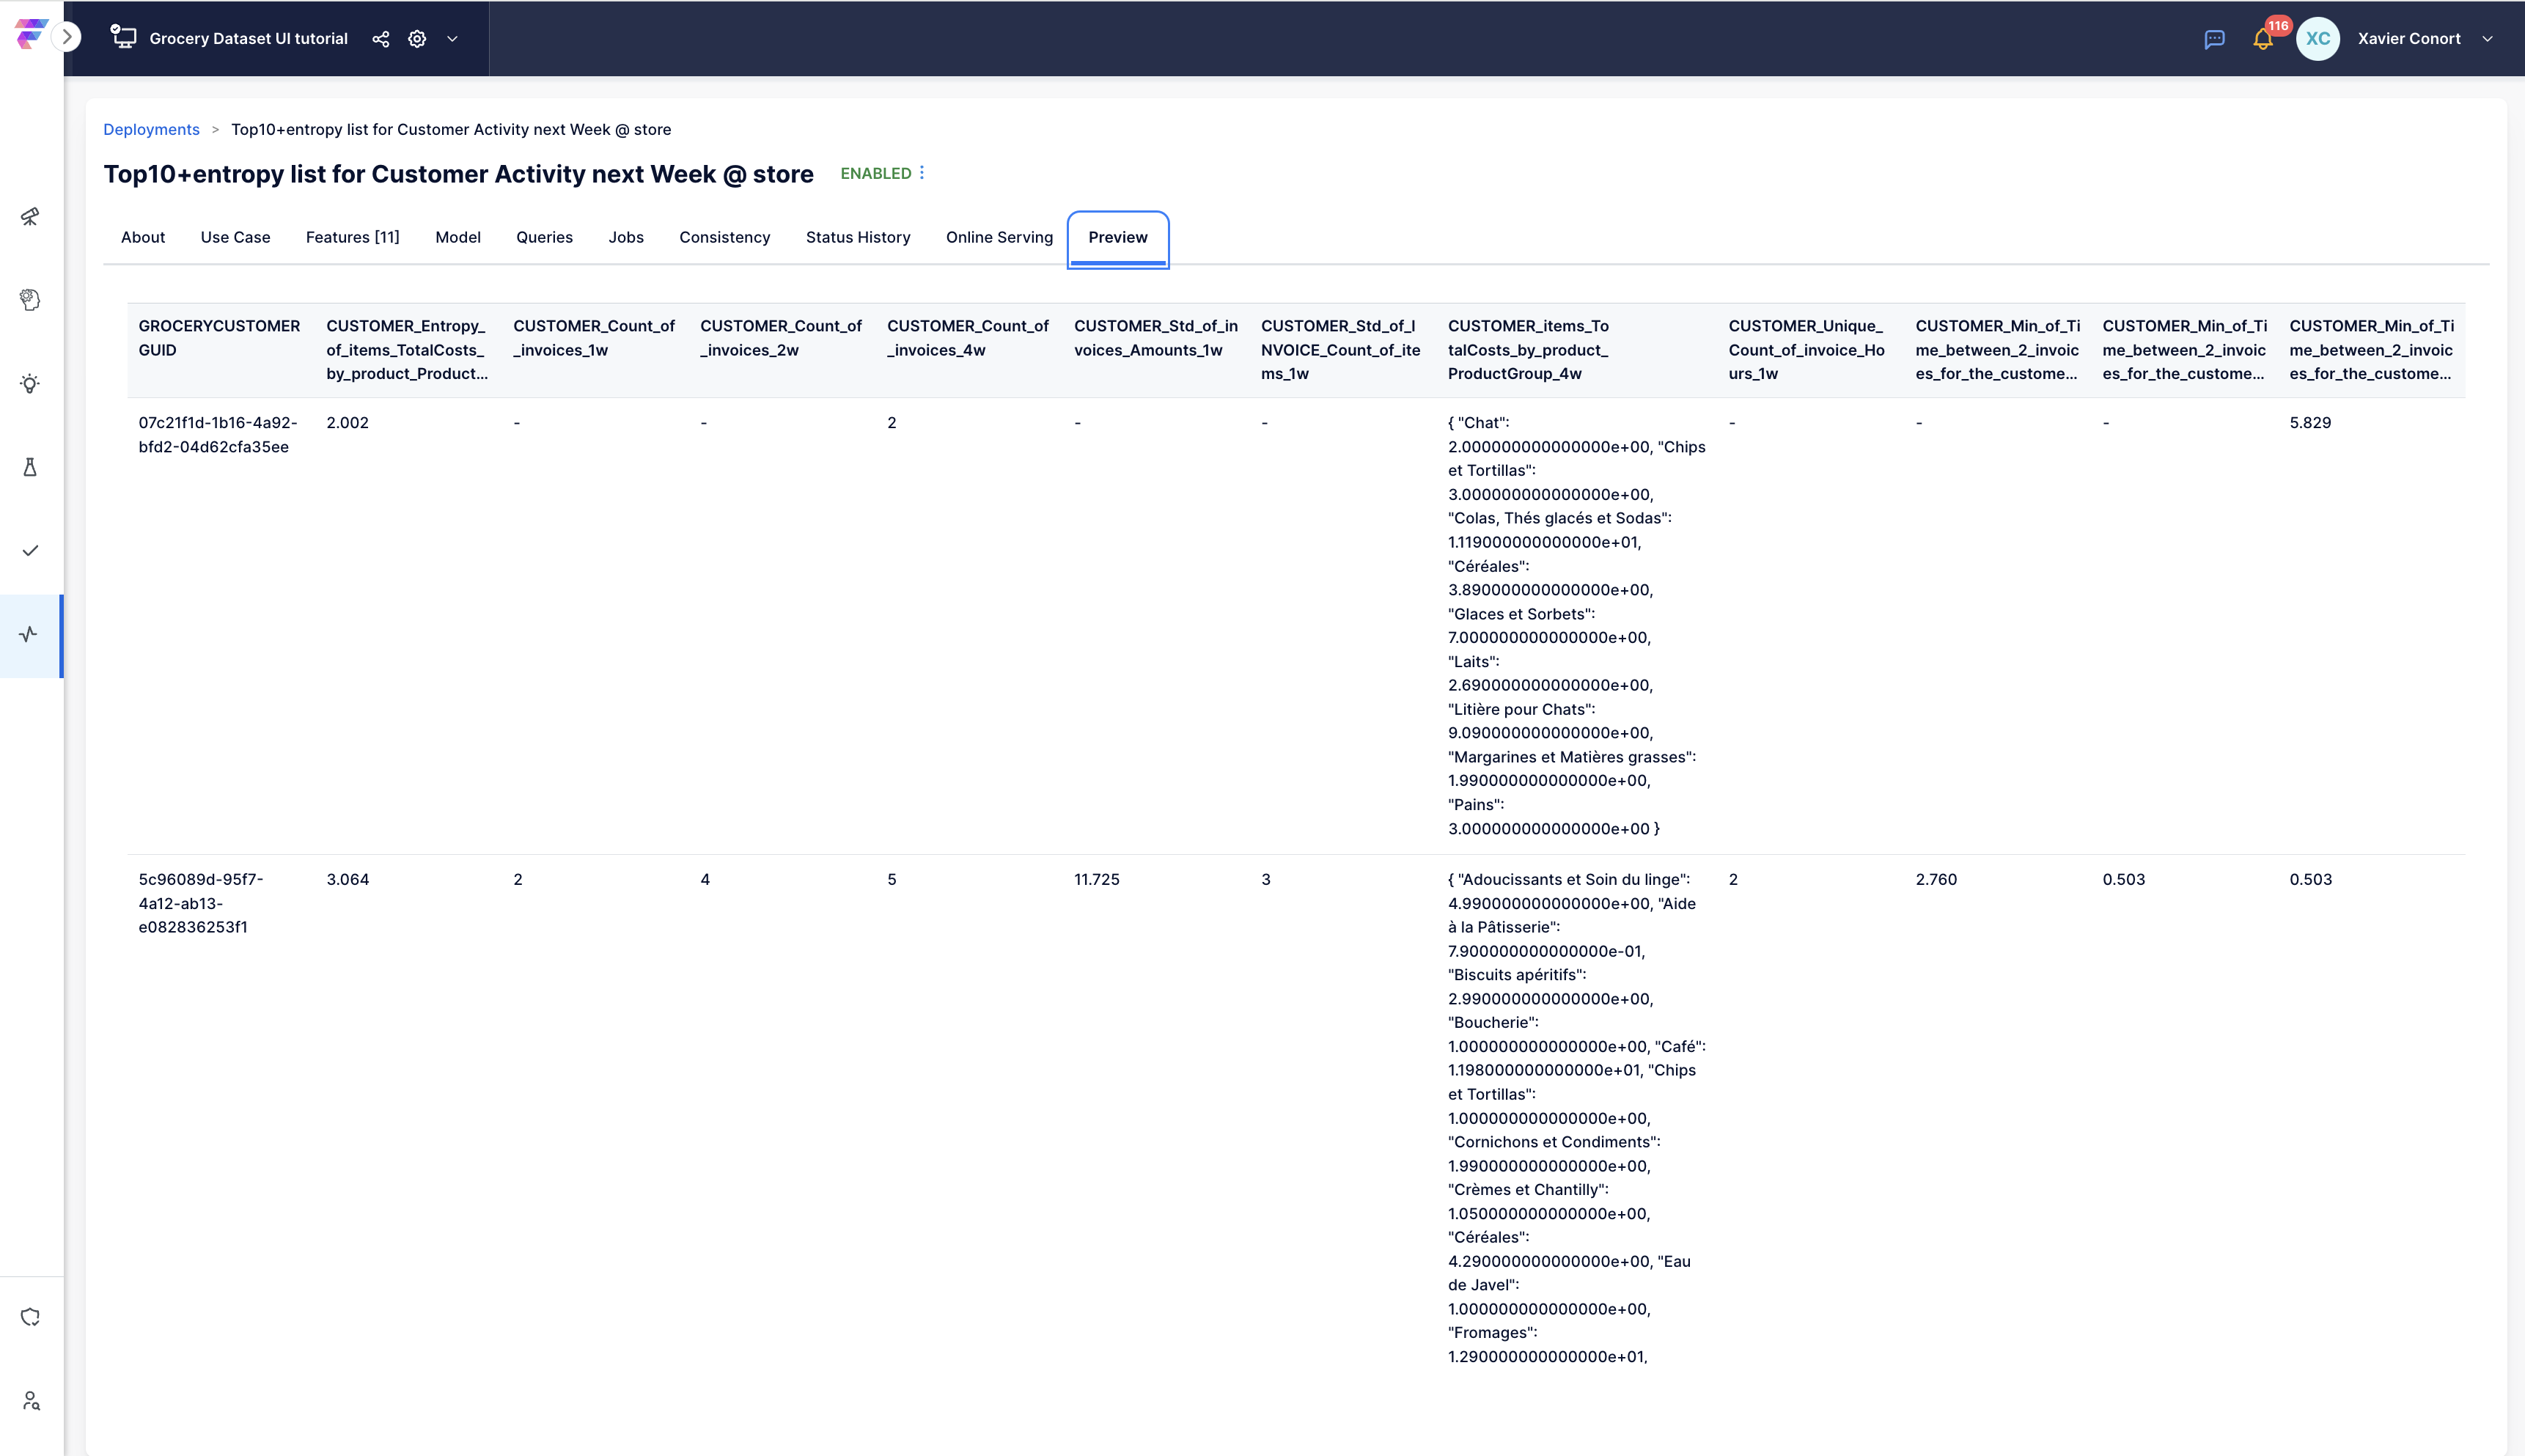
Go to the 'Preview' tab to see examples of feature values that will be served.
Use the SDK for batch serving if needed.